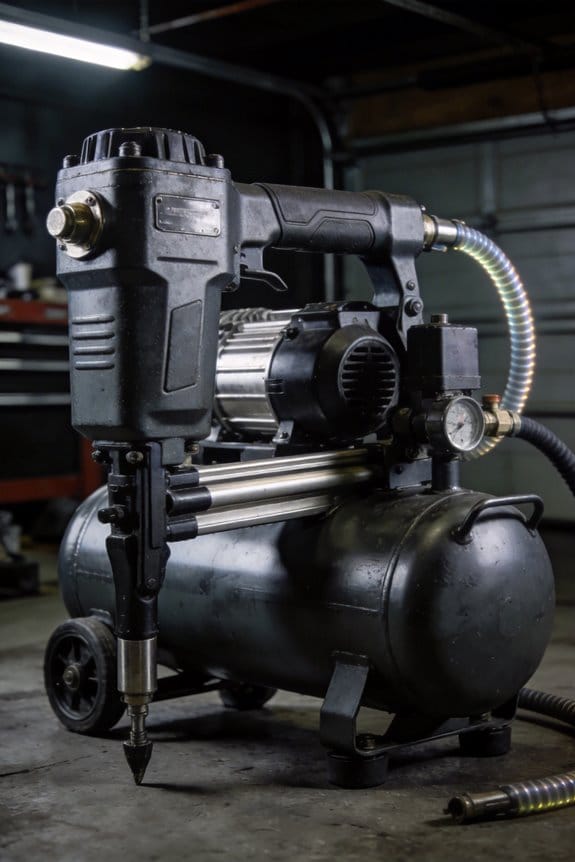
You pull the trigger and the nail barely kisses the wood instead of sinking flush, leaving you re-driving or stripping a head. You ask yourself whether the compressor isn’t strong enough, the hose is wrong, or the gun itself is at fault.
Most people blame PSI alone and overlook CFM, tank buffering, and plumbing losses. This piece will show you how compressor PSI, CFM, tank volume, and hose size interact in real-world shooting so you can pick equipment that consistently seats nails.
You’ll be able to size a compressor setup that delivers the drives-per-minute you need under load. It’s easier than it sounds.
Key Takeaways
If you’ve ever had your nailer feel slow or weak, this explains why.
Why it matters: slow cycles and soft-feel triggers waste time and give poor nail seating. Example: on a 2×4 sheathing run, your framing nailer that should fire 20 nails a minute may drop to 8–10 when CFM is short, leaving many nails sticking up.
1) What happens with too little CFM
Why it matters: insufficient airflow makes the tool cycle slowly and feel mushy. If your compressor can’t supply the nailer’s CFM at its working PSI, the driver travels slower and nails often seat high or only half in.
- Real-world example: running two framing guns (each 2.2 CFM at 90 PSI) off a tiny pancake compressor usually gives you one slow gun and one that stalls.
- Actionable fix (steps):
- Add the CFM ratings of every tool you use at once.
- Multiply by 1.25 for headroom (example: 2 guns at 2.2 CFM = 4.4 × 1.25 = 5.5 CFM).
- Buy or rent a compressor rated at that CFM at the operating PSI.
If you’ve ever had nails look shallow when pressure sags, this is why.
2) Why PSI matters and what to keep it at
Why it matters: PSI controls the driving force, so low PSI means nails won’t seat fully. Keep your tool within its 70–120 PSI operating range for consistent seating.
- Real-world example: a finish nailer rated for 70–90 PSI will fail to sink nails on dense oak if your line drops to 60 PSI during a burst.
- Actionable fix (steps):
- Check the tool’s recommended PSI on the label or manual.
- Set the regulator to that PSI while the compressor is running and under load.
- If pressure drops more than 5–10 PSI during firing, increase CFM capacity or tank size.
Before you buy a tank, understand what it does for you.
3) How tank size helps with bursts
Why it matters: a larger tank buffers the airflow so pressure doesn’t sag during rapid firing. A bigger tank lets you make more shots before the compressor must catch up.
- Real-world example: a 20-gallon tank lets a trim nailer fire dozens of nails in a row without a noticeable dip, while a 2–3 gallon pancake will show instant sag.
- Actionable fix (steps):
- For light trim work, use at least a 6–10 gallon tank.
- For framing or running multiple guns, aim for 20 gallons or more.
- If you fire long bursts, increase tank size before increasing motor CFM.
Think of your hoses and fittings like arteries for air.
4) Why hoses and plumbing matter
Why it matters: undersized or long hoses and distant tanks cause pressure loss and slower cycles. Use short runs and proper diameters to keep pressure at the tool.
- Real-world example: a 50-foot 1/4″ hose feeding a finish gun will drop pressure more than a 25-foot 3/8″ hose and feel weak at the tool.
- Actionable fix (steps):
- Use 3/8″ for single guns up to 25 feet; use 1/2″ for runs over 25 feet; use 3/4″ for manifolds or multiple guns.
- Keep hose runs as short as practical and avoid tight coils.
- Use quick-disconnects rated for the PSI you run.
Sum it up with a quick checklist you can use on the job:
- Add up tool CFM, multiply by 1.25.
- Buy a compressor that delivers that CFM at the tool’s PSI.
- Match tank size to burst needs: 6–10 gal for trim, 20+ gal for framing.
- Use 3/8″–1/2″ hoses for common runs, 3/4″ for multi-gun setups.
- Set regulator to the tool’s recommended PSI and watch for more than 5–10 PSI sag under load.
If you follow those steps, your nailer will feel snappy and sink nails where they belong.
Quick Compressor Picks for Brad, Finish, Pin and Framing Guns
If you’ve ever started a job with the wrong compressor, this is why.
Because your compressor directly controls how your nail gun performs, picking the right size and specs matters for speed and consistency. For a brad or pin nailer, get a small portable compressor that supplies about 1–2 CFM at 70–100 PSI; that will handle frequent light drives and keep maintenance simple. Example: use a pancake-style 2-gallon, 1.5 CFM unit when you’re installing cabinet trim in a small kitchen — it fits in the truck and runs a 18‑ga brader for a couple hours without refilling.
Before you buy for finish work, you need to know how pressure stability affects drives.
Choose a slightly larger compressor for finish nailers that delivers 1.5–2.5 CFM with a steady 70–120 PSI so nails seat consistently without pressure sag. Example: when you’re installing baseboard in a 12′ room with a 16‑ga finish nailer, a 4‑gallon 2.2 CFM unit keeps the tool firing cleanly between fills.
The difference between light trim and framing comes down to CFM demand.
For framing, pick a compressor rated 4–5 CFM at 70–120 PSI**, or larger if you’ll do long, continuous sequences of nails. Example: framing a wall with a 21° framing nailer for an afternoon? Use a 20–30 gallon**, 5+ CFM unit so you can run long bursts without the motor constantly cycling.
Consider tank capacity and noise for comfort and performance.
A bigger tank smooths delivery so the pressure doesn’t drop during repetitive firing, and a quieter model (look for dB ratings) makes the jobsite easier to work on. Example: a 20‑gallon, 5 CFM compressor with a 75 dB rating gives you calm operation and consistent nail setting during whole-day framing.
How CFM & PSI Affect Nail-Guns
If you’ve ever had a nail gun misfire on a job, this is why.
Why it matters: inconsistent firing slows you down and can ruin trim work. PSI is the force that drives each nail and CFM is how much air you have for repeated shots; both need to be right so nails seat properly and your tool cycles quickly.
How PSI and CFM work together
Why it matters: getting these matched makes your tool fire consistently under load. PSI (pounds per square inch) is the pressure behind each drive; your nail gun will list a required operating range, usually something like 70–120 PSI. CFM (cubic feet per minute) is the airflow the compressor must deliver while you’re shooting; framers commonly need 4–7 CFM for finish and 5–10+ CFM for framing guns at the rated PSI. Example: on a trim job you using a finish nailer at 90 PSI and shooting 2–3 nails per second need about 4–5 CFM to avoid pressure dips.
Steps to match your compressor to your nail gun
Why it matters: matching prevents slow cycles and trigger issues.
- Check the nail gun plate for operating PSI and CFM.
- Look at your compressor’s output rating at the tank pressure (for example, 5 HP, 12 CFM at 90 PSI).
- Ensure compressor CFM is at least 25–30% higher than the gun’s requirement to cover leaks and continuous work; for a tool needing 6 CFM, aim for 8 CFM.
- Monitor the gauge while firing a rapid sequence: if tank pressure drops below the gun’s minimum, you don’t have enough CFM.
Real-world example: a deck installer using a framing nailer that needs 7 CFM at 90 PSI with two people shooting nonstop should use a compressor rated 9–10 CFM at 90 PSI or larger, or else shots will slow and nails won’t seat fully.
What low CFM looks like on the job
Why it matters: recognizing the symptoms helps you fix things fast. Low CFM makes the compressor struggle to keep tank pressure up, so the gun cycles slower, the trigger feels mushy, and nails sit high. Example: when you start a series of flush cuts and the last few nails are only halfway in, your compressor is probably starving the gun.
Air quality and maintenance
Why it matters: dirty or wet air causes valves to stick and increases wear, which ruins responsiveness. Use an inline filter-regulator and water trap, drain the compressor daily, and add an oiler if your nail gun needs lubrication. Example: on a humid morning, if you don’t drain the tank you’ll spray water into the line and start seeing stuck valves by lunchtime.
Quick checklist before a job
Why it matters: this prevents surprises on site.
- Verify gun PSI range and CFM.
- Confirm compressor CFM at the tank pressure meets or exceeds tool needs by ~25–30%.
- Drain tank and check filters.
- Set regulator to the gun’s recommended PSI and test under load for one minute of continuous firing.
If you follow these steps you’ll get steady performance and fewer frustrated fixes.
Match Each Nail-Gun to Required CFM and Pressure
Before you pick a compressor, you need to know what each nail gun actually draws so you don’t end up with a unit that stalls mid-job.
Brad and finish nailers need low airflow: about 1–2.5 CFM at 70–120 PSI. If you’re doing occasional trim work at home, a 2.0 CFM compressor will usually handle it as long as you avoid air leaks and keep the tool oiled. Example: installing baseboard in a 12′ room with a finish nailer — a small pancake compressor will drive the job without dropping pressure.
Framing nailers demand more air: roughly 4–5 CFM at 70–120 PSI** for continuous driving and to use larger nails. If you’re building a deck or framing a wall, plan on a larger compressor** (or a bigger tank) so you can drive multiple nails without waiting for the motor to catch up. Real-world: when sheathing 8′ x 4′ plywood sheets, a higher-CFM unit keeps your pace at a consistent 1–2 nails per second.
Pin nailers run at lower pressure — about 60–100 PSI — and use very little CFM, so you can use a tiny compressor or a separate small tank for delicate trim work. Consider trigger type and cycle air use because some triggers (sequential vs. bump) change how many CFM you actually pull during rapid firing.
How to size your compressor in three steps:
- Add the peak CFM requirements of the tools you’ll run at once, then multiply by 1.5 for safety.
- Match the compressor’s rated CFM at the same PSI the tool needs.
- Pick a tank size: 2–6 gallons for trim and finish, 6–20+ gallons for framing and continuous work.
Example for sizing: if you want to run a framing nailer (5 CFM) and a finish nailer (2 CFM) simultaneously, multiply (5 + 2) × 1.5 = 10.5 CFM; get a compressor that delivers ~10–11 CFM at 90–120 PSI and a 20+ gallon tank.
Quick checklist before you buy:
- Confirm the compressor’s CFM rating at the pressure you need.
- Look at tank size based on how often you want the motor to run.
- Factor in extra CFM for future tools or using two tools at once.
Buy accordingly and you’ll spend less time babysitting pressure and more time finishing the job.
Why to Budget a 20–25% CFM Buffer
If you’ve ever balanced tools at a job site, this is why.
Why it matters: without extra CFM your tools can stall and you lose minutes fixing them.
When you’re sizing a compressor, budget an extra 20–25% CFM above the combined tool demand so the system won’t stall or overwork during real use. For example, if your finish nailer, framing nailer, and air ratchet draw 50 CFM combined, pick a compressor rated for 60–63 CFM. That small jump keeps PSI steadier when tools cycle and multiple guns fire at once.
Why it matters: brief pressure drops shorten motor life.
How this helps:
- Prevent stalls: the buffer holds pressure during short, heavy bursts so your nailer doesn’t stop mid-drive.
- Reduce run time: fewer full-load starts mean less heat and wear on the motor.
- Allow simple additions: adding a second finish nailer (about 2–4 CFM) won’t force an immediate upgrade.
Real example: on a siding job you and a helper both use finish nailers and an air stapler; your measured demand is 48 CFM but peaks hit 58 CFM when both nailers fire together—choosing a 60–63 CFM unit kept pressure within 5 PSI and eliminated stalls.
Why it matters: lower stress means fewer service visits.
Maintenance benefit: with a 20–25% buffer your compressors run cooler and less often at full load, so belts, valves, and the motor last longer and service intervals stretch. Replace belts and check valves at the hours the manufacturer lists, not earlier because the machine’s not fighting constant max load.
Real example: on a remodel shop, upgrading from a 50 CFM to a 60 CFM compressor cut daily run time by about 30 minutes, and the owner stretched belt replacements from six months to nine months.
Quick sizing steps:
- Add up tool CFM at working pressure.
- Multiply that total by 1.20–1.25.
- Choose the closest compressor rated at or above that number.
Real example: your tools total 40 CFM. 40 × 1.25 = 50 CFM, so pick a compressor rated 50 CFM or higher.
Bottom line: treat the extra 20–25% CFM as insurance for steady PSI, less motor wear, and room to add a simple tool without upgrading immediately.
Calculate Drives Per Minute (Quick Math)
Before you start, know why this matters: you want to avoid buying a compressor that can’t keep up with your gun.
If you’ve ever wondered how many drives per minute your setup will actually give you, here’s a simple way to figure it out. Start by estimating the air used per drive—the common unit is cubic feet per drive (CFD). Check your nail gun’s manual for a number (for example, 0.08–0.12 cubic feet per drive for many 16-gauge finish nailers at 90 psi), or measure with a flow meter if you have one. Example: a 16-gauge nailer that lists 0.10 CFD at 90 psi will use 0.10 cubic feet each time it fires.
Why this matters: drives per minute equals usable compressor CFM divided by CFD. Use these steps:
- Find your compressor’s usable CFM at the working pressure (not the tank volume). If the tank label says 5 CFM at 90 psi, use 5 CFM.
- Divide that CFM by the CFD from your tool. Example: 5 CFM ÷ 0.10 CFD = 50 theoretical drives per minute.
- Apply a safety margin of 20–25% for leaks and pressure drop. Example: 50 × 0.75 = 37–40 practical drives per minute.
- Factor cycle timing—some tools have slow return strokes that limit rate. If your gun’s spec lists a max cycle of 45 per minute, your compressor must support more than that after losses, or you’ll be capped by the gun.
Real example: you have a 4 CFM compressor and a brad nailer that uses 0.08 CFD at 90 psi. 4 ÷ 0.08 = 50 theoretical. With 25% margin, expect about 38 actual drives per minute; if the gun’s max cycle is 30, you’ll be limited to 30.
Don’t forget real testing. Hook your actual gun to the compressor, run it at the working pressure, and count drives over a minute to confirm. Simple test.
Real-World Compressor Examples: What a 1HP (2.0 CFM) Can Run
Here’s what actually happens when you run a typical 1HP portable compressor that delivers about 2.0 CFM.
Why this matters: if you know the compressor’s limits, you can avoid slowdowns and wasted time on the job. A 1HP/2.0 CFM unit handles intermittent tools well but struggles with continuous high-flow ones.
Nailers: brad and finish nailers
Why this matters: using the right nailer keeps your work fast and prevents your compressor from cycling nonstop.
1) What they need: brad and finish nailers usually use about 1–2.5 CFM per trigger pull.
2) How you’ll use it: you’ll get dozens of drives per minute if you space your shots—shoot a short run, pause for the compressor to recover, then continue.
Real-world example: installing quarter-round trim in a 12-foot room—shoot a 6–10 nail run, then pause 8–12 seconds while the tank refills.
Framing nailers
Why this matters: a framing nailer can stall your workflow if you expect framing speed from a small compressor.
1) What it needs: a framing nailer commonly requires 4–6 CFM at 90 PSI for continuous fast firing.
2) How you’ll use it: on a 2.0 CFM compressor you’ll be limited to roughly 15 drives per minute at best, so plan to work in short bursts.
Real-world example: driving 100 nails for a single wall plate—expect to shoot 10–15 nails, then wait 20–30 seconds for the compressor to recover.
Maintenance and preserving output
Why this matters: simple maintenance keeps your compressor delivering its rated CFM longer and reduces failures.
Steps:
- Drain the tank daily (or after each long job).
- Check and tighten hose and tool fittings weekly.
- Replace the intake filter every 3 months or sooner with heavy use.
Real-world example: on a weekend roofing job, a quick tank drain after the first day prevented rust and kept the unit hitting 2.0 CFM on day two.
Managing continuous use and noise
Why this matters: continuous high-demand tasks will overwork the compressor and may violate noise rules.
1) Add a small auxiliary tank (10–20 gallons) to smooth out airflow for longer bursts.
2) Schedule work in cycles: 10–15 minutes of firing, then 5 minutes of lower demand or idle.
3) Measure noise with a phone app near the compressor; many small units hit 80–90 dB under load, so use hearing protection.
Real-world example: using a 10-gallon tank with your 1HP unit let you drive a finish nailer for 30 seconds instead of 10, cutting pause frequency in half.
Quick checklist before you start
Why this matters: a short pre-job run avoids surprises and downtime.
1) Drain the tank.
2) Check PSI and target tool requirement (e.g., 90 PSI).
3) Run the compressor empty for 30 seconds to confirm consistent pressure rise.
End fact: a 1HP/2.0 CFM compressor is great for intermittent brad and finish work, tolerable for occasional framing at about 15 nails per minute, and will run longer with a small tank plus routine maintenance.
Running Multiple Tools: Compressors, Tanks, and CFM Needs
Before you match a compressor to multiple tools, you need to know why it matters: otherwise you’ll lose pressure at the worst moment and slow the whole job.
If you’re running a finish nailer, a trim stapler, and a framing gun on the same job, size your compressor to the combined CFM plus 20–25% headroom so pressure doesn’t sag when two or more tools fire together. For example, if your finish nailer needs 0.8 CFM, your stapler 1.0 CFM, and your framing gun 4.0 CFM, add them to get 5.8 CFM and then choose a compressor that can deliver about 7.0–7.5 CFM at the working pressure. This gives you enough reserve when tools cycle simultaneously.
Think of a holding tank like a buffer that smooths short bursts and keeps pressure steady at the worksite. Put a 30–60 gallon tank within 15–25 feet of the tool cluster to reduce pressure drop during quick cycles; use at least a 60 gallon tank if you’re doing long, continuous framing runs. A real example: on a remodel job where you had a finish crew and a framer sharing air, moving a 60 gal tank next to the finish bench stopped the finish nailer from misfiring during framing spikes.
Before you plumb multiple lines, you need to know how to balance flow so each tool gets enough air. Use a manifold with individual shutoffs and 3/4″ main feed and 1/2″ branches for handheld tools; that keeps each branch from starving when the framer pulls heavy air. Step-by-step:
- Install a 3/4″ manifold near the tank.
- Run 3/4″ to the manifold, then 1/2″ to each tool cluster.
- Put ball valves on each branch for testing and isolation.
- Test by running the highest CFM tool while measuring pressure at each branch; adjust lengths or add larger fittings if pressure drops more than 6 psi.
Before you decide between a bigger compressor or adding tanks, remember why it matters: framing needs steady high CFM while finish and trim run intermittently. If you mostly frame, buy a compressor that delivers the continuous CFM your largest tool needs at working pressure — for example, a 6+ CFM unit for heavy framing — and plan a 60–80 gallon tank. If you mostly do finish work with occasional framing, use a mid-size compressor (4–6 CFM) and add a 60 gal tank to cover short framing bursts.
If you’ve ever lost pressure during a surge, this is why fittings and hose size matter: undersized hoses create bottlenecks. Use at least 3/8″ hose for single handheld tools under 2 CFM, 1/2″ hose for clusters or anything above 2 CFM, and 3/4″ feed lines from the compressor to manifolds for best results. A concrete example: switching from 3/8″ to 1/2″ lead hose on a finish line reduced pressure drop from 8 psi to 3 psi under load.
Before you test your system, follow this quick checklist so you get meaningful results:
- Fully charge the tank and note idle pressure.
- Run the largest tool and watch pressure at the farthest branch.
- If pressure falls more than 8–10 psi, increase compressor capacity or add tank volume.
- Re-run with two tools firing together to confirm the 20–25% headroom holds.
If you keep these steps and numbers in mind, you’ll avoid surprise slowdowns and make your setup match the way you actually work.
What Happens With an Underpowered Compressor
Here’s what actually happens when your compressor can’t keep up with a nail gun’s air needs: the gun won’t finish its full driving cycle, so you’ll get nails set too shallow or not driven at all, which weakens the fastening and slows the job. This matters because one missed drive means a rework that costs time and can create a safety hazard. For example, on a siding job I had a 2.5 CFM portable compressor feeding a 0.131″ 21-degree framing nailer that needed 4 CFM at 90 PSI; the compressor dropped to 60 PSI mid-stroke and every third nail was shallow.
When CFM is too low you’ll see pressure drops between shots and the gun will hesitate, cutting nails per minute. The immediate effect is slower progress and more bending over to reset fasteners. On a deck build I watched production fall from 600 nails an hour to about 350 because the compressor couldn’t recover between bursts.
Before you add more tools to the circuit, understand how this damages equipment: continuous short cycling to compensate stresses the compressor motor and pump and raises condensation in the tank and lines, which sends water into the nailer. You care because moisture wrecks seals and causes misfires. I had a trim nailer start erratic firing after a week of cold, wet air; the seals swelled and the O-ring failed within two months.
How to fix it (why this matters: you save time and avoid tool damage):
- Match the numbers: check the nail gun’s rated CFM and PSI (usually on the magazine or manual) and buy a compressor that supplies at least 1.5 times that CFM at the required PSI to allow recovery. Example: if your finish nailer needs 2.0 CFM at 90 PSI, get a compressor delivering 3.0+ CFM at 90 PSI.
- Add tank capacity: a larger tank buffers bursts. Upgrade from an 8-gallon to a 20-gallon tank for framing bursts and you’ll maintain pressure longer during rapid firing.
- Stage work: run one high-demand tool at a time or alternate tasks so the compressor has time to recover between bursts. On a trim crew, have one person nail while another prepares pieces nearby.
- Use a water trap/regulator: install an inline filter-regulator and drain the tank daily in humid conditions to cut moisture and protect seals.
- Monitor with a gauge: add a second pressure gauge at the tool end and watch pressure during firing; if it drops more than 10–15 PSI, you need more CFM or tank.
A concrete example: for a 21-degree framing nailer rated 4.0 CFM at 90 PSI used in burst mode (3–5 nails per second), use a compressor rated 6.0+ CFM at 90 PSI with a 20–30 gallon tank, an inline filter-regulator, and daily tank drains — this setup kept my crew at target pace without shallow drives.
Follow those steps and you’ll keep drives consistent, reduce rework, and extend both compressor and tool life.
Risks of Oversizing: Short Cycling, Tool Stress, and Wasted Energy
Before you size a compressor, you need to know what goes wrong when it’s too big. It wastes electricity and wears things out faster.
Oversizing causes short cycling, and you can see it happen in minutes. Short cycling means the compressor starts and stops so often pressure never steadies; valves and the motor take extra stress and the motor life drops by years with frequent starts. I once watched a contractor on a jobsite where the 80‑gallon unit cycled every 30 seconds; the crew complained about the noise and the finish nailer kept misfiring.
Why that matters: your tools and seals wear faster when pressure spikes and falls. Pressure swings make seals squirm and fasteners go in crooked or underdriven, which meant a rework run of 50 trim nails on one house I worked on. Replace seals more often, and your downtime increases.
Oversizing also raises your electrical bill because starts draw a lot more amps than steady running. If a compressor starts 20 times an hour instead of running continuously, your meter will show noticeably higher kilowatt use and your breaker sees higher inrush currents. On a 5‑HP motor, each start can pull several times the running current for a few seconds.
How to avoid these problems — practical steps you can follow:
- Compare tool CFM to compressor CFM:
- Measure peak tool CFM (example: framing nailer ~2.5 CFM at 90 PSI).
- Choose a compressor that supplies that peak plus 20% margin.
- For intermittent use (nail guns): 20–60 gallon tanks work well.
- For continuous tools (sprayers, grinders): use larger tanks and a higher duty‑cycle pump.
- Use a tank big enough that run time is at least 2–3 minutes per start.
- Add a receiver tank downstream of the pump if you need extra air storage.
- Install a start/stop controller or a pressure‑band controller set to a wider cut‑in/cut‑out range (for example, 80/95 PSI instead of 90/92 PSI).
- Step 1: List each gun’s CFM and PSI from the tool label or manual. Example: a framing gun might say 4 CFM at 90 PSI, a finish gun 1.5 CFM at 90 PSI.
- Step 2: Add a 25% safety margin to each tool’s CFM. Example: 4 CFM × 1.25 = 5 CFM.
- Step 3: Add the adjusted CFMs for tools you’ll run at once to get peak CFM. Example: running two framing guns (5 CFM each) and one finish gun (1.9 CFM) = 11.9 CFM peak.
- Step 4: Choose a compressor rated at or above that peak CFM at the same PSI.
- Step 1: For continuous high-use (multiple framing guns), start with at least a 60–80 gallon tank.
- Step 2: For occasional or single-tool work, 20–30 gallons often works fine.
- Step 3: If your compressor short-cycles, increase tank size by 50% or add an auxiliary tank.
- Step 1: Run both the compressor and tools as you would on a typical drive. Watch the regulator gauge while firing repeatedly for 30 seconds.
- Step 2: Note PSI drop under load. If pressure falls more than 10–15 PSI below setpoint, you have a problem.
- Step 3: If you see a big drop, isolate causes (leaks, undersized compressor, long hose).
- Step 1: Turn compressor off and listen at fittings; also spray soap solution on couplers and hose ends to spot bubbles.
- Step 2: Tighten or replace fittings showing leaks. Replace worn quick-connects.
- Step 3: Check hose diameter: 1/2″ ID hoses are fine for single tools; 3/4″ ID is better for multiple tools or long runs.
- Step 1: Isolate one tool on a short hose directly from the compressor. Measure pressure drop while firing 20 rapid cycles.
- Step 2: Calculate actual CFM per cycle: CFM = (tank volume in cubic feet) × (pressure drop PSI ÷ starting PSI) × (60 ÷ time in seconds). Use this only for rough checks.
- Step 3: Compare measured demand to compressor rated output. If measured demand exceeds compressor output, upgrade or add tank capacity.
- Step 1: Add tank capacity or an auxiliary tank if you see frequent on/off cycles under load.
- Step 2: Reduce compressor outlet flow by using fewer tools at once or staging tool use.
- Step 3: Check pressure switch settings and unloader valve function; replace faulty parts.
- Step 1: Note tool list, measured peak CFM, tank size, regulator PSI, and any repairs or part swaps.
- Step 2: Keep a one-page job sheet with dates and symptoms for each site.
- Step 3: Review the sheet before the next similar job and adjust gear accordingly.
Example for clarity: if your shop runs a paint sprayer needing 6 CFM, pick a compressor rated for at least 7.2 CFM and aim for a run time of 2–5 minutes between stops by using a 60–80 gallon tank or an auxiliary receiver.
Don’t oversize the motor or tank on the assumption you’ll never hit full demand; that creates frequent starts, louder operation, and higher maintenance. Match capacity to your actual tool list, and you’ll save energy, reduce noise, and keep parts lasting longer.
Sizing Checklist and Quick On-Site Troubleshooting
Here’s what actually happens when you size and troubleshoot a jobsite compressor: get the compressor matched to your peak tool demand so you don’t stall mid-drive.
Why this matters: if your compressor can’t supply enough CFM or hold pressure, your nail guns will slow or misfire and you’ll waste time.
1) How do I calculate required CFM and PSI?
Real-world example: on a small deck job you run one framing gun and one brad nailer. The framing gun needs 5 CFM (after margin) and the brad gun 2 CFM, so pick a compressor that gives at least 7 CFM at 90 PSI.
2) What tank size do I need?
Why this matters: tank size smooths short spikes so the motor doesn’t short-cycle every few seconds.
Real-world example: a crew using two framing guns on a house found their 20-gallon tank short-cycling; adding a 60-gallon auxiliary tank stopped the short cycles.
3) How do I check pressure stability on site?
Why this matters: pressure drops during a drive cycle show undersizing or leaks and cause misfires.
Real-world example: on a roof, you fired 20 nails in 30 seconds and saw gauge drop from 100 to 82 PSI — that 18 PSI drop told you the compressor couldn’t keep up.
4) How do I find leaks and basic faults quickly?
Why this matters: leaks steal CFM and make a good compressor look bad.
Real-world example: a crew thought the compressor was weak until they found a split 1/2″ hose leaking at the swivel; swapping to a continuous 3/4″ hose restored performance.
5) What if drives slow or tools feel weak?
Why this matters: you need to know whether the tool or compressor is the culprit before buying gear.
Real-world example: isolating a framing gun showed it pulled 6 CFM during rapid firing, while the compressor only delivered 5 CFM — that mismatch caused the slow drives.
6) What to do about short cycling?
Why this matters: short cycling causes wear and can’t keep steady pressure.
Real-world example: replacing a sticking unloader valve on a 20-gallon unit stopped 30-second cycles and reduced motor starts by half.
7) How should I document changes?
Why this matters: records make recurring problems easier to fix next time.
Real-world example: a foreman kept a sheet showing that on a 12×16 shed they needed 10 CFM at 90 PSI; next time they brought a properly sized 80-gallon setup and finished faster.
Final tip: always round up on CFM and tank size, use 3/4″ hose for multi-tool runs, and write down what you changed.
Frequently Asked Questions
Can I Use an Air Hose Reducer or Booster to Run a Higher-Cfm Tool?
No — I wouldn’t rely on hose adapters or pressure boosters; only about 20–25% extra compressor capacity prevents performance loss. Using boosters/adapters risks pressure drops, tool underperformance, and wear, so upgrade compressor or tank instead.
How Does Altitude Affect Compressor Performance and Nail Penetration?
Higher altitude lowers air density, so I notice reduced compressor output and weaker nail penetration; I compensate with regulator adjustment increasing PSI and allow longer refill/tank capacity to maintain drives per minute and consistent fastening.
Are Oil-Free Compressors Better for Trim and Finish Work?
Yes — I prefer oil-free compressors for trim and finish work because they’re low vibration operation and cleaner, reducing oil contamination; however, I’ll watch seal longevity impact and expect potentially shorter service intervals.
What Maintenance Extends Compressor Life Under Heavy Intermittent Use?
I’d start with the stat that compressors running continuously can drop effective CFM by over 25%. To extend life under heavy intermittent use I’d do regular inspections, timely filter replacements, drain moisture, and avoid short cycling.
Can Battery-Powered Nailers Replace Compressors for Professional Jobs?
Yes — I think battery-powered nailers can replace compressors for many professional jobs, but battery limitations and tool compatibility matter: they suit trim, finish, some framing, yet heavy continuous work still favors pneumatic setups.