You’re standing in your cramped garage, staring at a paint gun and a bulky compressor that smells like motor oil, and wondering why your finishes keep showing greasy specks. Or you’ve plugged an airbrush into a weekend-use tank only to see sputtering and oil stains on your electronics — what went wrong? Most people assume any compressor will do and overlook oil contamination and weight/noise trade-offs.
This intro will show you exactly why oil-free portable compressors prevent oil aerosols, how to pick the right PSI and CFM with a 25% margin, and which small moisture trap and runtime strategy to use for spraying and tool work. You’ll walk away knowing the exact model features to choose. It’s easier than it seems.
Key Takeaways
Before you pick a compressor, know why oil-free models matter: they give you clean air with less fuss so your paint, electronics, or airbrush work stays contamination-free.
– Oil-free portable compressors deliver clean, low-maintenance air ideal for indoor DIY projects like painting, airbrushing, and electronics work. Example: when you spray a white trim with an oil-free 1.5 HP pancake compressor (2–3 CFM at 40 PSI), you won’t see oily specks on the finish.
If you’ve ever struggled to move tools around, this is why portability pays: you can carry a small unit where you need it and store it easily.
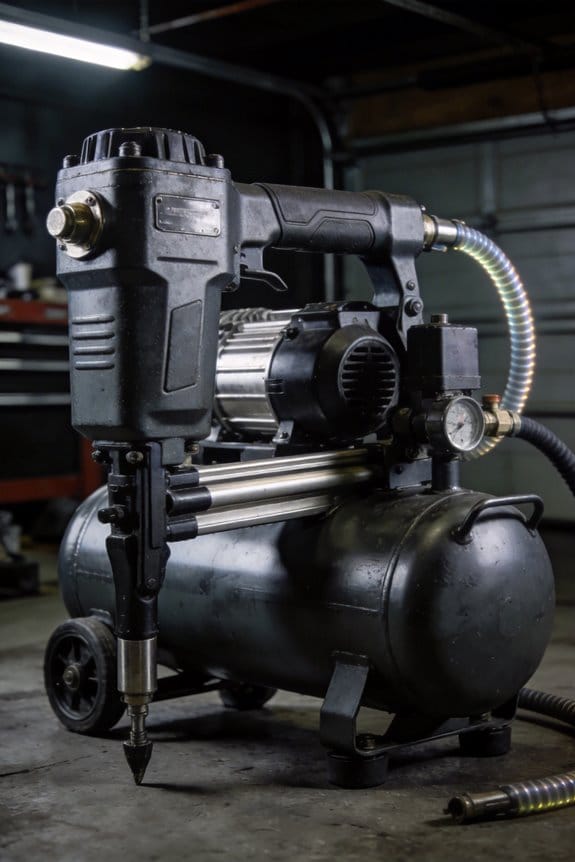
– Their light weight and compact tanks make them easy to carry, store, and use in small home workshops or garages. For example, a 6-gallon pancake compressor weighing 30–35 lbs fits on a shelf and you can lift it into a car by yourself.
Here’s what actually happens when you choose oil-free for occasional use: you spend less time on maintenance and more time on projects.
– Lower upfront and maintenance costs plus no oil changes suit occasional DIYers who prioritize simplicity and portability. Step 1: buy a 1–2 HP oil-free model for basic tasks. Step 2: check the intake filter every 50 hours. Step 3: drain the tank after each use.
Think of noise like a neighbor checklist: quieter machines mean fewer complaints.
– Quieter operation and rubber mounts reduce noise, making them neighbor-friendly for residential and apartment use. Example: an oil-free compressor with 60–65 dB output is similar to background music and won’t usually disturb nearby units.
The difference between light projects and heavy work comes down to airflow and duty cycle.
– For heavier continuous jobs, match required CFM/duty cycle and consider larger or oil-lubricated units to avoid premature wear. Example: a paint-spraying job on a kitchen cabinet set needs about 6–10 CFM at 40 PSI; choose a 20–30% duty-cycle pancake and consider a 30–60 gallon oil-lubed compressor for sustained work.
Should You Buy an Oil‑Free Portable Compressor?
Before you buy an oil-free portable compressor, you need to know one short reason it matters: it affects how you’ll use and maintain the tool over years.
Why this matters: oil-free units cut contamination risk and lower maintenance, which matters if you paint, run air tools indoors, or work where oil fumes are a problem. Example: if you paint furniture in a 10-by-12-foot garage, an oil-free compressor reduces oil spots on trim.
1) Decide if oil-free fits your use
Why this matters: matching duty cycle prevents premature wear.
Steps:
- Check the compressor’s duty cycle (expressed as a percentage).
- Compare that to your expected runtime per hour.
- Match one with at least the same or higher percentage.
Example: if you’ll sand cabinets for 30 minutes out of each hour, pick a model with a 50%+ duty cycle and a 1.5–2.0 HP motor.
Why this matters: contamination risk and weight affect your projects and comfort.
If you need low contamination for finishing, choose oil-free. If you carry the unit up stairs, note weight. Example: a 6‑gallon oil-free pancake runs about 20–24 pounds and is hand-carryable; a 20‑gallon oil-lubricated wheel might be 60–80 pounds and needs a dolly.
2) Compare lifetime cost, not just purchase price
Why this matters: energy and repairs can double initial cost over years.
Steps:
- Write down the purchase price.
- Estimate annual energy cost: (PSI × CFM × hours × electricity rate) is complex, so use manufacturer wattage and hours instead; multiply watts by hours per year and divide by 1,000 to get kWh, then multiply by your rate.
- Estimate annual maintenance: for oil-free, use $0–$30; for oil-lubricated, budget $50–$150 for oil and seals.
- Add probable repair cost based on warranty length.
Example: a $150 oil-free pancake drawing 900 watts used 200 hours/year at $0.15/kWh costs 900 W × 200 h /1000 × $0.15 = $27/year in electricity, plus minimal oil-free maintenance.
Why this matters: warranty affects resale and out-of-pocket repairs.
Check warranty length and what it covers. Example: a one-year parts warranty means you’ll likely pay labor on repairs after year one; a three-year warranty that includes piston and valve coverage saves several hundred dollars if a part fails.
3) Know the technical trade-offs in plain terms
Why this matters: design choices change lifespan and performance.
Steps:
- Read specs for bearings, seals, and rated PSI/CFM.
- Compare those specs to your tools’ required PSI/CFM (pneumatic nailer: ~70–90 PSI, 2–5 CFM; paint sprayer: 30–50 PSI, 3–6 CFM).
- If your tools need continuous high CFM, prefer higher-duty-cycle models or consider oil-lubricated for heavy daily use.
Example: a framing nailer that fires continuously on a big job can overwork a 50% duty-cycle oil-free compressor; rent a heavy-duty oil-lubricated unit or use multiple smaller compressors instead.
If portability, low contamination, and simple upkeep matter to you, an oil-free portable compressor is often the sensible choice.
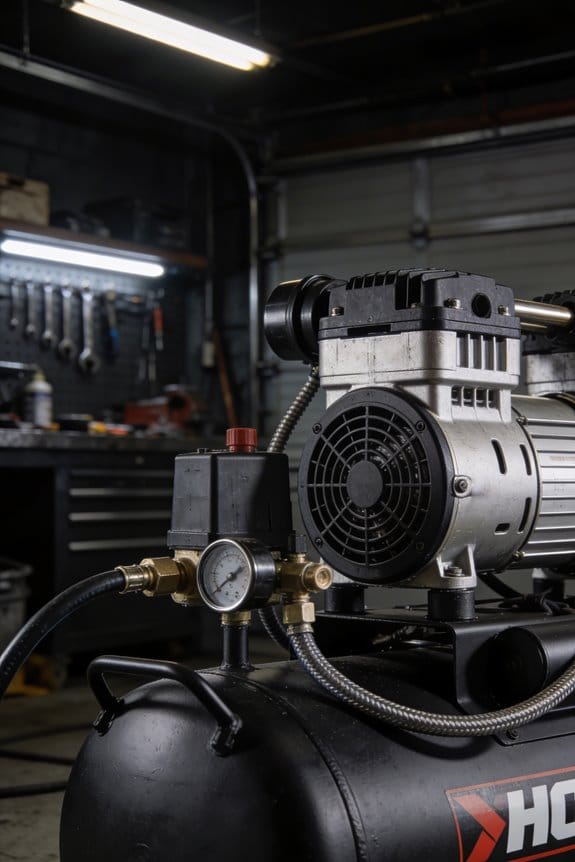
Why Oil‑Free Portable Compressors Are Ideal for DIYers

If you’ve ever struggled with a greasy compressor in a small garage, this is why.
Why it matters: oil-free compressors keep your tools and finishes clean so you don’t ruin paint or food-safe work. For example: imagine spraying trim with a small HVLP gun in a 10×12 garage—oil in the air will show up as tiny spots in the finish.
How oil-free units work and what that gives you
Why it matters: understanding the mechanism tells you what maintenance you can skip. Oil-free compressors use sealed pistons or rotary screws with special coatings instead of circulating oil, so you don’t need to check or change oil after every use. A common model for DIYers is a 1.5–2.5 HP pancake or hot-dog compressor rated at 2–5 CFM at 90 PSI; those give enough flow for brad nailers, tire inflation, and light spray jobs.
Practical steps to pick one
Why it matters: following concrete steps gets you a compressor that actually covers your projects.
- Match CFM: add the CFM needs of your tools and pick a compressor with at least 20% more CFM than that total (for example, a 3 CFM spray gun + 2 CFM brad nailer = 5 CFM; buy a 6 CFM unit).
- Check duty cycle: choose 25–50% for occasional use, 75%+ for long runs; a 50% duty cycle means the compressor can run 3 minutes out of every 6.
- Tank size: 3–6 gallons for intermittent nailing and airbrushing, 10–20 gallons if you want longer spray sessions without frequent motor starts.
Example: a 2 HP, 6 CFM, 20% duty cycle, 6-gallon pancake is ideal if you mainly do finish nailing and short spray touch-ups.
Maintenance and real-world trade-offs
Why it matters: knowing what to do and expect keeps the compressor working longer. Oil-free units are lighter (often 20–40 pounds for portable models) and quieter by a few decibels than comparable oil-lubed units, but the seals can wear faster if you run them well beyond their duty cycle; you’ll replace the pump sooner on heavy use. One real example: a weekend woodworker who runs finish-spray sessions under 10 minutes at a time can expect 5–8 years of reliable service from a quality oil-free pump.
Quick use tips
Why it matters: simple habits prevent problems and save time.
- Drain the tank after each use to prevent rust.
- Keep intake filters clean — check monthly if you run the machine weekly.
- Use an inline water/oil separator for spray work; change the element every 3 months with moderate use.
Example: after a 20-minute trim-spraying session, drain the tank and wipe the intake filter; this prevents moisture and maintains spray quality.
Final choice checklist
Why it matters: a short checklist prevents buyer’s remorse.
- CFM at required PSI (10–20% cushion minimum).
- Duty cycle matching your session length.
- Tank size for run time you want.
- Portable weight under 40 lb if you’ll move it often.
Example: if you want to move between garage and job site, choose a 6 CFM, 6-gallon, <35 lb unit with a 50% duty cycle.
Pick an oil-free portable compressor when you want low daily maintenance, cleaner air for finishes or food-safe projects, and easier handling around the shop.
Best DIY Projects for Oil‑Free Portable Compressors

If you’ve ever sprayed furniture and seen tiny oil spots ruin the finish, this is why.
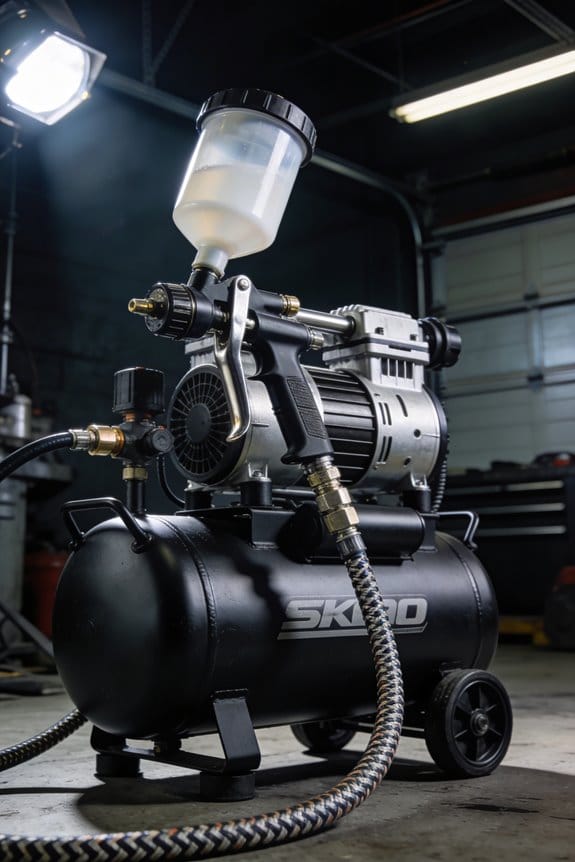
Why it matters: Oil-free air prevents blemishes during spray painting. Example: I spray a small side table with latex primer and finish coat using a 1.5‑gallon oil‑free compressor at 30–35 PSI for the primer and 25–30 PSI for the topcoat; the paint lays down smooth with no oil specks.
How to do it:
- Set compressor to 30–35 PSI for primer, 25–30 PSI for topcoat.
- Use a 1.4–1.8 mm nozzle HVLP gun for furniture.
- Keep the gun 6–8 inches from the surface and overlap passes by 50%.
- Drain the tank after every use to remove moisture.
Tips: Choose a portable unit with at least 1.5 CFM at 30 PSI and an onboard moisture trap. Quick example: a 1.5‑gal oil‑free compressor with a built‑in dryer handled two coats on a nightstand without stopping.
If you’ve ever needed to inflate a tire quickly, this is why.
Why it matters: Oil-free airflow avoids contaminating valve stems and seals. Example: I top off car tires from 28 to 32 PSI in under two minutes using a 2‑gallon oil‑free compressor with an inflation gun and preset chuck.
How to do it:
- Attach the inflation chuck, set regulator to target PSI (e.g., 32 PSI), then connect.
- Inflate in short bursts and re-check pressure with a handheld gauge.
- If inflating sports balls, use a needle adapter and 10–15 PSI.
Tips: Use a compressor with 2–4 CFM for faster fills and a shutoff chuck to prevent overinflation.
If you’ve ever tried a tiny airbrush and gotten blotchy results, this is why.
Why it matters: Low moisture and oil‑free output protect delicate finishes during airbrushing. Example: I paint scale model figures with a single‑action airbrush at 10–15 PSI using a 0.3 mm tip and a 1‑gallon oil‑free unit fitted with a mini moisture trap.
How to do it:
- Fit a mini moisture trap and set regulator to 10–15 PSI.
- Use a 0.2–0.4 mm tip depending on detail.
- Keep passes thin: 2–3 light layers instead of one heavy coat.
Tips: Choose a compressor with <2 CFM and an integrated dryer if you paint indoors frequently.
If you’ve ever framed drywall and missed a few nails, this is why.
Why it matters: Consistent PSI ensures nails and staples set flush every time. Example: I use a 2‑gallon oil‑free compressor at 90 PSI for a framing nailer, driving 16D nails into studs accurately during a weekend shed build.
How to do it:
- Check your tool’s required PSI and CFM (e.g., framing nailer: 90–120 PSI, 2–4 CFM).
- Set regulator to the lower end of the tool’s range and test on scrap wood.
- Adjust up in 5 PSI increments until nails set flush without over‑driving.
Tips: Pick a compressor with fast recovery time (short pump cycle) and a regulator that holds steady under load.
Compare Portability, Air‑Purity (Class 0), Runtime, and Power

If you’ve ever had a compressor that couldn’t keep up, this is why.
Portability — How will you move it and how often will you carry it?
Why it matters: If you move between job sites, a heavy tank slows you down and costs time.
- Look for compressors under 40 lb if you carry them by hand for more than 10 minutes; choose 20–30 lb for frequent lifts.
- Choose compact frames with side handles or telescoping pulls when you’ll load it into a van or truck daily.
Example: I moved a 28 lb pancake-style oil-free unit across a two-story house for trim work; the small footprint fit on stair treads and I carried it up three flights without help.
Tip: measure doorway widths and stair turns at your sites before buying.
Air-Purity (Class 0) — What guarantees true oil-free air?
Why it matters: If your work involves painting, electronics, or lab use, oil aerosols ruin finishes and components.
– Check for actual Class 0 certification and ask for the test report from the manufacturer; seal integrity and verified filtration matter more than marketing words.
Example: A restoration shop rejected a compressor labeled “oil-free” until the supplier produced a third-party Class 0 certificate showing <0.01 mg/m3 oil aerosol.
Step 1: Request certification. Step 2: Confirm the test method and date.
Runtime — How long will it actually run between refills or charges?
Why it matters: Downtime for refills or battery swaps interrupts continuous jobs like nailing a roof or spray painting a wall.
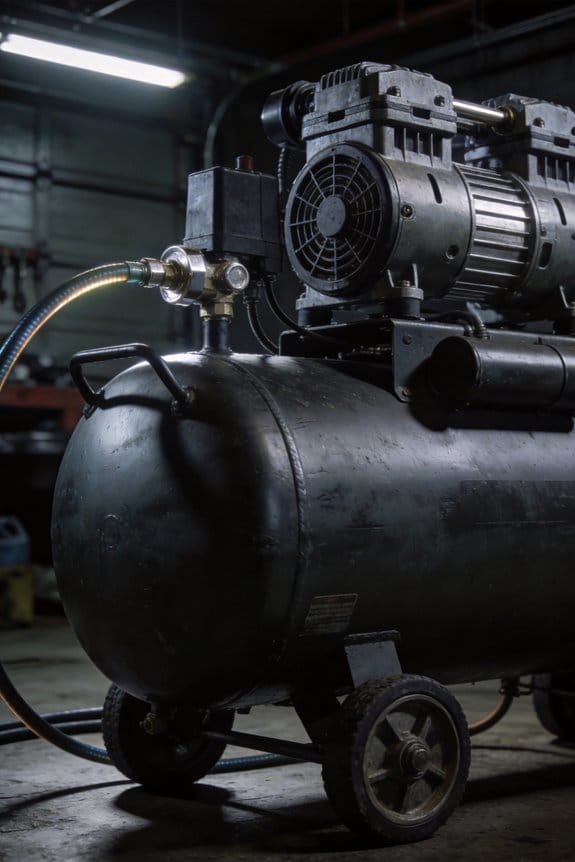
- Match tank size and duty cycle to your task: choose 6–10 gallon tanks for heavier continuous work, 1–3 gallon for trim and handheld tools.
- For battery units, expect 20–60 minutes of heavy use; keep a spare battery if you need longer runs.
Example: On a full-day deck build I used a 6-gallon compressor and refilled twice, which fit my schedule; a 2-gallon would have meant five refills.
Steps: 1) Calculate run time = (tank capacity × usable pressure range) ÷ tool CFM. 2) Add 25% margin.
Power and Output Consistency — Will your tools run smoothly?
Why it matters: Tools stall or underperform when PSI drops or the compressor can’t meet CFM demand.
- Match peak and continuous CFM and required PSI: for finish nailers use 2–3 CFM at 70–90 PSI; for framing nailers use 4–6 CFM at 90–120 PSI.
- Look for compressors with consistent cut-in/cut-out cycles and at least a 50% duty cycle for heavy use.
Example: I swapped a small pancake unit for a 2.5 HP oil-free compressor when my brad nailer started missing shots during long strips; the new unit held 90 PSI steady and eliminated stalls.
Tip: pick a compressor with 25–30% more CFM than your highest-demand tool.
How to balance these attributes for your job
Why it matters: Matching specs to tasks prevents wasted money and frustration.
1) List your tools and note each tool’s CFM and PSI needs.
2) Decide how long you need uninterrupted runtime (minutes or hours).
3) Choose a compressor that meets the highest CFM + 25% margin, has a tank size for your runtime target, is under your carry-weight threshold, and provides verified Class 0 if you need oil-free air.
Example: For a mobile finish crew using finish nailers and a paint sprayer: pick a 20–30 lb portable compressor with a 3–6 gallon tank, 3–6 CFM at 90 PSI, and Class 0 certification if you spray solvent-based finishes.
Buying Checklist & Real‑World Tips for Quiet Operation, Battery Use, and Maintenance

Before you buy a compressor, you need to know three things that decide how it fits into your day: quiet operation, battery performance, and routine maintenance.
Why quiet matters: noisy compressors make long jobs miserable and can get you kicked off jobsites. Look for a decibel rating at working load — for example, 65–70 dB at 90 psi under 3 CFM load is quiet enough to talk over without shouting. Also check for sound insulation and rubber mounts; those cut vibration and reduce noise by 5–10 dB in real use. Real-world example: on a morning scaffolding job I used a unit rated 68 dB at load and could hear a coworker three feet away while nailing.
Why battery performance matters: a weak battery stops your work and wastes time. Check the battery capacity in watt‑hours (Wh), not just volts; a 500 Wh pack will run a 300 W compressor about 1.6 hours at moderate demand. Look for stated runtime at common CFM loads — for instance, the manual should list minutes at 2 CFM or 4 CFM — and note charge time: 80% in under an hour is ideal. Prefer models with swappable packs so you can swap in a charged pack and keep working. Real-world example: on a long fence install I carried two 600 Wh packs and changed them every 90 minutes to keep three guns running.
Why maintenance matters: short, regular checks keep the unit reliable and avoid big repairs. Check these specific items before you buy:
- Filter access: make sure the air filter is reachable without tools and can be changed in under five minutes.
- Oil-free internals: if you don’t want daily oil changes, pick an oil-free pump.
- Service intervals: look for items listed as maintenance every 500 hours or 6 months.
- Nozzle guidance: confirm the manual lists nozzle sizes for common tasks (e.g., 15–18 ga brad nails, 2–3 CFM).
- Seasonal storage: follow steps to drain moisture and use desiccant packs if storing below 40% humidity.
Real-world example: I inherited a jobsite compressor with a sealed oil pump and a door filter; swapping the filter took two minutes and avoided a full teardown.
Simple buying checklist (do these before you spend money):
- Confirm decibel rating at working load (target 65–72 dB for quiet jobs).
- Verify battery Wh, runtime at 2–4 CFM, and charge time (prefer swappable packs).
- Check filter access, oil‑free or service interval, and nozzle guidance.
- Physically inspect rubber mounts and insulation if possible.
- Ask for the seasonal storage steps and write them on the unit.
If you follow these steps, you’ll pick a compressor that stays quiet, lasts a full day on battery, and is easy to maintain.
Frequently Asked Questions
Can I Use an Oil‑Free Compressor for Spray Tanning at Home?
Yes — I would, but check filters first. I’m cautious: oil-free compressors enable skin safe atomization, yet compressor noise and airflow consistency matter; pick a quiet, properly filtered unit and test spray pattern before tanning.
Are Replacement Filters and Parts Widely Available for Niche Brands?
Yes — I’ve found brand availability varies; mainstream models have plentiful replacement filters and parts, while niche brands often rely on aftermarket compatibility or custom orders, so I’d check suppliers and user forums before buying.
How Do Oil‑Free Compressors Perform in Subzero Temperatures?
Yes — I struggle to stay cheerful admitting oil‑free compressors can cold start sluggishly, but with good moisture control and heaters they manage subzero work fine; I recommend preheating, warmed storage, and vigilant condensation drains.
Can I Airline Multiple Pneumatic Tools Simultaneously From One Unit?
Yes — I can run multiple pneumatic tools from one unit, but you’ll need multiple outlets and careful pressure balancing, or tool performance will suffer; I’d add a regulator, manifold, and monitor to keep pressures steady.
What Warranties Cover Motor Burnout From Continuous Heavy DIY Use?
Warranties often exclude motor burnout from continuous heavy DIY use; they cover defects, not misuse. I’ll check terms, note warranty limitations, demand proof of heat protection features, and push for repair or prorated replacement.