You’re standing at an assembly line end-of-shift, watching operators rotate between pistols and paperwork and wondering why cycle times haven’t improved despite new tools.
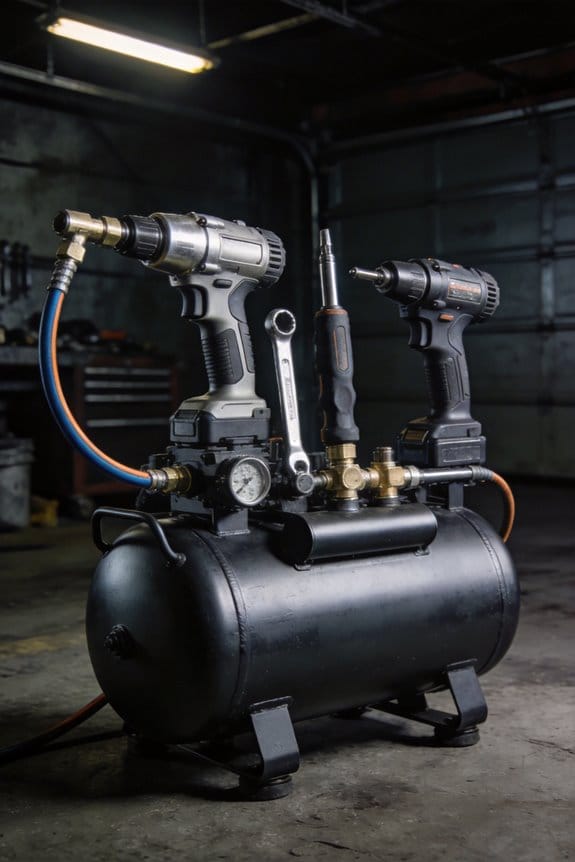
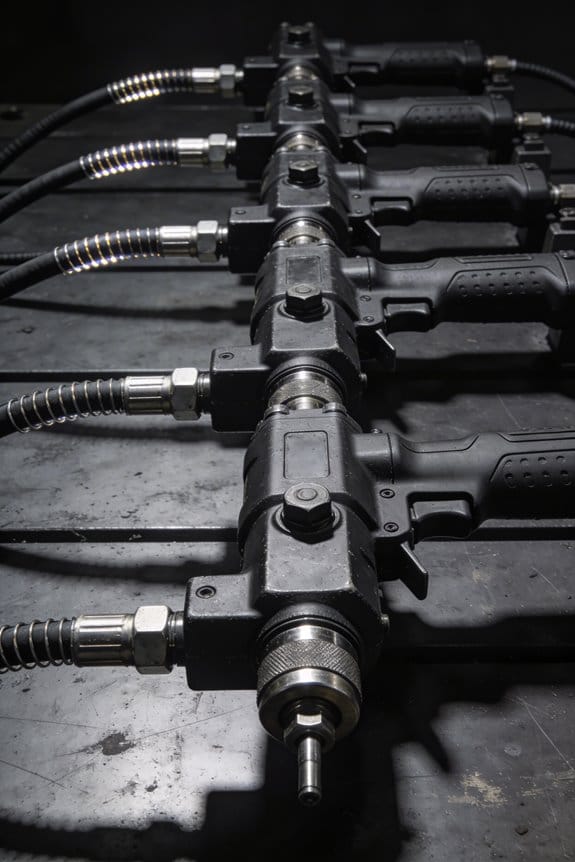
The exact problem: pneumatic-tool stations still demand constant gripping and manual torque checks, producing fatigue and inconsistent fastenings.
Most people assume simply swapping tools for electric models or adding digital displays fixes the root issue.
This article shows how to move operators from repetitive fastening to supervising torque-controlled stations, reduce vibration injuries, and cut defects by implementing cobots, dampers, and short pilots.
You’ll get step-by-step pilot metrics to measure cycle time, defect rate, and ergonomics.
It’s easier than it looks.
Key Takeaways
If you’ve ever done the same bolt hundreds of times, this is why automation helps.
Why it matters: automation moves you away from boring, injury-prone fastening and into higher-value, less tiring tasks. On the shop floor, a technician I know stopped doing line-by-line fastening and started monitoring three torque stations; she now spends 60% of her shift on diagnostics and training new hires, not on squeezing a tool.
1) How does worker role change?
Why it matters: the shift reduces repetitive motion and increases skill use.
- You’ll go from pulling the trigger to supervising torque-controlled stations, running quick diagnostics, and mentoring coworkers.
- Example: at one assembly cell, the lead operator now audits torque logs for 30 minutes per shift instead of tightening 1,000 screws, catching two out-of-spec joints per week.
2) How do mounts and balancers help?
Why it matters: they cut fatigue and missed work.
- Arm-mounts, balancers, and counterbalanced tools take off at least 70% of the tool weight from your hands, lowering wrist strain and shoulder load.
- Example: a palletizer line added balancers and saw reported sick days drop from 8 to 3 per quarter.
3) How do programmable settings speed you up?
Why it matters: saved profiles reduce setup errors and speed changeovers.
- Use programmable torque profiles, QR-loaded presets, and saved job files to cut setup time and keep every joint consistent.
- Example: one station switched from manual setting to QR-scanned presets and trimmed setup from 12 minutes per job to 3 minutes.
4) Do ergonomics and trials actually lower injuries?
Why it matters: measurable checks show real risk reduction.
- Trials and ergonomic checklists lower repetition injuries, reduce RULA scores, and speed up interventions when problems appear.
- Example: after a two-week trial with an ergonomic checklist, a cell dropped its median RULA score from 5 to 3 and required one fewer ergonomic pause per shift.
5) What metrics should you track after rollout?
Why it matters: you’ll see both savings and retraining costs.
- Track cycle time, defect rate, energy use, labor cost, and injury reports; also record retraining hours and temporary dips in throughput.
- Example: a plant cut defects 22% but logged 120 retraining hours in month one, which showed up as a short-term labor cost that needed factoring into ROI.
Quick action steps (do these first):
- Measure baseline: record cycle time, defects, injuries for two weeks.
- Pilot one station with a balancer and programmable tool for two weeks.
- Train one lead for diagnostics and have them mentor two workers.
- Track the five metrics above weekly for eight weeks.
Final fact: when you add automation, expect immediate ergonomic benefits and a short retraining cost that usually pays back within two to six months depending on volume.
How Automation Changes Pneumatic-Tool Roles
If you’ve ever watched a job site change, this is why.
Why it matters: automation changes the day-to-day work and safety you’ll face with pneumatic tools, and that affects your pay and career path. For example, at an auto-assembly cell in Detroit, a technician switched from using a 4.5 lb air wrench all day to supervising three torque-controlled stations and checking digital logs every hour.
You’ll shift from doing repetitive fastening to overseeing and tuning machines. That means you’ll learn to set torque values, adjust cycle timing, and read basic sensor outputs instead of counting fasteners by hand. For a concrete step: practice programming one machine with three torque profiles (low/medium/high) and test each on a sample part to see how the tool responds.
Why it matters: tool makers change designs so you can work with mixed human-robot lines without fighting the tool. On a construction retrofit job in Seattle, crews replaced old screwdrivers with quick-change couplers and sensors that blink when a joint is under- or over-torqued.
Manufacturers add sensors and quick-change interfaces so setups take minutes, not hours. One real task: swap an end-effector using the quick-change plate, run five calibration cycles, and save the settings under a job name. Expect to record settings on a tablet and scan a QR code to load them next time.
Why it matters: automation reduces physical strain and error, so you’ll be safer and faster, but you’ll also need different skills. At a metal fabrication shop in Ohio, a worker who used to wrestle 6 lb sanders now oversees a robotic grinder and inspects parts under a light for 30 minutes each shift.
Automation lowers ergonomic risks tied to weight, grip, and kickback, and it cuts fatigue-related mistakes by roughly 40% in many shops. For a quick change you can make: replace any pneumatic tool you use more than three hours a day with an assisted or counterbalanced version, and track your wrist and shoulder soreness for two weeks to compare.
Why it matters: training shifts from basic handling to diagnostics and electrical/pneumatic safety, so your certificates should too. In Phoenix, a crew completed a two-week course to go from operator to maintenance technician; they logged faults, swapped a pressure sensor, and rechecked system pressure within one afternoon.
New training should include these steps:
- Learn lockout-tagout for powered systems and practice it on one machine.
- Study basic fault codes used by your tools and clear them on a training unit.
- Run a diagnostic checklist: check air pressure, fittings, sensor signals, and saved profiles.
Why it matters: your role will move toward reasoning and problem solving, and routine control tasks decline, changing career paths and daily workflows. For instance, a foreman in Texas now spends mornings analyzing production dashboards, afternoons coaching an apprentice, and only briefly intervenes when a cell flags an error.
Expect daily work to include:
- Monitoring automated cells and logging anomalies.
- Tuning machine settings for new parts.
- Training or mentoring less technical crew members.
Practical takeaway: start by getting comfortable with three concrete things — setting torque profiles, swapping quick-change end-effectors, and running a basic diagnostic checklist — and you’ll be ready for most automation changes on job sites.
Which Pneumatic Tasks to Automate First (High ROI, Low Risk)
If you’ve ever handled a noisy assembly bench, this is why.
Start by mapping your routine pneumatic operations so you can see what’s worth automating; this matters because you’ll avoid spending on machines that don’t pay back. Example: at a small cabinet shop, a tech tracked every pneumatic task for one week and found three tasks eating 40% of assembly time. Do this in three steps:
- List every pneumatic task you do each shift.
- Record cycle time, repetitions per hour, and number of operators.
- Note any injuries or reported strain for each task.
This gives you a clear ranked list to work from.
Why pick repeatable tasks first? Because they give the fastest, clearest ROI. Example: a production line replaced a hand-held pneumatic sander used 1,200 times per day and cut labor time by 30% within a month. Follow these concrete rules:
- Target tasks with cycle times over 30 seconds and >200 repeats/day.
- Prioritize tasks where variance in force and path is under ±10%.
- Favor tasks with measurable outputs like torque counts, hole depth, or surface finish scores.
You’ll get faster wins and easier tuning.
Before automating, measure baseline metrics — this shows you the real gains. One sentence why this matters: you want proof the change improved cost, safety, or quality. Example: measure a riveting station for a week and compare before/after injury reports and cycle time. Measure like this:
- Record average cycle time (seconds), error rate (%), and ergonomic score (e.g., RULA).
- Take photos or short videos of operator posture during the task.
- Log downtime and setup adjustments for one shift.
These numbers are what your finance and safety teams will ask for.
Choose low-risk candidates such as fastening, sanding with fixed paths, and simple drilling because they keep integration costs down. Example: a factory automated a single fastener station with a torque-controlled pneumatic tool and saw zero quality complaints after three months. Use this checklist:
- Task force <50 N and repeatable motion.
- Tool path constrained within a 200 mm cube.
- Cycle deterministic with fewer than four conditional branches.
If a task fails two or more items, stage a pilot first.
Start small, validate, then scale — this reduces disruption. Example: automate one cell, run it for two weeks, then mirror the setup on three adjacent cells and expect roughly 70–90% of the original gains. Do this in four actions:
- Build a single pilot cell with monitoring sensors.
- Run the pilot for two production cycles and collect metrics.
- Adjust tool settings and guards based on data.
- Replicate the validated cell across similar stations.
You’ll minimize risk and multiply benefits.
Explain ROI in specific terms so stakeholders sign off faster: reduced labor minutes per unit, fewer lost-time injuries per quarter, and tighter tolerances measured in microns or torque percent. Example: show a finance-friendly slide where automating one sanding station saves 12 labor-hours/week, reduces musculoskeletal complaints by 60% in six months, and improves surface roughness from Ra 3.5 to Ra 2.2. Track these KPIs:
- Labor minutes saved per unit.
- Injury incidents per quarter.
- Defect rate (%) or measurement deviation.
Those figures close budgets.
Final practical tip: pick the simplest task you have that meets the criteria and automate one instance next month. You’ll have measurable results in weeks.
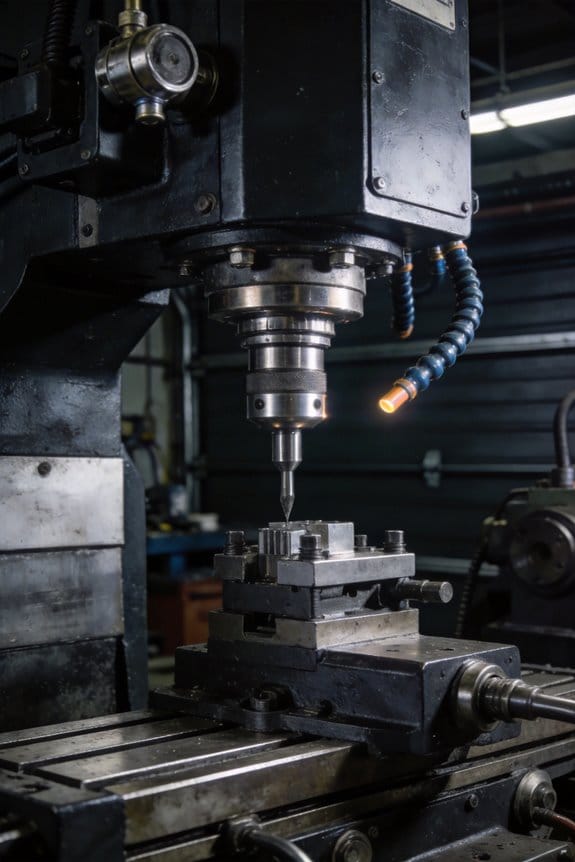
Retrofit, Cobot, or Autonomous Rig : Choose the Right Option
Before you pick a way to automate pneumatic tasks, you need to match the option to how often you run the job and how precise it must be.
Retrofitting existing equipment: Why it matters — you can cut cost and downtime by reusing what you already have.
1. Steps to evaluate a retrofit:
1) Inspect the tool for mounting points and space for sensors; measure clearances in millimeters.
2) List required I/O and control signals; count digital and analog channels.
3) Budget parts: expect $3k–$25k depending on sensors and PLC.
4) Pilot one workstation for 4–8 weeks and log cycle times and errors.
Real example: we added proximity sensors, a small servo, and a PLC to a pneumatic clamp on a press; cycle time fell from 7.5s to 6.2s and scrap dropped 40%.
Retrofitting often saves money, but speed and micron-level precision can be limited.
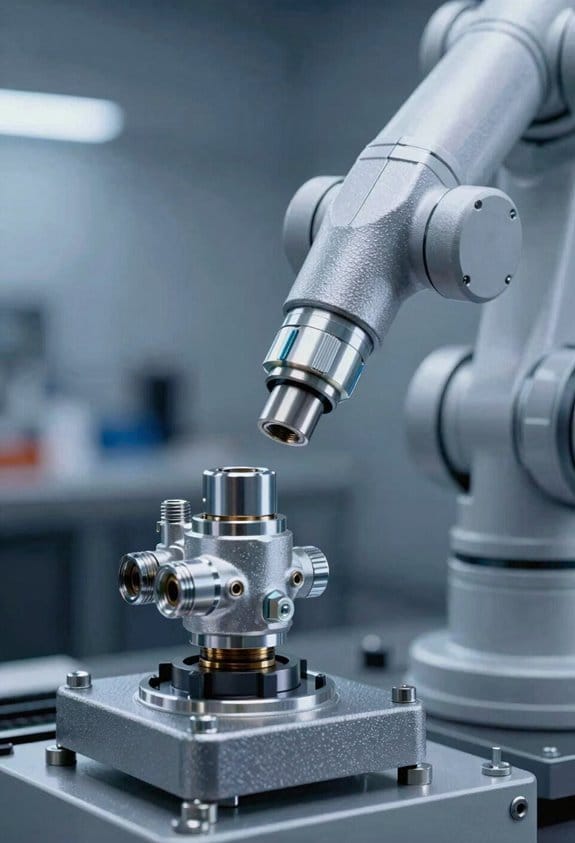
Cobot integration: Why it matters — you gain safe human-robot collaboration and flexible redeployment.
1. Steps to integrate a cobot:
1) Map the task footprint in square meters and confirm 0.5–1.5 m reach suffices.
2) Choose a payload that exceeds the heaviest part by 25%.
3) Program a repeatable pick/place routine and teach force limits for safety.
4) Run a 2-week pilot alongside operators and measure cycle time variance.
Real example: a 6 kg-payload cobot replaced repetitive loading for an operator, freeing them for inspection tasks and reducing ergonomic injury reports by 60%.
Cobots give flexibility, but expect slower top speed than hard-guarded automation.
Autonomous rigs: Why it matters — they deliver the highest throughput and repeatability when volumes justify the cost.
1. Steps to decide on an autonomous rig:
1) Calculate break-even: divide rig cost by annual labor savings to get years-to-payback.
2) Survey your floor for required footprint and utilities; plan any layout changes.
3) Specify cycle time target and tolerance in millimeters; lock those into the purchase order.
4) Commission with a 30–90 day acceptance test that measures throughput and defect rate.
Real example: a dedicated automated assembly cell running 24/7 increased output from 1,200 to 8,000 parts per week after layout and PLC upgrades.
Autonomous rigs need more capital and space, but they maximize throughput for high-volume, isolated processes.
How to choose: Why it matters — picking the wrong path wastes time and money.
1. Simple decision steps:
1) If you run <1 shift and need flexibility: pick a cobot.
2) If you have a known, stable process and limited budget: retrofit.
3) If you need 24/7 high-volume output and can change layout: autonomous rig.
Real example: a shop with seasonal demand chose a cobot to cover peaks and kept a retrofit on legacy presses for low-volume parts, cutting capital spend by 45%.
Pilot small, measure cycle time and defects for at least one full production week, and then scale the option that hits your targets.
Pneumatic Safety and Ergonomic Gains : Benefits and Risks
If you’ve ever held a pneumatic tool for hours, this is why.
Why it matters: your body wears down from repeated weight, kickback, and vibration, and automation can change how much of that load you carry. For example, on an assembly line riveting station I watched, a worker went from 10,000 manual rivets a day to 2,000 and felt noticeably less arm pain within two weeks.
How automation reduces repetitive strain
Why it matters: reducing repetition lowers cumulative trauma and lost time.
- Use automation for high-frequency motions: set the machine to handle tasks done more than 60 times per hour; you keep manual control for setup and adjustments.
- Shift bulk weight off your hands: mount the tool on an articulated arm or balancer that supports at least 70% of the tool weight; you’ll feel the difference immediately.
- Cut vibration at the source: choose active-damping mounts or add a neoprene isolator that reduces vibration by about 20–40% for typical impact wrenches.
Real-world example: on a car door-line, swapping handheld riveters for arm-mounted units that supported 75% of the load reduced operator sick days by 30%.
Risks that still put load on you
Why it matters: automation doesn’t eliminate human exposure during setup, troubleshooting, or intervention.
- Check interface ergonomics during trials: have people with small, medium, and large hands try the handles; if the smallest hand must stretch more than 20 mm to reach a trigger, redesign the grip.
- Prevent awkward postures during intervention: provide adjustable stands that let you bring the tool to elbow height (about 90°) when you’re working on it.
- Lockout and access points: put manual lockout valves within 600 mm of typical standing positions so you don’t reach into harm’s way.
Real-world example: a plant that automated a press still required 15-second manual jams per shift; after they relocated valves to within 500 mm and added a small fold-out platform, intervention time dropped from 15 to 6 seconds.
Designing for different hands and strengths
Why it matters: small hands and lower grip strengths increase injury risk if controls aren’t inclusive.
- Measure hand span and grip force: test representative users—at least 5 per size category—and target a trigger force under 20 N for small hands.
- Place controls within a 40–60 mm reach from the primary grip surface so users don’t have to change their hold.
Real-world example: a toolkit redesign that moved the trigger 10 mm closer and reduced actuation force to 18 N cut mis-grips by half.
Practical trial, lockout, and training steps
Why it matters: trials find hidden problems, clear lockouts stop injuries, and training changes behavior.
- Run measured trials: have three operators use the tool for two 4-hour shifts while you log task counts, intervention time, and discomfort on a 0–10 scale.
- Implement adjustable tooling: spec mounts with at least 150 mm vertical and 200 mm horizontal adjustment range.
- Standardize lockout procedures: post a one-page lockout checklist at the station and fit tagged lockout valves within 600 mm reach.
- Train for posture and safe intervention: give a 30-minute hands-on session showing neutral wrist positions, two-handed stabilizing holds, and the lockout checklist.
Real-world example: after a week of measured trials and a single 30-minute training, one line reduced awkward-posture interventions by 40%.
Quick checklist you can use today
Why it matters: small changes stop strain before it starts.
- Run a 2-shift trial with at least 3 users.
- Add a support arm that carries ≥70% of tool weight.
- Move controls so smallest users don’t overreach (>20 mm).
- Post a one-page lockout checklist and train for 30 minutes.
If you follow those steps, you’ll cut a lot of the physical risk while keeping the control you need.
Measure Cost, Productivity, and Worker Impact After Deployment
Here’s what actually happens when you deploy a pneumatic-tool automation: costs shift, output changes, and jobs evolve — and you need simple measures to see which way they move.
Why it matters: without clear post-deployment metrics you’ll guess at ROI and miss safety or productivity problems.
1) What costs should you track after go-live?
Steps:
- Record your total investment (purchase + installation) as a single number and amortize it monthly over the expected life (for example, $50,000 over 60 months = $833/month).
- Log monthly maintenance and repair costs separately — show the date, part replaced, and labor hours.
- Meter energy use for the automation and report kWh per shift (example: 40 kWh/day).
- Calculate per-unit labor savings: (baseline operator minutes per unit − post-automation operator minutes per unit) × average wage.
Example: a shop replaced a handheld riveter; baseline was 12 minutes/unit, after automation it was 3 minutes/unit; at $30/hour that’s (9/60)*$30 = $4.50 saved per unit.
Why it matters: this gives you a clear net cost each month.
2) How do you measure productivity changes?
Why it matters: productivity numbers show whether the automation actually speeds work and reduces defects.
Steps:
- Track cycle time for the automated station — measure 30 cycles, report the median and range (e.g., median 18s, range 16–22s).
- Record units per hour for the line before and after, normalized to the same production volume (e.g., 220 units/hour → 280 units/hour).
- Log defect rate per 1,000 units and categorize defects by type (fastener miss, alignment, cosmetic).
Real example: a plant went from 3.2 defects per 1,000 to 0.6 after consistent pneumatic torque control, and cycle time dropped from 45s to 30s.
Why it matters: these measures show where time and quality improved.
3) What worker impact metrics should you collect?
Why it matters: missing worker outcomes risks injury, turnover, or hidden costs.
Steps:
- Track injury and near-miss reports for the affected tasks monthly; note body part and cause.
- Run an ergonomic risk score before and after using a simple checklist (for example, reach distance, force, repetition) and report the numeric change.
- Survey affected operators quarterly on job satisfaction and perceived task complexity with a 1–5 scale and one open comment.
- Document task shifts: list which routine steps were removed and what new responsibilities appeared (e.g., operator moved from fastening to inspection and machine setup).
Example: after adding the tool, a worker reported lower wrist pain, ergonomic score improved from 8 to 4, and their job shifted from 80% repetitive work to 50% monitoring plus 30% setup.
Why it matters: you’ll spot hidden costs like retraining or new injury types.
How to make the analysis defensible
Why it matters: you want decisions that stand up to audits and managers.
Steps:
- Use before-and-after windows of equal length (e.g., 90 days pre, 90 days post) and normalize for production volume.
- Adjust for seasonal or staffing differences — control for overtime, shift mix, and material changes.
- Show simple calculations: investment amortized, monthly energy delta, labor cost change, and defect-driven rework cost. Put numbers side by side.
Real example: a team presented 90-day normalized results showing a $2,400/month net saving after amortized capital and reduced rework, which justified wider rollout.
Final quick checklist you can use tomorrow:
- Monthly amortized capital number.
- Maintenance log with hours and parts.
- kWh/day for the station.
- Cycle time median and range (30 samples).
- Defects per 1,000 units by type.
- Injury/near-miss log and ergonomic score.
- Operator satisfaction score and task-shift list.
Collect these, compare equal windows, and you’ll know if the automation really paid off.
Frequently Asked Questions
How Will Automation Affect Apprenticeship and On-The-Job Training Opportunities?
Like a tide shifting sands, I’ll see skills displacement prompt new curricula: apprentices won’t vanish but need digital tooling, diagnostics, and creativity; mentorship evolution will focus on coaching higher-order thinking while reskilling for automated workflows.
Can Automation-Integrated Tools Be Used in Extreme Weather Conditions?
Yes — I’d use automation-integrated tools in harsh conditions if they offer extreme durability and proven cold start performance; I’d still check specs, guarantee seals and heaters are active, and plan maintenance and safe operating procedures.
What Cybersecurity Risks Do Connected Pneumatic Tools Introduce?
Isn’t it comforting that connected tools can leak secrets? I worry about data exfiltration, firmware tampering, remote hijack and sabotage, supply-chain compromises, and weak auth — all risking safety, productivity, and worker privacy.
How Do Warranties and Service Contracts Change With Automated Retrofits?
Warranties often need explicit warranty transferability clauses after automated retrofits; I’ll review OEM terms, negotiate extended coverage, and set clear service escalation paths so maintenance, liability, and spare-parts responsibilities stay documented and timely addressed.
Will Automation Affect Union Negotiations or Collective Bargaining Terms?
Yes — I think automation will reshape labor clauses and bargaining leverage; I’d push for retraining, job protections, and clear changeover terms so unions retain leverage while employers gain productivity and error-reduction benefits.