You’re at a job site with a portable compressor that dies halfway through inflating tires, and you’re left juggling an air hose and a stopwatch, wondering why it won’t keep up. You need to know whether to carry a second tank, buy a bigger unit, or tweak settings so the thing actually runs when you need it. Most people assume lighter compressors are simply underpowered and blame size alone, overlooking storage, cycling behavior, and controls that change effective runtime.
This piece will show which specific upgrades and adjustments — extra storage tanks, variable-speed drives or inlet-guide control, oil cooling, and simple leak- and sizing-fixes — extend real usable run time and reduce motor wear.
You’ll get a clear decision checklist and practical steps to implement immediately. It’s easier than it looks.
Key Takeaways
If you’ve ever struggled with a tiny air compressor dying mid‑job, this is why.
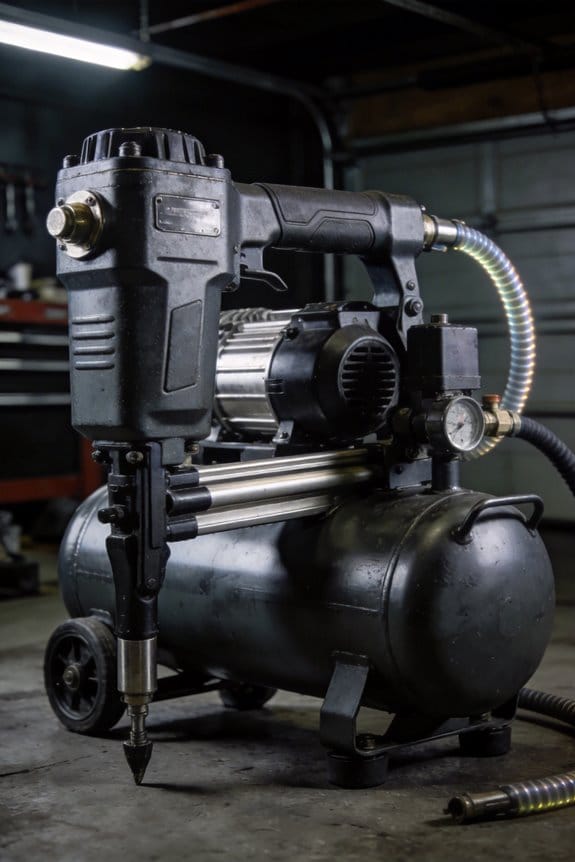
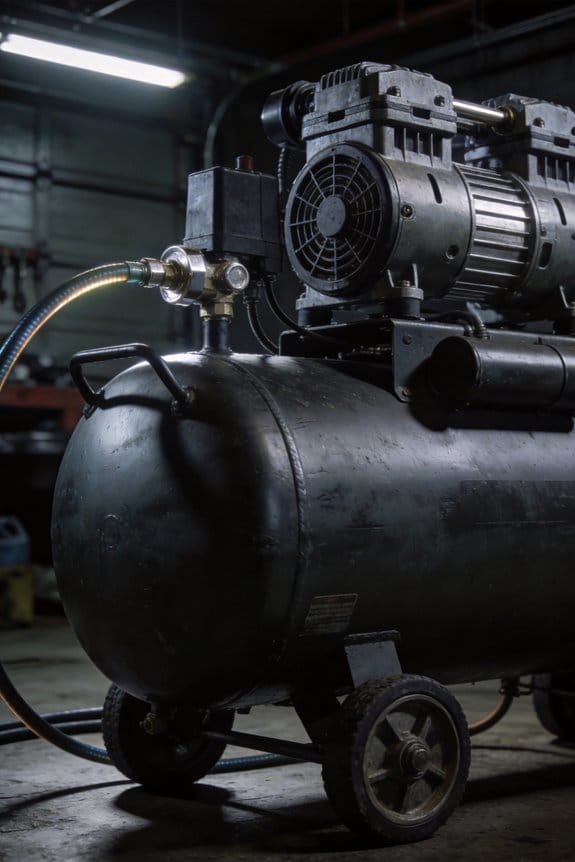
Why it matters: choosing the wrong small compressor means your nailer or paint gun will stop often, slowing work and wasting time. A 1–3 HP, 2–6 gallon portable unit typically stores only a few cubic feet of air, so under continuous use you’ll see short run periods and long recovery times. For example, a 2 HP pancake compressor with a 4‑gallon tank might run for 30–60 seconds powering a framing nailer and then take 2–3 minutes to refill.
How to smooth output and get more usable time — add an inline receiver or a bigger tank. Why it matters: extra stored air reduces how often the motor starts, which saves wear and lets your tool keep firing longer. Use these steps:
- Add a 3–5 gallon inline receiver near your tool if your compressor tank is under 6 gallons.
- Or connect a 20–30 gallon tank for shop use to cut start cycles dramatically.
Real example: mounting a 5‑gallon inline tank near a finishing nailer can double the number of shots before the compressor kicks on.
How to reduce starts and improve efficiency — use better controls or a VSD (variable speed drive). Why it matters: controlling motor speed cuts start current and matches output to what you actually need, lowering energy and wear. If your demand varies, install:
- A pressure regulator and a larger start/stop differential (e.g., 80–60 psi).
- A VSD on motors above 3 HP for gradual speed changes.
Real example: a small body shop swapped a fixed‑speed 5 HP unit for a VSD unit and halved compressor starts during light workdays.
How to right‑size your system so you don’t undersize tools. Why it matters: matching CFM to tools prevents the compressor from being overloaded and keeps jobs moving. Steps:
- Measure each tool’s CFM at its working pressure (for a paint sprayer, note CFM at 40 psi).
- Add 25–30% headroom to the highest CFM number.
- Pick a compressor and tank that meet that adjusted CFM.
Real example: a shop measured a spray gun at 12 CFM, added 30% (15.6 CFM target), and chose a compressor/tank combo that delivered 16 CFM with a 30‑gallon tank.
Tank sizing rule of thumb. Why it matters: more gallons per scfm means fewer cycles and steadier pressure. Aim for 1–3+ gallons of tank per scfm of demand; for intermittent handheld tools stay near 1 gallon per scfm, and for continuous shop use go toward 3 gallons per scfm. For instance, if you need 10 CFM steady, target a 30 gallon tank for smoother operation.
Quick Decision: Pick a Small Compressor for Runtime vs. Convenience
Think of choosing a small compressor like picking hiking gear for a day trip: you want light weight but also enough capacity to get you where you’re going.
Because you’re deciding between runtime and convenience, this matters: small compressors often run well below their nameplate capacity, which raises energy use and wear. If you buy a 5 HP-rated unit but it runs at 30–50% load most of the time, the motor cycles more and draws more energy per useful air delivered. Example: on a job where you need 10 cfm continuous, a 5 HP unit rated 30 cfm will run at part-load and cycle frequently, using more electricity than a 7.5 HP unit matched closer to demand.
Before I tell you how to choose, know why each factor matters in one sentence: runtime affects total energy cost and maintenance frequency. If you want steady flow for tools like sanders or a paint gun, pick capability over portability. A real case: a contractor used a 10-gallon, 3 HP pancake compressor for trim work and found it stopped every 20 seconds, which slowed the job and burned through the motor faster.
How to decide (step-by-step):
- Measure your need: run each tool and note peak and continuous cfm at the operating pressure (psi). Do this for the longest task you do.
- Target sizing: add 25–30% headroom to your continuous cfm number and choose a compressor that can deliver that at the required psi.
- Pick storage: if portability matters, choose a tank size and accept shorter runtimes; if runtime matters, choose larger tanks (30–60 gallons) to reduce starts per hour.
- Consider VSD (variable-speed drive): if you can spend more, get a VSD unit — it modulates motor speed and keeps you closer to optimal efficiency when loads vary.
- Check duty cycle and starting frequency: prefer compressors rated for 100% duty or with thermal protection if you’ll run long stretches.
If portability tops your list, accept these trade-offs: expect more energy use, shorter duty cycles, and more maintenance. Example: a 20 lb portable 2-gallon unit might fit in your trunk and cost $120, but it’ll restart dozens of times per hour under continuous use.
If runtime tops your list, prioritize capacity and sustained output: choose a slightly larger fixed unit or a VSD-capable model and a 30–60 gallon tank. Example: a 7.5 HP, 60-gallon setup will deliver continuous 40+ cfm at 90 psi with far fewer starts than a small pancake compressor.
Quick numbers to remember:
- Small portable compressors: 1–3 HP, 2–6 gallon tanks, good for intermittent hobby use.
- Jobsite mid-size: 3–5 HP, 20–30 gallon tanks, suitable for moderate continuous use.
- Runtime-focused setups: 5+ HP, 30–60+ gallon tanks, or VSD units for variable loads.
Final takeaway: if you need continuous flow for tools, size up and add tank capacity or a VSD; if you value moving the unit and light weight, buy small but expect higher running costs and more wear.
How Portability and Simple Controls Shorten Compressor Runtime

Here’s what actually happens when you grab a portable air compressor for a job: you get convenience, not long runtime. Why this matters: shorter runtimes mean more frequent motor starts and higher energy use, which raises your electric bill and wears the motor faster.
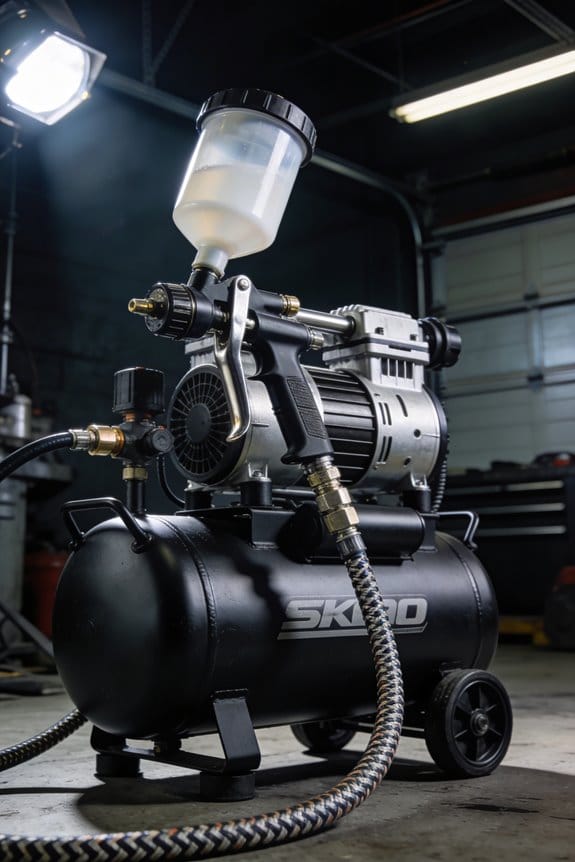
Portable units are light because manufacturers cut weight by using small tanks (typically 1–6 gallons), fixed-speed motors, and basic pressure-switch or load/unload controls that force the compressor to cycle on and off often. For example, a 2-gallon pancake compressor with a 1.5 HP motor may run for 30–60 seconds and then shut off for 90–120 seconds under intermittent nailing work; you hear the motor start every minute. The frequent starts draw 2–3 times the running current for a few seconds, which boosts energy use and shortens motor life.
Before you pick a compressor, know this trade-off in one sentence: portability gives you quick setup but less stored air and more cycling. A real-world visual: imagine using a brad nailer on baseboards—small compressor, small tank, constant starts; bigger job, constant buzzing and stops.
How the controls affect runtime and efficiency — and what to do about it. Why this matters: better controls reduce on/off cycles so you save energy and get smoother output. Many portables use:
- Pressure switch (common): it turns the motor fully on until a high pressure (e.g., 125 psi) then off at a lower pressure (e.g., 100 psi).
- Simple load/unload valve: it lets the motor spin without compressing until the valve loads, then compresses briefly.
These cause pressure swings of 10–25 psi, so tools get bursts of air and then wait. Example: roofing or stapling with a coil nailer on a small compressor often yields choppy drives and extra motor strain.
Three specific actions you can take:
1. Increase storage if possible: add an inline receiver tank (5–20 gallons) to smooth output and increase runtime between starts. Install steps:
1) Choose a tank rated for your system pressure (example: 20 gal, 150 psi).
2) Mount it vertically near the compressor outlet.
3) Use 1/2″ or larger hoses and an isolation valve.
Result: fewer starts and steadier tool performance.
2. Use a tool that matches the compressor’s CFM: check tool CFM at working pressure and match to your compressor’s rated CFM. For example, a finishing nailer often needs 0.5–1.2 CFM at 90 psi; don’t run it on a compressor that only delivers 0.6 CFM continuously if you need sustained firing.
3. Upgrade controls when you need longer runs: consider a unit with a variable-speed drive or an electronic governor for modulation, or a compressor with a larger motor and receiver. Example: swapping a 1.5 HP fixed-speed unit for a 2–3 HP variable-drive model can cut cycling by half on medium-duty jobs.
If you only do short tasks, keep using a small portable — it’s light and fast. For continuous or long runs, prioritize larger tanks (10+ gallons) and better controls so you reduce starts and save energy.
Features That Extend Runtime (VSD, Oil‑Cooling, Inlet Guides, Storage)
If you’ve ever watched a compressor cycle on and off and wondered how to make it run longer between starts, this is why.
VSD (Variable Speed Drive) — what it does and why you care
Why it matters: matching motor speed to demand cuts starts and saves energy, so your compressor runs longer and costs less to operate.
How it works, step by step:
- The VSD senses your air demand and adjusts motor RPM continuously.
- When demand drops, it slows the motor instead of stopping it.
- When demand rises, it ramps up smoothly to meet the need.
Example: on a small fabrication shop with intermittent tool use, a VSD unit kept the compressor running for hours at low RPM instead of restarting every 10 minutes, reducing starts by about 70% and cutting electricity bills noticeably.
Tip: look for units that list energy savings in percent and have soft-start settings.
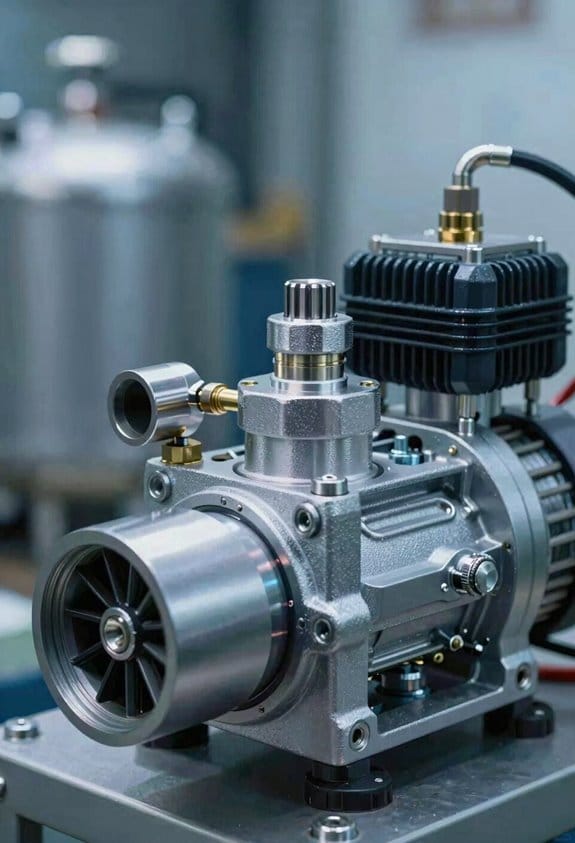
Oil‑cooled designs — why cooler oil extends run time
Why it matters: lower internal temperatures prevent thermal cutouts, so you get longer continuous duty and fewer forced stops.
How it works, step by step:
- Oil circulates around hot components to absorb heat.
- A heat exchanger sheds that heat to ambient air or water.
- Cooler oil keeps seals and bearings within safe temperatures.
Example: a mobile service unit operating in hot summer conditions ran at full load for 6 hours straight with oil cooling, whereas an air‑cooled unit on the same route throttled back after 2 hours because of overheating.
Tip: check oil-change intervals and whether the system has temperature gauges you can read.
Inlet guide vanes (IGVs) — trimming flow without waste
Why it matters: IGVs let a centrifugal compressor reduce output smoothly so you avoid energy-sapping blow‑off or throttling losses during turndown.
How it works, step by step:
- Vanes at the intake change angle to control airflow into the rotor.
- Changing vane angle reduces flow while keeping the machine running efficiently.
- This avoids dumping compressed air back to the inlet or using bypass valves.
Example: a food‑packaging plant with variable demand used IGVs to cut flow by 40% during night shifts without using a blow‑off valve, saving thousands in wasted compressed air each year.
Tip: ask for control maps that show efficiency across vane angles.
Storage tanks — how bigger tanks buy you longer unloaded time
Why it matters: more stored air smooths delivery so the compressor can stay off or unloaded longer between starts.
How it works, step by step:
- The compressor fills the tank to set pressure.
- Your system draws from that reserve during peaks.
- The compressor restarts only when tank pressure drops below the cutoff.
Example: replacing a 120‑gallon tank with a 240‑gallon tank at a vehicle shop doubled the time between starts during washdown cycles, reducing motor starts from dozens to single digits per day.
Tip: size tanks by matching tank volume (gallons or liters) to peak flow (CFM or l/min) and desired run time; a rule of thumb is adding one gallon per CFM for extra storage.
Other practical features that reduce downtime
Why it matters: the right accessories make siting, servicing, and refilling faster, so you lose less uptime to non‑production tasks.
Specific, actionable items:
- Vibration isolation and noise reduction: pick mounts and enclosures that meet local noise limits so you can site the compressor closer to work areas.
- Maintenance accessibility: choose units with easily removable panels and clearly labeled service points to cut routine service time by 30–50%.
- Quick refueling/top‑up points: look for external oil fill ports and accessible fuel caps if you use a portable backup, so you can refill without moving the unit.
Example: a contractor used quick‑access drains and external oil fill ports to finish daily maintenance in under 10 minutes, keeping the crew working instead of waiting on a technician.
Tip: photograph service points and list routine tasks with intervals (daily, weekly, monthly) so you or your tech can work fast.
Final quick checklist for buying or upgrading
Why it matters: a short checklist keeps you focused on the features that extend runtime and cut costs.
Checklist (numbered for clarity):
- Choose VSD if your demand varies — expect big energy savings.
- Prefer oil‑cooled if you run long continuous shifts or in hot environments.
- Use IGVs for centrifugal units with frequent turndown.
- Increase tank volume to smooth peaks — add about 1 gallon per CFM as a starting point.
- Specify vibration mounts, easy access panels, and external fill points for fast servicing.
If you want, tell me your usage pattern (average CFM, peak CFM, duty hours, ambient temp) and I’ll suggest a concrete combo of features and a rough tank size.
How Control Types Affect Compressor Runtime and Part‑Load Efficiency

If you’ve ever wondered how compressor controls change runtime and efficiency, this matters because the wrong control can double your energy use during light demand.
Fixed-speed load/unload: This keeps pressure steady by turning the motor fully on and off. Example: a small workshop compressor that cycles every 3–5 minutes during light use. If your system spends more than 40% of the time below 60% load, expect roughly 20–40% extra energy wasted compared with better controls. Steps to evaluate:
- Log pressure and run times for 48 hours.
- Calculate percent time below 60% load.
- Replace or add storage if that percentage is over 40%.
Variable-speed drive (VSD): This modulates motor speed to match demand, which lowers energy use and reduces wear because the motor soft-starts and runs fewer full-power cycles. Example: a printing shop with fluctuating demand where a VSD cut energy use by ~30% and reduced start-current spikes from 400 A to 150 A. Steps to implement:
- Measure peak and average flow for a week.
- Size a VSD for peak plus 10% margin.
- Program minimum speed to avoid short cycling.
Variable displacement: This changes internal flow so the compressor runs at near-optimal efficiency between about 50% and 100% capacity. Example: a cold-storage plant that stays around 60–80% demand and saw steadier pressure with less energy than a load/unload model. Steps to choose this:
- Confirm your steady-state load range (hourly averages).
- If that range stays mostly between 50–100%, request a variable-displacement model.
Startup sequencing and staged starts: This affects cycling stress and counts against motor start limits, which matters because too many simultaneous starts trips breakers and shortens motor life. Example: a facility with three compressors staggered 20 seconds apart reduced peak start current by 40% and cut nuisance trips. Steps to set sequencing:
- Set minimum off-time to prevent immediate restarts (e.g., 60–120 seconds).
- Stagger starts by 15–30 seconds between units.
- Limit starts per hour to match motor thermal limits.
How to choose for your site: Match control to your typical load profile and storage capacity. Example: if you have long, steady demand at 60–90% load, variable displacement or VSD will pay back faster than load/unload. Steps to decide:
- Gather 7 days of flow and pressure data.
- Calculate percent time in these bands: <40%, 40–60%, 60–100%.
- Pick VSD if lots below 60%, variable displacement if mostly 50–100%, and load/unload only if demand rarely falls below 60% and upfront cost is the main constraint.
Small bold tip: add storage when retrofitting controls — a tank sized for 3–5 minutes of peak flow smooths demand and reduces cycling counts.
How Temperature, Air Density and Altitude Change Available Runtime
Think of air like a fuel tank for your compressor: more air mass means more output per intake stroke. Why this matters: if your compressor delivers less mass, your tools run slower and the motor works harder, and your storage needs change.
How temperature changes runtime
Why this matters: temperature directly changes air density and therefore delivered mass per stroke.
Cold air is denser, so your compressor ingests more mass each stroke and finishes cycles sooner. Example: at 0°C a compressor delivers about 8–10% more mass than at 20°C, so a 100‑litre tank might refill in 10 minutes at 20°C and about 9 minutes at 0°C. Steps to adjust:
- Check the average site temperature range.
- Increase storage or slow controls by about 5–10% for every 10°C above your baseline.
- Consider a cooler intake or larger tank if you regularly operate in cold conditions.
If you run in freezing weather, drain moisture more often.
How altitude changes runtime
Why this matters: altitude lowers air density the same way heat does, so capacity falls as elevation rises.
At 2,000 m elevation, air density is roughly 20% lower than at sea level, so your compressor will deliver about 20% less mass per stroke and run longer under the same load. Example: a compressor rated 100 cfm at sea level behaves like an 80 cfm unit at 2,000 m. Steps to adjust:
- Find your site elevation.
- Multiply required flow by 1 / (density ratio) — about 1.25 at 2,000 m — to size the compressor.
- Buy a larger machine or add at least 20–30% more storage for high‑elevation sites.
Also check motor cooling: motors run hotter with thinner air.
How humidity affects intake and separators
Why this matters: moisture changes density slightly and creates condensate that clogs coolers and separators.
Moist air is marginally less dense than dry air, and warm, humid intake will condense when cooled, loading your intercooler and separators. Example: coastal sites with 80% relative humidity will produce noticeably more condensate after cooling than desert sites at 20% RH. Steps to adjust:
- Measure average relative humidity.
- Size separators and drains for higher condensate loads—double capacity if RH regularly exceeds 70%.
- Add a refrigerated dryer if you need dry air for tools or processes.
Inspect and service separators more frequently in humid climates.
Choosing controls and storage for your site
Why this matters: wrong settings or undersized tanks mean more motor wear, voltage drops, and stalled tools.
If you know your temperature range, elevation, and humidity, pick controls and storage to match the worst case, not the average. Example: if your shop sits at 1,500 m and summer temps reach 35°C, assume ~25% capacity loss and specify a tank 25–30% larger than the sea‑level spec. Steps to follow:
- Gather local data: average temp extremes, elevation, and RH.
- Increase compressor or tank size by the percentage loss from temperature/altitude.
- Set cut‑in/cut‑out pressures to avoid short cycling—aim for at least 10% tank volume change between cycles.
- Install proper dryers, separators, and automatic drains based on humidity.
Label the control panel with the local correction factors for maintenance staff.
Quick checklist before purchase
Why this matters: a short prep prevents costly undersizing.
- Note elevation (m or ft), temperature range (°C or °F), and average RH (%).
- Apply density correction: roughly −1% capacity per 100 m elevation or −3% per 10°C rise, then size accordingly.
- Add 20–30% extra storage for high elevation or hot climates.
If you follow these steps, your compressor will run more reliably and your tools will perform consistently under the actual site conditions.
Sizing, Storage and Leak Fixes to Maximize Small‑Compressor Runtime
Here’s what actually happens when you size and maintain your compressed‑air system the right way: you get noticeably more runtime, lower energy bills, and fewer surprise shutdowns.
Why it matters: matching compressor size, storage, and leak control to your actual air use keeps your system efficient and predictable.
1) Right‑size the compressor
Why it matters: compressors run most efficiently near full load, so oversizing wastes energy.
Steps:
- Measure your peak and average air demand for a typical day (use a flow meter or record pressure drop during peak tasks for 24–72 hours).
- Choose a compressor whose rated free air delivery (FAD) at operating pressure is about 110–125% of your measured peak, not the lofty nameplate number.
- If your peak is very short (under 5 minutes), size for the sustained peak and rely on storage for spikes.
Example: a small metal shop that peaks at 60 scfm but averages 30 scfm should pick a 66–75 scfm unit instead of a 100 scfm model; that smaller unit will run longer on load and use less energy.
2) Add the right amount of storage
Why it matters: storage smooths short spikes so the compressor runs longer between starts, reducing wear.
Steps:
- Calculate required storage: for buffering, use 1–3 gallons per scfm of peak demand for short spikes, or 3–6 gallons per scfm if you want longer run times and fewer starts.
- Place a receiver tank near heavy users and keep it at the same pressure range as your system.
- If you have multiple tools cycling, combine tanks or add a larger central tank rather than many small tanks.
Example: if you have a 50 scfm peak, install 50–150 gallons for spike buffering; for fewer starts install 150–300 gallons.
3) Find and fix leaks quickly
Why it matters: leaks commonly waste 20–30% of produced air and cut runtime drastically.
Steps:
- Do a regular leak audit every 3 months. Use soapy water for visible joints and an ultrasonic leak detector for valves and hidden leaks.
- Prioritize and repair leaks: fix high‑flow leaks (hose splits, open drains) first, then smaller ones.
- Track leak repairs and measure system leakage (shut off compressors and record pressure drop over 15 minutes).
Example: in a bakery, repairing a 1/8″ round hole in a hose (about 40 scfm at 100 psi) restored enough air to run two mixers simultaneously without tripping the compressor.
4) Maintain separators, valves, and dryers
Why it matters: degraded components increase pressure drop and let moisture corrode pipes, which grows leaks and reduces runtime.
Steps:
- Replace separator elements and intake filters on the manufacturer’s schedule or when differential pressure rises above the recommended limit.
- Check pressure drop across key points monthly: more than 2–3 psi across a filter or separator signals service.
- Drain and service dryers: set automatic drains to empty daily; service desiccant or refrigerated dryers per hours run.
Example: a print shop cut a 6 psi system pressure drop to 2 psi after replacing a clogged separator, which let them lower operating pressure by 4 psi and save energy.
5) Control humidity and corrosion
Why it matters: moisture accelerates corrosion, which causes leaks and valve failures.
Steps:
- Size a dryer to match your CFM at operating pressure, not the compressor nameplate. If you run 100 scfm, buy a dryer rated for at least 100 scfm at your dew point.
- Install aftercoolers and drains at the compressor and at low points in the piping.
- Use corrosion‑resistant piping or paint interiors and inspect annually.
Example: a car shop added a refrigerated dryer sized to its 80 scfm use and eliminated rust spots on fittings within six months.
6) Monitor and schedule repairs
Why it matters: simple monitoring stops small issues from becoming runtime problems.
Steps:
- Install a basic controller or data logger to record run hours, starts per hour, inlet/outlet pressure, and energy use.
- Set alarms for abnormal starts (>4 starts/hour) or rising differential pressure across filters.
- Keep a maintenance log with dates, parts replaced, and measured improvements.
Example: a small factory cut unplanned downtime by 50% after logging starts per hour and replacing a worn pressure switch that caused rapid cycling.
Final practical tips
Why it matters: small, concrete actions add up to much longer runtime.
- Lower nominal system pressure by 2–4 psi where tool performance allows; every 2 psi saved cuts energy by about 1%.
- Use quick‑disconnects with valves to stop big leaks when a tool is disconnected.
- Re‑test leakage and storage needs after any process change or new tool installation.
If you follow those steps—measure demand, right‑size the compressor, add the correct storage, fix leaks, control moisture, and monitor—you’ll get predictable runtimes and pay less to run your system.
Practical Checklist: Choose a Small Compressor That Balances Convenience and Runtime
Here’s what actually happens when you match your air needs to a compressor’s operating profile: the machine spends more time loaded and less time cycling, which saves energy and wear.
Why this matters: running near design load keeps your compressor efficient and lasting longer. Example: a small auto repair shop that needs 12 CFM at 90 psi for intermittent nail guns and a tire inflator will save fuel and reduce cycles by using a unit sized for that CFM instead of a much larger compressor.
1) Figure out your real air demand.
Why this matters: a correct CFM and pressure match prevents over- or undersizing. Example: measure tool runtimes for a week at the jobsite and record peak simultaneous use — if you see 12 CFM for three tools running together, list that as your peak.
Steps:
1.1 Count the tools you’ll run at once.
1.2 Record each tool’s CFM and working pressure (usually on the tool label).
1.3 Add simultaneous CFMs and add a 10–20% safety margin.
2) Check duty cycle and typical run durations.
Why this matters: compressors wear less and run cooler if their duty cycle matches your pattern. Example: a paint booth that runs continuously during shifts needs a 100% or high-duty-cycle unit, not one rated 30% at 175 psi.
Steps:
2.1 Note average run time per cycle (minutes).
2.2 Match that to a compressor’s duty cycle spec (e.g., 50% at 10 minutes on, 10 minutes off).
2.3 Choose a unit whose duty cycle equals or exceeds your typical runtime.
3) Prefer variable-speed drive (VSD) or efficient control for variable demand.
Why this matters: VSDs reduce energy use when your demand changes. Example: a small fabrication shop with fluctuating grinders and blow-offs cut power use by 30% after switching to a VSD compressor.
Steps:
3.1 Compare fixed-speed vs VSD models for estimated savings (ask dealer for a simple kW vs load curve).
3.2 If your demand varies by more than 30% daily, prioritize VSD.
4) Size storage tank to reduce cycling.
Why this matters: the right tank smooths peaks and reduces short cycles that waste energy. Example: a woodworking shop added a 60‑gal tank and reduced compressor starts from 20/day to 6/day.
Steps:
4.1 Target 1–3 gallons of tank per CFM for intermittent use (e.g., 40 CFM → 40–120 gal).
4.2 For frequent short bursts, err toward the higher end.
5) Consider part-load efficiency and turndown ratio.
Why this matters: a compressor with good turndown keeps efficiency at lower loads. Example: a small print shop that mostly runs at 30% load chose a unit with 4:1 turndown and saw steadier pressure with fewer unload cycles.
Steps:
5.1 Ask for the compressor’s turndown ratio (e.g., 4:1).
5.2 Verify efficiency or power draw at 25–50% loads.
6) Plan for maintenance and spare parts access.
Why this matters: timely upkeep preserves efficiency and avoids downtime. Example: a bakery kept an extra inlet filter and a spare belt on site and avoided a day-long outage during peak production.
Steps:
6.1 Check oil change interval and service hours (e.g., change oil every 500 hours).
6.2 Confirm local dealer or parts availability for filters, belts, and valves.
7) Balance noise mitigation with runtime penalties.
Why this matters: enclosures and mufflers reduce noise but can raise operating temperature and cut cooling airflow. Example: a dentist’s office chose a sound-attenuated cabinet and added a slightly larger fan to keep run times normal.
Steps:
7.1 Measure ambient noise limits (dB) in the intended room.
7.2 Choose acoustic options and ensure adequate ventilation or upgraded cooling fans.
8) Final checklist before buying.
Why this matters: a quick checklist prevents costly mismatches at installation. Example: a landscaper used this checklist and avoided buying a compressor that wouldn’t fit their workshop door.
Steps:
8.1 Confirm required CFM at working pressure plus 10–20% margin.
8.2 Verify duty cycle >= your typical runtime.
8.3 Decide on VSD if demand swings >30%.
8.4 Size tank to 1–3 gal per CFM.
8.5 Confirm maintenance intervals and spare parts access.
8.6 Check noise limits and ventilation needs.
If you follow those steps, you’ll pick a small compressor that balances convenience and runtime and avoid common mismatches.
Frequently Asked Questions
How Often Should Oil Separators Be Replaced in Portable Screw Compressors?
I recommend replacing oil separators every 1,000–2,000 operating hours or sooner if performance drops; I’ll note it on your maintenance schedule and track filter lifespan to prevent efficiency loss and rising pressure differentials.
Can Small Compressors Run Safely in Dusty or Corrosive Environments?
Yes — I can: like a knight with a smartphone, I’ll fit dust resistant enclosures and corrosion resistant coatings, schedule frequent filtration and maintenance, and monitor runtimes so small compressors keep running safely in harsh, dirty settings.
What Maintenance Interval Prevents Efficiency Loss From Separator Saturation?
I recommend separator inspection every 3–6 months and element replacement annually (sooner if conditions are harsh); I’ll adjust schedules based on runtime, oil condition, and pressure drop trends to prevent efficiency loss from saturation.
Are Battery-Powered Mini Compressors Effective for Continuous Small-Tool Use?
Like a brief campfire, I’d say no — battery-powered mini compressors aren’t ideal for continuous small-tool use; battery longevity and sustained torque output fall short versus mains units, so they suit intermittent, portable jobs instead.
How Do Warranty Terms Change With Frequent Start/Stop Cycling?
Warranty erosion happens quickly with frequent start/stop cycling; I’ll warn you that manufacturers often include cycling penalties or void clauses, so I’d check terms closely and document runtimes to dispute unjustified warranty denials.