You stand in front of a panel after a coat has dried and see heavy edges, orange peel, or thin spots and wonder exactly why coverage failed. You ask yourself whether the gun pressure, hose, or nozzle size is to blame and how to stop re-coating the same area.
Most people blame technique or paint rather than tuning air pressure, hose choice, and gun adjustments in small increments. This article shows you step-by-step how to measure pressure at the gun, set regulator and compressor slightly higher, and adjust gun PSI in 1–2 psi steps until you find breakup and recovery.
You’ll also learn quick tests, shaping ring tweaks, and how to log settings so one coat becomes enough. It’s easier than it looks.
Key Takeaways
If you’ve ever watched paint come out of a spray gun and wondered why it looks different each time, this is why.
Why it matters: getting atomization right saves you time and prevents visible texture on your finish. Example: when you crank pressure up too far on a car door, the mist breaks into ultra-fine fog that dries too fast and leaves an orange peel; when pressure is too low on a cabinet door, you get long strings and droplets that dry lumpy.
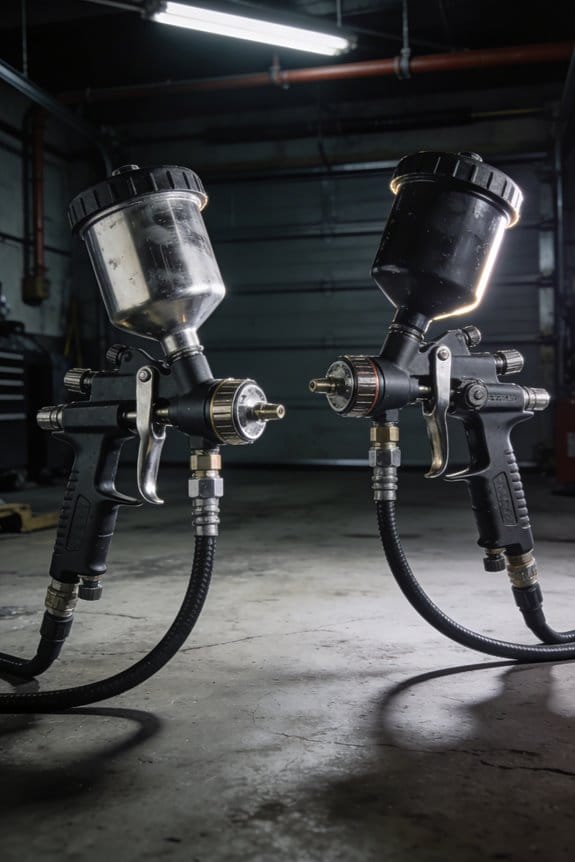
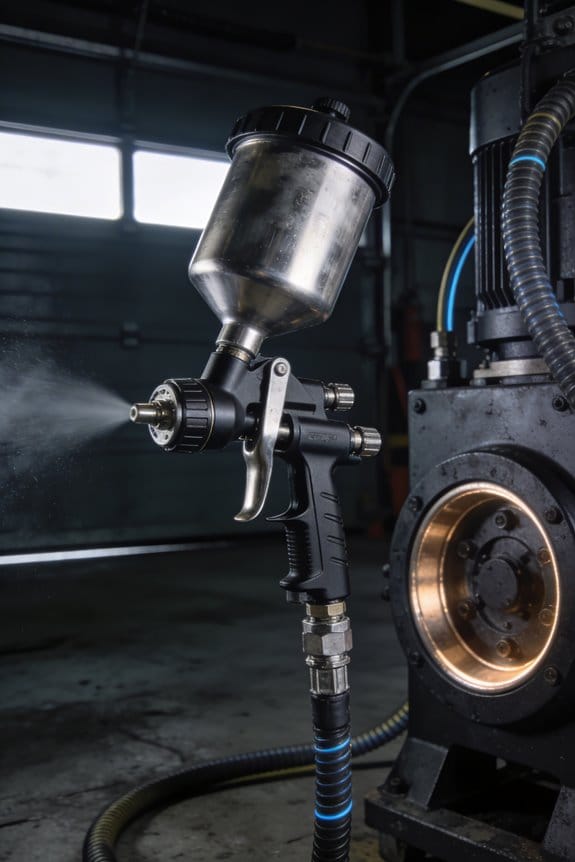
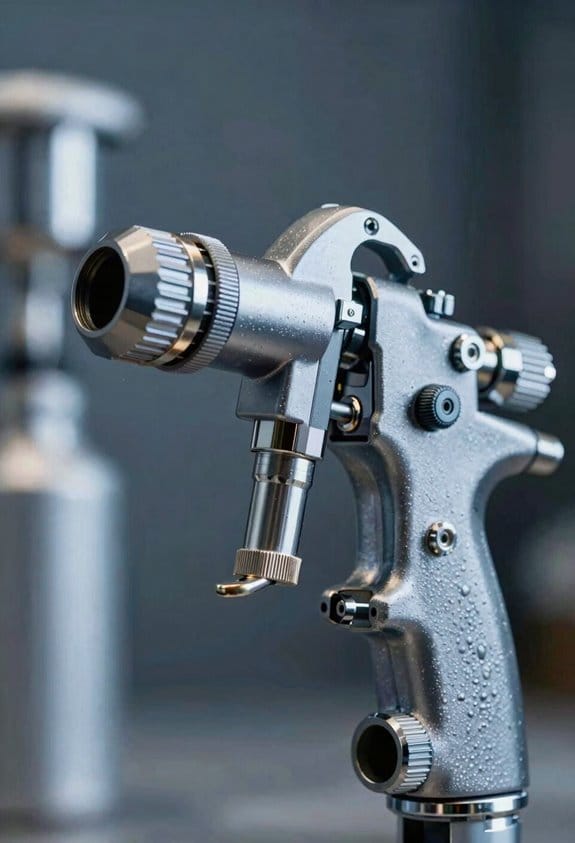
1) How gun-with-trigger pressure controls atomization
Why it matters: pressure at the gun determines whether paint breaks into a fine mist or oversized droplets. Example: on an HVLP gun spraying basecoat, running 20 psi at the gun gives smooth coverage, but raising it to 30 psi creates over‑break and more texture.
Steps:
- Set your gun to the manufacturer’s baseline (usually 18–22 psi for HVLP, 25–35 psi for conventional).
- Test-spray on a cardboard panel in 2–3 psi increments.
- If you see misting over the panel, drop pressure by 2–3 psi; if you see strings or splatters, raise by 2–3 psi.
Tip: a 2–3 psi shift will often move you across the breakup/recovery threshold.
If you’ve ever lost a nice finish because your hose choked under load, this is why.
Why it matters: inconsistent hose pressure makes your coverage uneven and costs extra coats. Example: when you pull the trigger on a long run and the psi falls from 20 to 16, the spray turns heavy and causes runs on one side of the door.
Steps:
- Use hose diameters recommended by the gun maker (usually 3/8″ or 1/2″ for long runs).
- Keep total hose length short; under 25 feet is ideal.
- Accept no more than a 2–3 psi drop when you pull the trigger; measure with a gauge at the gun.
Think of shaping-air like tuning a camera lens.
Why it matters: the inner and outer air rings shape the tone and edge of your fan so you control where paint lands. Example: using the inner (center) air to soften the middle of a fan on a trim piece gives a smooth center without blowing the edge.
Steps:
- Close the inner air slightly if the center is hard and throws texture; open it 1/8 turn to soften the center.
- Tighten the outer air (open 1/8–1/4 turn) to sharpen the fan and get a crisp edge.
- Test on scrap and note the 1/8-turn changes—small adjustments make big visible differences.
Better atomization increases transfer efficiency, meaning you’ll need fewer coats and your texture differences will shrink. Example: moving from 30 psi to 22 psi on an HVLP primer cut your required coats from three to two on a cabinet door and left a smoother surface.
Steps:
- Aim for the lowest pressure that still gives full coverage—usually a gun psi in the low 20s for HVLP.
- Check transfer efficiency by weighing a panel before and after a test spray if you want a number; otherwise, count coats on a scrap.
- Record the settings that gave the best coverage and texture for each paint and gun combo so you can repeat them.
Quick Step-by-Step Pressure Tuning (Do This First)
Before you start pressure tuning, know that proper atomization saves paint and gives a smoother finish.
1) Set starting pressure and check feel.
- Why this matters: starting in the right range gets you to good atomization faster.
- Example: on a 3/16″ HVLP gun with lacquer, 30 psi at the regulator is a good starting point; you’ll avoid reworking a patch.
- Steps:
- Set regulator to 30 psi.
- Pull the trigger slightly to check trigger feel and to wet the nozzle.
- Watch the spray pattern at arm’s length (about 18 inches).
Lower pressure until atomization breaks, then back up slightly.
- Why this matters: the break point shows where you lose mist, which causes runs or dry edges.
- Example: when you drop from 30 to 20 psi and see large droplets replacing the mist, you hit the break point.
- Steps:
- Reduce pressure in 2–3 psi increments.
- Stop when the pattern shows visible droplets or stringing.
- Raise pressure 2–3 psi above that break point for stable mist.
Balance airflow and watch for uneven flow.
- Why this matters: uneven hoses or regulator ports cause sputter and heavy edges on one side.
- Example: if the left side of a wall panel is heavier, check that hose for kinks or loose fittings.
- Steps:
- Inspect hoses for kinks or partial clogs.
- Confirm regulator ports are open and set to the same pressure.
- If you have two guns, swap hoses to see if the problem follows the hose.
Inspect the nozzle for wear regularly.
- Why this matters: a worn nozzle changes the fan shape and increases splatter.
- Example: after 200 hours with abrasive coatings, a fan that used to be 8″ at 18″ becomes jagged and 6″, which means the nozzle is worn.
- Steps:
- Visually inspect the tip for burrs or uneven edges.
- Replace the nozzle if the fan edge looks ragged or the spray widens unpredictably.
Measure paint recovery to judge transfer efficiency.
- Why this matters: recovery tells you how much paint actually lands on the work versus what you lose as overspray.
- Example: spray into a cardboard box and weigh it: if you catch 300 g but used 500 g, your transfer efficiency is 60%.
- Steps:
- Spray a fixed number of passes into a collection box lined with plastic.
- Weigh the box before and after to get recovered mass.
- Divide recovered mass by paint used to calculate efficiency.
Keep adjustments small, repeatable, and recorded.
- Why this matters: small changes let you reproduce results across jobs and paints.
- Example: write “lacquer — 30 psi start, break at 22 psi, set 24 psi” on a job sheet so you can match it next time.
- Steps:
- Change pressure in 2–3 psi increments only.
- Test spray between each change.
- Log the final setting, paint type, nozzle size, and temperature.
Do these first, and you’ll get reliable atomization fast.
Set Your HVLP Gun & Regulator for Reliable Atomization
Think of setting your HVLP gun like tuning a bike before a long ride: it keeps things smooth and predictable.
Why this matters: correct pressure and setup stop runs, poor atomization, and wasted paint. Start by matching your gun’s recommended working pressure to the regulator while keeping the compressor output higher so you don’t drop pressure when you pull the trigger. Example: if the gun needs 10 psi at the air cap, set the regulator inlet 2–3 psi above the gun’s maximum (so about 12–13 psi), then confirm the regulator reads 10 psi at the gun with the trigger slightly pulled. I once tuned a gun this way for a cabinet refinish; the finish laid down evenly and I cut my recoat time in half.
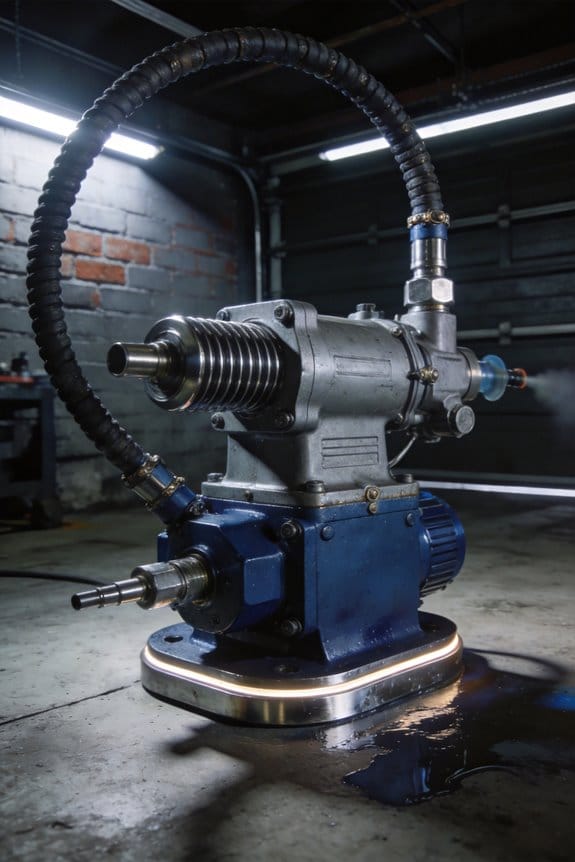
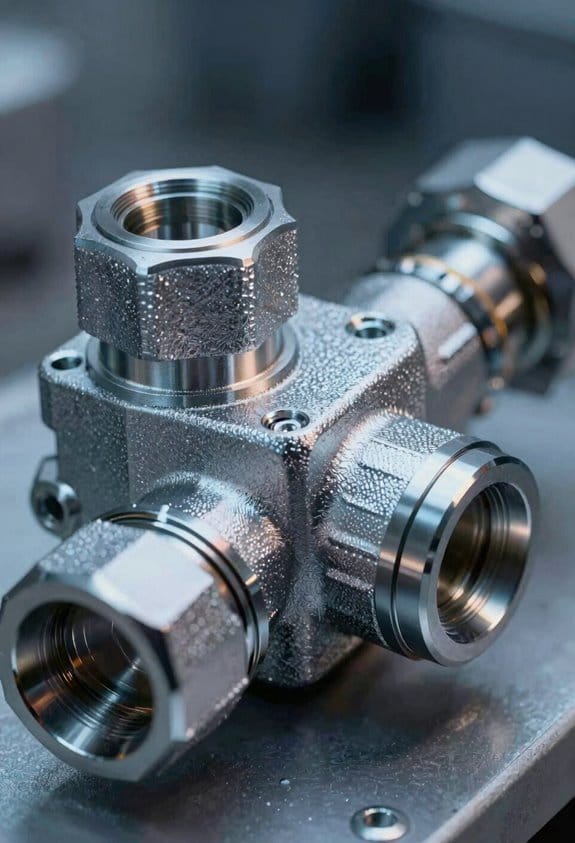
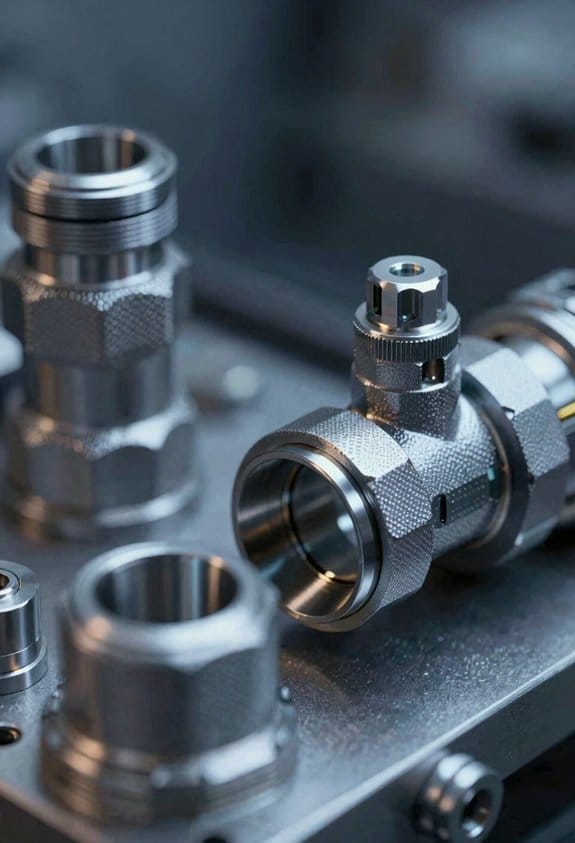
Why hoses and fittings matter: undersized lines starve airflow and make the gun pulse. Check your hoses and fittings next using these steps:
- Measure hose internal diameter and length; use at least 3/8″ ID for runs under 25 feet and 1/2″ ID for longer runs.
- Replace any quick-disconnects that restrict flow with full-bore couplers rated for at least the compressor pressure.
- Run the compressor and pull the trigger, watching for pressure drop more than 2–3 psi at the gun; if it does, upsize the hose.
Example: on a 30-foot run to a spray booth I swapped 1/4″ hose for 1/2″ and eliminated a 6 psi drop.
Why trigger technique matters: smooth pulls keep spray even. Practice trigger technique in three numbered steps:
- Hold the gun with a relaxed wrist and bring the trigger back steadily over 0.5–1.0 second.
- Maintain a consistent trigger position as you move the gun across the surface.
- Release smoothly over 0.5–1.0 second to avoid tailing or buildup.
Do a practice pass on cardboard until your lines overlap by 50% and the pattern edge looks razor-sharp. Short practice saves lots of sanding later.
Why nozzle care matters: a worn or clogged nozzle ruins atomization even at perfect pressure. Do this maintenance routine:
- After every session, wipe the tip and air cap, then blow them out with solvent and compressed air.
- Inspect the fluid tip for wear or ovalization; replace when the orifice looks out-of-round or the pattern has fishtails.
- Keep a spare tip in the toolbox matched to the material (e.g., 1.3–1.4 mm for lacquers, 1.6–1.8 mm for heavier primers).
I kept a spare 1.4 mm tip during trim work and swapped it mid-job when spots started to spatter; the finish smoothed right out.
Final quick checklist before you spray:
- Regulator set to gun’s target at slight trigger pull.
- Compressor set 2–3 psi above regulator inlet.
- Hose is 3/8″ ID or larger for short runs, 1/2″ for long runs.
- Practice a smooth 0.5–1.0 second trigger pull.
- Clean and inspect fluid tip after each session.
Follow these concrete steps and you’ll get steady atomization and fewer reworks.
Adjust Atomization and PSI Targets by Paint Type (Single‑Stage, Metallics, Base)
Before you set your gun and regulator, know this: matching pressure to paint type saves you time, reduces overspray, and gives cleaner edges.
Here’s what actually happens when you change pressure for different paints: atomization changes droplet size and spray pattern, so you need specific targets to get consistent coverage.
Why it matters: if you use the wrong pressure you’ll get orange peel, runny edges, or wasted material.
1) Single‑stage paints — What pressure and why
- Set your regulator to 25–27 psi at the gun for a good starting point.
- If the paint is thick (high viscosity), start at 27 psi; if it’s thin, start at 25 psi.
- Check your fan and fluid settings: use a medium fan, nozzle 1.3–1.4 mm, and a 10–12% overlap on passes.
Example: when spraying a factory‑color single‑stage red on a door, I set 26 psi, 1.4 mm tip, and kept passes short so the edges feathered; that hit full coverage in two passes.
Before you spray the panel, test on a card and note PSI and spray distance.
2) Metallics and pearls — How to break the flakes evenly
- Aim for 28–29 psi at the gun to move metallic flakes without blasting them flat.
- Use a narrower fan and slightly higher fluid (1.4–1.6 mm tip) to avoid mottling.
- Make a swatch and tilt the card under light to check flake orientation.
Example: while laying a silver metallic on a quarter panel, I bumped to 29 psi and used a tighter fan; the flakes laid flat and reflected evenly across the panel.
Why it matters: wrong pressure makes the metallic look patchy or washed out.
3) Base coats — How to improve first‑pass transfer
- Increase 1–2 psi above your usual base setting (so if your base standard is 24 psi, use 25–26 psi).
- Keep your gun 6–8 inches from the panel and use steady, overlapping passes.
- If you’re low on material and need better transfer on the first coat, add the extra psi rather than increasing fluid flow.
Example: spraying a dark base coat over a primer, I used 25 psi and got solid coverage in two passes without runs.
Why it matters: better transfer means fewer coats and less chance of texture differences.
Maintenance and checks — What to watch for and how often
- Check nozzle/tip wear every 3–4 hours of spraying or after each gallon; worn tips change droplet size and force you to raise pressure.
- On each change, spray a test card and record psi, tip size, fan, and distance.
Example: a worn 1.3 mm tip on white paint made me go from 25 psi to 30 psi; swapping the tip back to a fresh 1.3 mm restored the original 25–27 psi performance.
Why it matters: small hardware changes change spray behavior and waste material if unchecked.
Quick step checklist before you spray
- Pick paint type and set starting psi: single‑stage 25–27, metallics 28–29, base +1–2 psi over normal.
- Mount the correct tip (1.3–1.6 mm depending on material).
- Set fan size and keep 6–8 in distance.
- Spray a test card, inspect under good light, and tweak +/-1 psi if needed.
- Record the final settings on the card for repeatability.
One last practical tip: when you adjust pressure, change nothing else until you test — that way you know which setting fixed the issue.
Tune Shaping Air & Bell Cup Rings for Spray Pattern Control
Think of shaping air like steering the paint stream with invisible fingers.
Why it matters: getting the shaping air right controls your pattern size and edge hardness so you waste less paint and spend less time sanding. For example, on a 1.4 mm bell configuring air to create a 6–8 inch soft halo saved me rework on a white hood.
1) Feel how shaping air moves the paint.
- Step 1: Set your compressor to the gun’s recommended PSI; I use 30–35 PSI at the gun for most base coatings and 20–25 PSI for clearcoat.
- Step 2: Start with both inner and outer rings at mid travel (about 50% open).
- Step 3: Pull the trigger and slowly vary the shaping air while spraying a test panel 12 inches from the bell, watching the pattern shift and listening for a change in tone.
When you increase the inner ring air it pulls more paint into the center, creating a wider, softer halo; nudge it 10% and watch the ring expand visibly on your panel. For example, on a flared fender I moved the inner ring from 50% to 65% and got a smooth transition without orange peel.
2) Use the outer ring to tighten the fan.
Why it matters: the outer ring defines edge sharpness, so dialing it controls overspray and edge definition. On a chrome bumper I tightened the outer ring to about 35% and got a crisp edge with minimal touch-up.
Steps:
- Reduce outer ring by 5–15% increments while keeping inner ring steady.
- Spray a 6–8 inch stroke each time and compare edges.
- Stop when the fan matches the panel width and edge hardness you need.
3) Make only small changes and document results.
Why it matters: rings interact, so a tweak to one changes the other and your final finish will vary if you guess. When I changed the outer ring by 10% the inner ring needed a 5% adjustment to keep coverage even.
Steps:
- Change one ring at a time, max 10% per change.
- Mark each test on the panel with the ring settings, PSI, and air volume.
- Repeat the test three times at the target PSI to confirm consistency.
4) Keep airflow and PSI steady.
Why it matters: inconsistent air gives you changing patterns, which creates uneven coverage and wasted panels. On a long job I lock the regulator and check pressure every hour to hold at 32 PSI.
Practical tips:
- Measure pressure at the gun, not the compressor.
- Use a flow meter or a consistent airline diameter to keep volume steady.
- If pattern shifts during a run, pause and re-check fittings for leaks.
Final note: treat the inner and outer rings as a team; small, measured steps, documented tests, and consistent PSI will get you repeatable edges and coverage.
Match Viscosity and Pigment Load: Test Mixes & Target Readings

Before you mix, decide on target viscosity and pigment load so your tests mean something.
You need that because matching viscosity to nozzle and pigment load to color keeps results repeatable. I do small 250–500 mL batches, label each bottle with the target viscosity (measured in seconds), pigment percentage, and date. Example: a 1.4 mm nozzle at 25 psi works well at 20–22 Zahn seconds for my base coat. Measure viscosity with a Zahn cup or a simple Ford cup; record the cup type and seconds. Agitate gently before measuring to re-suspend heavy pigments. If you let pigment settle for 30 minutes, the flow will be different.
1) Mix and label
- Step 1: Weigh or measure base and pigment so pigment load is a clear percent (for example, 8% by weight).
- Step 2: Make 300 mL batches; label jars with “20 s / 8% / 03-21”.
- Step 3: Shake gently for one minute before you measure.
You should match spray conditions during tests so viscosity adjustments translate to real jobs.
I spray test panels at the same psi and nozzle I plan to use. For example, spray a 6 x 8-inch panel at 25 psi with a 1.4 mm tip, holding the gun 6 inches away and using a 50% overlap. Inspect for edge definition and orange peel. If you see heavy orange peel, reduce viscosity by 2–3 Zahn seconds or increase reducer by 5–10 mL per 100 mL mix. If coverage is thin, increase pigment load by 1% or reduce reducer by 5 mL per 100 mL.
2) Test, inspect, adjust
- Step 1: Spray one pass, then two passes at the set overlap.
- Step 2: Note coverage, edges, and texture.
- Step 3: Adjust reducer in 2–3 second or 5–10 mL increments, then repeat.
You must document every tweak so you can reproduce what worked.
I write each change on the chart: starting viscosity, adjustment made, and final result. Example entry: “Start 22 s → +5 mL reducer → 19 s → smooth edges, slight orange peel.” Keep mixes that meet both flow and color goals; discard the rest after recording their formulas.
Booth & Compressor: Stabilize Air Supply, Filtration, Safety
Before you tune your booth and compressor, know why it matters in one sentence: consistent air pressure and clean air keep your spray finish repeatable and safe.
Here’s what actually happens when you check booth pressure and compressor output: the booth either keeps dust out and captures overspray, or it pulls contaminants into your work. Aim for slight positive booth pressure of about 0.04–0.05 inches of water column; that number keeps dust out and helps overspray capture. For example, I measured 0.045″ on a car booth and saw noticeably less dust on the final clear coat.
Why monitor compressor output? Because your gun needs steady PSI when you pull the trigger. Set your regulators so the gun sees the correct PSI under trigger pull — for many HVLP guns that’s 8–10 PSI at the cap, so set the regulator 2–3 PSI higher to allow for line drop. Use 3/8″ or larger supply hoses for runs under 25 feet; if your hose is undersized you’ll lose pressure and get thin, uneven coats. I swapped a 1/4″ hose for a 3/8″ on a large panel job and the finish went from orange peel to smooth.
How to prevent particles and moisture from ruining a job: you must filter and maintain filters regularly. Replace desiccant or coalescing elements every 3–6 months depending on use, or sooner if you see water carryover; inspect filtration media monthly for saturation. Example: on a busy body shop I schedule filter checks every Monday and replaced a saturated filter before it sprayed water on a fresh hood.
Steps to ensure reliability and safety:
- Check booth pressure daily with a manometer and record the 0.04–0.05″ reading.
- Verify regulator settings weekly, confirming the gun sees target PSI under trigger.
- Inspect hoses and fittings monthly; upgrade to 3/8″ hose for long runs.
- Replace or service filters on a calendar: primary filters every 3 months, fine/HEPA and desiccants every 6 months or as needed.
- Plan motor redundancy: add a backup supply or parallel motors so pressure stays steady during long runs.
One concrete safety example: on a 12-hour night run, a primary motor failed but the parallel motor kept booth pressure at 0.044″, preventing a rush job with poor ventilation. That’s why I recommend parallel motors or a standby compressor for jobs over four hours.
A few quick checks before each shift:
- Confirm booth reads 0.04–0.05″.
- Blow out air lines to check for water.
- Verify filter gauges aren’t showing excessive differential pressure.
Keep a simple log with date, booth pressure, regulator PSI, and filter status; after a few weeks you’ll spot trends and avoid surprises.
Troubleshooting & Optimization Checklist (Tests to Record)
Before you start recording tests, know why this matters: if you log the right numbers you’ll spot small problems before they ruin a finish.
Here’s what to do, step by step:
- Check baseline PSI. Record three readings: compressor gauge, gun inlet, and gun-with-trigger. Example: compressor reads 90 psi, gun inlet 60 psi, gun-with-trigger 40 psi. A drop of 2–5 psi between readings usually means a leak or a failing regulator.
- Find atomization threshold. Lower your gun pressure from 30 psi in 1–2 psi steps until the spray breaks up, then raise it until it recovers and record both numbers. Example: breakup at 22 psi, recovery at 24 psi.
- Test paint flow at target thinness. Thin a test cup to your normal ratio (for example 10% reducer) and spray a 6″ x 6″ panel. Note coverage, edge detail, and any orange peel. Photograph the panel for future comparison.
- Observe shaping-air effects. With inner ring only, spray a 12″ wide test pattern and measure width; then add the outer ring and measure again. Record ring settings and resulting pattern widths in inches.
- Log booth pressure and ventilation. Measure static pressure at the booth door and air changes per hour if you can; also record room temperature and relative humidity at spray time. Example: booth -0.02 in. w.c., 8 ACH, 72°F, 45% RH.
- Keep equipment maintenance notes. Record filter change dates, hose inspections, regulator service, and any parts you replaced. Example: inlet filter changed 03/15/26, 1/4″ hose swapped for 3/8″ on 03/20/26.
Why this set of tests helps: you’ll link a specific measurement to a visible defect so fixes are verifiable.
Real-world example: on one job I logged gun-with-trigger pressure dropping 4 psi overnight, matched that to a worn regulator diaphragm noted in the maintenance log, and replacing the regulator stopped runs on the third coat.
A few quick tips:
- Use a simple spreadsheet with columns for date, job, each PSI reading, atomization low/high, flow test result, pattern widths, booth pressure, temp/RH, and maintenance notes.
- Photograph every test panel and label the image with date and settings.
- Re-run the same tests after any repair or setting change and compare the numbers.
Keep entries short and consistent. That way you’ll build a trend line that points to the part or setting that needs attention.
Frequently Asked Questions
How Does Ambient Humidity Affect Atomization and Drying Times?
Slow and steady wins the race — I tell you ambient humidity slows atomization and lengthens drying kinetics, causing larger droplets, poor misting and longer tack times; I adjust pressure, thinner and airflow to compensate.
Can Air Pressure Changes Alter Metallic Flake Orientation?
Yes — I can influence flake alignment by adjusting pressure; I’ll use lower psi for gentler laydown and higher psi for stronger flattening, which creates a noticeable specular shift as flakes orient and reflect light differently.
Is There a Rule for Pressure When Using Airbrush vs. Siphon Feed?
Yes — I follow different pressure rules: I set lower psi for airbrushes and higher for siphon feeds, adjusting nozzle settings and paint thinning accordingly so atomization stays clean and consistent for each feed type.
How Do Needle/Nozzle Wear and Damage Mimic Pressure Issues?
“An ounce of prevention beats a pound of cure.” I’ll tell you: needle erosion and nozzle misalignment mimic low-pressure issues by causing spitting, poor atomization, and wide uneven spray; I’d inspect and replace worn parts to fix it.
Can Reduced Pressure Improve Edge Definition on Soft Fades?
Yes — I’ve found reduced airflow can improve edge crispness on soft fades by tightening the pattern, but you’ve got to balance pigment flow and avoid under-atomization; adjust slowly to retain smooth feathering without sputter.