You’re staring at a perfectly prepped trim piece and can’t get a smooth, showroom finish without wasting half the can—how do you keep edge definition and cut overspray?
You’re asking whether pneumatic spray tools still make sense next to modern airless systems for small parts, tight control, and material savings.
Most people assume airless equals better speed and forget that finer atomization and adjustable air control matter for finish quality.
This piece shows how to choose between HVLP, conventional, and pressure-pot setups, exactly which settings to use, and how to test for repeatable fan patterns so your parts come out consistent.
You’ll get clear, actionable steps to save material and improve results.
It’s easier than it looks.
Key Takeaways
If you’ve ever wanted a show-quality finish, this is why pneumatic guns still matter: they give finer atomization and smoother results than airless systems, so your car or cabinet gets that mirror-like surface without extra sanding. For example, a restoration shop using a pneumatic gun with a 1.4 mm tip can produce a clearcoat that needs one less wet-sand step than the same job sprayed airless.
Before I tell you how to set things up, know why it helps: HVLP pneumatic systems cut overspray and material waste by about 20–40%, which lowers your coating cost and keeps shop air cleaner. A small cabinet painter I know switched to HVLP and reduced paint purchases by a third over six months.
How you tune pattern and atomization matters because different coatings need different settings. Use the separate air and fluid controls like this:
- Start with the fluid knob half open.
- Set the air control to about 20–25 psi at the gun for thinner materials.
- Adjust the pattern knob until you get a 6–8 inch fan at 12 inches from the panel.
- Fine-tune by increasing fluid in 1/8-turns if the spray feathers; increase air in 2–3 psi steps if you see runs.
A cabinet finisher I worked with uses those exact steps to switch between lacquer and urethane without changing guns.
If you do batch work or need exact repeatability, pressure-pot pneumatic setups deliver steady flow and consistent finishes across parts. In a small production run, a parts shop uses a 2-gallon pressure pot at 15 psi fluid pressure and gets identical coverage on 50 panels in a day.
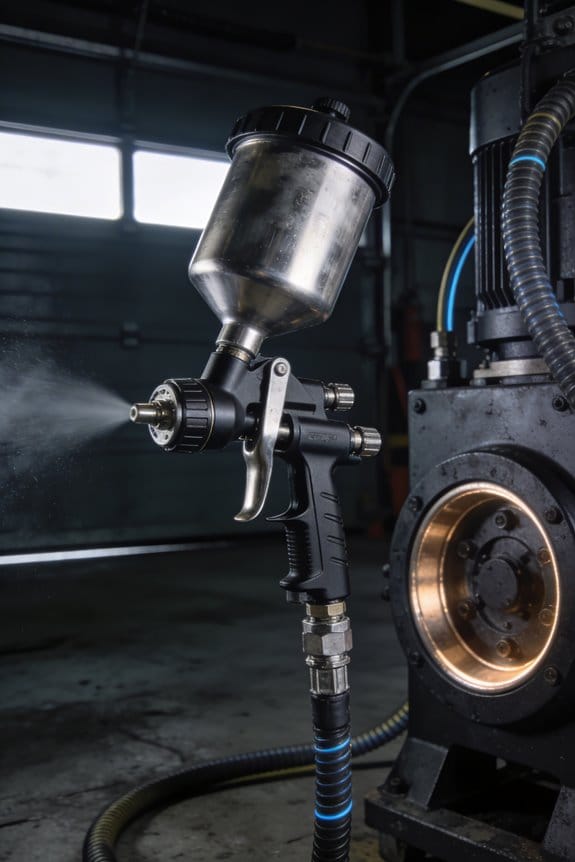
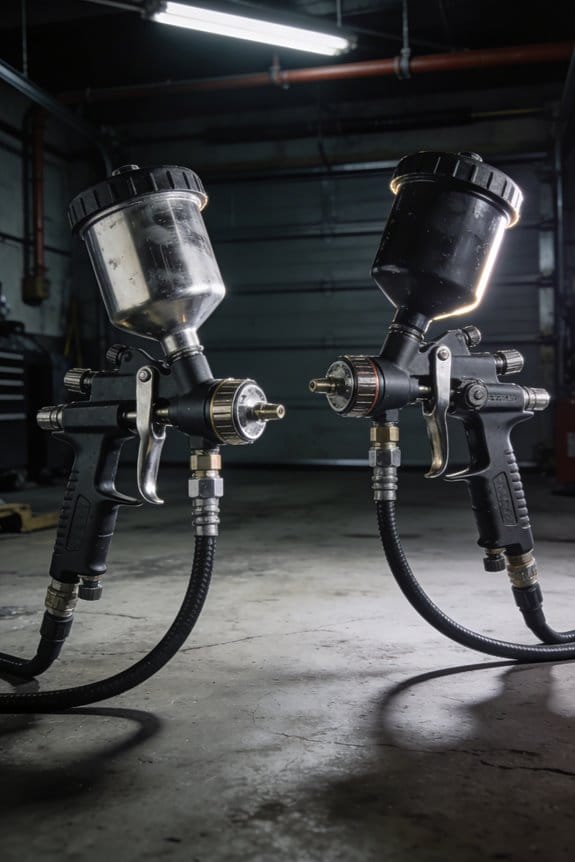
You want comfort and control when you spray, and pneumatic tools are lighter and have less kick than airless sprayers, so you stay steady on detail work. Use interchangeable tips from 1.0 to 2.2 mm: pick 1.0–1.4 mm for thin clearcoats and stains, 1.6–1.8 mm for primers, and 2.0–2.2 mm for heavy body paints. An antique furniture painter uses a 1.2 mm tip for trims and a 1.8 mm tip for drawer fronts to match finish thickness.
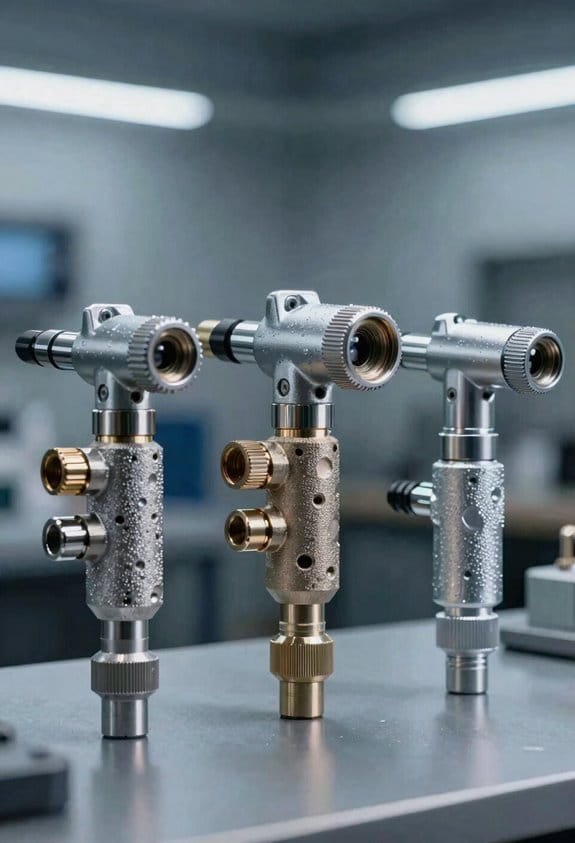
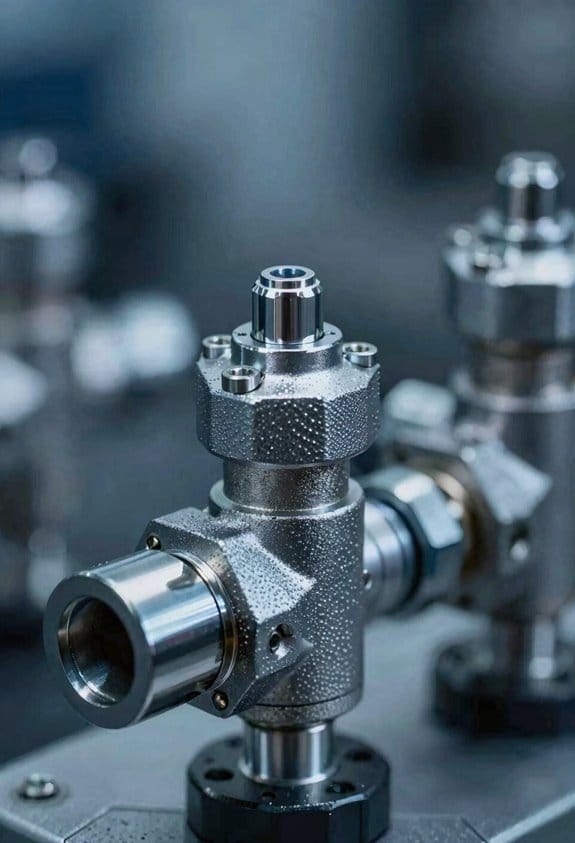
When to Pick Pneumatic Spray Tools Over Airless
Before you pick a sprayer, know why finish quality matters: you’re protecting a surface and making it look great for years.
If you want the smoothest finish on furniture or trim, go pneumatic. Pneumatic guns atomize coatings into finer droplets, which gives smoother surfaces when you spray lacquer, varnish, or thin polyurethane. For example, when I sprayed a maple side table with acrylic lacquer using an HVLP pneumatic gun at 10–12 psi and a 1.3 mm tip, the surface needed only one light sanding before topcoat.
You’ll get more control with pneumatic tools because you can adjust air and fluid separately. That lets you tighten the pattern for narrow trim or widen it for a cabinet side. Try these steps:
- Set fluid control to half open.
- Set air pressure to 10–15 psi at the gun for HVLP or 20–30 psi for conventional setups.
- Test on cardboard and adjust until the spray pattern is even across a 4–6 inch pass.
Pneumatic guns feel lighter and have less kick, so you’ll get less arm fatigue on precise jobs. I used a gravity-feed, 600–800 g lightweight gun for a built-in bookshelf and finished all shelves in a single afternoon without my shoulder locking up.
If you want to cut overspray and waste, choose HVLP or a pressure-pot pneumatic setup. HVLP at the gun with a 1.3–1.5 mm tip typically reduces overspray by 20–40% versus high-pressure airless, which saves material on small jobs like window sashes. For example, a pressure-pot with a 2-quart cup and regulator kept solvent levels lower while I sprayed eight window frames.
Pneumatic systems handle a wide range of viscosities with simple regulators, so you can spray thin stains and heavier catalyzed finishes without massive thinning. Use a 1.0–1.3 mm tip for thin stains and a 1.4–1.8 mm tip for thicker coatings; test and adjust the fluid knob until you see full, wet coverage without runs.
Why pick pneumatic over airless? Because you’ll trade some speed for predictable, repeatable results when finish quality and control matter most. If you’re spraying one or a few pieces, or doing detail work where appearance is critical, pneumatic is usually the better choice.
Decision Framework: How to Choose a Pneumatic Sprayer
Before you pick a sprayer, know exactly what you need it to do — that helps you avoid buying the wrong tool.
Start by listing the jobs you’ll use the sprayer for and why that matters in one sentence: matching features to tasks saves time and money. For example, if you’re spraying exterior latex house paint on a 2,000 sq ft home, you’ll need a system that keeps up with high volume and rough surfaces — something like a 1.5–2.0 GPM airless unit.
1) Assess project scale, material, and surface detail.
- Why it matters: bigger jobs need more flow; delicate trim needs finer control.
- Real example: spraying kitchen cabinets with waterborne lacquer needs an HVLP or turbine gun and 1.0–1.4 mm tips for smooth, low-overspray results.
2) Check material viscosity and pick tip sizes and feed systems.
- Why it matters: wrong tip or feed causes orange peel, runs, or constant thinning.
- Real example: a conventional solvent enamel on furniture often needs a 1.2–1.8 mm tip and a pressure pot for steady delivery.
3) Balance control needs against speed.
- Why it matters: you want the finish quality you need without wasting time.
- Real example: if you have ornate railings and ornate scrollwork, use an HVLP at 8–12 PSI at the gun for control; for fences and siding, use an airless sprayer at 1,800–3,000 PSI to cover fast.
4) Consider operator skill and training requirements.
- Why it matters: some guns need practice to get consistent results.
- Real example: a novice with an airless may have runs and heavy edges — practice on scrap at recommended gun distance (10–12 inches) and overlap 50%.
5) Verify regulatory compliance first.
- Why it matters: VOC limits or capture/filtration rules can restrict your options.
- Real example: some local codes ban non-HVLP spraying of high-VOC coatings indoors, so you might need a filtered HVLP or a spray booth with capture.
6) Compare feed systems and how they affect overspray and finish.
- Why it matters: each system has trade-offs in finish, overspray, and material efficiency.
- Real example: pressure pots give steady flow and less overspray for laminates; HVLP gives the softest finish but sprays slower.
7) Evaluate adjustability and air/pressure control.
- Why it matters: fine tuning prevents runs and uneven texture.
- Real example: choose a gun with adjustable needle, air cap, and fan control so you can dial in a 3–4 inch fan for trim or 8–10 inch fan for panels.
8) Prioritize cleanup and maintenance.
- Why it matters: harder cleanup increases downtime and cost.
- Real example: choose stainless fluid passages or easy-disconnect components if you’re switching between solvent and waterborne coatings daily.
9) Calculate total cost of ownership.
- Why it matters: initial price isn’t the real expense — consumables and maintenance are.
- Real example: a $600 unit that needs $50 filters monthly and $200 annual pump rebuild may cost more over two years than a $1,200 unit with cheaper consumables.
10) Make the final choice based on finish quality, efficiency, and safety.
- Why it matters: the right balance prevents rework and keeps operators safe.
- Real example: for showroom-quality cabinetry, choose an HVLP turbine system with a 1.0 mm tip, respirator, and proper cross-ventilation.
Quick checklist you can use:
- Job type and square footage
- Coating type and viscosity (cps or recommended tip size)
- Desired finish (smooth, textured, utility)
- Feed system preference (pressure pot, HVLP, airless)
- Operator skill level
- Local VOC/regulatory limits
- Cleanup time and tools
- Consumable costs and maintenance schedule
If you follow these steps, you’ll pick a sprayer that matches your work, your skill, and your budget.
How Finish and Control Compare: Air-Assisted, HVLP, Conventional
If you’ve ever stood in front of three different spray guns, this is why you need to pick carefully.
Why it matters: your finish quality and how much control you have determine whether a job looks professional or sloppy. Air-assisted, HVLP, and conventional each trade off finish and control differently.
Air-assisted: what it does and when to use it.
Why it matters: you get smoother fans than airless without completely losing transfer efficiency.
Example: spraying cabinet doors with 8–12% lacquer reducer in a 1.3–1.5 mm tip.
1) Set paint pressure to 40–60 psi and atomizing air to 15–25 psi.
2) Hold the gun 6–8 inches from the surface and overlap passes by 50%.
3) Back off pressure in 5 psi steps if you see orange peel.
You can adjust paint and atomizing air separately, so you can dial a medium-viscosity coating into a clean fan. Tip: if your fan edge feathers, reduce atomizing air by 3–5 psi. The critical number to remember is 6–8 inches for distance.
HVLP: how it helps you waste less and keep detail.
Why it matters: lower pressure means less overspray and cleaner shop air.
Example: spraying trim and furniture with a 1.0–1.3 mm tip at 8–10 psi (at the gun).
Steps:
1) Thin the finish to the manufacturer’s recommended VOC/thinner ratio for HVLP.
2) Use a 1.0–1.3 mm nozzle for thin stains or lacquers, 1.3–1.5 mm for heavier paints.
3) Keep the gun 4–6 inches from the work and move at a steady 12–18 inches per second.
HVLP keeps pattern control with lower pressure, so you get detailed work without a sandstorm. Watch for runs if you hold too long.
Conventional air (high-pressure): when to pick it for the absolute finest atomization.
Why it matters: this method gives the finest finish for furniture or cars because it atomizes paint the best.
Example: spraying automotive clearcoat with a 1.2 mm tip at 25–30 psi.
1) Choose tip/needle combos matched to your material (1.0–1.4 mm for most clears and basecoats).
2) Set pressure where the spray pattern is full and even; adjust in 2–3 psi increments.
3) Keep 6–8 inches distance and use consistent passes with 50% overlap.
Conventional systems let you change tips and needles for tight work, which is why pros still use them for show-quality surfaces.
Quick decision guide (three clear choices).
Why it matters: you’ll pick the right tool fast on the jobsite.
- Pick air-assisted for medium-viscosity, precision jobs where you need smoother fans than airless.
- Pick HVLP when you want low waste and tight detail in a workshop with limited ventilation.
- Pick conventional air spray when you need the absolute finest finish and you can control overspray.
Small checklist before you spray:
Why it matters: these checks prevent common finish problems.
1) Test spray on scrap at the chosen distance and pressure.
2) Adjust atomizing air or gun pressure in 2–5 psi steps until the pattern is even.
3) Note the distance and speed that gave the best result and repeat on each piece.
You’ll get predictable results if you follow the numbers: tip size, pressure ranges, and distance.
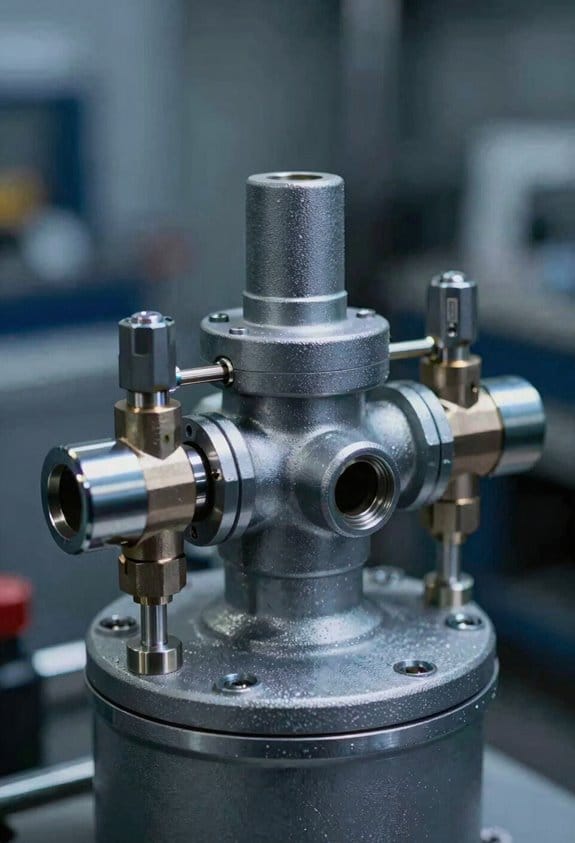
When to Use Pressure Pots or Air Spray for Low-Overspray Precision
If you’ve ever tried to spray paint a small part and ended up with too much fog, this is why.
Why it matters: you want controlled coverage so paint lands where you intend and you waste less material. I recommend a pressure pot when you need rock‑steady flow and the lowest overspray for repeatable runs. Example: spraying 50 identical metal brackets for a rack — set the pot at 20–25 psi, use an HVLP gun with a 1.4–1.8 mm tip, and you’ll get consistent wet film thickness across the whole batch.
Before explaining how, know the basic tradeoff: pressure pots give stable fluid pressure to the gun, while air spray gives finer atomization at the cost of more spread. Use a pressure pot when you need repeatability and low waste. Example: finishing cabinet doors for a small run — run the pot at 18–22 psi, keep cup pressure at 0.5–1 psi, and match the tip (1.8 mm for thin lacquers, 2.2 mm for heavier primers).
How to use a pressure pot (step‑by‑step):
Why this matters: following exact settings reduces runs and blowbacks.
- Set main pot pressure to 15–25 psi for most lacquers and urethanes; increase to 30 psi only for very viscous material.
- Set cup pressure (gun feed) to 0.5–1.0 psi so paint flows steadily without spurting.
- Choose tip size: 1.2–1.4 mm for thin stains and clear coats, 1.8–2.2 mm for primers and basecoats.
- Keep hose runs short and 1/4″–3/8″ ID to avoid pressure drop.
- Test on scrap: spray two passes, flash 5 minutes, then evaluate for orange peel or runs.
Real example: a small autobody shop sets pot at 22 psi with a 2.0 mm tip to apply primer to a quarter panel; they test three pass thicknesses on scrap, then spray the panel with consistent coverage.
When to use air spray instead (step‑by‑step):
Why this matters: air spray gives the smoothest finish for visible surfaces. Use it when finish quality beats material efficiency.
- Choose air spray for fine atomization—good for clear coats and high‑gloss base layers.
- Use 40–60 psi at the gun for conventional air spray; lower to 30–45 psi for LVLP/LP models.
- Fit a precision nozzle or a 1.2–1.4 mm tip for fine finishes; widen to 1.6 mm for heavier coats.
- Mask aggressively: use 3M Blue masking tape and paper, and hold backstops 6–12″ from edges to reduce fog.
- Test spray pattern on card stock and adjust air cap until you get a uniform fan.
Real example: a furniture finisher uses conventional air spray at 50 psi with a 1.3 mm tip to deliver a glass‑smooth clear coat on a dining table top, masking the edges and limiting overspray to 8–10 inches.
Tips that apply to both systems:
Why this matters: small adjustments save time and mess.
- Use adjustable regulators on both pot and air lines; keep gauges readable.
- Match tip size to material viscosity; use a viscosity cup to measure and thin to the manufacturer’s recommended seconds.
- For tight work, maintain 6–10″ gun distance and overlap passes by 50%.
- Clean filters and strainers before every job to avoid blockages and specks.
Practical rule of thumb: go pressure pot for batch work where consistency and low overspray matter; pick air spray for final visible surfaces when atomization quality is the priority.
Material Fit: Viscosity, Substrates, and Small-Scale Projects
Before you spray, you need to match the sprayer to the paint and surface because wrong combinations waste material and ruin finishes.
Measure viscosity or follow the paint maker’s chart before you start; most automotive primers want 18–22 seconds on a Zahn #2 cup, while thin lacquers are around 8–12 seconds. For example, when I sprayed a teak boat sample, I thinned the varnish to 20 s Zahn and it flowed without runs. Steps:
- Check the manufacturer’s viscosity chart or use a Zahn cup.
- Adjust with the recommended reducer to hit the target seconds.
- Re-measure after thinning.
Think of substrate compatibility like choosing tape that doesn’t peel your wall; the coating has to stick to what you’re spraying.
For wood, use an adhesion-promoting primer such as a shellac- or acrylic-based primer; for bare steel, use an etch or epoxy primer; for composites, use a primer listed for that laminate. I once prepped an aluminum sign by scuffing, wiping with solvent, and using an etch primer, which kept the topcoat from lifting. Steps:
- Clean thoroughly with solvent and a microfiber rag.
- Scuff with 320–400 grit where needed.
- Apply a compatible primer per the maker’s instructions.
If you’re painting small parts, you want low overspray and fine atomization so you don’t lose detail.
Use a pressure-fed cup gun or an HVLP turbine with a 1.0–1.4 mm tip for most small-scale work; set air pressure at the gun to 10–20 psi for HVLP and 20–30 psi for pressure-fed units as a starting point. I spray bicycle brake levers with a 1.2 mm tip at 12 psi and get smooth, even coverage. Steps:
- Pick tip size: 1.0–1.4 mm for small parts, 1.6–2.0 mm for thicker materials.
- Start at the suggested pressure and test.
- Adjust distance to 6–10 inches for best atomization.
You need to test before you commit because tests catch clogging, sagging, and mismatched flow early.
Spray a scrap of the same substrate at your working distance, check film thickness with a wet-film gauge if you have one, and look for runs or orange peel. I always spray two passes on scrap before parts; it prevents rework. Steps:
- Spray a scrap at working distance.
- Check finish and measure wet film if available.
- Tweak pressure, tip, or thinning and retest.
Adjusting controls is how you control film build and finish quality.
Change one variable at a time: pressure, tip size, or distance. For example, if you see orange peel, reduce flow or increase atomization by raising pressure 2–3 psi, or switch to a smaller tip by 0.2 mm. Steps:
- Change only one setting.
- Re-test on scrap.
- Lock in settings that give the finish you want.
You’ll get the best results by measuring, testing, and adjusting rather than guessing.
Cost and Operations: Maintenance, Speed, and Long‑Term Savings
Before you choose between pneumatic spray tools and airless systems, know this matters because it changes your upfront cost, downtime, and how much paint you use.
I’ll lay out the core cost and operational differences so you can plan purchases and your workflow with fewer surprises. Pneumatic tools usually cost less to buy: expect a quality pneumatic gun and basic compressor setup to start around $400–$1,000, versus $1,500–$4,000 for a decent airless rig. One clear reason is simpler maintenance—pneumatic guns don’t have high‑pressure pumps or piston seals that need frequent replacement. Example: a small cabinet shop I worked with bought a $650 pneumatic gun and kept it running years with a $20 rebuild kit every 18 months.
Why this matters: maintenance time becomes labor cost. Pneumatic setups are faster to service because you’re mostly cleaning nozzles and swapping small seals; that often takes 10–30 minutes and a $10–$25 parts spend. Airless systems need regular checks of hoses, piston assemblies, and filters; a hose replacement can cost $150–$300 and take an hour or more. Short sentence.
If your shop does large, high‑volume jobs, airless systems pay off because they spray much faster and move more material per minute. Airless sprayers can coat a wall up to 5 times faster than a handheld pneumatic gun, which trims labor on big jobs. Example: a contractor covering 2,000 sq ft of siding cut his labor from two days to one day after switching to airless.
Why this matters: speed reduces labor hours and can offset higher parts costs. For frequent, large projects, expect lower cost per square foot with airless even when you include a $250–$600 annual maintenance budget. Short sentence.
If you do precision work, varied coatings, or small batches, pneumatic tools often save you money over time because they reduce overspray and let you switch tips and pressures quickly. A trim painter using a pneumatic gun will typically see 10–30% less wasted paint on small pieces, since they can dial pressure and use finer nozzles. Example: a furniture refinish shop using three different clear coats switched nozzles between jobs and cut material waste by about 15% annually.
Why this matters: conserving material lowers recurring costs and reduces the need to replace components worn by abrasive coatings. Typical seal and nozzle swaps for a pneumatic setup run $10–$50 each, and you’ll do them only when you change materials or after heavy use. Short sentence.
Steps to decide which to buy:
- Estimate your average job size in square feet and hours per week.
- Multiply labor hours by your hourly labor cost to get weekly labor expense.
- Compare that to the combined annual ownership cost (purchase amortized over 3–5 years plus estimated yearly maintenance).
- Choose airless if labor savings exceed the higher ownership and maintenance cost; choose pneumatic if material savings and lower repair downtime save more.
Example: run the numbers for 1,000 sq ft jobs weekly with $25/hr labor—airless will likely win. Run the numbers for custom 50–200 sq ft pieces weekly—pneumatic will likely win.
Final practical tips:
- For small shops, get a mid‑range pneumatic gun (~$400) and budget $100/year for spare tips and seals.
- For high‑volume shops, buy a commercial airless sprayer (~$2,000) and budget $400–$600/year for hoses, pistons, and filters.
- Track these three metrics monthly: hours spent on maintenance, dollars spent on parts, and paint waste percentage. Those numbers tell you when to switch systems.
Short sentence.
Frequently Asked Questions
Can Pneumatic Tools Be Used for Spray Painting Outdoors in Windy Conditions?
Yes — I can use pneumatic tools outdoors in wind, but I’ll employ wind compensation techniques like lower pressure and HVLP settings, shield the work with portable shelters, and adjust distance and overlap to prevent drift and maintain finish.
Are Specialized Certifications Required to Operate Industrial Pneumatic Spray Systems?
Yes — I’ve found operators usually need specialized certifications and operator training to meet regulatory compliance; think of it like a pilot’s license for guns, ensuring safety, proper technique, and adherence to workplace and environmental rules.
How Do Pneumatic Sprayers Handle Abrasive or Particulate-Filled Coatings?
I filter and recommend particle sieving before use, run coarser nozzles and slower air to reduce nozzle erosion, purge often, and choose hardened tips or pressure-pot setups so I can spray abrasive or particulate-filled coatings reliably.
Can Pneumatic Spray Equipment Be Safely Used With Flammable Solvent Coatings?
Yes — I can, but only with strict precautions: I follow grounding procedures, use explosion risk controls, ventilate, use rated hoses and PPE, avoid ignition sources, and follow solvent and equipment manufacturer safety guidelines at all times.
What Are Typical Warranty and Spare-Parts Availability Differences Between Pneumatic and Airless Brands?
Like an old clock versus a new engine, I tell you warranty overlap is common but pneumatic brands often offer longer parts lifecycle and easier spare-parts availability; airless makers focus warranties on pumps while parts can be pricier.