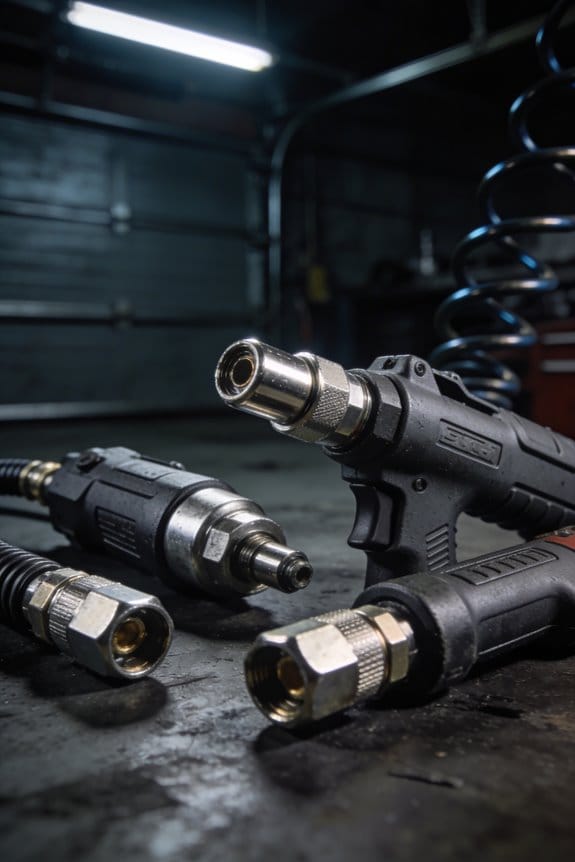
You hook up your air tool, expecting full power, but something feels off.
The tool just doesn’t have the snap it used to, and you’re left wondering why. Most people blame the tool or compressor, but the real culprit is often the quick-connect fitting.
This article will show you exactly how fittings create pressure drops through internal restrictions and turbulence, and how to choose and maintain them to keep your tools running at full strength.
You’ll learn practical fixes that restore performance without buying new equipment. It’s easier than you think once you know what to look for.
Key Takeaways
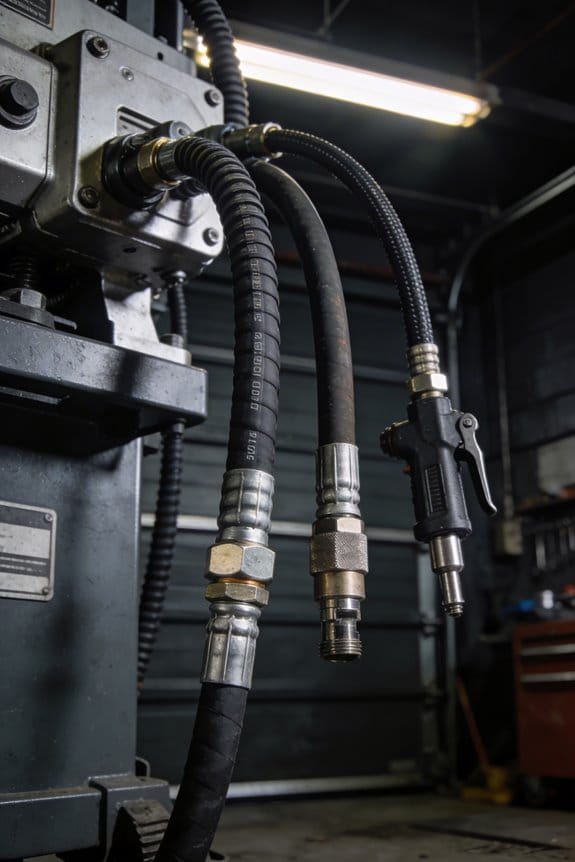
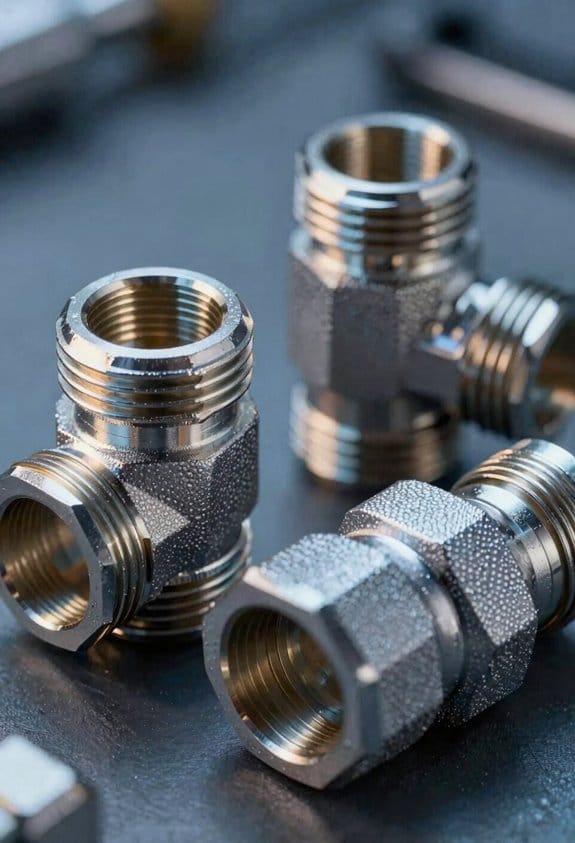
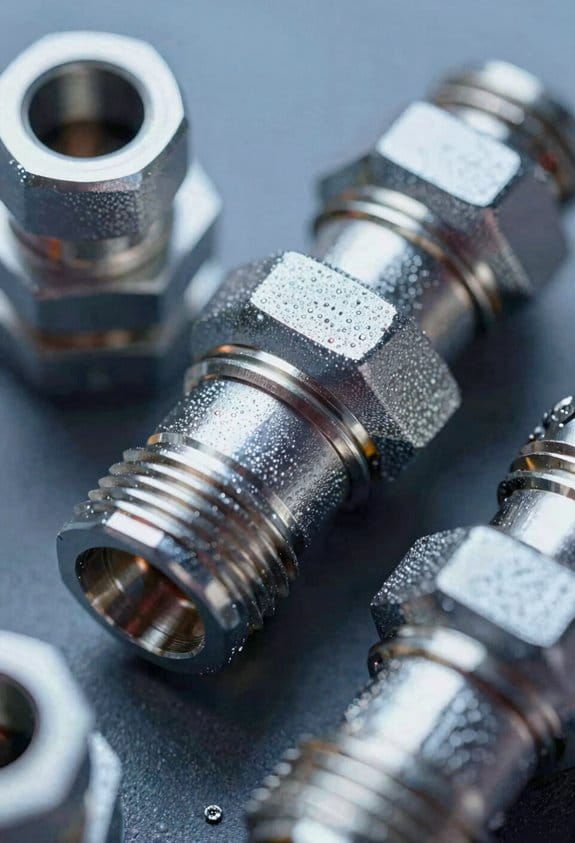
Here’s what actually happens when you attach a quick-connect fitting to your air tool line. Those fittings aren’t just simple connectors—they’re miniature flow restrictors that change how your tools perform.
Quick-connects create internal flow restrictions that generate turbulence and pressure loss. Every time you push that fitting together, you’re forcing air through tight channels and abrupt direction changes. A typical quick-connect fitting can drop your system pressure by 5-15 PSI compared to a straight hose connection.
This pressure drop directly reduces your tool’s torque output. A 10 PSI loss at 90 PSI supply means roughly 11% less torque. Your impact wrench spins slower. Your ratchet feels weaker. That’s why your tools seem sluggish after connecting through quick-connects.
The internal paths inside quick-connects create more friction than straight hose sections. Where a smooth hose lets air flow straight through, a quick-connect forces it around corners, through seals, and past locking mechanisms. Each restriction adds resistance.
Material and seal quality determine how much pressure you actually lose. Cheap fittings with soft plastic internals can leak 5-10% of your air pressure. Brass fittings with tight seals hold pressure better but still restrict flow. The difference between a $3 fitting and a $15 fitting shows up in your tool’s performance.
Contamination and wear make things worse over time. Dust, oil mist, and metal particles build up inside the fitting. Seals wear out. What started as a 5 PSI drop becomes 10-15 PSI after a few months. Your tools get slower, and you blame the compressor when the problem is your fittings.
If you’ve ever wondered why your impact wrench sounds weaker after connecting through a quick-connect, now you know. Those fittings aren’t free—they cost you power every time you use them.
What Causes Pressure Drop in Quick-Connect Fittings?
Before you install quick-connect fittings, you need to know what causes pressure drop. Here’s what actually happens when fluid flows through these connectors. The O-rings that create seals wear down after repeated use. As they degrade, they create more resistance to fluid flow. You’ll notice pressure drop increases with each connection and disconnection cycle.
Material porosity in the fitting body lets small amounts of fluid escape. This leakage reduces overall pressure in your system. The complex internal geometry of quick-connects creates multiple flow restrictions. Each passage adds friction and turbulence to the fluid stream.
Temperature changes make everything worse. Materials expand and contract, creating gaps that weren’t there before. These gaps increase friction and allow more fluid to bypass the seal. You might see pressure drop spike when your system heats up or cools down.
The latching mechanism itself introduces extra surface area where turbulence forms. Whether it’s ball or bayonet style, the mechanism disrupts smooth flow. This disruption converts pressure energy into heat and vibration.
Most people don’t realize that quick-connects typically cause 3-5% more pressure drop than simple fittings. In high-flow systems, that difference matters. You can minimize pressure loss by choosing fittings with larger internal passages and high-quality seals. Regular inspection catches worn O-rings before they cause major problems.
How Hose Size and Flow Rate Affect Pressure Loss
Here’s what actually happens when you pick the wrong hose size. Your inner diameter determines everything. A 1/2-inch hose at 10 GPM loses about 5 PSI per 100 feet. Switch to a 3/4-inch hose with the same flow, and you’ll drop to roughly 1 PSI per 100 feet. That’s not just a small improvement—it’s five times less pressure loss.
Think of fluid like traffic. When you cram too many cars into a narrow lane, everyone slows down. The same thing happens inside your hose. Smaller diameter means higher velocity, which means more friction against the walls. More friction equals more pressure drop.
Your flow rate compounds the problem. Double your GPM, and your pressure loss increases by roughly four times. That’s because velocity squares with flow rate. If you’re running 20 GPM through a 1/2-inch hose instead of 10 GPM, you’re not just doubling your pressure loss—you’re quadrupling it.
Before you buy new hoses, measure what you actually need. Most quick-connect systems work fine with 3/4-inch hose for flows under 15 GPM. If you’re pushing 20+ GPM, go to 1-inch. Here’s a quick reference:
- 1/2-inch: good for 5-10 GPM
- 3/4-inch: handles 10-20 GPM
- 1-inch: works for 20-30 GPM
The fastest way to fix pressure problems isn’t replacing your pump. It’s upsizing your hose. You don’t need bigger equipment if your hose is bottlenecking the system. Most people try to solve pressure loss by cranking up their compressor, but that’s like trying to push more water through a pinched straw.
Why Fitting Design and Direction Changes Restrict Flow
Here’s what actually happens when you add fittings to your system. Every fitting you add creates a bottleneck. Quick-connect fittings contain multiple components that force fluid through smaller passageways, generating turbulence and restricting flow. When fluid encounters sudden direction changes like 90° elbows, it experiences vena contracta – a narrowing of the flow stream that increases velocity while decreasing pressure.
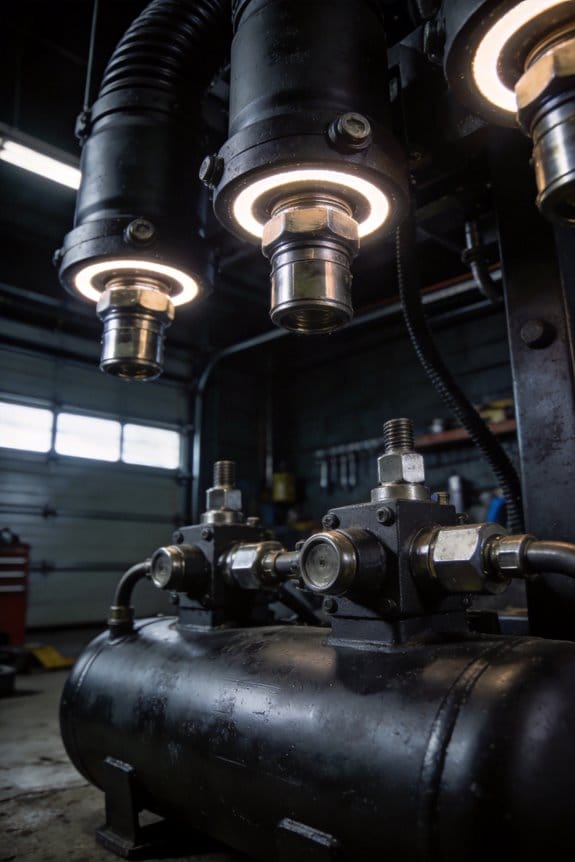
The ball check valves in many quick-connects create additional restrictions as they open and close. Even the simple act of connecting and disconnecting fittings causes momentary flow interruptions. Snap-type designs with ball latching mechanisms can handle up to 500 psig, but their internal passages are often smaller than your hose diameter. Non-spill designs with high-flow valves minimize this effect, but they still create more restriction than a straight section of hose.
If you’ve ever noticed your pressure washer losing power when you add attachments, this is why. You don’t need expensive flow meters if you understand these basics. Most people think bigger fittings always mean better flow. Here’s the better way: count your fittings and direction changes before blaming your pump.
How Pressure Drop Impacts Your Tool’s Performance
your tools start working harder for less result. You’ll notice the difference immediately – that impact wrench that used to snap bolts loose now just bounces off them.
Your pneumatic tools are precision instruments that need specific pressure to work right. When you’re losing 500 psi through your system, you’re basically running everything at half power. That drill bit that should slice through steel now grinds and heats up. Your impact driver sounds like it’s working but delivers maybe 60% of its rated torque.
The numbers tell the story: at 90 psi, your 1/2-inch impact wrench delivers about 300 ft-lbs of breakaway torque. Drop to 60 psi, and you’re down to roughly 180 ft-lbs. That’s the difference between removing a rusted lug nut and standing there wondering why nothing’s happening.
Your tools aren’t just slower – they’re working wrong. Lower pressure means less force at the working end. Your hammer drill won’t penetrate concrete effectively. Your ratchet will slip on tight fasteners. Even your air hammer loses its bite, turning clean cuts into ragged edges.
Here’s the kicker: you’re wearing out your tools faster too. When pressure drops, your tools compensate by running longer cycles. That extra run time generates heat, breaks down lubrication, and stresses bearings. A tool designed for 2,000 hours might fail at 1,200 if you’re constantly running it below spec.
The vibration damping suffers too. You’ll feel it in your hands – more chatter, more kickback, more fatigue after an hour of work. Your wrists and elbows take the brunt of it. That’s why you’re sore at the end of the day even though you’re not doing more work.
Your lubrication schedule needs adjusting. Lower pressure means oil doesn’t reach critical components as effectively. Parts that should get a fresh coat of oil every few minutes might go 10-15 minutes between proper lubrication. That’s how bearings start failing early.
Think of it like trying to run a marathon breathing through a straw. You can do it, but you’re working twice as hard for half the speed. Your tools are doing the same thing – straining against inadequate pressure while wearing themselves out faster.
The fix isn’t complicated: find and fix those pressure drops. Check your hoses for kinks or damage. Look at your fittings – those quick-connects are often the culprit. Even a 1/4-inch kink in a 3/8-inch hose can cost you 50 psi. Your tools will thank you, and you’ll get your work done faster with less fatigue.
Choosing the Right Quick-Connect Fitting for Your System
Before you connect your first fitting, you need to know the torque specs. Over-tightening cracks threads and destroys O-rings. Under-tightening leaves you with leaks. Most manufacturers specify 10-20 ft-lbs for standard fittings. Grab a torque wrench and set it to the exact number in the manual. No guessing.
If you’ve ever had a fitting fail after a few months, this is why. Threads strip, O-rings compress permanently, and the connection becomes unreliable. A torque wrench costs $20-50 and prevents these headaches. Check the manual for your specific fitting type—some high-pressure systems need 30-40 ft-lbs.
You don’t need to inspect fittings daily if you follow a simple schedule. Check them monthly for visible wear, corrosion, or damage. Replace O-rings once a year or immediately if they show cracking, flattening, or discoloration. Clean both male and female surfaces with a lint-free cloth before connecting. Even tiny debris can score surfaces and create leak paths.
The fastest way to ruin a fitting isn’t pressure—it’s contamination. Dirt, metal shavings, or old sealant can destroy seals instantly. For high-cycle applications, hardened steel fittings last 3-5 times longer than standard brass. They cost more upfront but save money when you’re connecting and disconnecting daily.
Three signs mean immediate replacement: visible cracks in the body, O-rings that don’t spring back when compressed, or threads that feel rough or uneven. Don’t wait until failure happens under pressure. Keep spare O-rings and fittings in your toolkit. When one fails, swap it out and inspect the mating surface for damage.
How Temperature and Material Selection Affect Pressure Drop
Here’s what actually happens when temperature changes in your system.
Hot fluid flows like water, cold fluid moves like syrup. When temperature rises, fluid viscosity drops by up to 80%, letting it slip through fittings with less resistance. A hydraulic system running at 150°F might see 40% lower pressure drop than the same system at 50°F.
Cold fluid gets thick. At freezing temperatures, oil viscosity can increase 10x, forcing your pump to work harder and creating pressure drops that weren’t there when the system was warm.
Think of material surfaces like roads. A polished highway lets you drive faster than a gravel road. Smoother fitting surfaces reduce friction, but only if the material won’t react with your fluid. Stainless steel works great for water but corrodes quickly with saltwater. Brass handles most chemicals but can’t take extreme heat.
Before you pick fittings, check your fluid’s temperature range and chemical makeup. Most manufacturers list compatibility charts – use them. A $20 fitting failure costs you hours of downtime and cleanup.
The fastest way to avoid pressure problems isn’t fancy fittings – it’s matching materials to your specific fluid and temperature.
Quick Tips to Minimize Pressure Drop and Maximize Tool Power
Before you pick a fitting, you need to know what pressure drop actually costs you. Every restriction in your system steals power from your tools and makes them work harder than they should.
Think of fittings like highways for air or fluid. When you use the wrong size, you’re forcing traffic through a narrow tunnel. That’s why matching your fitting size to your hose diameter is step one. A 1/4″ hose with a 1/8″ fitting creates turbulence that can drop pressure by 10% or more.
Quick-connect fittings seem simple, but they’re not all equal. Some have multiple valves and internal paths that create resistance. You’ll get better flow with straight-through designs that minimize obstructions. For pneumatic tools, check the pressure rating before you buy. A fitting rated for 150 psi won’t survive in a 200 psi system.
Temperature changes everything. Materials expand when hot and contract when cold. That polymer fitting that works fine in your shop might crack in winter conditions. Metal fittings can seize up if you don’t account for thermal expansion. Always match materials to your operating environment.
High-vibration applications need special attention. Whip hoses absorb shock that would otherwise break connections. They’re cheap insurance compared to replacing damaged fittings. And those pressure ratings? They’re not suggestions. Snap and screw types handle up to 500 psig, while bayonet designs withstand 3000 psig. Pick the wrong one and you’re gambling with system failure.
A small leak costs more than you think. At 95 psi, a 1/64″ leak wastes 0.40 CFM. That’s like leaving a faucet dripping 24/7. You wouldn’t tolerate that with water, so don’t accept it with compressed air.
Frequently Asked Questions
How Does Pressure Drop Affect Tool Speed?
Pressure drop reduces tool speed by limiting flow rate, which slows actuation response. When fittings restrict airflow, tools lose efficiency, making movements sluggish and reducing overall performance during operation.
Can Quick-Connect Fittings Cause System Overheating?
Yes, quick-connect fittings can cause system overheating. Thermal buildup occurs when undersized connectors restrict flow, creating friction-induced heat. Connector degradation accelerates with sustained high temperatures, risking premature failure and costly downtime.
What Role Does Fluid Viscosity Play in Pressure Drop?
Fluid viscosity plays a major role in pressure drop. Thicker fluids create more resistance, increasing pressure drop. Temperature dependence means warmer fluids flow more easily, reducing pressure drop. I’ll consider viscosity when selecting fittings and hoses.
Why Do Directional Changes Increase Pressure Loss?
When fluid changes direction, it creates flow turbulence that disrupts smooth movement, causing pressure loss. Imagine water hitting a sharp corner – it swirls and creates eddies, slowing flow and increasing pipe erosion over time.
How Can I Test for Leaks in Quick-Connect Fittings?
I can test for leaks using pressure testing with soapy water. Apply the bubble method by spraying or brushing soapy solution on fittings while pressurized. Bubbles indicate leaks, helping me identify problem areas quickly.