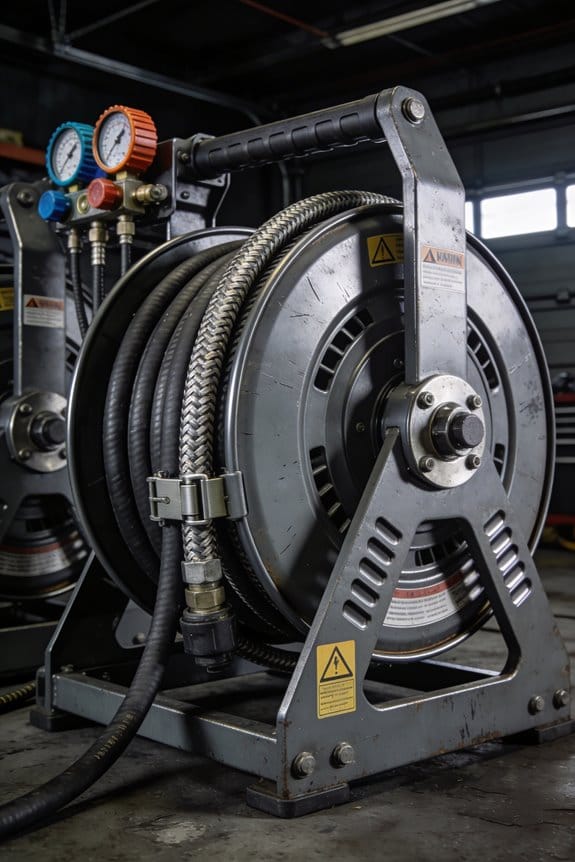
You step into the shop and spot a hose snaking across the main aisle — you freeze because you can’t remember if it’s been retracted or inspected. The exact problem is: which hoses need reels or rerouting right now to stop trips, abrasion, and sudden failures?
Most people assume any reel or a quick clamp fixes the issue and ignore bend radius, support points, and pressure-testing needs. This piece shows exactly how to pick the right reel, where to route hoses, and how to clamp and test them so hoses stay off walkways, resist wear, and don’t pop apart under pressure.
You’ll get step-by-step choices and simple maintenance checks that cut downtime and injuries. It’s easier than it sounds.
Key Takeaways
If you’ve ever tripped over a hose in a busy shop, this is why.
Why it matters: keeping hoses off walkways prevents trips and keeps high-traffic zones clear. Example: at a busy auto bay, a properly placed reel pulled the hose off the floor during a tire change, so the technician didn’t snag it while moving a jack. Place reels so the hose retracts straight back toward walls or ceilings, not across aisles. Aim for reels mounted at least 6–8 feet high when ceiling-mounting, or 4–6 feet on a wall so you don’t have to stoop to grab the hose.
Think of guiding and retracting like steering a cable down a smooth channel.
Why it matters: reducing rubbing and abrasion makes hoses last longer and saves you replacement time. Example: a machine shop added a swivel guide arm and cut hose replacements from every six months to every two years. Use a swivel guide arm that supports the hose weight and lets it retract without kinks; pick arms rated for your hose diameter. Check for rubbing points monthly and replace frayed sections immediately.
Before you route hoses, know that improper bends and loose clamps cause torsion and fitting failures.
Why it matters: correct routing and clamps stop premature leaks and bursts. Example: on a spray booth, a hose looped too tight caused a fitting to crack during a pressure spike, spraying fluid across the floor. Step 1: plan a route with gentle bends—keep bend radii at least 5× the hose diameter (for a 1″ hose, use a 5″ radius). Step 2: space clamps every 3–4 feet and within 6 inches of fittings. Step 3: secure hoses so they don’t twist when you pull.
It sounds obvious, but outlet orientation and drip control change cleanup and safety.
Why it matters: pointing outlets toward containment and using drip trays limits fluid spray and injury during failures. Example: a hydraulic cart failure dumped oil; a small drip tray under the outlet kept the floor usable and prevented a slip. Mount outlets so the nozzle faces a drain or containment pan, and use a metal drip tray sized at least 12×12 inches under each outlet.
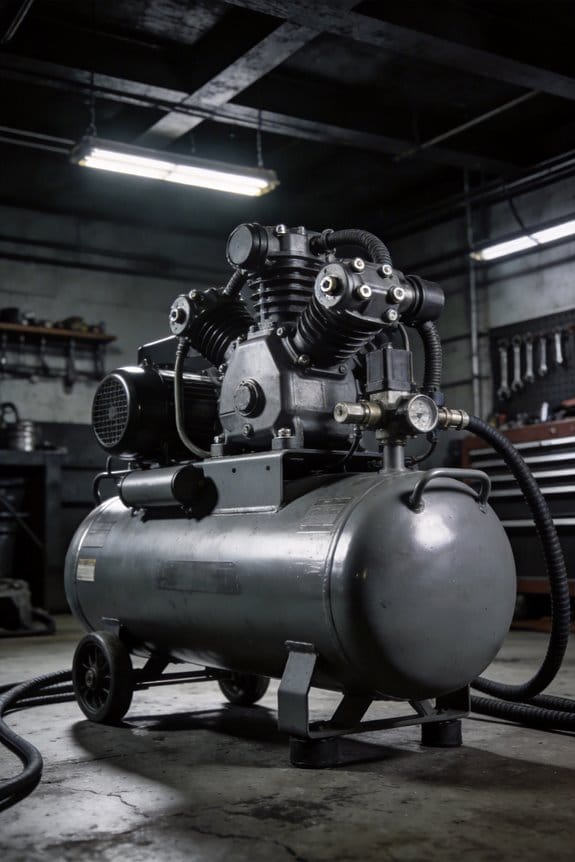
The fastest way to avoid reel failure is to match reel specs to your system.
Why it matters: a reel rated too low will fail under pressure and wear out fast. Example: a shop using a 200 psi-rated reel on a 300 psi air system had the spring break after weeks, halting work. Step 1: choose a reel with a maximum pressure rating at least 25% higher than your system pressure (for 300 psi, pick ≥375 psi). Step 2: verify cycle life—look for reels rated for at least 20,000 cycles if you retract multiple times daily. Step 3: schedule maintenance checks every 3 months.
What Hazards Do Hose Reels and Routing Eliminate?
If you’ve ever tripped over a hose in a busy workshop, this is why.
Why this matters: tripping, leaks, and hose failure cause injuries and downtime, and you can prevent them with simple routing and reels.
How hose reels and routing reduce trip hazards
Why this matters: tripping risks drop when hoses aren’t on the floor.
1) Keep hoses off walking areas. Use wall-mounted or ceiling reels positioned 3–4 feet from walkways so the hose retracts clear of foot traffic.
2) Retract after each use. Pull the hose fully onto the reel and lock it; make this a two-step habit: retract, then secure the nozzle on a bracket.
Example: in my shop I moved the air-reel to the far side of the compressor and reduced floor hoses from five to zero in high-traffic zones, cutting trips during busy shifts.
How reels prevent abrasion and accidental leaks
Why this matters: rubbing on floors or edges wears hose covers until they leak.
1) Route hoses at least 6 inches away from sharp edges and moving parts, and secure them with rubber-lined clamps.
2) Use retractable reels with guided spools to avoid dragging.
Example: I replaced an inline hose that had a 2-inch patch worn thin after it ran along a metal lip; after rerouting with a rubber grommet, the same hose lasted two years longer.
How routing directs failing fluid away from people and equipment
Why this matters: when a hose blows, directed flow reduces injury and equipment damage.
1) Orient hose runs so couplers point away from benches and controls; position outlets toward floors or containment pans.
2) Install drip trays or a catch basin under high-pressure lines.
Example: I angled a hydraulic line toward a grated drain; when a fitting failed it sprayed downward into the drain instead of soaking the nearby control panel.
How retractable reels reduce kinks and bursts
Why this matters: kinks concentrate stress and cause ruptures.
1) Use reels with a swivel and smooth guide arm that supports the hose without sharp bends; keep bend radius greater than the hose manufacturer’s minimum (often 6–10 times hose diameter).
2) Retract completely after each use so the hose isn’t left folded.
Example: switching to a reel with a 6-inch guide reduced kinks on a 1/2-inch air hose that used to bend over a bench edge.
How durable mounts and correct endpoints extend hose life
Why this matters: strain at connections causes premature failure.
1) Mount reels to solid structures using at least four bolts on a 4–6 inch pattern, and use vibration-damping pads if the reel is on equipment.
2) Fit swivel joints or strain-relief fittings at endpoints to prevent twisting.
Example: I moved a reel from a thin sheet-metal panel to a 3/4-inch plywood backing and the connection fittings stopped loosening every month.
How avoiding hot surfaces and chemicals reduces breaches
Why this matters: heat and chemicals degrade hose materials quickly.
1) Keep hoses at least 12 inches from hot pipes or exhausts, or route them behind insulation.
2) Choose hose materials rated for expected chemicals and temps (for example, rubber for general air/water, PTFE for aggressive solvents).
Example: after rerouting a steam-line-proximate hose 18 inches away, its surface no longer blistered within weeks.
Practical checklist to apply right now
Why this matters: a short routine prevents most common failures.
1) Walk the area and mark hose runs that cross walkways.
2) Install reels at least 3–4 feet from main paths.
3) Secure hoses with rubber-lined clamps every 4–6 feet.
4) Angle couplers away from people and sensitive gear.
5) Retract and stow every hose when you finish.
Follow these steps and you’ll cut trips, leaks, and premature hose failures while making your workspace safer and more reliable.
Choose the Right Hose Reel and Hose for Your Shop
Before you pick a hose reel, you need to know what it will face in your shop.
Why this matters: choosing the wrong reel shortens life and raises safety risks. Example: in my buddy’s small auto shop, a light-duty reel failed after three months under daily air-blow duty, spraying oil onto the floor.
1) How do I match reel duty to shop use?
Why this matters: a reel underspecified for pressure or cycles will leak or jam.
Steps:
- Check the reel’s pressure rating and cycle life. Look for models rated for at least 150% of your system pressure and for continuous-duty or 25,000+ cycle ratings if you use it daily.
- Match type to use: choose spring-retract reels for light to medium-duty air (up to 300 psi typical), and motor-driven reels for high-frequency or heavy hydraulic work.
Concrete example: if your shop runs a 120–150 psi air supply and you use the hose multiple times per hour, buy a spring reel rated 300 psi and 30,000 cycles.
2) What hose material should you choose?
Why this matters: wrong material fails from chemicals, heat, or abrasion.
Steps:
- Identify what fluids and temperatures the hose will see. Use nitrile for oil and fuel, EPDM for hot water and steam up to about 250°F (120°C), and PVC or polyurethane for general compressed-air hoses.
- Check chemical compatibility charts from the hose maker for the exact solvents or cleaners you use.
Real-world example: for brake-cleaner spray and engine-degreasers in a bay that reaches 140°F, pick a nitrile-lined hose rated for those chemicals and at least 150°F operating temperature.
3) Where should you mount the reel?
Why this matters: placement affects stress, reach, and trip hazards.
Steps:
- Choose wall-mount for fixed stations, ceiling-mount for center-bay coverage, or portable stands for movable work.
- Measure reach: the hose should extend to the farthest work point plus 2–3 feet slack. Keep the reel 6–12 inches above eye level to minimize bending and tripping.
Example: mounting a reel on the bay wall 8 feet from the center post with a 50 ft hose gives full coverage and keeps the hose off the floor when retracted.
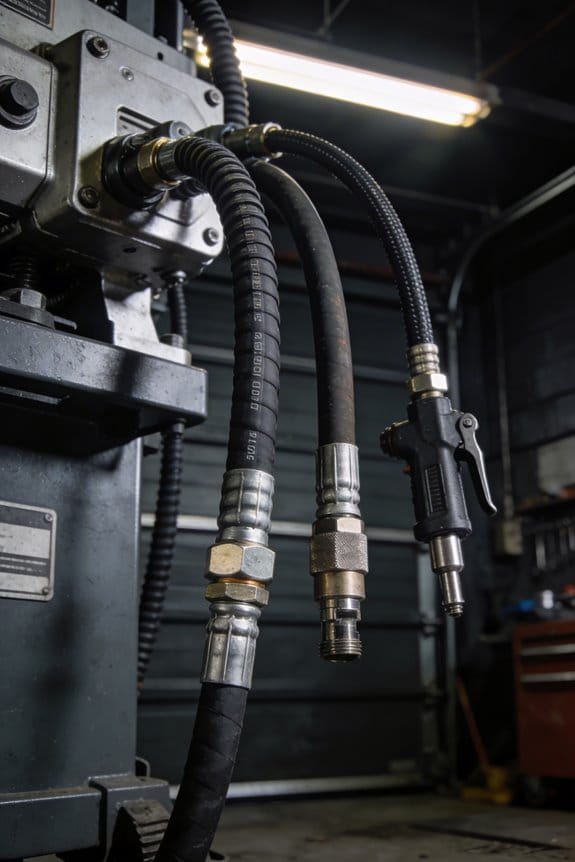
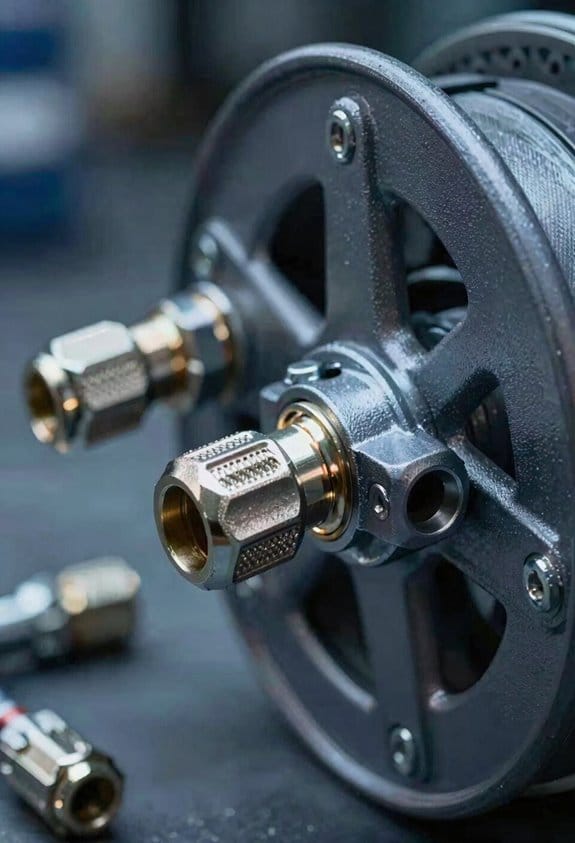
4) What hose diameter and fittings do you need?
Why this matters: wrong diameter or fittings reduce flow and cause leaks.
Steps:
- Match diameter to flow needs: 3/8″ ID is typical for air tools up to 10 CFM, 1/2″ ID for higher-demand tools (15–25 CFM), and 5/8″+ for long runs or sandblasting.
- Use compatible fittings and thread types (NPT, BSP) and thread sealant or tape where specified. Use swivel fittings at the reel to reduce torque on the hose.
Example: for a 20 CFM grinder, use 1/2″ hose with 1/2″ NPT fittings and a 300 psi rating.
5) How should retraction work?
Why this matters: jerky retraction creates sudden pulls and wears fittings.
Steps:
- Test retraction before you buy: it should be smooth and controllable, not snap-back. Look for adjustable tension or braking.
- Prefer guides and fairleads that reduce twist and abrasion.
Real-world example: swapping a reel with a soft-brake mechanism stopped a coworker’s frequent hose snags and cut fitting replacements in half.
6) How do you maintain the system?
Why this matters: inspections catch wear before failures happen.
Steps:
- Inspect hoses monthly for cuts, kinks, soft spots, or swelling.
- Replace hoses showing any of those defects or older than the manufacturer’s recommended service life (often 2–5 years for high-use hoses).
- Grease or service reel bearings annually per the manual.
Example: a monthly check found a 1-inch abrasion on a hose in a tire shop; replacing it prevented a burst under pressure the next week.
A few final, quick tips:
- Label reels with maximum pressure and hose type.
- Keep a spare hose and fittings on the shelf.
- If you’re unsure, take a short video of your setup and ask a supplier; they can confirm pressure ratings and fitting types.
If you follow these steps, you’ll end up with a hose and reel that last longer and keep your shop safer.
How Length, Bend Radius & Routing Prevent Kinks
Before you route a hose, you need to know why length and bend radius matter: they stop kinks that cut flow and ruin fittings. Think of a garden hose that pinches when you step on it — the same physics apply to hydraulic or pneumatic lines, and the result is restricted flow and heat buildup.
1) What minimum bend radius should you use?
Why this matters: bending tighter than the spec permanently deforms the hose and reduces flow.
Steps:
- Check the hose datasheet for the Minimum Bend Radius (MBR), usually given in millimeters or inches.
- Use the MBR as your working radius; for example, if the MBR is 75 mm, keep the curvature no tighter than that.
- If you must bend near fittings, increase radius by 25% to reduce stress.
Real-world example: on a return line with a 75 mm MBR, you routed it around a pump and used a 95 mm curve at the fitting, which stopped micro-cracks at the crimp.
2) How much straight length before a bend is required?
Why this matters: a short straight lead-in stabilizes the hose and reduces stress at the fitting.
Steps:
- Leave a straight run of at least 2 × hose outer diameter (OD) before the first bend.
- For a hose with a 20 mm OD, that means 40 mm of straight length.
- If space is tight, add a short rigid tube of that length to meet the requirement.
Real-world example: you replaced a 20 mm OD hose at a pump and added a 40 mm stainless sleeve before the elbow; the hose no longer pulled at the crimp during start-up.
3) How do you allow dynamic length for moving assemblies?
Why this matters: moving parts need slack so you don’t exceed the hose’s elastic limit and cause fatigue.
Steps:
- Measure maximum travel and double it to get required extra length; for example, 50 mm travel → 100 mm slack.
- Provide that slack as a gentle bend or service loop, never as a tight S-bend.
- Anchor the hose at both ends so motion is absorbed by the loop, not the fittings.
Real-world example: on a forklift mast with 60 mm stroke, you added a 120 mm loop and tied it to the carriage; the hoses lasted three times longer.
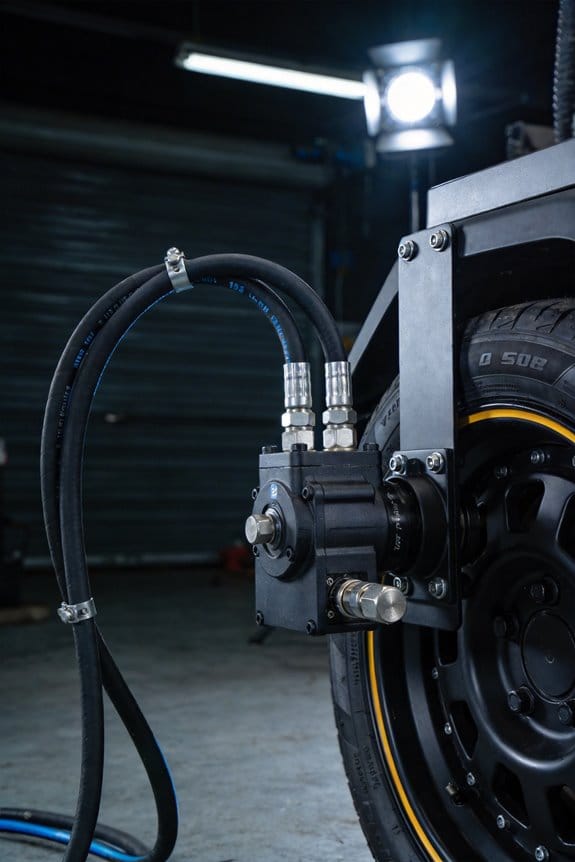
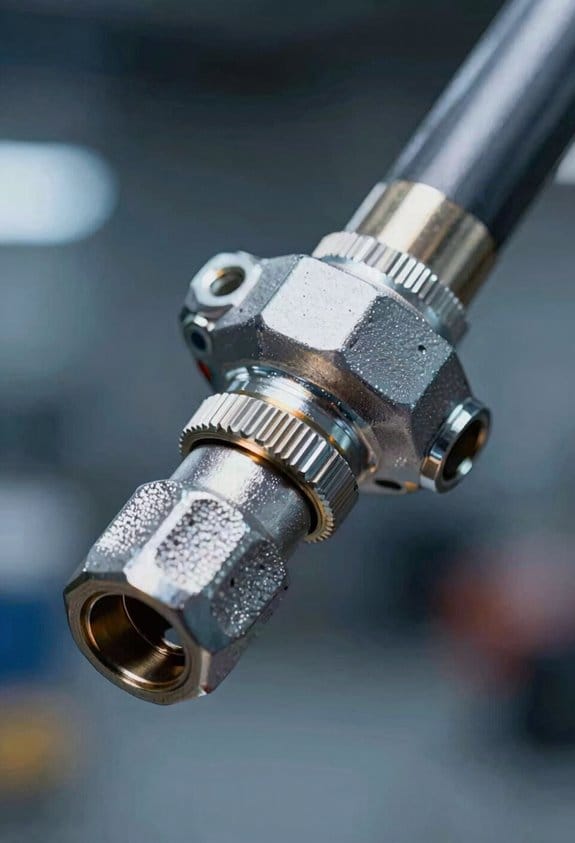
4) How should you orient and support bends?
Why this matters: routing bends in one plane and supporting couplings prevents torsion and sharp stress at connections.
Steps:
- Route bends so each one is in a single plane whenever possible.
- Use clamps or supports within one hose diameter of each fitting to stop sharp bending at the crimp.
- Avoid twisting the hose; if a rotation is needed, use a swivel fitting.
Real-world example: you had a hose twisting into a bracket; after re-routing the bend into one plane and adding a clamp 20 mm from the fitting, vibration-related leaks stopped.
5) What do you do if a hose kinks during installation or testing?
Why this matters: a kinked hose has hidden damage and will fail prematurely.
Steps:
- Remove and discard the kinked hose immediately.
- Replace with a new hose of the same spec.
- Re-evaluate routing and supports to prevent the same kink; if necessary, increase bend radius or add a sleeve.
Real-world example: during a pressure test a hose pinched against a sharp chamfer; after replacing the hose and adding a 3 mm rubber guard at the contact point, no further kinks occurred.
Quick checklist to keep on hand:
- Use the hose’s Minimum Bend Radius exactly as specified.
- Keep straight length ≥ 2 × hose OD before bends.
- Add dynamic slack = 2 × maximum travel.
- Route bends in one plane and clamp near fittings.
- Discard any hose that kinks during install or test.
Follow these rules and your hoses will flow reliably.
Practical Routing to Reduce Gravity, Strain, and Heat
Here’s what actually happens when you route hoses with gravity, strain, and heat in mind: if you let a hose pull on its fitting, twist unpredictably, or ride next to an exhaust, it fails fast and creates shop hazards.
Why it matters: failed hoses leak, cause downtime, and can start fires.
How I build gravity mitigation into your routing
Why it matters: unsupported hoses pull on fittings and wear seals.
1) Put a support clamp within 3–6 inches (75–150 mm) of every connection.
Example: on a skid-steer hydraulic line, I bolt a cushioned clamp 4 inches from the fitting so the hose cantilevers into the run instead of hanging on the connector.
Use a clamp that matches the hose diameter and has a rubber insert; tighten to the torque the clamp maker specifies.
Tip: if the fitting is vertically oriented, add an elbow to redirect the hose horizontally so gravity doesn’t load the joint.
How I reduce strain where motion happens
Why it matters: motion-focused strain causes kinking and internal abrasion.
1) Add a service loop or 6–12 inches (150–300 mm) extra length where parts move.
Example: on a lift arm, I route a 10-inch loop that flexes in a single plane so the hose bends predictably instead of whipping.
2) Use swivel fittings or elbows at the connection point to keep the hose from twisting.
Example: install a 90° swivel elbow at the cylinder port; the hose then rotates at the fitting instead of passing torque down the hose.
3) Secure the hose every 12–18 inches along the run with clamps that allow the planned bend radius.
Result: flex stays where you expect it and abrasion points are reduced.
How I keep hoses away from heat
Why it matters: heat shortens hose life and can soften covers, exposing reinforcement.
1) Maintain at least 6–12 inches (150–300 mm) separation from exhausts and manifolds when possible.
Example: on a generator frame, I reroute fuel return lines to clear the muffler by 8 inches and clip them to an opposing rail.
2) If you can’t get that clearance, fit a thermal sleeve over the hose or install a 1/8–1/4-inch metal heat shield between the hose and the heat source.
Example: under a truck cab, I wrapped coolant hoses in a silicone sleeve rated to 500°F where they pass near the turbo.
3) Inspect any insulated or shielded run every 6 months for compression or chafing at the edges of the shield.
Practical checklist to extend hose life (follow these steps)
Why it matters: a simple routine prevents most failures.
1) Identify fittings that bear weight. Clamp within 3–6 inches.
2) Add service loops of 6–12 inches where movement occurs.
3) Use elbows or swivels on rotating joints.
4) Secure runs every 12–18 inches.
5) Keep hoses 6–12 inches from heat or add sleeves/shields.
6) Inspect every 3–6 months for chafe, kinks, or heat damage.
One more specific tip: when you fasten clamps, don’t over-tighten — clamps should hold without deforming the hose; overtightening creates stress points that fail first.
Installation & Maintenance Checklist to Detect Hose Hazards

Before you start inspections, know why they matter: catching a small abrasion today prevents a burst hose and a messy shutdown tomorrow.
Here’s what to check each day and why it matters. Do a quick visual sweep every morning: look for cuts, chafing, oil deposits, and wet spots. If you see a 1/8-inch cut that exposes braid or fabric, tag the hose out of service. Example: on a forklift hydraulic hose I inspected, a hairline tear grew into a leak after two weeks because no one recorded it.
1) Daily visual check (takes 2–5 minutes per hose)
- Look for surface abrasion, oil seepage, bulges, and kinks.
- Check fittings for drips and loose clamps; hand-tighten only, then log it.
- Tag any hose with visible braid exposure or wet fittings.
Why monthly inspections catch problems before they fail: bending stress and support issues worsen slowly and silently.
Do a hands-on monthly review with these steps. Measure bend radius with a 2-inch template for small hoses and a 6-inch template for larger lines; replace hoses bent tighter than the manufacturer’s spec by 25%. Example: a compressed-air line on a jobsite was routed with a 1-inch bend, and the monthly check found it flat-sided and leaking within a month.
2) Monthly inspection (takes 15–30 minutes per run)
- Verify routing: hoses should follow the shortest path without twisting.
- Check supports every 12 inches for hoses under 1 inch ID and every 24 inches for larger hoses.
- Confirm bend radius: use the template and compare to the hose size printed on the cover.
Before you do pressure tests, understand what a failed test means: hidden internal damage can show only under pressure, and a failed test must result in immediate replacement.
Pressure-test annually or after any suspected damage; use a calibrated gauge and pump to 1.5 times the system working pressure, hold for five minutes, and watch for leaks or permanent deformation. Example: a steam hose that passed visual checks bulged and wept under a 1.5x test, revealing internal delamination.
3) Annual pressure test (takes 30–60 minutes per assembly)
- Isolate the hose, fit test adapters, and pressurize to 1.5× working pressure.
- Hold for five minutes, then depressurize gradually and inspect for permanent swelling.
- Destroy and discard any hose that shows bulging, slow leaks, or blistering.
You need a tagging and record system so your team can act fast when something’s wrong.
Set up tags and a log: write install date, next inspection due, test results, and clearance status on each tag; keep records in a spreadsheet with columns for location, hose ID, install date, last test, and condition. Example: after switching to color-coded tags and a shared spreadsheet, one plant cut unplanned downtime by 40% because crews replaced hoses before failure.
4) Tagging and record-keeping (initial setup takes 1–2 hours, then 1–5 minutes per update)
- Use durable vinyl tags and color-code by status: green = serviceable, yellow = needs attention within 30 days, red = out of service.
- Record every inspection in the spreadsheet and include photo evidence for any anomalies.
- Train crew: anyone can tag a hose; supervisors review tags weekly.
A few practical dos and don’ts you can use immediately:
- Don’t route hoses where gravity causes sag; add a support clamp every 12–24 inches depending on hose size.
- Don’t let hoses twist; twist increases wear at the fittings.
- Do replace hoses showing permanent kinks or any deformation after testing.
- Do keep spare hoses of the three most-used sizes on hand; aim for a 10% spare inventory relative to installed hoses.
End with one checklist you can print and use today:
1) Daily: visual sweep, tag obvious damage.
2) Monthly: measure bend radius, check supports, tighten fittings.
3) Annual: 1.5× pressure test for five minutes, replace failures.
4) Ongoing: update tag, log in spreadsheet, keep photo evidence.
If you follow these steps, you’ll spot trouble early and avoid surprise failures.
Real-World Hose Reel Routing Examples for Safer Shops
Before you set up hose reels in a workshop, you need to know why routing matters: it prevents kinks, cuts wear, and keeps people safe. I once helped a small auto shop where a poorly routed hose shredded at the fitting every month until we rerouted it over a ceiling track; after that the failures stopped.
1) How should you route short service runs?
Why it matters: short runs get used most and wear fastest if they rub floors or twist.
Steps:
- Mount a wall loop 18–24 inches from the reel so the hose never touches the floor.
- Match the loop radius to your hose spec — for a 3/4″ hose use a 6–8″ radius, for 1″ use 8–10″.
- Angle the loop so the hose enters the reel aligned with the drum; this reduces side loading on the spool bearing.
Example: I installed a 24″ wall loop with a 8″ bend for a 3/4″ air hose at a paint booth, which stopped the hose kinking at the door threshold.
2) When should you use overhead tracks for longer runs?
Why it matters: gravity sag at long spans stresses fittings and shortens hose life.
Steps:
- Install a continuous overhead track centered above the work aisle, about 8–10 feet high for standing work.
- Space supports every 6–8 feet for a 3/4″–1″ hose, closer if hoses are heavier.
- Use a trolley or guided reel to keep the hose aligned in one plane and prevent twisting.
Example: A fabrication shop I worked with replaced a 25 ft floor run with an 8–10 ft high track and trolleys; fittings that had leaked weekly lasted over a year without service.
3) What are the basic bend and support rules you must follow?
Why it matters: small, repeated bends or multi-plane motion cause cracks and leaks.
Steps:
- Keep the bend radius at least 2× the hose outer diameter — measure the OD and double it.
- Confine motion to a single plane; use guides or flanges to prevent out-of-plane twists.
- Fit elbows or strain-relief supports at connections so the hose leaves fittings straight for at least 6–8 inches.
Example: In a dairy plant I re-routed a washdown hose to leave the fitting straight for 8″ and added a support elbow; the seal no longer failed under daily flexing.
Quick checklist before you finish installation:
- Hose bend radius >= 2× OD.
- Wall loop radius matches hose spec.
- Overhead track supports every 6–8 ft for medium hoses.
- 6–8″ straight run at each fitting with an elbow or support.
Follow these numbers and you’ll avoid most common hose failures.
Frequently Asked Questions
Can Hose Reels Be Retrofitted to Existing Equipment Safely?
Yes — I can retrofit reels to existing equipment safely if I do thorough retrofit planning, perform safety verification (pressure and bend tests), guarantee correct routing and supports, and discard any kinked or improperly bent hoses immediately.
Do Retractable Reels Affect Tool Calibration or Accuracy?
Like a compass, I’ll say: no—proper retractable reels usually don’t cause tool drift or sensor interference if tension and routing avoid twisting, slack, or electromagnetic sources; I’ll verify setup and test calibration after installation.
Are There Industry Standards for Hose Reel Placement Heights?
Yes — I follow industry installation heights and mounting guidelines: reels should be mounted ergonomically, typically chest-to-head height for standing use, lower for seated work, with clearances per manufacturer specs and applicable safety codes.
How Do Reels Perform With Corrosive or Abrasive Fluids?
I’ve seen reels survive harsh chemicals when material compatibility’s right; I’ll tell you, choosing abrasion resistance and corrosion-resistant casings, seals and liners keeps reels functional, but incompatible fluids still demand discard and regular inspections.
Can Hose Routing Improve Shop Insurance or Compliance Ratings?
Yes — I’ve seen proper hose routing lower insurance premiums and smooth compliance audits by reducing hazards, preventing leaks or kinks, and showing documented maintenance, inspections, and safe routing that insurers and auditors value.