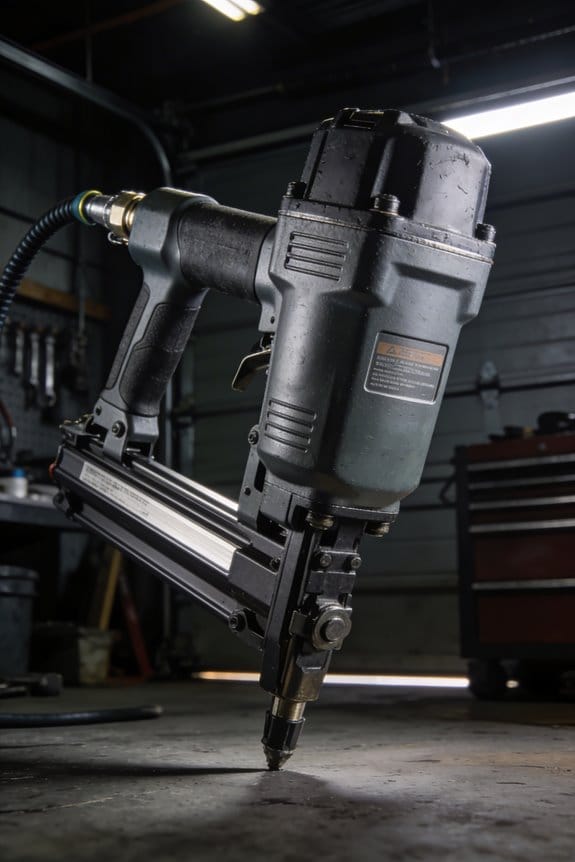
I switched from manual hammering to pneumatic nailers in my furniture production shop, hoping to save time. The reality was that inconsistent nail depth and operator fatigue were costing me more than I realized. Most woodworkers underestimate how much compressed air technology improves both speed and quality.
This article will show you exactly how pneumatic nailers deliver consistent power, reduce rejects, and pay for themselves through labor savings. You’ll learn the setup, maintenance, and workflow integration that make them indispensable. It’s simpler than you think.
Key Takeaways
Here’s what actually happens when you switch from hand-nailing to pneumatic nailing. You’ll notice the difference immediately — thousands of nails driven in the time it takes to do a few dozen by hand. That’s not just faster; it’s a complete shift in how you think about assembly time.
Most people underestimate how much battery-powered tools slow them down. Here’s the better way: pneumatic nailers run off a consistent air supply, so there’s no waiting for a charge or swapping out drained batteries mid-job. You keep going until the work is done.
The key to sustained productivity is keeping your body fresh. Pneumatic nailers are lighter and more balanced than their corded or battery-powered cousins, which means less strain on your wrist and arm. Over an eight-hour shift, that adds up to fewer breaks and more output.
If you’ve ever wasted minutes hunting for the right fastener, this will feel like a revelation. Organizing nails by type and size — keeping coils or strips within arm’s reach — means you never break rhythm. A quick reload becomes just another seamless step in the process.
Step 1: Secure your compressor in a stable spot where hoses won’t be a tripping hazard. Step 2: Label each connection clearly so anyone on the team can swap tools without confusion. Step 3: Check pressure settings before starting; even a 10 PSI difference can affect nail depth.
Think of your pneumatic setup like a musician’s instrument. When it’s tuned and ready, you don’t think about the mechanics — you just play. That’s the difference between fighting your tools and letting them disappear into the background of your workflow.
When your fastening system works this smoothly, you’ll find yourself taking on bigger jobs without adding hours to your schedule. That’s when production woodworking stops feeling like a race and starts feeling like a well-oiled machine.
Drive Production Efficiency
Here’s what actually happens when you switch from manual hammering to pneumatic nailers. You’ll drive thousands of nails per hour with consistent depth and accuracy. Manual hammering creates fatigue and inconsistency that pneumatic tools eliminate. Compressed air delivers reliable force through hardwoods and softwoods alike. Steady performance continues throughout extended production runs without slowing down.
Most people underestimate how much material handling improves with pneumatic nailers. Here’s the better way: operators work faster when nailers integrate into assembly lines. Quality doesn’t suffer because the tools maintain consistent depth automatically. Training focuses on proper handling techniques, safety protocols, and maintenance procedures. These three areas maximize productivity from day one.
The key to reducing labor hours is understanding where pneumatic nailers make the biggest impact. High-volume tasks see up to 40% labor reduction when you switch tools. Operators can maintain steady pace without the arm fatigue that comes from manual hammering. Product quality improves across entire production batches because every nail goes in at the same depth. Consistency becomes automatic rather than relying on operator skill.
If you’ve ever watched a production line struggle with bottlenecks, this is why pneumatic nailers matter. Assembly line workers spend less time on each unit when fastening happens faster. The compressed air system keeps nails flowing without the pauses that come from manual loading. Operators handle more pieces per hour without sacrificing quality standards. Material moves through the shop more efficiently when fastening isn’t the limiting factor.
Step one: choose the right nailer for your specific woodworking operations. Framing nailers work best for structural work where holding power matters most. Finish nailers excel at trim work where appearance and minimal hole size count. Brad nailers handle delicate tasks like attaching thin veneers or assembling picture frames. Matching the tool to the task prevents damage and ensures proper fastening.
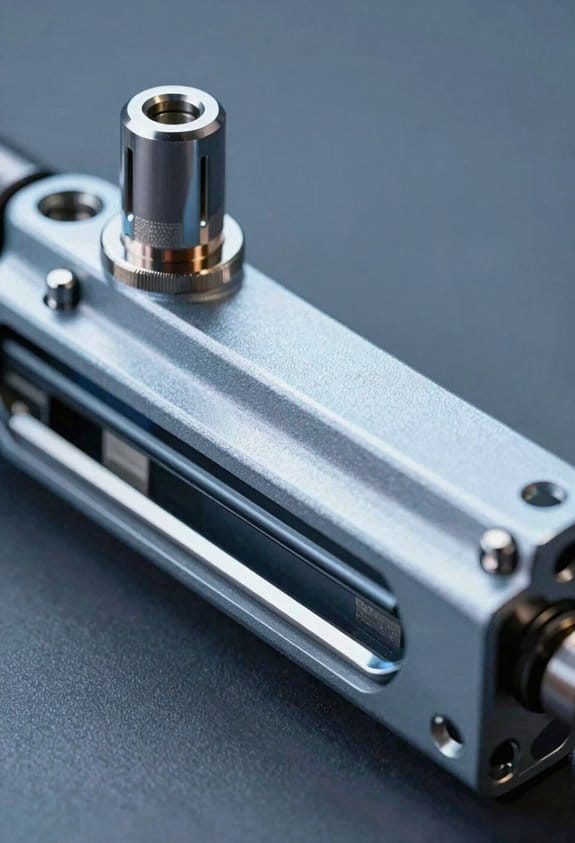
Step two: set up your compressed air system correctly. Most pneumatic nailers need 70-120 PSI to operate effectively. The air compressor should deliver at least 4-5 CFM for continuous operation. Connect a regulator to maintain consistent pressure even when other tools draw air. Moisture traps prevent water from entering the nailer mechanism. These simple steps prevent most performance problems.
Step three: establish proper maintenance routines that keep nailers running smoothly. Clean the magazine weekly to prevent dirt from jamming nails. Oil the air inlet daily with a few drops of pneumatic tool oil. Check the driver blade monthly for wear and replace when needed. Store nailers with the trigger locked and no nails in the magazine. Regular maintenance prevents costly downtime.
Think of pneumatic nailers like power steering in a car. Manual hammering is like turning the wheel without assistance – possible but exhausting over time. The compressed air provides the muscle while you guide the tool. Just as power steering lets you control the car more precisely, pneumatic nailers give you better control over nail placement. The tool does the heavy lifting while you focus on accuracy.
Here’s how to maximize productivity with pneumatic nailers in your shop. Organize nails by size and type in clearly marked containers near each workstation. Keep spare batteries charged for cordless models or ensure adequate hose length for pneumatic ones. Position nailers within easy reach to minimize movement between tasks. Train operators on both safety and efficiency techniques. These simple organizational changes compound into significant time savings.
The difference shows up fastest in high-volume production runs. Manual hammering might handle 200-300 nails per hour before fatigue sets in. Pneumatic nailers maintain 800-1200 nails per hour throughout an entire shift. The consistent depth eliminates rework from nails set too deep or too shallow. Operators report less physical strain at the end of the day. Production quality stays uniform from first piece to last.
Safety protocols deserve special attention because pneumatic nailers operate at high pressure. Always wear safety glasses to protect against flying debris. Keep fingers away from the trigger when not actively driving nails. Never point the nailer at anyone, even when disconnected from air. Check the work surface for hidden utilities before fastening. These precautions prevent most workplace injuries.
Maintenance directly impacts both safety and productivity. A dirty nailer can misfire or double-fire nails unpredictably. Worn O-rings cause air leaks that reduce driving power. Regular cleaning and inspection catch problems before they cause accidents. Replace worn parts immediately rather than waiting for failure. Well-maintained tools work more reliably and last longer.
Training makes the biggest difference in how effectively teams adopt pneumatic nailers. New operators often hold the tool at wrong angles or use incorrect air pressure. Proper training covers nail selection, depth adjustment, and troubleshooting common issues. Experienced operators can mentor newer team members. Regular refresher sessions keep everyone updated on best practices. Good training prevents bad habits from forming.
Material handling becomes more efficient when fastening speeds up. Workers can move completed assemblies to the next station faster. Less time spent holding pieces together means more pieces processed per hour. The consistent fastening quality reduces quality control checks. Overall workflow smooths out when one bottleneck disappears. Production lines run more predictably with pneumatic tools.
The learning curve for pneumatic nailers is shorter than most people expect. Basic operation takes about 30 minutes to learn. Full proficiency develops over a few days of regular use. Most operators feel comfortable within their first week. The tools themselves provide feedback through sound and feel when something isn’t right. Troubleshooting becomes intuitive with experience.
Cost savings accumulate quickly once pneumatic nailers are in regular use. Labor hours drop significantly on fastening-intensive tasks. Fewer rejects occur because of consistent nail depth and placement. Operator fatigue decreases, reducing workplace injuries. The initial investment pays for itself within months on most production lines. Quality improvements often justify the switch alone.
Production scheduling becomes more reliable with pneumatic nailers. Jobs finish faster and more predictably. Rush orders become manageable because fastening isn’t the limiting factor. Customer satisfaction improves when promised delivery dates are consistently met. The entire operation runs more smoothly when one major bottleneck disappears. Planning becomes easier with more consistent production times.
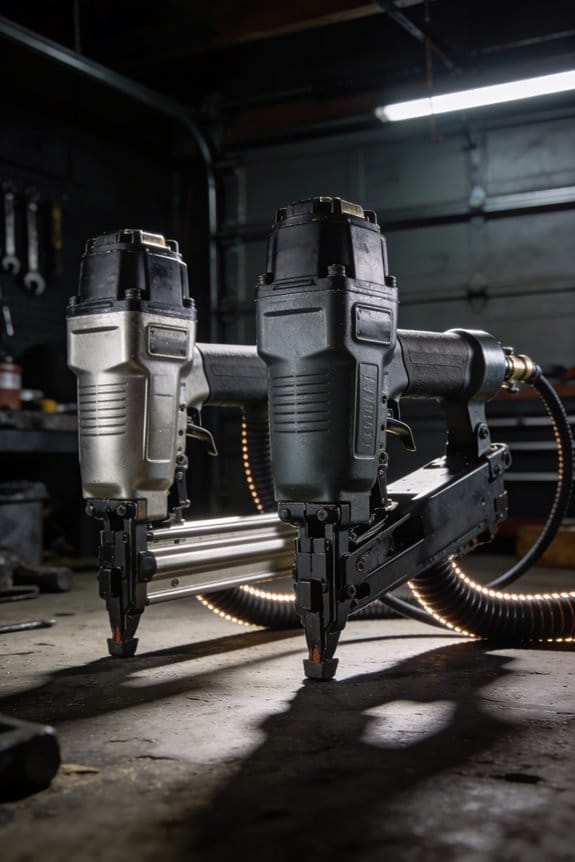
Compare to Battery-Powered

Decide what matters more – the convenience of no hose or the reliability of constant power. If you’re tackling a full day of framing or roofing, that air hose starts looking pretty good. The next thing to consider is how each tool handles different nail sizes and materials.
Power, Speed, and Consistency Features

Air pressure becomes your constant driving force. Unlike battery tools that lose power as they drain, pneumatic nailers maintain steady air pressure throughout your workday. You’ll notice this immediately—every nail drives with the same force, whether it’s your first shot or your hundredth.
The key to speed advantage is cycle timing. Pneumatic nailers can fire nails rapidly, with some models driving multiple nails per second. This quick cycle timing means you’ll complete fastening tasks in a fraction of the time compared to manual methods. The consistent air pressure also means there’s no waiting for a battery to recharge or power to drop off mid-task.
If you’ve ever struggled with inconsistent nail depth, this is why pneumatic nailers excel. They deliver uniform nail placement and depth across entire projects. For example, when installing trim, you’ll get the same countersink depth on every nail—no more some nails sticking out while others sink too deep.
Step 1: Connect your nailer to a compressor that can maintain 70-120 PSI. Most projects work best at around 90 PSI. Step 2: Load your nails properly, making sure they’re seated correctly in the magazine. Step 3: Test on scrap wood first to dial in your pressure setting.
Think of pneumatic nailers like a reliable assistant who never gets tired. They’ll drive nails with the same power at 9 AM as they will at 5 PM. This reliability guarantees professional results every time, making pneumatic nailers an essential tool for production-minded woodworkers seeking efficiency and precision.
Power, speed, and consistency are the three pillars that make pneumatic nailers superior for production woodworking. The driving force behind these tools comes from air pressure, which delivers consistent power to drive nails through various materials. Unlike battery-powered alternatives, pneumatic nailers maintain steady air pressure throughout extended use, guaranteeing each nail is driven with equal force.
The speed advantage becomes evident in cycle timing. Pneumatic nailers can fire nails rapidly, with some models capable of driving multiple nails per second. This quick cycle timing greatly reduces the time spent on fastening tasks, allowing woodworkers to complete projects faster. The consistent air pressure also means there’s no waiting for a battery to recharge or power to drop off mid-task.
Consistency in nail depth and driving force is vital for professional results. Pneumatic nailers excel here, delivering uniform nail placement and depth across entire projects. This reliability guarantees a high-quality finish every time, making pneumatic nailers an essential tool for production-minded woodworkers seeking efficiency and precision.
Optimize Finish Work
Here’s what actually happens when you use finish nailers for trim work. You’ll notice how they transform your approach to baseboards, crown moldings, and door casings. The precision placement means you can consistently drive nails at the exact depth needed without damaging delicate wood surfaces. This accuracy eliminates the frustration of bent nails or misaligned trim pieces that often occur with manual nailing.
Most people struggle with bent nails and misaligned trim when nailing by hand. Here’s the better way: finish nailers drive nails consistently at the right depth. The reduced rework becomes immediately apparent once you start using them. The consistent driving force and depth control mean fewer nails need to be removed and repositioned. You’ll spend less time filling nail holes and sanding surfaces smooth, which speeds up your entire finishing process. The tool’s ability to drive nails flush with or slightly below the wood surface creates a professional appearance that requires minimal touch-up work.
Step 1: Load the nailer with the correct gauge nails for your trim material. Step 2: Adjust the depth setting based on your wood thickness. Step 3: Position the nailer perpendicular to the trim surface. The ergonomic design also reduces fatigue during extended trim installation sessions, allowing you to maintain accuracy throughout your project.
Think of finish nailers like a surgeon’s steady hand. They give you control that manual nailing simply can’t match. If you’ve ever had to remove and reset nails multiple times on a single trim piece, this is why finish nailers matter. They drive nails straight and true the first time, every time. The consistent driving force means you won’t have nails poking through the back of your trim or failing to penetrate the base material.
The key to professional-looking trim installation is simpler than it sounds: consistent nail placement at the right depth. Using finish nailers, you can achieve this consistency across every piece of trim in your project. The tool’s ability to drive nails flush with or slightly below the surface means you’ll spend minutes instead of hours filling and sanding nail holes. This speed advantage compounds across an entire room of trim work.
Most people underestimate how much time they spend fixing nail placement mistakes. With finish nailers, you can complete entire rooms without a single nail-related adjustment. The consistent driving force eliminates the variation that comes with manual hammering, where fatigue and technique variations create uneven results. You’ll notice the difference immediately in the quality of your finished work.
If you’ve ever struggled with trim work that looks amateurish despite your best efforts, this explains why. Manual nailing creates too many variables for consistent results. Finish nailers remove those variables, giving you professional results regardless of your experience level. The ergonomic design also reduces fatigue during extended trim installation sessions, allowing you to maintain accuracy throughout your project.
Furniture Manufacturing Workflows
Most people think pneumatic nailers are just faster versions of hammers. Here’s what actually happens when you switch to pneumatic nailing: your production line suddenly gains predictable rhythm.
The key to consistent furniture joints is pressure control. If you’ve ever struggled with nails driving at different depths, this is why pneumatic systems matter. They deliver the same force every time, creating joints that actually hold together.
Step 1: Choose the right nailer for the job. Brad nailers work best for trim where you need minimal visibility. Finish nailers handle structural pieces that need real holding power. Framing nailers? Those are for heavy-duty assembly only.
For assembly line operations, pneumatic nailers reduce labor hours by up to 40% compared to manual nailing. This translates to faster production cycles and lower costs per unit. Many manufacturers use specialized nailers for different stages – brad nailers for delicate trim work and finish nailers for structural assembly.
Inventory tracking becomes more manageable with pneumatic systems since you’re dealing with standardized fasteners rather than varying hand-nailed patterns. The compressed air system also allows multiple workers to operate simultaneously without waiting for tools to charge, keeping the production line moving smoothly.
Here’s a real-world example: A mid-sized furniture shop switched from manual to pneumatic nailing on their chair production line. They cut assembly time from 15 minutes to 9 minutes per chair. That’s 40% faster, just from consistent nail depth and no hammer swings.
Think of pneumatic nailers like having a robot assistant who never gets tired. The tool does the same exact motion, with the same exact force, every single time. No more weak joints from under-driven nails or split wood from over-driven ones.
If you’re scaling up production, pneumatic nailers are non-negotiable. They’re the difference between handmade inconsistency and factory-level quality. The upfront cost pays for itself in reduced labor and fewer rejects.
Pneumatic nailers work because they remove human variation from the process. That’s the real advantage – not just speed, but predictability.
Integrate Into Shop Routines
You’ll spend time planning, but it pays off quickly. First, I establish dedicated workstations where each tool has its place. This means mounting compressors securely and organizing hoses to prevent tangles. Next, I create a workflow sequencing system that moves projects smoothly from one station to another. For example, I keep assembly areas close to finishing stations to minimize movement.
Most people skip inventory staging. Here’s the better way: Store fasteners, nails, and other consumables near each workstation to reduce downtime. Color-coded bins help you quickly identify different nail sizes and types. I also maintain a backup supply of commonly used items to prevent production halts.
The key to maintenance is simpler than it sounds. Clean air filters weekly and check for leaks in hoses and connections. By integrating these practices, I’ve greatly reduced setup times and increased overall productivity in my shop.
If you’ve ever struggled with tangled hoses, this is why organization matters. Mounting compressors securely prevents accidents and keeps your workspace tidy. Color-coding bins saves you from hunting through mixed fasteners during critical assembly moments.
Step 1: Mount your compressor on a sturdy base away from dust and debris. Step 2: Run dedicated air lines to each workstation using quick-connect fittings. Step 3: Label every hose and tool connection so anyone can use the system.
Think of your workflow like a assembly line in a factory. Materials flow smoothly from one station to the next without backtracking. When you keep assembly areas close to finishing stations, you’ll save minutes on every project that add up to hours over time.
Regular maintenance schedules keep tools running at peak performance. Clean air filters weekly and check for leaks in hoses and connections. By integrating these practices, I’ve greatly reduced setup times and increased overall productivity in my shop.
Frequently Asked Questions
How Do Pneumatic Nailers Reduce Overall Project Costs?
Here’s what actually happens when you use pneumatic nailers instead of manual hammering. You’ll drive nails three to four times faster, and your arms won’t feel like jelly after an hour. That speed difference adds up quickly when you’re framing walls or installing subflooring.
Most people think the cost savings come only from labor. Here’s the better way to look at it: pneumatic nailers reduce material waste too. When you’re using a nail gun, you’re less likely to bend nails or drive them at wrong angles, which means fewer mistakes that require removal and replacement.
The key to understanding cost reduction is simpler than it sounds. You’re essentially trading the cost of compressed air and tool maintenance for dramatically reduced labor hours and material waste. If you’ve ever watched a crew manually nail an entire roof deck, this is why switching to pneumatic tools changes everything.
Step 1: Calculate your current nailing time. Time how long it takes to drive 100 nails manually. Now watch someone do the same with a pneumatic nailer — you’ll see the difference immediately.
Step 2: Factor in the reduced fatigue. Your workers can maintain consistent speed and accuracy for longer periods, meaning fewer breaks and higher daily output.
Step 3: Add up the material savings. Fewer bent nails, fewer split boards, and more consistent fastening patterns mean you’ll order less lumber and finish materials.
Think of pneumatic nailers like power steering in a car. You could steer manually, but once you experience the efficiency difference, you won’t go back. The initial tool investment pays for itself within the first few projects through labor savings alone.
Here’s the bottom line: pneumatic nailers cut labor hours by up to 40% in high-volume tasks. By reducing material waste and labor time, they significantly lower overall project costs through faster, more precise fastening.
What Maintenance Do Pneumatic Nailers Require?
it starts jamming, misfiring, and eventually stops working entirely. Regular upkeep prevents these headaches before they start.
Most people wait until something breaks. Here’s the better way: clean your nailer after every use, replace the air filter every few months, and lubricate moving parts monthly.
The key to keeping your nailer running smoothly is simpler than it sounds. After each job, blow out dust with compressed air and wipe down the exterior. This takes 2 minutes and prevents buildup that causes jams.
If you’ve ever had a nailer suddenly stop mid-project, this is why: debris in the firing mechanism or a dry piston. A quick wipe-down and lubrication would have prevented it.
Step 1: Clean — after every use, remove the magazine and blow out dust from the nose and magazine channels. Step 2: Filter — replace the air filter every 3-4 months, or when it looks dirty. Step 3: Lubricate — add 2-3 drops of pneumatic tool oil to the air inlet before each day’s use.
Think of your nailer like a car engine: it needs clean air, proper lubrication, and occasional filter changes to run reliably.
The filter replacement matters because dirty air causes internal wear. A $5 filter prevents $50 in repairs later.
Step 4: Check O-rings — inspect them monthly for cracks or wear. Replace if they feel hard or brittle. This prevents air leaks that reduce power.
Real-world example: A carpenter I know replaced his filter quarterly and oiled weekly. His nailer lasted 8 years before needing major service. His coworker, who never maintained his, replaced his every 18 months.
Step 5: Storage — when not in use, store your nailer in a dry place with a few drops of oil in the mechanism. This prevents rust and keeps seals supple.
Maintenance takes 5 minutes per week but saves hours of downtime and hundreds in replacement costs. Next, let’s look at what to do when your nailer still acts up despite regular care.
Can Pneumatic Nailers Handle Different Nail Sizes?
Here’s what actually happens when you load different nail sizes…
You’ll find most pneumatic nailers have adjustable magazines that handle various fastener lengths. I can switch between brad nails for trim work, finish nails for baseboards, or framing nails for construction simply by adjusting the magazine settings and depth control.
The key to nail size compatibility is simpler than it sounds. Your nailer’s magazine capacity determines which fasteners it can shoot. Most models specify a range like 5/8″ to 2″ for brad nailers or 2″ to 3-1/2″ for framing nailers.
If you’ve ever struggled with jams, this is why. Using nails outside your nailer’s specified range causes misfires and can damage the tool. Always check the manufacturer’s size recommendations before loading.
Step 1: Identify your nailer’s capacity — look for a sticker or engraving on the magazine.
Step 2: Match your fastener length to the specifications. For example, a 16-gauge finish nailer typically handles 1″ to 2-1/2″ nails.
Step 3: Adjust the depth control based on your material thickness. Thicker wood needs deeper penetration.
Think of nail size selection like choosing the right drill bit. You wouldn’t use a 1/4″ bit for a 1/2″ hole, just like you shouldn’t force 3″ nails into a tool rated for 2″.
Most people make the mistake of assuming all nailers work with any nail. Here’s the better way: always verify compatibility before purchasing fasteners. The wrong size wastes money and causes frustration.
Using the correct nail size ensures clean drives without splitting wood or leaving nails proud of the surface. This matters because improper fastening weakens joints and creates rework.
One real-world example: Installing crown molding requires 1-1/2″ to 2″ 18-gauge brad nails. Using 5/8″ brads would leave the molding loose, while 2-1/2″ nails might split the delicate trim.
Some nailers feature quick-change magazines for rapid size switching. This saves time when moving between different woodworking tasks on the same job.
End each project by clearing remaining nails from the magazine. This prevents spring fatigue and keeps your nailer ready for the next job.
Remember: nail size isn’t just about length — gauge thickness matters too. Thicker gauges (lower numbers) provide more holding power but require more powerful nailers.
Are Pneumatic Nailers Safe for Beginners?
Yes, pneumatic nailers are safe for beginners with proper safety training and tip placement. Always wear protective gear, read the manual, and practice on scrap wood before tackling your project.
Here’s what actually happens when you fire a pneumatic nailer without proper technique. The nail can ricochet or split the wood if you’re not holding it correctly. Most people angle the nailer too steeply. Here’s the better way: keep it perpendicular to the surface with firm, steady pressure.
The key to safe operation is understanding the tool’s power. These nailers drive fasteners at high velocity—often 100 pounds per square inch or more. If you’ve ever hammered your thumb by accident, this is why. The force is concentrated and immediate.
Step 1: Check your safety gear — here’s how to do it right. Wear safety glasses, ear protection, and sturdy gloves. The glasses protect against flying debris. The ear protection matters because the compressor noise adds up over time. The gloves give you a better grip and protect your hands.
Step 2: Read the manual before touching the nailer. This sounds obvious, but many skip this step. The manual shows you where the safety tip is and how to load nails properly. Think of it like learning the rules before playing a game.
Step 3: Practice on scrap wood first. Find some leftover lumber and fire 10-15 nails into it. Get comfortable with the trigger pull and how the nailer feels in your hands. This builds muscle memory before you work on your actual project.
Most beginners rush to start their project. The better approach is to master the basics first. Your confidence grows with each successful nail, and you’ll avoid costly mistakes on your real workpiece.
Safety isn’t complicated—it’s about habits. Once you develop the right ones, using a pneumatic nailer becomes second nature.
How Do Pneumatic Nailers Perform in Humid Conditions?
Here’s what actually happens when you use a pneumatic nailer in humid conditions…
Moisture creeps into the tool’s internal components, causing metal parts to corrode faster than in dry environments. Your nailer’s lifespan can drop by 30-50% if you don’t take precautions.
Most people ignore humidity until their nailer starts jamming. Here’s the better way: store your tool in a sealed plastic container with silica gel packets. Replace the packets every 3-4 months when they turn pink.
The key to preventing rust is simpler than it sounds. After each use, wipe down all metal surfaces with a clean cloth lightly coated in machine oil. This creates a barrier against moisture.
If you’ve ever had a nailer seize up mid-project, this is why: trapped humidity mixed with sawdust creates a perfect environment for corrosion. Run your nailer empty for 10 seconds before storing to clear out debris.
Step 1: Clean — Remove all visible dust and debris from the nailer’s exterior and magazine.
Step 2: Oil — Apply one drop of pneumatic tool oil to the air inlet before each use.
Step 3: Dry — Keep your nailer in a climate-controlled area when not in use.
Think of humidity like salt on a car in winter — it accelerates rust formation on metal parts. Even stainless steel components can pit and corrode over time.
One real-world example: A carpenter in Florida noticed his nailer’s depth adjustment stopped working after just 6 months. The adjustment rod had corroded completely, costing him $75 in parts and 3 hours of downtime.
Run your nailer with a moisture trap on the air hose. This catches water before it enters the tool.
Store tools with desiccant packs in sealed containers.
Oil internal components weekly during humid months.
Use rust prevention sprays monthly on external metal parts.
Humidity reduces pneumatic nailer performance by causing internal corrosion and jamming.
Without proper care, moisture damage can cut your tool’s lifespan in half. The next section covers how to maintain your nailer’s air pressure system for consistent performance.