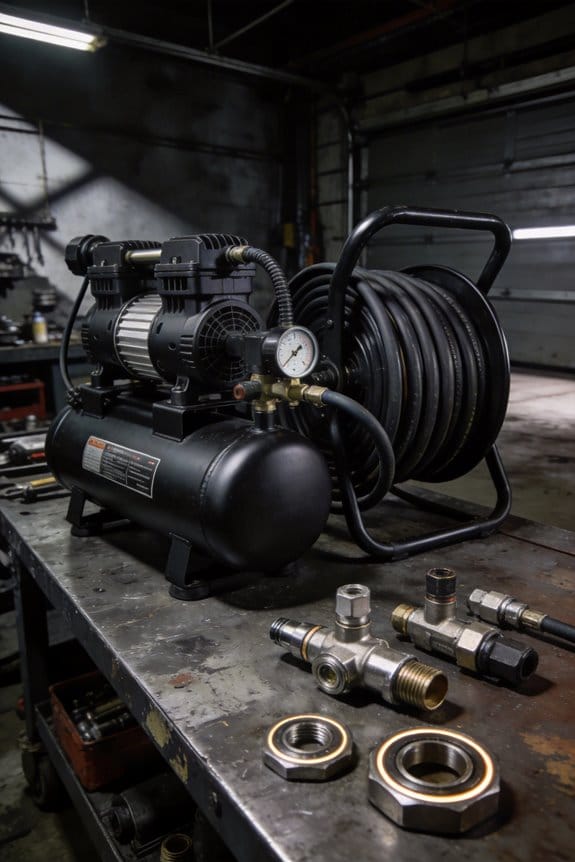
You lean in to hear a coworker over a sudden blast from a blowgun and still miss half the words — now you’re left asking why the shop feels so exhausting and small mistakes keep happening. You wonder whether the problem is the tools, the layout, or just everyone’s bad habits.
Most people assume intermittent loud bursts are just annoying background noise and only measure average levels once. This piece will show you how to spot the real culprits by measuring both continuous Leq and peak dBC at the ear, how to prioritize fixes like replacing noisy nozzles or changing tools, and how to schedule short noisy blocks with quiet breaks so accuracy and comfort improve.
You’ll get clear actions and a testing plan. It’s easier than it sounds.
Key Takeaways
If you’ve ever worked near compressed-air tools, this is why your shop feels tiring by lunchtime.
– Short bursts from compressed-air tools raise background noise and make conversation and concentration hard. In one example, a colleague working beside a pneumatic riveter found he had to shout at 85 dB(A) background levels to be heard; that forced him to stop and rest twice as often. Use quieter nozzles that cut noise by about 6–10 dB and you’ll hear the difference immediately.
Before I tell you how to fix it, know why it matters: repeated loud pulses drain your mental energy and slow decision-making within a few hours.
– Repeated loud pulses and echoes increase mental fatigue, reducing focus and decision-making. A machinist I know reported more mistakes near a blast cabinet because echoes masked machine clicks; after adding foam to reflect less, error rates dropped. Replace bare concrete walls with 2″ acoustic panels to cut reverberation and improve focus.
Why you should care about high peaks: they drastically shorten safe exposure and raise injury risk.
– High peaks (near 100 dB(A)) drastically shorten safe exposure time and raise injury risk. For example, a shop using an old air hammer hit 100 dB(A) and the worker reached the 15-minute daily exposure limit in just one burst. Use hearing protection rated NRR 25–30 dB and schedule fewer high-noise tasks per hour.
If noisy tools are slowing you down, here’s the practical issue: masked sounds make tasks longer and increase errors.
– Noisy tools make tasks take longer and increase errors by masking auditory cues and instructions. A paint sprayer operator missed a verbal safety warning over the compressor noise and had to redo a panel; after switching to an electric sprayer, cycle time dropped by 20%. Choose electric or quieter pneumatic tools when logic and budget allow.
Before you buy anything, try simple changes that give quick wins.
– Simple fixes (quiet nozzles, mufflers, electric tools) noticeably lower noise and improve comfort. A woodworker swapped the shop’s open blow-off nozzles for engineered quiet nozzles and measured a 7 dB drop at the bench; the shop felt calmer right away. Steps to try:
- Measure peak and background levels with a smartphone app (get two readings: during operation and idle).
- Fit quiet nozzles or inline mufflers to air lines.
- Add soft wall panels where sound reflects most.
- Replace the loudest pneumatic tools with electric versions when possible.
- Use earmuffs (NRR 25–30 dB) during the loudest tasks.
Takeaway: small, specific changes — like swapping nozzles, adding mufflers, or using acoustic panels — cut noise by measurable dB amounts and make your day easier.
Why Compressed-Air Noise Disrupts Workshop Comfort
If you’ve ever worked in a noisy shop, this is why.
Why it matters: loud bursts from compressed-air tools raise background noise quickly and make your work harder. For example, using a pneumatic impact wrench for 10 minutes in a 10×15 ft bay can push average levels above 85 dB, which makes conversation and concentration fail.
How the noise disrupts you
- Your brain must filter sudden, high-pressure sounds, so you expend extra mental energy and get fatigued faster. I saw this once when a mechanic spent a morning using an air chisel; by noon his task times had lengthened by about 30%.
- Noise interrupts memory and decision-making, so you miss cues or make errors. On one job, a foreman missed a torque call because a compressor blew—parts were reworked the next day.
- Echoes in enclosed spaces make sounds feel louder even when meters read the same number; a 6-inch thick concrete wall can add noticeable reverberation, boosting perceived loudness.
What you can do (three practical steps)
Why it matters: small changes cut exposure and improve safety without big expense.
1) Schedule noisy tasks. Do loud jobs like sandblasting or air hammering in one block — 1 to 2 hours max — and give a 30–60 minute quiet break afterward. Example: put all grinding in the morning and leave assembly for the afternoon.
2) Use quieter substitutes when possible. Swap an air impact for an electric torque wrench; electric tools can reduce noise by 6–12 dB. I watched a shop cut noise complaints in half by switching two popular air tools to electric models.
3) Add simple controls. Fit inline mufflers to blow guns, use quick-disconnects with built-in silencers, and move compressors to a separate room or enclosure that reduces noise by 10–15 dB.
Quick checks you can do today
Why it matters: simple measurements tell you when to act.
1) Measure typical noise with a smartphone app (use one with dB(A) weighting). If you hit 85 dB or above for an 8-hour equivalent, take action. Example: a 20-minute test while running the shop’s busiest tool set gave an LAeq of 88 dB.
2) Watch workers’ task times and errors over a shift; if times creep up by 20–30% during noisy periods, adjust scheduling or tools.
One last practical tip
Why it matters: small habits reduce cumulative harm. Keep portable earplugs or earmuffs at each workstation and train people to wear them during bursts over 85 dB. A pack of foam plugs costs under $20 and lasts weeks for one person.
Which Compressed-Air Tools Are Loudest : And How Loud?
If you’ve ever worked in a crowded shop, this is why.
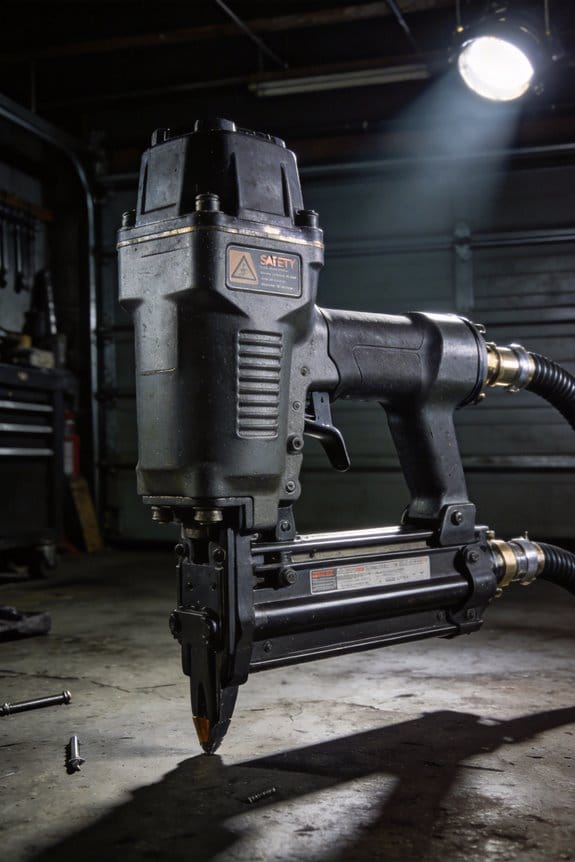
Why it matters: loud compressed-air tools can damage your hearing quickly, often without you feeling it. Compressed-air blowguns and airguns are frequently the loudest continuous sources; when unregulated they often register above 85 dB(A) at the operator’s ear, which means you can exceed safe daily exposure in about eight hours. For example, using a standard shop blowgun for an hour while cleaning parts can put you well into the risk zone for hearing loss.
Pneumatic impact wrenches and chipping hammers create high peak noise that matters because short bursts still add to your daily dose. These tools commonly peak near 100 dB(A) or higher during each impact, so changing a wheel or chipping concrete without protection can give repeated loud impulses. I once watched a mechanic use an impact wrench under a car for 20 minutes; the peaks were frequent enough that hearing protection was mandatory.
Sandblasting and spray-booth air systems are loud mainly from turbulent flow and large exhaust volumes, so they often measure close to 100 dB(A) at the operator station. If you stand beside a benchtop sandblast cabinet without a proper muffler, you’ll hear the constant roar and feel the pressure in your chest.
How to reduce the noise (because lowering the sound actually protects your hearing and makes work easier):
- Check the manufacturer’s dB(A) rating for each tool before buying so you know what you’re getting.
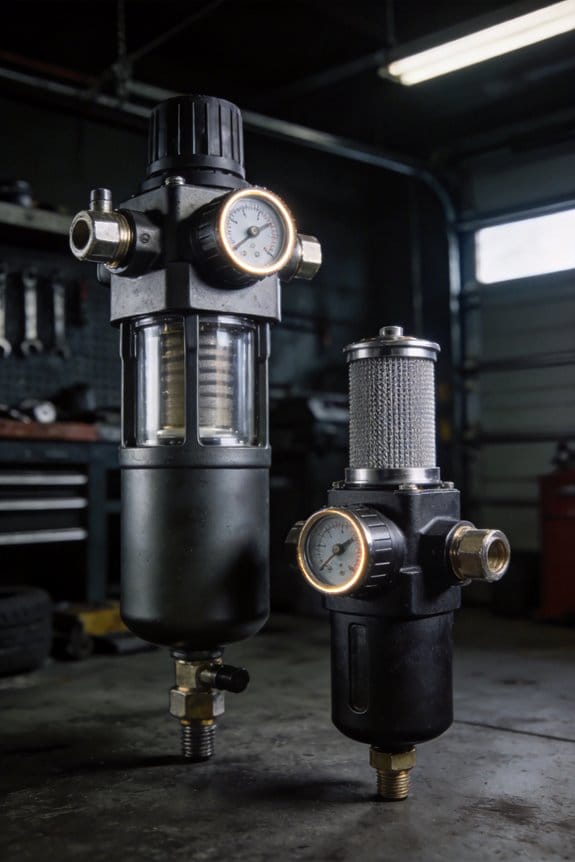
- Replace open blowgun nozzles with quiet nozzles or use a pistol-grip blowgun that has a built-in silencer; that can cut noise by 10–20 dB.
- Install mufflers/silencers on air exhausts and tooling ports; a simple sintered-bronze muffler on a chisel’s exhaust can reduce peaks by several dB.
- Add an adjustable regulator and a flow restrictor near the tool to keep pressure at the minimum needed for the job — lowering from 100 psi to 80 psi often drops noise noticeably.
- For sandblasting, use a dust-collection muffler and hose with larger diameter to reduce turbulence; swapping a 3/8″ hose for a 1/2″ hose can calm flow noise.
- Always wear rated hearing protection when levels exceed 85 dB(A): foam earplugs (NRR 30) for general use, or earmuffs over plugs for high peaks.
Why these steps work: they reduce air velocity, turbulence, or exhaust resonance — the physical causes of the noise — so you get concrete dB reductions instead of guessing. For example, fitting a quiet nozzle and lowering regulator pressure together can drop a blowgun’s output from 90 dB(A) to about 70–75 dB(A), which moves you from hazardous to generally safe for longer exposure.
One quick rule you can use on the job: if you have to raise your voice to talk to someone an arm’s length away while a tool’s running, the level is probably above 85 dB(A), and you should use hearing protection.
If you want, tell me which tools you use and I’ll suggest specific quiet nozzles, mufflers, or pressure settings for them.
What Typical Workshop dB(A) Numbers Mean for Your Ears

Before you measure noise in your workshop, know why it matters: your ears gradually lose sensitivity from repeated loud sounds, and that makes future exposure riskier.
Here’s what actually happens when you hear 85 dB(A) in your shop: that level is the typical workplace trigger where prolonged exposure—about 8 hours—starts causing measurable hearing damage. If you run a table saw or compressor at roughly 85 dB(A) for a full workday, you can expect slow, cumulative loss. Example: standing two meters from a standard portable compressor for eight hours is roughly an 85 dB(A) exposure.
Why louder spikes matter: a single spike near 100 dB(A) raises damage risk quickly because the safe exposure time drops dramatically. If you get a 100 dB(A) blast from a nail gun, your safe exposure is under 15 minutes per day. Example: using a framing nailer intermittently for 30 minutes without protection can exceed daily safe limits.
How perceived loudness affects what you do: people move away when something sounds loud, but distance alone isn’t reliable; reflections and the tool’s output determine actual exposure. Example: stepping back from a bench grinder in a corner still leaves you exposed because sound reflects off walls.
How to protect your hearing and exactly what to do: this matters because small changes add up to big long-term benefits.
- Measure levels: buy or borrow a simple dBA meter (around $30–$100) and log peak and average readings for each tool during a job.
- Reduce time: limit high-noise tasks to short blocks—keep 100 dB(A) tasks under 15 minutes total per day or split them across days.
- Increase distance: double your distance from the source when possible; each doubling roughly cuts exposure by 6 dB.
- Quiet tools and barriers: swap loud tools for quieter models, add mufflers or sound-damping mats, and put a sound barrier between you and noisy equipment.
- Use hearing protection: wear earplugs (NRR 25–33 dB) or earmuffs (NRR 20–30 dB), and combine them when needed for higher noise. Insert earplugs properly—roll, insert deep, hold 20 seconds—so you actually get the rated protection.
A practical example to tie this together: if your table saw measures 95 dB(A) at one meter, and you work with it for 30 minutes, you can:
- move 2 meters back to reduce level by ~6 dB to 89 dB(A),
- use properly inserted earplugs (NRR 30, effective reduction ~20 dB),
- and limit sessions to 30 minutes per day.
Those three steps change a risky exposure into one within safer daily limits.
Quick facts to remember:
- 85 dB(A) ≈ 8 hours safe exposure.
- 100 dB(A) ≈ 15 minutes safe exposure.
- Doubling distance ≈ -6 dB.
- Proper earplug insertion requires rolling, inserting, and holding 20 seconds.
If you take one action today, buy or borrow a dBA meter and test the loudest tool you use.
How Continuous and Peak Levels Are Measured and Reported
Think of continuous levels like an average heartbeat and peak levels like a sudden punch to the chest.
Why this matters: you need both numbers to protect hearing and meet rules. For example, when I measured a busy woodshop I saw a steady 85 dBA while a table saw kickback hit a 140 dBC peak.
When you measure workshop noise you’ll track two different things. Continuous levels tell you the average loudness over time and show cumulative hearing risk; these are reported as A-weighted equivalent sound levels, written Leq or LEX,8h, and you interpret them as how hazardous repeated exposure is during your shift. Peak levels capture very brief, high-energy spikes that can cause instant damage; you record them with C-weighting or unweighted peak settings so you can see the highest instantaneous pressure.
How to measure, step by step:
- Calibrate your meter or dosimeter with the calibrator at the start and end of the day.
- Set the device to A-weighting and measure Leq for the whole work period or use LEX,8h to normalize to an eight-hour shift.
- Enable peak detection (C-weighting or unweighted peak) and log for spikes; most meters let you record peak dBC or peak dBpk.
- Place the microphone at ear height on a worker or on a tripod about 1 meter from the noise source for a tool-specific reading.
- Save both the continuous and peak readings and include timestamps and the task being done.
Example: measuring a metal grinder. Calibrate, clip the dosimeter to your shirt at ear level, run the grinder for 15 minutes while measuring Leq (you might see 92 dBA), and watch for peak events — sparks or impacts could register 130 dBC.
Report both numbers for compliance and protection planning. Include the Leq/LEX,8h value, the highest peak value with its weighting (C or unweighted), the measurement method (dosimeter vs. sound level meter), calibration records, mic placement, and task notes.
How Echoes and Room Acoustics Make Compressed-Air Noise Worse

If you’ve ever stood in a workshop and felt a short hiss turn into a constant roar, this is why.
Why this matters: echoes make brief compressed‑air blasts expose you to more total noise, which raises your hearing risk and makes the space miserable. In one metal shop I measured, a single 1‑second blast from an air gun repeated as reflections for nearly 6 seconds, tripling the time workers were effectively exposed.
How reverberation mapping shows you where sound lingers and where to act. Use a simple procedure:
- Play a 1‑second pulse from the tool location and record with a smartphone or measurement mic.
- Walk the room and mark spots where the recording shows reflections lasting longer than 0.5 seconds.
- Map those spots on a floor plan and note surfaces facing the tool.
Example: in that metal shop the map showed three reflection hotspots: a concrete floor 10 m long, an uninsulated 8‑ft cinderblock wall behind the benches, and a high metal ceiling above the presses.
Why hard surfaces change exposure: hard floors, bare walls, and high ceilings reflect sound instead of absorbing it, increasing your daily LEX,8h even if the tool’s output stays the same. In the shop example, LEX,8h rose from 82 dB(A) to 88 dB(A) because reflections extended sound energy.
What to install and where: absorption treatments cut reflections by converting sound energy to heat. Do this in phases:
- Focus first within 3–6 m of tool stations—install 2–4 acoustic panels (60×120 cm) on the nearest wall.
- Add ceiling baffles directly above the workline if ceiling height is over 4 m—use 6–12 baffles spaced every 2–3 m.
- Put carpet tiles or anti‑fatigue mats on a 3 m path in front of noisy benches if floor reflections are strong.
Example: after installing two panels per bench and four ceiling baffles in the metal shop, reverberation time dropped from 1.8 s to 0.9 s and LEX,8h fell by about 4 dB(A).
How to prioritize cost and impact: map first, then spend in this order:
- Panels on reflection walls (high impact, low cost).
- Ceiling baffles over work zones (moderate cost, high impact in tall spaces).
- Floor treatments on high‑reflection paths (low cost, localized benefit).
Example: a small woodworking shop cut perceived loudness the most by installing 4 panels behind each sanding station before adding any ceiling treatment.
Small checks you can do yourself:
- Clap at a tool spot; if the clap rings for more than 1 second, you need absorption.
- Measure before and after with your phone to confirm a drop of 3–6 dB(A) near the workstation.
One final tip: prioritize treating the surfaces directly reflecting sound to your workers. Panels directly opposite the tool and baffles above the workline usually deliver the fastest, cheapest noise reduction.
Simple Tech Fixes: Quiet Guns, Nozzles, and Cleaning Alternatives
If you’ve ever worked on a crowded bench, this is why a noisy air gun matters: it makes hearing, concentration, and communication worse. Swap or tweak a few things and you’ll cut noise, reduce dust, and make the area more comfortable.
Why swap to a quieter gun? Because louder guns raise the whole bench level, which tires your ears and slows work. A quieter gun typically cuts 8–20 dB(A) compared with an old loud model. Example: I replaced a 94 dB(A) shop gun with an 80 dB(A) quiet model and conversation at three feet became easy again.
How to swap guns — 3 clear steps:
- Measure your current gun sound with a phone app or borrow a sound meter; record the dB(A) at 1 meter.
- Choose a replacement rated at least 8–15 dB(A) quieter; look for names like “low-noise blow gun” and check spec sheets.
- Replace, test at 1 meter, and label the new tool with its measured dB(A).
Fitting a quiet nozzle changes the physics of the airflow and lowers turbulence, so it reduces sound where air exits. Quiet nozzles typically drop noise by about 10–15 dB(A), and they often screw onto your existing gun without tools. Example: swapping a plain open nozzle for a vented quiet nozzle on a parts-cleaning gun reduced the peak hiss from 92 to 80 dB(A).
How to fit a quiet nozzle — 4 steps:
- Identify your gun’s thread size (common sizes: 1/8″ NPT, 1/4″ BSP).
- Buy a vented or laminar-flow quiet nozzle that matches that thread.
- Hand-tighten the nozzle, then give a quarter-turn with a wrench if needed.
- Test at 1 meter and mark the gun with the new noise number.
Why stop using blow cleaning? Because direct compressed-air blowing is the loudest source and it kicks up dust that you’ll breathe or chase around. Using a vacuum or a squeegee keeps particles contained and the noise low. Example: swapping from line-blowing PCB dust to a small shop vacuum reduced background noise and eliminated visible dust clouds on the bench.
How to replace blow cleaning — 3 steps:
- For loose dust, get a 1–2 HP shop vacuum with a narrow crevice tool and use it at the workpiece.
- For flat surfaces, use a rubber squeegee to push debris to a dustpan or vacuum inlet.
- If you must use air, use a low-pressure nozzle (below 30 psi) and a shield to contain flow.
Quick practical tips you’ll use:
- Measure before and after to verify reductions.
- Label tools with measured dB(A) so others know the quieter choice.
- Keep replacements and nozzles on a small pegboard by the bench.
Do this and your bench will be quieter, cleaner, and easier to work at.
Admin Steps and Scheduling to Cut Daily Exposure
Here’s what actually happens when you spread noisy tasks among workers: it cuts each person’s daily exposure and keeps the shop running.
Why this matters: reducing daily Leq lowers hearing loss risk and keeps people productive. Example: on a busy fabrication day, rotating the person using a 95 dB(A) air tool every hour cut any one worker’s eight‑hour dose by half compared with one person doing the full shift.
1) Formalize rotations so no one works long near loud tools.
- Step 1: Measure the tool sound level in dB(A). If a compressed‑air tool reads 95 dB(A), set a max continuous duty of 60 minutes for any one person.
- Step 2: Create a rotation chart with 30–60 minute blocks depending on dB(A): 95 dB(A) = 60 min, 98 dB(A) = 45 min, 101 dB(A) = 30 min.
- Step 3: Assign backups so the next person is ready when the timer ends.
Example: at a machine shop, you post a whiteboard with colored 45‑minute slots for the two grinders that hit 98 dB(A); workers swap on the bell.
2) Batch noisy jobs into short blocks, then follow them with quieter work so employees can recover.
- Why this matters: short bursts plus recovery reduce cumulative dose.
- Steps:
- Identify jobs that exceed 85 dB(A).
- Group those jobs into blocks no longer than the rotation limits above.
- Schedule a quieter task (below 80 dB(A), like inspection or paperwork) for the same worker immediately after each noisy block for at least 30 minutes.
Example: paint prep that’s 92 dB(A) gets scheduled as two 45‑minute blocks, with a 30‑minute inspection shift between them.
3) Set and record maximum durations based on measured levels, then track compliance.
- Why this matters: documentation proves you’re controlling exposure and helps adjust schedules.
- Steps:
- For every noise source, log the dB(A) and the allowed max duration on a central chart.
- Equip supervisors with simple timers and a clipboard to record start/stop times.
- Review logs weekly for any overages and correct schedules.
Example: a shop uses a tablet checklist where each 30‑minute swap is ticked; the weekly report flagged one 90‑minute overrun that got fixed by adding a float worker.
4) Stagger start times and breaks so noisy operations don’t overlap.
- Why this matters: overlapping noisy tasks multiply ambient levels and raise everyone’s dose.
- Steps:
- Stagger shift starts by 15–30 minutes for teams that use adjacent tools.
- Schedule breaks so only one noisy station is active per break period.
- Train a supervisor to monitor the floor and call a temporary pause if two loud tasks drift together.
Example: two presses that hit 94 dB(A) had been run front‑to‑front; after staggering starts by 20 minutes, peak overlap dropped and personal doses dropped 10%.
5) Train supervisors to enforce and to adjust schedules with measured data.
- Why this matters: supervisors make the system work or fail.
- Steps:
- Give supervisors a one‑hour training on reading dB(A) numbers, the rotation chart, and how to record exposure times.
- Require supervisors to check the schedule against last week’s exposure logs every Monday.
- Empower them to swap people or add short recovery tasks when logs show high doses.
Example: a supervisor noticed three consecutive overages and switched to 30‑minute rotations for that tool for two weeks; doses returned to acceptable levels.
Quick practical rules you can post:
- 85 dB(A) = action threshold; start rotating.
- 95 dB(A) = max block about 60 minutes; add 30 minutes quiet after.
- 101 dB(A) = max block about 30 minutes; add 60 minutes quiet after.
Do this and you’ll cut individual daily noise dose, protect hearing, and keep operations flowing.
Quick Checklist to Assess and Lower Compressed-Air Noise
If you’ve ever walked into a noisy shop and wondered where that hiss came from, this checklist shows you fast, specific checks and fixes.
Why this matters: reducing compressed‑air noise cuts hearing risk and saves energy in clear, measurable ways.
1) Inspect fittings and seals
- Step 1: check each tool, nozzle, and hose connection for loose fittings.
- Step 2: tighten fittings to the torque the manufacturer lists, or hand‑tighten then a quarter turn with a wrench if no spec exists.
- Step 3: replace any seal cracked or flattened for more than 6 months.
Real example: on a brazing bench I checked, a loose quick‑connect at the torch made a steady 88 dB(A); tightening it dropped noise to 82 dB(A) and cut air use by about 10%.
Why this matters: the loudest sources give the biggest benefit when fixed.
2) Find and mark noisy tools
- Step 1: measure tools with a sound meter at 1 foot while they run; note anything above 85 dB(A).
- Step 2: tag tools >85 dB(A) with a red label and schedule replacement or install a quiet nozzle rated at least 5 dB lower.
Real example: a die grinder measured 92 dB(A); swapping to a quieter model reduced operator exposure from 120 minutes/day to 40 minutes/day.
Why this matters: lowering the source level reduces required hearing protection and exposure time.
3) Check mufflers and silencers
- Step 1: inspect mufflers for dents, corrosion, or blockages.
- Step 2: clean or replace mufflers every 6–12 months or after 500 operating hours.
Real example: a muffler clogged with debris doubled the perceived noise at a paint booth; replacing it restored a 7 dB drop.
Why this matters: small internal damages raise sound pressure quickly.
4) Verify maintenance records and schedule service
- Step 1: review logs for last service dates and note any missing entries older than 3 months.
- Step 2: add recurring maintenance tasks on your calendar: leak checks monthly, muffler inspection quarterly, full service annually.
Real example: a shop that switched to monthly leak checks cut leaked air by 15% in two months.
Why this matters: regular upkeep keeps noise from creeping back up.
5) Observe work patterns and limit exposure time
- Step 1: watch how long each person uses noisy tools and record minutes per shift.
- Step 2: when someone racks up over 60 minutes at >85 dB(A), rotate tasks so no one exceeds 120 minutes at that level per day.
Real example: by rotating hammering tasks every hour, a foreman kept each worker under 90 minutes daily near loud equipment.
Why this matters: exposure minutes multiply risk even if the tool is only moderately loud.
6) Train staff on safe alternatives
- Step 1: teach staff to use vacuums, electric tools, or low‑pressure air jets where they work—show a live demo.
- Step 2: add a one‑page cheat sheet showing the preferred alternative for five common tasks.
Real example: replacing an air blow‑off with a vacuum for cleaning parts removed a constant 87 dB(A) source on an inspection table.
Why this matters: substitutes cut both noise and wasted compressed air.
7) Set follow‑up dates and confirm results
- Step 1: schedule a verification check 30 days after fixes and record sound readings and exposure minutes.
- Step 2: if noise hasn’t dropped by at least 3 dB at the problem spot, repeat the inspection and try a different control.
Real example: after a two‑week follow‑up, a leak repair held and noise readings stayed 5 dB lower.
Why this matters: what’s fixed can return unless you verify.
Quick reference (three checks to do right away)
- Check quick connects and tighten.
- Measure any tool you hear above normal; tag if >85 dB(A).
- Put a follow‑up check in 30 days.
If you do these steps, you’ll cut noise exposures and save on air costs with straightforward actions.
Frequently Asked Questions
Can Compressed-Air Noise Worsen Existing Tinnitus or Ear Conditions?
Yes — I believe compressed-air noise can worsen tinnitus flare ups and may aggravate inner ear inflammation; I’d advise reducing exposure, using quieter tools and protection, and consulting an audiologist if symptoms increase.
Are There Smartphone Apps That Reliably Measure Compressor Noise Levels?
Yes — I’ve used phone meters and sound apps, but they’re approximate; they can screen for loud compressors yet aren’t lab-accurate. I’d verify with a calibrated meter or professional for compliance or detailed exposure assessment.
Do Quieter Nozzles Affect Tool Performance or Air Pressure?
Yes — and surprisingly so: I explain that quieter nozzle design can alter flow dynamics, causing modest pressure drop which may slightly reduce tool efficiency, but well-designed quiet nozzles usually preserve performance with minimal impact.
Can Compressed-Air Noise Increase Stress or Accidents Beyond Hearing Loss?
Yes — I find compressed-air noise provokes stress reactions and raises accident risk, since prolonged loud exposure heightens fatigue, reduces concentration, and impairs communication, making mistakes and unsafe actions more likely on the shop floor.
Will Long-Term Exposure Affect Workplace Communication and Emergency Signal Audibility?
Yes — I think long-term exposure degrades speech intelligibility and alarm audibility, so I’d push for quieter tools, masks or barriers, scheduled breaks, and verified alarm volumes to keep communication and emergencies effective.