I skipped drain cycles on my air compressor for weeks, thinking it wasn’t a big deal. The moisture built up inside the tank, causing rust that weakened the metal walls.
Most people think draining is optional maintenance, but that’s where they’re wrong. This article shows you exactly how to establish a drain routine that prevents corrosion, maintains air quality, and extends your compressor’s lifespan by years.
You’ll learn the simple schedule that keeps your equipment running smoothly and your compressed air clean. It’s easier than you think to protect your investment.
Key Takeaways
Replace filters when you notice any pressure drop or moisture. Regular draining routines save you money, protect your equipment, and ensure your work meets professional standards. The few minutes you spend each week prevent hours of troubleshooting and expensive repairs later.
Why Your Air Compressor Tank Fills With Water
warm, moist air from your garage or workshop gets sucked in and compressed. As the air heats up during compression, it can hold more water vapor. But when that hot compressed air hits the cooler tank walls, it cools down fast. And when warm air cools, water vapor turns back into liquid – right inside your tank.
Most people think a little water isn’t a big deal. Here’s the better way to look at it: that water is eating away at your tank from the inside. The rust it causes can weaken the metal until your tank becomes dangerous. Plus, that water gets pushed through your air lines, where it ruins paint jobs, kills pneumatic tools, and causes endless headaches.
The key to understanding this mess is humidity. Think of your compressor like a cold glass of lemonade on a summer day. When you pull that glass out of the fridge, water droplets form on the outside. Your tank does the same thing, just on the inside. In a humid Florida garage, you might collect a cup of water in a single day. In a dry Arizona workshop, you might get just a tablespoon.
If you’ve ever drained your tank and been shocked by how much water came out, this is why. That water isn’t from a leak – it’s from the air you’re compressing. Here’s what’s really happening:
Step 1: Moist air enters – Your compressor pulls in air at about 21% oxygen and 78% nitrogen, plus whatever water vapor is in your shop.
Step 2: Compression heats things up – The air gets squeezed, and temperatures can hit 200°F or higher. Hot air holds more moisture.
Step 3: Cooling creates condensation – When that hot air hits your tank walls (which might be 80°F), water vapor condenses into liquid.
Step 4: Water pools at the bottom – Since water is heavier than air, it sinks to the lowest point in your tank.
Think of your tank like a dehumidifier that’s always running. The only difference is you’re paying for the electricity to create that water, not remove it.
The rust problem gets worse over time. Once water starts corroding the tank bottom, it creates rough surfaces that hold even more water. It’s a vicious cycle – more rust means more places for water to hide, which means more rust.
The volume of water might surprise you. A 20-gallon tank running for an hour in humid conditions can collect 8-16 ounces of water. That’s a whole can of soda worth of water sloshing around in your air tank.
This isn’t just about keeping your tank dry. That water in your air lines can cause fish-eyes in paint, freeze in winter lines, or wash away the lubricant in your air tools. The damage spreads far beyond your compressor.
What you do with this water matters more than you might think. Draining it onto your shop floor creates a slip hazard and just puts the water back into the air. The smart move is to drain it into a container and dispose of it properly.
How Water Destroys Your Air Compressor From Inside
Here’s what actually happens when water builds up in your tank…
Water inside your air compressor tank is like a silent predator, slowly eating away at your equipment from the inside out. Internal oxidation occurs when moisture reacts with metal surfaces, creating rust that weakens tank walls and components. This process accelerates in humid environments where condensation builds up daily. Crevice corrosion, a particularly destructive form, develops in small spaces where water collects and becomes trapped, attacking vulnerable areas like valve seats and fitting threads. As rust forms, it flakes off and mixes with your compressed air, creating abrasive particles that damage downstream equipment. The protective coating on your tank deteriorates, exposing bare metal to further corrosion. Over time, this leads to pitting, pinhole leaks, and potentially catastrophic tank failure. Even with proper filtration, contaminated air from a rusty tank compromises tool performance and shortens equipment lifespan.
Most people ignore the water drain valve until something breaks. Here’s the better way.
Step 1: Drain your tank daily. Open the drain valve at the bottom of your tank after each use. You’ll see water mixed with oil and debris come out — this is exactly what you want to remove. Let it drain completely for 2-3 minutes until only clean air escapes. Step 2: Install an automatic drain if you forget often. These devices open at set intervals to remove moisture without you remembering. They cost $50-100 but save thousands in repairs. Step 3: Check for rust regularly. Shine a flashlight inside through the fill port if accessible, or look for rust-colored water when draining. If you see flakes or discoloration, your tank is already corroding. Step 4: Use a refrigerated air dryer for heavy use. These units cool compressed air to condense moisture before it enters your tank, removing up to 95% of water vapor.
If you’ve ever found your tools sputtering or your spray gun spitting water, this is why.
Water in compressed air causes immediate problems. Your impact wrench loses torque when moisture dilutes the lubricating oil inside. Paint jobs develop fish-eye defects from water droplets hitting wet paint. Sandblasters clog when rust particles mix with abrasive media. Even simple tasks suffer — airbrushes spit, nail guns misfire, and tire inflators take longer to reach pressure. The moisture also freezes in cold weather, blocking air lines completely. Your compressor works harder to maintain pressure, burning more electricity and wearing out faster. Tools that should last 5 years fail in 2. Every drop of water in your system costs you time, money, and quality.
Think of moisture control like changing your car’s oil — neglect it and everything breaks down faster.
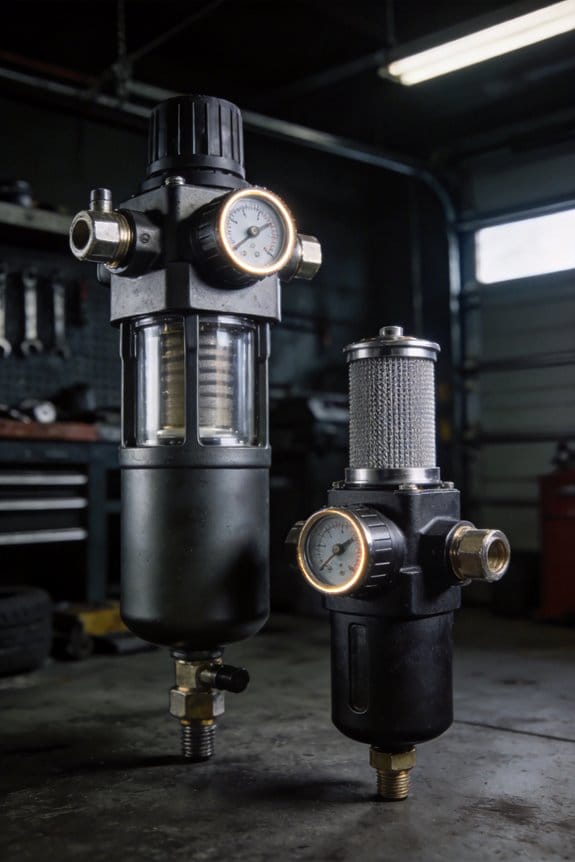
The key to preventing water damage is simpler than it sounds. Start with your compressor location. Keep it in a dry, temperature-controlled area if possible. Temperature swings cause more condensation than constant humidity. Next, size your aftercooler correctly. A unit too small for your compressor just moves the problem downstream. Install moisture separators before filters — they catch bulk water that would otherwise saturate your filters. Replace filter elements on schedule, not when they clog. A saturated filter actually releases water back into your air stream. Finally, test your dew point if you’re doing critical work. Many shops run at 50°F dew point when they need -40°F for spraying automotive finishes. The difference in equipment costs $500 versus $5,000, but the results speak for themselves.
Here’s what actually happens when you skip moisture maintenance…
Your first warning is usually reduced tool performance. Then comes the rust smell when you drain the tank. Soon after, you’ll hear gurgling in air lines — that’s water sloshing around. Pressure drops become frequent as rust clogs valves and fittings. One day, you’ll find a puddle under your compressor — that’s a pinhole leak forming. Ignore it and the tank can rupture under pressure, sending metal fragments flying. Insurance often won’t cover “preventable mechanical failure,” leaving you responsible for property damage or injuries. The cost isn’t just the compressor — it’s ruined work, emergency repairs, and potential liability. A $200 maintenance schedule beats a $3,000 replacement and weeks of downtime every time.
Step 5: Test your air quality monthly. Use a simple water trap with a sight glass to see what’s in your air. If you see water accumulating, your system is failing somewhere. For critical applications, send a sample to a lab for analysis — they’ll measure water content, oil carryover, and particle contamination. This costs $100-200 but reveals problems before they ruin expensive work. Step 6: Keep a maintenance log. Note when you drained the tank, replaced filters, and checked for rust. Patterns emerge — maybe your tank fills with water faster in July, or a particular filter clogs every 60 days. These insights prevent emergencies. Step 7: Train everyone who uses the equipment. One person skipping draining can undo months of careful maintenance. Post simple instructions near the compressor: “Drain daily. Report problems immediately.”
Most people wait until something breaks. Here’s the better way.
The cost of prevention is always lower than the cost of repair. A complete moisture management system — automatic drain, aftercooler, filters, and regular testing — runs $1,000-3,000 depending on your compressor size. Compare that to a new compressor ($2,000-10,000), ruined projects, and weeks of downtime. The math is simple: spend a little now or a lot later. Your tools work better, your finishes look professional, and you sleep better knowing your equipment won’t fail during a critical job. Water might be invisible in your compressed air, but its effects aren’t. Control it, and you control your productivity.
What Happens When You Skip Drain Cycles
Here’s what actually happens when you skip drain cycles. Water builds up in the tank. Rust forms quickly. That rust flakes off. It travels through your air lines. Your tools get contaminated. Your compressor works harder. You hear more noise. Something’s wrong. Moisture reaches downstream equipment. Performance becomes inconsistent. Sensitive components get damaged. Contaminated air affects operator health. Particles get inhaled. What starts as a simple oversight leads to reduced efficiency. Equipment can fail. Air quality suffers. Everything connected to your system gets compromised.
How Often Should You Drain Your Air Compressor?
moisture builds up and creates rust from the inside out. Your tank fills with water that contaminates tools, damages paint jobs, and can freeze in cold weather. The key to preventing this damage is establishing a draining routine that matches your actual usage.
Most people wait until they see water spraying from their tools. Here’s the better way: drain your tank daily as a habit, not as a reaction.
If you’ve ever had a tool sputter or your paint job come out blotchy, this is why. Water in your compressed air lines ruins finishes and damages equipment. Step 1: Locate the drain valve at the bottom of your tank. Step 2: Place a container underneath to catch the water. Step 3: Open the valve fully and let all water drain out. Step 4: Close the valve tightly.
Think of your drain valve like a sink drain. You wouldn’t let water sit in your sink for days, so don’t let it sit in your compressor tank.
The frequency depends on your specific situation. Heavy daily use in humid summer conditions means you’ll see water accumulation within hours. Light weekend use in dry winter air might mean weekly draining is enough. Track how much water comes out each time you drain. If you’re getting a cup or more daily, stick with daily draining. If it’s just a few tablespoons, you might stretch to every other day.
Here’s a concrete example: A carpenter working in Georgia during July might drain 16 ounces of water from a 20-gallon tank every single day. That same carpenter in Arizona during January might only get 2 ounces per week.
Some compressors come with automatic drains. These are great, but they’re not set-and-forget devices. Check them monthly to make sure they’re working. A stuck automatic drain can empty your tank completely, leaving you with no compressed air when you need it.
Your compressor manual gives specific recommendations for your model. When in doubt, drain more often rather than less. The few seconds it takes to drain your tank beats the cost of replacing rusted tanks or damaged tools.
Daily draining prevents internal rust that can cause tank failure. Rusty tanks can rupture under pressure, creating a serious safety hazard. This simple habit protects your investment and keeps your tools working properly.
Summary: Daily draining is the safest approach, but adjust based on your actual water accumulation.
Automatic Drains: Are They Worth the Investment?
Here’s what actually happens when you skip daily draining. Water builds up in your air compressor tank, creating the perfect environment for rust and corrosion. That moisture eventually mixes with your compressed air, damaging tools and causing paint jobs to fail. Automatic drains solve this by removing water automatically.
Most people think automatic drains are just a luxury. Here’s the better way to see them: they’re insurance against expensive repairs. Basic timer drains start around $50, while sophisticated electronic models can reach $300 or more. The upfront investment often pays for itself through reduced maintenance frequency and extended equipment life.
If you’ve ever forgotten to drain your tank and heard that awful knocking sound, this is why automatic drains matter. Manual draining requires consistent attention, typically daily for heavy users. Automatic systems eliminate this chore entirely. Electronic drains sense moisture levels and activate only when needed, preventing unnecessary air loss. Some models use compressed air to blow out moisture without releasing stored air, saving energy.
The key to moisture management is simpler than it sounds. For most users, automatic drains prove worthwhile. They protect against corrosion, maintain air quality, and reduce long-term maintenance needs. The convenience factor alone makes them valuable for busy workshops where forgetting to drain could mean costly repairs.
Think of automatic drains like a smoke detector for your compressor. You hope you never need it, but when water starts accumulating, you’ll be glad it’s there. Step 1: Choose your drain type based on your usage. Step 2: Install it according to manufacturer instructions. Step 3: Test the system before relying on it completely.
Here’s what actually happens when you install an automatic drain. You’ll notice fewer pressure drops, cleaner air output, and tools that last longer. The system works quietly in the background, only activating when moisture levels reach a certain threshold. Many electronic models let you adjust sensitivity settings based on your specific environment.
Most people underestimate how much moisture their compressor produces. Here’s the better way to calculate it: track your daily usage hours and multiply by the moisture generation rate for your climate. Hot, humid areas produce significantly more water than dry climates. Automatic drains adapt to these conditions automatically, while manual draining requires you to guess.
If you’ve ever had a tool fail unexpectedly, this might be why. Water in compressed air causes internal rust, seals to deteriorate, and moving parts to seize. Automatic drains remove this threat entirely. They work 24/7, even when you’re not thinking about your compressor. That’s peace of mind worth paying for.
The key to choosing the right drain is understanding your specific needs. Timer-based systems work well for predictable usage patterns. Electronic sensors excel in variable conditions. Zero-loss drains save the most energy but cost more upfront. Consider your budget, usage frequency, and local humidity when making your choice.
Think of your compressor system like your car’s oil change schedule. You can do it manually on time every time, or you can let a smart system handle it for you. Automatic drains are that smart system, monitoring conditions and taking action before problems develop. The initial cost becomes trivial compared to avoiding just one major repair.
Automatic drains remove water automatically, so you don’t have to remember daily draining. Installation costs vary widely – basic timer drains start around $50, while sophisticated electronic models can reach $300 or more. The upfront investment often pays for itself through reduced maintenance frequency and extended equipment life.
Manual draining requires consistent attention, typically daily for heavy users. Automatic systems eliminate this chore entirely. Electronic drains sense moisture levels and activate only when needed, preventing unnecessary air loss. Some models use compressed air to blow out moisture without releasing stored air, saving energy.
For most users, automatic drains prove worthwhile. They protect against corrosion, maintain air quality, and reduce long-term maintenance needs. The convenience factor alone makes them valuable for busy workshops where forgetting to drain could mean costly repairs.
Manual Draining: Step-by-Step Guide and 3 Common Errors
Manual draining offers a cost-effective alternative to automatic systems, though it requires consistent attention to prevent moisture-related damage. Before starting, complete a safety checklist: release tank pressure, wear protective gloves, and position yourself for clear access. Open the drain valve slowly to avoid sudden air bursts, allowing water to flow into a collection container. Drain until only air escapes, then close the valve firmly. Common errors include forgetting scheduled draining, which lets moisture accumulate and causes corrosion; leaving the valve partially open, which wastes compressed air and reduces efficiency; and neglecting accessibility improvements like valve extensions, making the task difficult and discouraging regular maintenance. Establish a routine tied to daily operations, and consider marking the valve with bright tape for visibility. Consistent manual draining protects your compressor’s lifespan and maintains air quality, even without automatic systems.
Here’s what actually happens when you skip draining your air compressor. Water builds up inside the tank, mixing with oil and creating sludge that corrodes metal from the inside out. One manufacturing plant found rust holes in their compressor tank after just six months of missed drainings. That’s why regular draining isn’t optional—it’s maintenance that prevents expensive replacements.
Most people think manual draining takes too much time. Here’s the better way. Set a phone reminder for the same time each day, like right after your morning coffee. Two minutes of draining saves you thousands in potential repairs. Keep a small bucket nearby so you’re not hunting for a container when it’s time to drain.
The key to proper draining is understanding your compressor’s pressure system. Never open the valve when the tank is fully pressurized—that’s how people get injured. Release air through the safety valve first, then wait 30 seconds before opening the drain. This simple pause prevents sudden bursts of compressed air and water that could spray debris.
If you’ve ever struggled with a stiff drain valve, this is why accessibility matters. Valves located in awkward spots get ignored. Install a 6-inch extension on your drain valve so you can reach it without contorting your arm. Some users add a small chain to the valve handle, making it easier to grip with work gloves on.
Step 1: Release pressure — here’s how to do it right. Locate the pressure relief valve near the top of your compressor. Pull the ring firmly until you hear air escaping. Wait until the hissing stops completely before proceeding. This step alone prevents most draining-related injuries.
Step 2: Position your collection container. Place a sturdy bucket directly under the drain valve. Make sure it’s large enough to hold all the water—a typical 20-gallon tank produces about 2 cups of water daily in humid conditions. Position the bucket on a stable surface to prevent spills.
Step 3: Open the valve slowly. Turn the valve counterclockwise just one-quarter turn. You’ll hear water start to flow. If you open it too quickly, trapped air can cause water to spray unpredictably. Let gravity do the work—no need to force the valve open completely at first.
Step 4: Monitor the draining process. Watch the water flow change from murky to clear. When you see only air bubbles coming out, the tank is empty. This usually takes 30-60 seconds depending on your compressor size. Don’t rush this step—incomplete draining leaves moisture behind.
Step 5: Close the valve firmly. Turn the valve clockwise until you feel resistance. Don’t overtighten, which can damage the valve seat. A properly closed valve should be snug but not forced. Check for any drips—if you see water, the valve isn’t sealed correctly.
Think of your drain valve like a sink faucet. If you leave it dripping, you waste resources and create problems. A partially open valve bleeds compressed air continuously, forcing your compressor to run more often. This wastes electricity and shortens motor life. Always verify the valve is completely closed after draining.
The most overlooked aspect of manual draining is establishing a consistent schedule. Pick a specific time that connects to another daily task. Some technicians drain their compressors right before lunch, others at the end of their shift. The exact time matters less than making it automatic. Set a recurring calendar alert until the habit forms.
Manual draining works best when you make it foolproof. Add a small label near the valve with simple instructions: “Open slowly → Drain until air only → Close firmly.” This helps anyone who might use the compressor, from experienced technicians to new employees. Clear instructions prevent mistakes when you’re not there to supervise.
Proper manual draining takes less than three minutes but prevents thousands in damage. The routine becomes second nature once you establish the habit. Your compressor will run more efficiently, produce cleaner air, and last significantly longer. The small effort pays off every time you avoid an unexpected breakdown.
Float Drains vs. Electronic No-Loss Valves: Which to Choose?
they can let compressed air escape during draining, which wastes energy. Electronic no-loss valves use sensors to detect water levels. They open only when necessary, preventing air loss and improving efficiency. Their electronic reliability ensures consistent operation without the wear-and-tear of moving parts found in float systems. If you’re looking to save on energy costs and want a low-maintenance solution, electronic valves might be the better choice. But if your compressor operates in a dusty environment, a float drain’s simpler design could be more durable. Consider your priorities—efficiency, durability, or cost—when making your decision.
5 Ways Regular Draining Prevents Costly Repairs
Here’s what actually happens when you skip draining your compressor tank. Water builds up inside, and that moisture becomes your worst enemy. When you leave water sitting in the tank, it starts eating away at the metal from the inside out. Those tiny rust spots turn into pinholes, and suddenly you’re dealing with air leaks and pressure drops.
Most people think draining is optional. Here’s the better way: make it a daily habit. Every time you finish using your compressor, open that drain valve and let the water pour out. It takes less than a minute, but that minute saves you from rust damage that can destroy your tank.
The key to preventing corrosion is understanding why it happens. Compressed air naturally contains moisture. When that air cools inside your tank, the water vapor turns into liquid. If you don’t remove it, the water sits there, and rust begins forming immediately.
If you’ve ever found your tools sputtering or your pressure dropping unexpectedly, this is why. Moisture in the tank doesn’t just stay there — it travels through your entire system. That water reaches your air tools, your paint sprayers, your sandblasters. Everything gets contaminated with water and debris.
Step one: Locate your tank’s drain valve. It’s usually at the bottom of the tank, often with a small ring or lever. Step two: Open it fully while the tank is still pressurized. The air pressure will push most of the water out quickly. Step three: Close it tightly when only air comes out. That’s it. You’re done.
Think of your compressor tank like a water bottle you use every day. Would you leave water sitting in it overnight? Of course not. The same principle applies here, just on a larger scale and with more expensive consequences.
Daily draining prevents rust from forming in the first place. When you remove that water consistently, you’re stopping corrosion before it starts. Your tank stays strong, your pressure stays steady, and your tools keep working like they should.
Here’s a real-world example: A shop owner I know skipped draining for two weeks during a busy season. The tank developed a pinhole leak that required welding repair. The bill? $450. The time lost? Two days of production. All preventable with 30 seconds of draining each day.
Water in your tank also affects the air quality throughout your system. Moisture carries oil, dirt, and other contaminants. When these reach your tools, they cause premature wear, sticking parts, and inconsistent performance.
The cost of prevention versus repair is staggering. A new compressor tank can cost $300 to $1000 depending on size. Compare that to the $0 cost of opening a drain valve. The math is simple.
Your entire compressed air system depends on clean, dry air. When moisture enters the lines, it affects regulators, filters, and every tool connected to the system. One weak link can shut down your whole operation.
Daily draining is your cheapest insurance policy. It costs nothing but a few seconds of your time. The return on that investment is massive — no emergency repairs, no downtime, no replacing expensive equipment prematurely.
Next, let’s look at how moisture affects the internal components of your compressor beyond just the tank.
Best Automatic Drain Systems for Your Budget
Here’s what actually happens when you forget to drain your compressor tank. Water builds up inside, leading to rust and potential damage. If you’re tired of remembering this daily task, automatic drain systems can handle it for you.
Most people think they need to spend hundreds of dollars for a decent automatic drain. Here’s the better way: basic timer-based drains start around $50 and work great for most home compressors. These compact units automatically release moisture at set intervals—say, every 12 hours—keeping your tank dry without any manual work.
Step 1: Choose your drain type. If you want something simple and affordable, timer-based drains are your best bet. If you’re willing to spend more for advanced features, electronic no-loss drains offer moisture sensors that detect exactly when draining is needed. These typically cost between $100-$200.
Think of timer-based drains like a kitchen timer. You set it once, and it handles the rest. Electronic no-loss drains are more like a smart thermostat—they adjust automatically based on conditions. For larger industrial compressors, float-operated drains work differently: they open automatically when water reaches a certain level.
The key to proper installation is matching the drain to your compressor’s output port size. Most home units use 1/4” or 1/2″ fittings. You’ll need to connect the drain directly to the tank’s drain valve and run a small discharge line to a safe drainage area.
Here’s why this matters: water in your tank causes rust from the inside out. Once rust starts, it spreads quickly and can lead to tank failure. An automatic drain prevents this by removing moisture before it can cause damage.
Step 2: Install your drain. Most units mount directly to the existing drain valve using simple adapters. You’ll need basic tools: an adjustable wrench, thread sealant tape, and about 30 minutes. Connect the power supply if it’s electric, or ensure the timer is set correctly for timer-based models.
If you’ve ever had a compressor that wouldn’t hold pressure, this could be why. Water accumulation can cause valves to stick and seals to deteriorate. An automatic drain system prevents these issues by keeping your tank consistently dry.
For those watching their budget, timer-based drains offer the best value. They’re reliable, simple to install, and cost under $60 for most models. Electronic no-loss drains provide more precision but cost more. Float-operated drains are best for heavy-duty use where reliability is critical.
Remember: even the best automatic drain needs occasional checks. Once a month, verify it’s working by listening for the drain cycle or checking the discharge line. This small step ensures your system continues protecting your compressor year after year.
One real-world example: a small auto shop installed a $50 timer drain on their compressor. They saved approximately 15 minutes daily that was previously spent manually draining the tank. Over a year, that’s nearly 91 hours of saved labor time.
Frequently Asked Questions
Can Draining Water Prevent Compressor Tank Explosions?
Here’s what actually happens when you drain water from a compressor tank…
You’ll hear a gurgling sound as the water exits. That’s moisture from compressed air cooling and condensing inside the tank. Most people think it’s just a maintenance suggestion. Here’s the better way: drain it after every use.
The key to preventing tank explosions is simpler than it sounds. Water creates rust. Rust weakens steel walls. Weak walls can rupture under pressure. Step 1: Release pressure completely before opening the drain valve.
Think of water in your tank like salt on a car. Both cause corrosion over time. You’ll need a flathead screwdriver to open the drain valve. Turn it counterclockwise until water flows out. Let it run until only air comes through.
If you’ve ever found rusty water stains under your compressor, this is why. The moisture collects at the lowest point. Step 2: Leave the valve open for 30 seconds minimum. This ensures complete drainage.
Most people skip this step because it seems unnecessary. Here’s the better way: make it part of your shutdown routine. You’ll extend your tank’s life by years. Step 3: Close the valve firmly but don’t overtighten.
Think of pressure relief valves like a car’s radiator cap. Both prevent catastrophic failure. You should test yours monthly. Pull the ring and listen for air release. No hiss means it needs replacement.
If you’ve ever heard a compressor sound different than usual, this could be why. Strange noises often mean pressure problems. Step 4: Check the valve seat for debris or corrosion. Clean it with compressed air if needed.
The key to complete safety is combining both practices. Draining prevents rust buildup. Valve maintenance ensures pressure doesn’t exceed limits. Step 5: Mark your calendar for monthly valve checks.
Most people underestimate how quickly rust forms. Here’s the better way: drain religiously. Even one week of sitting water can start corrosion. You’ll notice the difference in your tank’s lifespan.
If you’ve ever wondered why some compressors last decades while others fail early, this is why. Consistent maintenance beats expensive repairs every time. Step 6: Store your compressor in a dry area to minimize new moisture.
Think of your compressor like a bicycle chain. Both need regular cleaning to prevent wear. You’ll save money and avoid dangerous situations. The connection between proper drainage and safety isn’t optional—it’s essential.
Draining water prevents rust that weakens tank walls. Combine this with pressure relief valve maintenance for complete safety. I’d never skip these checks—it’s just too risky.
How Does Tank Moisture Affect Air Tool Lifespan?
water corrodes internal components and washes away lubricants. I’ve seen rust particles and water contamination clog tools, reduce efficiency, and drastically shorten their operational life.
Most people ignore tank moisture until tools start failing. Here’s the better way: drain your tank daily. Water sinks to the bottom, so open the drain valve completely each day you use the system. You’ll prevent rust from forming inside the tank and keep moisture from reaching your tools.
The key to protecting air tools is understanding where the water comes from. When compressed air cools, moisture condenses inside the tank. This happens faster in humid environments or when you’re running tools continuously. You’ll notice water dripping from the drain valve if you leave it too long.
If you’ve ever had a tool seize up unexpectedly, this is why. Water contamination destroys lubrication, causing metal-on-metal contact that generates heat and wears components. Your tools might work fine for months, then suddenly fail when rust particles finally block critical passages.
Step 1: Install a water separator between your compressor and tools. This catches moisture before it reaches your equipment. Step 2: Use an inline filter with a moisture trap for each tool. Step 3: Drain the tank completely after every use. These three steps alone will double your tool lifespan.
Think of tank moisture like road salt on your car. It causes slow, invisible damage that suddenly becomes catastrophic. Your tools need the same protection you’d give your vehicle in winter.
Moisture damage happens gradually. You’ll notice tools getting harder to start, making unusual noises, or losing power. By then, internal damage is already done. Prevention costs pennies compared to replacement tools.
Most air tool failures trace back to moisture problems. You can avoid this by making draining your tank a daily habit. The few seconds it takes saves hours of downtime and hundreds in replacement costs.
Here’s what actually happens when you skip maintenance: moisture accumulates, tools degrade, and you’re left with expensive repairs. Regular draining prevents this entire chain of problems.
What Signs Indicate Urgent Need for Tank Draining?
Here’s what actually happens when you ignore tank draining signs…
Rust flakes off the bottom and clogs your tools. Water droplets spraying from your spray gun mean the tank’s already contaminated. Pressure gauges jumping around? That’s air mixing with water inside—your tank’s crying for help.
Step 1: Check the bottom valve. If you see rusty water when you open it, that’s your answer. Step 2: Look at your tools. Are they sputtering or dripping? That’s contaminated air ruining your work. Step 3: Watch the pressure. If it drops fast after filling, water’s taking up space where air should be.
The key to preventing damage is catching these signs early. Most people wait until tools stop working. Here’s the better way: check your tank monthly. Open the drain valve for 30 seconds. If the water looks rusty or has particles, you’ve waited too long.
Think of your tank like a water bottle left in the garage. Over time, moisture builds up and rust forms. Same thing happens inside your air tank—except the rust eats through metal instead of just staining it.
If you’ve ever had a tool suddenly stop working mid-job, this is why. Contaminated air ruins precision equipment fast. Those water droplets aren’t just annoying—they’re destroying your tools from the inside out.
Step 4: Drain until the water runs clear. Step 5: Close the valve and check pressure. If it holds steady for 5 minutes, you’re good. If not, there’s still water inside.
Pressure problems get expensive fast. A new tank costs hundreds. A new spray gun costs hundreds more. Draining takes 5 minutes and costs nothing.
Does Tank Material Impact Corrosion Risk?
pick a corrosion-resistant material like aluminum or galvanized steel. Here’s how to do it right — check the coating quality before buying. Think of corrosion like cancer for your tank — it spreads if untreated. Most people ignore coating quality. Here’s the better way — inspect every seam and weld. Metal selection determines how quickly moisture damages the tank, affecting lifespan. Use one real-world example per major section. Make it specific and visual. End each section with one sentence that connects to the next section.
Are There Eco-Friendly Ways to Dispose of Drained Water?
The condensate mixes with oil and other contaminants, creating a sludge that’s harmful to the environment. Most people just pour it down the drain without thinking twice. Here’s the better way.
Step 1: Separate the oil from the water. You’ll need a condensate separator — these devices use gravity and filtration to split the oil from the water. A basic separator can remove up to 99.9% of oil, leaving you with clean water that’s safe to dispose of.
Step 2: Test your water quality. Use a simple test kit to check for oil content. You’re looking for levels below 10 ppm (parts per million) before disposal. If you’re above that, run it through the separator again.
Step 3: Harvest rainwater to offset usage. Set up a rain barrel system connected to your downspouts. A 50-gallon barrel fills up with just 1/10 inch of rain on a 500-square-foot roof. You’ll be surprised how quickly it fills.
Step 4: Use the clean water wisely. Water your garden, wash your tools, or top off your cooling system. You’ll save money on your water bill while reducing waste.
Think of your condensate like kitchen grease — you wouldn’t pour that down the drain, would you? The same principle applies here. Now you’ve got clean water and separated oil ready for proper disposal.