You turned on the air and felt a damp, musty smell that shouldn’t be there, or noticed puddles under the unit after a long run.
You asked yourself why your vents rattle with moisture and why filters go soggy so fast. Most people assume it’s just old equipment or seasonal humidity and overlook hidden condensation and leaks.
This piece will show you how moisture forms inside coils, ducts, and pans, how that leads to mold, corrosion, clogged drains, and reduced airflow, and exactly which simple inspections and fixes stop the damage. Follow the steps and you’ll cut run time, prevent mold spread, and protect components. It’s easier than you think.
Key Takeaways
If you’ve ever felt sticky air inside your home, this is why.
Why it matters: Moisture in your ductwork and HVAC system causes mold, odors, corrosion, and poor comfort — and those problems cost you money and health.
- Moisture condenses at duct seams and slow-air spots, wetting insulation and causing hidden mold and odor growth.
- Why this happens: When warm, humid air hits cooler metal at seams or in low-velocity sections, water drops out of the air.
- Real example: You pull down attic access and find dark stains along a duct run where insulation is soggy.
- What to do: 1) Seal seams with UL-listed HVAC foil tape or mastic; 2) Insulate ducts to R-8 in unconditioned spaces; 3) Improve airflow so air moves at least 400–600 feet per minute in that duct.
Why it matters: Standing water breeds bacteria and damages equipment.
- Clogged condensate pans and drains back up water, creating bacterial growth and system corrosion.
- Why this happens: Algae and dust plug the drain line so water can’t leave the pan during cooling cycles.
- Real example: A homeowner smells sour mildew; a tech finds a buried drain line full of sludge and a pan overflowing onto the blower.
- What to do: 1) Once a season, pour a cup of diluted bleach (1 part bleach to 10 parts water) or an HVAC-safe enzymatic cleaner down the drain and flush with a gallon of water; 2) Inspect the pan monthly during cooling season; 3) Replace cracked pans within 24–48 hours.
Why it matters: High indoor humidity makes surfaces stay damp, which leads to mildew, ruined clothes, and irritated sinuses.
- High indoor humidity (>60% RH) promotes persistent damp surfaces, textile mildew, and occupant respiratory irritation.
- Why this happens: Your system can’t remove moisture fast enough, so relative humidity stays high even if temperature is cool.
- Real example: You notice musty smells in the bedroom and clothes in the closet feel slightly damp after a humid summer night.
- What to do: 1) Aim for 40–50% RH in summer; 2) Use a dehumidifier sized for the area (for a 1,500 sq ft basement, pick a 50–70 pint/day unit); 3) Run bathroom and kitchen exhaust fans during showers and cooking for at least 20 minutes.
Why it matters: Dirty coils stop your system from removing moisture, so humidity climbs and energy use increases.
- Dusty coils reduce heat transfer and hold moisture, lowering dehumidification and worsening humidity problems.
- Why this happens: Dirt acts like insulation on the coil, so the coil runs warmer and can’t condense as much water.
- Real example: A heat pump with a visibly gray indoor coil drops only 2°–3°F instead of 10°–12°F, and the house stays humid.
- What to do: 1) Clean coils once a year (more if you have pets or construction dust); 2) Turn power off, remove access panels, and use a fin comb and coil cleaner or hire a pro; 3) Replace filters every 1–3 months to keep coils clean.
Why it matters: Continuous moisture sources can overload any HVAC system no matter how new it is.
- Unsealed ducts, roof leaks, and unvented appliances introduce continuous moisture sources that overload HVAC capacity.
- Why this happens: Even small leaks add several gallons of water vapor per day, and your AC wasn’t sized to remove that extra moisture.
- Real example: A laundry room with an unvented dryer deposits moisture into the house; you see condensation on windows each morning.
- What to do: 1) Seal duct leaks with mastic or foil tape; 2) Repair roof and window leaks promptly; 3) Vent dryers and combustion appliances outdoors; 4) If humidity still runs high, get a load/ventilation assessment from an HVAC pro.
Quick checklist to get started:
1) Check indoor RH with a digital hygrometer; aim for 40–50% in summer.
2) Inspect condensate pans and drains monthly during cooling season.
3) Seal visible duct seams and insulate ducts in unconditioned spaces.
4) Replace filters every 1–3 months and clean coils annually.
5) Vent appliances and fix leaks within 48 hours.
Follow those steps and you’ll stop most moisture problems before they become mold, smell, or expensive repairs.
Where Moisture Hides in HVAC : And Why It Matters
Here’s what actually happens when moisture hides in your HVAC system: it creates small, out-of-sight wet spots that lead to mold, corrosion, and poor performance.
Why this matters: mold can make you sick and reduce system efficiency by 5–15%.
You find moisture in these places and how to fix each one
1) Where duct joints and collars leak
- Why it matters: moving air slows at joints and moisture drops out onto metal.
- Real example: behind a kitchen supply register you unseal, you’ll see a dark ring and damp insulation.
- How to check and fix:
- Inspect every main duct joint and collar once a year.
- Run your hand along seams; feel for cold or damp spots for 10–15 seconds.
- Reseal with foil HVAC tape or mastic and fasten with drive screws if loose.
– Takeaway: a properly sealed seam cuts air leakage and visible condensation.
2) Where insulation has gaps
- Why it matters: gaps let humid air hit cold duct and condense inside walls.
- Real example: in an attic, a 6-inch ripped duct wrap shows wet insulation after a humid rain.
- How to check and fix:
- Walk accessible duct runs quarterly during summer humidity.
- Look for compressed, darkened, or detached insulation sections.
- Replace damaged wrap with R-6 or R-8 insulation and tape all seams.
– Takeaway: replacing a 6-inch damaged wrap prevents dozens of gallons of condensate annually.
3) Where access panels and service ports sit
- Why it matters: air slows behind panels and creates pockets where water pools.
- Real example: under the air handler, behind the service panel, you’ll find a shallow puddle if the pan is misaligned.
- How to check and fix:
- Remove access panels during a seasonal check.
- Look for rust, pooled water, or water stains.
- Tighten fasteners, add a thin foam gasket, and level the panel so water drains to the pan.
– Takeaway: a tight panel prevents localized pooling and metal rot.
4) Condensate pans and drain lines
- Why it matters: clogged drains back up water into the system and create bacteria.
- Real example: a bathroom-connected drain line with hair and sludge causes an HVAC pan overflow after a heavy shower day.
- How to check and fix:
- Inspect the condensate pan weekly for the first month after service, then monthly.
- Pour 1 cup (240 ml) of distilled white vinegar down the drain monthly to clear slime; flush with 1–2 gallons of water.
- If slow or stopped, snake the line or replace the PVC run; install an overflow switch if none exists.
– Takeaway: simple vinegar flushes reduce clogs that cause overflows.
5) Dirty evaporator coils
- Why it matters: dirt insulates coils so they run colder and hold more moisture, reducing drying capacity.
- Real example: a skirt of gray dust on your indoor coil shows when you pull the access door; the return vents feel cooler but humidity stays high.
- How to check and fix:
- Inspect coils every 6 months if you have pets, otherwise yearly.
- If fins are dusty, spray a foaming coil cleaner and rinse per label instructions, or hire a tech for deep cleaning.
- Replace filters every 1–3 months to keep coils clean.
– Takeaway: clean coils improve humidity control and restore 5–10% efficiency.
6) Thermal bridges on metal framing and collars
- Why it matters: cold spots cause condensation even when the rest of the system looks dry.
- Real example: a metal joist running against an uninsulated duct shows droplets along the seam on humid afternoons.
- How to check and fix:
- Scan ductwork with your hand or an infrared thermometer during operation; note spots 5–10°F colder than surrounding surfaces.
- Add 1/4–1/2 inch closed-cell foam or thermal break tape where metal meets framing.
- Insulate adjacent framing to equalize temperatures.
– Takeaway: small thermal breaks stop consistent drip points.
7) Crawlspaces and basements feeding humid air
- Why it matters: they raise the air your HVAC conditions, increasing runtime and moisture load.
- Real example: after a rainy week, the basement returns steamier and the dehumidifier runs constantly.
- How to check and fix:
- Measure relative humidity (RH) in the return air at the system — aim for 40–50% RH in summer.
- If RH is above 60%, seal crawlspace vents, add a 6-mil vapor barrier, and consider a 30–50 pint dehumidifier sized for the space.
- Seal gaps where pipes and wires enter the conditioned space with foam to stop humid air infiltration.
– Takeaway: controlling the source air reduces load and runtime.
Final practical checklist you can use right now
- Replace filters every 1–3 months. Do it.
- Inspect ducts, pans, and coils every 6–12 months. Mark dates.
- Flush condensate drains monthly with 1 cup vinegar and 1–2 gallons water.
- Seal seams and add thermal breaks where you find cold metal 5–10°F below nearby surfaces.
- Measure return-air RH; if >60%, address crawlspace/basement humidity.
Follow these steps and you’ll stop most hidden moisture problems before they start.
Research: Prevalence and Health Impacts of Damp HVAC

Here’s what actually happens when HVAC systems get damp: they become breeding grounds for mold and moisture problems that affect both buildings and people.
Why this matters: damp HVAC links to higher respiratory illness and worse indoor air. Example: a landlord in Minneapolis found black spots on supply vents after a seasonal flood, and tenants reported more coughing within two months.
What the research shows about how often moisture problems occur
- Studies report about 85% of buildings have had past water damage.
- Around 45% of buildings showed active leaks during surveys.
- Roughly 1 in 3 new homes had visible mold on surfaces or window frames at inspection.
Why this matters: those prevalence numbers mean you have a decent chance of encountering damp systems in buildings you live or work in. Example: during a housing inspection, a buyer saw mold staining along the baseboard and measured elevated humidity near the HVAC return.
How dampness and mold affect your health
Why this matters: damp indicators raise asthma and respiratory risks. Example: a school teacher developed wheezing after visible mold patches appeared above classroom ceiling tiles.
Key findings:
- Dampness indicators (like condensation, leaks, or mold smell) are associated with an asthma odds ratio of about 1.3.
- Visible mold patches are linked to higher rates of upper respiratory infection.
- Poor HVAC maintenance—clogged filters, dirty coils, blocked drain lines—can raise respiratory risk ratios up to about 2.1.
Why this matters: keeping your HVAC clean reduces those risks. Example: a small café replaced its filters monthly and cleared a blocked drain; staff reported fewer colds the following winter.
How to reduce damp-related health risks (specific steps)
Why this matters: cleaning and minor fixes cut mold growth and lower illness risk. Example: a homeowner followed these steps and removed visible mold from the duct boot in one afternoon.
Follow these steps:
- Inspect monthly for leaks, standing water, or mold smells.
- Change filters every 1–3 months; use MERV 8–13 filters for homes depending on sensitivity.
- Clean coils and drain pans annually; if dirty, hire an HVAC tech.
- Keep condensate drain lines clear—flush with bleach solution (1/2 cup bleach to 1 gallon water) quarterly.
- Maintain indoor humidity between 30–50% using a dehumidifier if needed.
- If you see widespread mold or persistent leaks, get a professional moisture assessment.
Final, practical tip: document what you find with photos and dates, and if you’re renting, report issues in writing so repairs are more likely.
Signs You’re Breathing Wet Air (Quick Diagnostics)

If you’ve ever walked into a room that smells musty, this is why.
Why it matters: high indoor humidity makes mold grow and makes you feel uncomfortable. For example, I walked into a second-floor apartment where towels never dried and the bathroom mirror fogged all day — the tenant had repeated sinus problems.
1) Check for obvious smells and damp surfaces.
- What to do: walk every room and sniff for a musty odor, press a fingertip to window sills, tile grout, and the back of closet shelves to see if they feel cool and damp.
- Example: in that apartment, the closet back panel felt cold and slightly spongy under my fingers.
Why it matters: condensation means the air can’t hold moisture and surfaces stay wet, which accelerates mold. For example, a supply vent with beads of water dripped onto carpet after a long humid night.
2) Look for visible condensation and fog.
– Steps:
- Check windows in the morning for fog or water lines.
- Inspect supply diffusers and cold pipes for droplets.
- Note if bathroom mirrors stay fogged for hours after a shower.
– Example: I found clear water trails on the baseboard below a duct run, a sign the duct was cooling warm moist air.
Why it matters: damp textiles shelter mold and bacteria and can keep releasing moisture into the air. For example, towels left folded on a hamper smelled sour after a day.
3) Test textiles and linens.
- What to do: squeeze a folded towel, press your palm into carpet pile, and feel for lingering dampness after 30 minutes in a dry room. If items stay damp, you have a humidity problem.
- Example: a gym towel in one condo still felt cool and moist two hours after being hung.
Why it matters: relative humidity (RH) directly affects your health and comfort, and you can measure it cheaply. For example, renters lowered symptoms by dropping RH from 65% to 45% with small fixes.
4) Measure RH with a hygrometer.
– Steps:
- Buy a digital hygrometer ($15–$40).
- Place it at breathing height in the main living area, away from vents and windows.
- Read the number after 1–2 hours; aim for 30–50% RH.
- If you see consistently over 60%, schedule an HVAC inspection.
– Example: the apartment’s meter read 67% in the afternoon and 72% at night.
Why it matters: humid air reduces evaporation from your skin and can make breathing feel harder. For example, occupants reported clammy skin and shortness of breath after spending a few hours inside.
5) Watch for symptoms you can feel.
- What to notice: clammy breath, sticky skin, increased allergies or sinus irritation, and towels or carpets that never fully dry.
- Example: a tenant described waking with a sore throat only on days spent at home.
If readings or symptoms are high, inspect the HVAC system or call a technician. Start by checking that condensate drains aren’t clogged, that ducts are insulated where they run through cool spaces, and that filters are clean. If those fixes don’t lower RH from above 60% into the 30–50% range, get professional help.
Where Moisture Enters HVAC and Homes

If you’ve ever noticed musty smells or wet spots after a storm, this is why.
Why this matters: moisture causes mold, ruins insulation, and corrodes ducts fast. I check the roof for leaks because water from damaged shingles or flashing runs into attics and reaches ductwork, insulation, and ceiling cavities. For example, a missing shingle after last winter let rain run along the roof valley and drip onto the attic insulation for days; I found dark wet spots around the HVAC plenum. Step 1: walk the roof or use binoculars from the ground and look for cracked shingles or lifted flashing; Step 2: replace shingles or seal flashing with roof cement within a week.
Before you ignore the seal around windows and doors, know what can happen when those gaps stay open.
Why this matters: outdoor humidity sneaks in and raises indoor relative humidity, which shortens HVAC life. I inspect windows, doors, and foundation cracks where moist outdoor air and rain can seep in, raising indoor humidity. For example, an old casement window with cracked caulk let humid air stream into a living room during summer evenings; the drywall blistered above the baseboard. Step 1: run your hand along seals after a rain; Step 2: remove cracked caulk and apply new silicone caulk, aiming for a 1/8–1/4 inch bead.
The difference between appliance steam and outdoor humidity comes down to where the vapor goes.
Why this matters: unvented steam adds gallons of water vapor per day and overloads your dehumidifier. I watch appliance emissions from dryers, stoves, and unvented combustion appliances, which add significant water vapor when not vented properly. For example, a clothes dryer vented into a basement raised humidity to 70% and fogged the windows each morning; after I rerouted the vent outside, humidity dropped to 45% in two days. Step 1: confirm every dryer and range hood vents outdoors; Step 2: use rigid duct and a vent cap, keeping runs under 25 feet.
Think of basements and crawlspaces like a sponge that never dries out.
Why this matters: they continuously release moisture into your home unless you act. I consider basements and crawlspaces, which release moisture from damp soil and poor drainage. For example, a crawlspace with a dirt floor and a clogged exterior drain sent damp air up into the first-floor rooms; installing a 6-mil vapor barrier and repairing the drain cut humidity by half. Step 1: check for standing water and a dirt floor; Step 2: install a vapor barrier (6-mil polyethylene), add a 2–3 inch gravel layer, and slope exterior grade away from the foundation by at least 6 inches over 10 feet.
The fastest way to bring humid outdoor air inside is uncontrolled ventilation during wet weather.
Why this matters: high air-change rates let outside humidity overload indoor systems. I evaluate ventilation pathways, since high air-change rates can bring in humid air if outdoor conditions are wet. For example, an older home with continuous whole-house ventilation pulled in damp night air during summer and kept the dehumidifier running constantly; adjusting the ventilation schedule to daytime dryer hours cured the problem. Step 1: check your mechanical ventilation schedule; Step 2: set ventilation to run when outdoor dew point is lower than indoor, or add a humidity controller.
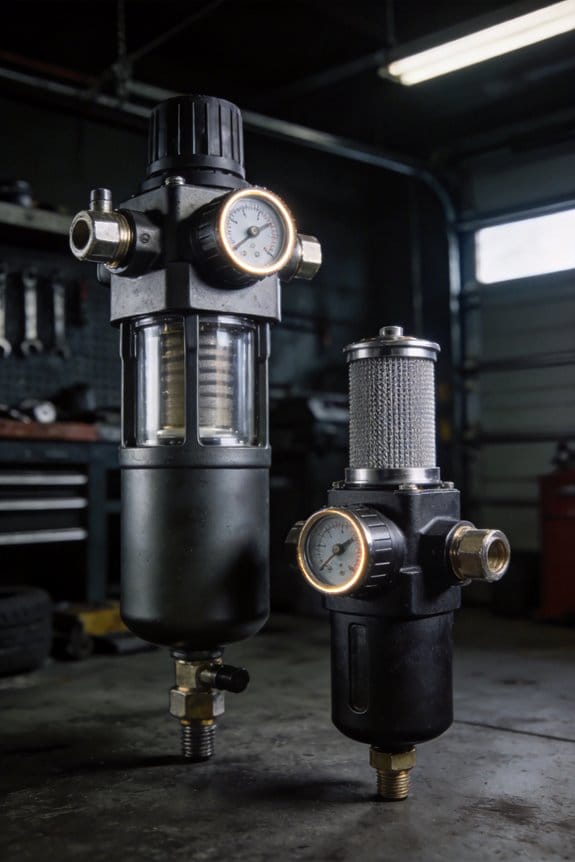
HVAC Moisture Failure Modes: Coils, Filters, Drains, Fans

If you’ve ever seen water dripping from an HVAC unit, this is why.
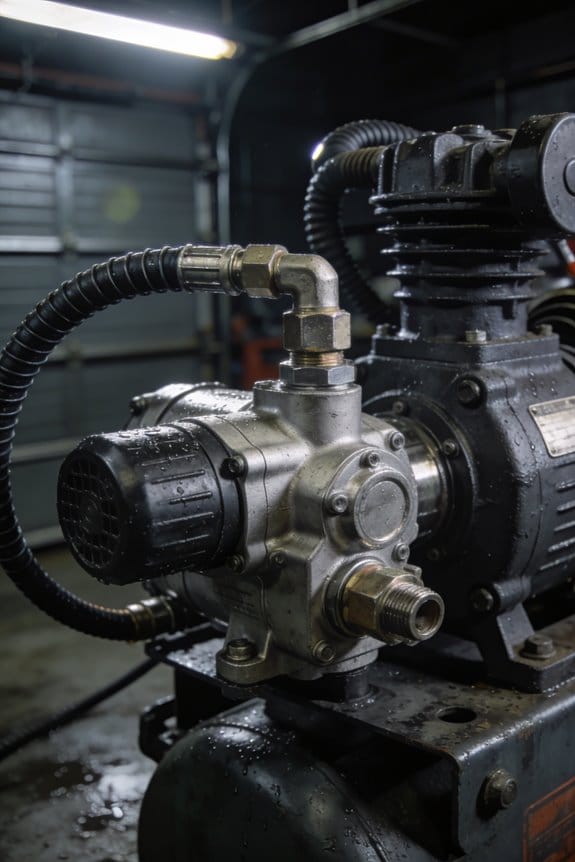
Evaporator coils — Why it matters: reduced cooling and faster corrosion cost you money and shorten system life. Example: on a rooftop unit I inspected, dark slimy film on the coils cut airflow and made the compressor run 30% longer on hot afternoons. How to fix it:
- Turn the system off and wear gloves.
- Spray a foaming coil cleaner along the coil faces and wait 10 minutes.
- Rinse with low-pressure water or use a wet/dry vacuum to remove runoff.
- Inspect the drain pan and clear any debris.
Do this every 6 months. If the fins are bent, use a fin comb to straighten sets of 5–10 fins at a time.
Air filters — Why it matters: a wet, clogged filter reduces airflow and sends moisture downstream where mold grows. Example: a homeowner told me their living room smelled musty after rain because a damp filter let humid air pass into ductwork. How to fix it:
- Check your filter monthly during humid seasons.
- Replace disposable filters every 1–3 months or sooner if they look dark.
- For reusable filters, wash with a mild detergent, rinse, and dry completely before reinstalling.
- Ensure the filter frame seals; tape gaps with HVAC foil tape if needed.
Use MERV 8–11 for homes; avoid very high MERV unless your fan can handle the resistance.
Condensate drains — Why it matters: a clogged drain overflows and soaks insulation, ceilings, or electrical components. Example: a blocked floor drain left a ceiling stain and ruined insulation above a living room after a weekend storm. How to fix it:
- Locate the condensate drain line and the trap.
- Use a wet/dry vacuum at the drain access to pull out clogs for 30–60 seconds.
- Flush the line with 1 cup of household bleach diluted in 1 gallon of water once every 3 months, or use a commercial enzymatic cleaner monthly.
- Inspect the drain pan for rust or cracks; replace pans older than 10 years.
Keep a secondary overflow switch installed where water would cause damage.
Fans — Why it matters: uneven airflow creates moist pockets that let microbes grow, reducing comfort and system efficiency. Example: a neglected blower wheel with thick dust made one bedroom feel clammy while others stayed dry. How to fix it:
- Turn power off at the breaker.
- Remove the blower assembly and clean the wheel with a brush and compressed air; use a soft brush for coated blades.
- Check belt tension (if belt-driven)—tighten to manufacturer spec or replace if cracked.
- Balance fans by inspecting mounting and bearings; replace bearings if noisy or rough.
Schedule blower checks annually and after any long idle period.
Final practical routine — Why it matters: regular checks stop small moisture issues becoming big repairs. Example: following this checklist, a renter avoided a $1,200 duct cleanup after noticing early signs of damp on a monthly check. Steps:
- Monthly: inspect filters and drains.
- Every 3 months: flush condensate lines and check drain pan.
- Every 6 months: clean coils and confirm fan balance.
- Annually: perform a full blower and duct inspection with a professional if you find mold or persistent humidity.
Do these and you’ll cut moisture-related failures and extend the life of your system.
How Moisture Damages Coils, Ducts, Insulation, and Finishes
Think of moisture like an uninvited guest that keeps showing up where air and temperature change.
Why this matters: if you miss early signs, repairs cost more and systems fail sooner. I’ll show you what to look for and what to do.
How does moisture damage coils?
Why it matters: corroded coils transfer less heat, so your system runs longer and wastes energy.
Example: picture an AC coil in a basement that stays wet after a humid night; you can see brown streaks and feel weaker cooling the next day.
What happens and what to do:
- Water sits on aluminum or copper fins and causes electrochemical reactions that eat metal and create pits you can’t see from 3 feet away.
- Pitted fins and tubes cut heat transfer by 10–30% within months, so the compressor runs extra cycles.
- Inspect monthly during humid months: look for streaks, green or brown deposits, and flaky metal.
- Fixes:
- Clean with an approved coil cleaner once per season.
- Replace fins or small coil sections within 3–6 months of visible corrosion.
- For major corrosion, plan coil replacement; don’t postpone past a year.
How does moisture harm ducts?
Why it matters: blocked or leaky ducts reduce airflow and can spread spores throughout your home.
Example: a metal return duct in a crawlspace that sweats in summer, showing rust spots and a musty smell in the upstairs rooms.
What happens and what to do:
- Condensation forms on cooler duct surfaces when humid air contacts them, and that moisture causes rust in metal ducts and mold in insulated or fibrous ducts.
- Rust creates pinholes and leaks; mold narrows airflow and sheds spores that trigger allergy symptoms.
- Inspect quarterly: feel for cold, wet spots, look for rust streaks, and sniff for mustiness near registers.
- Fixes:
- Improve insulation: add or repair 2 inches of closed-cell insulation around cold ducts in unconditioned spaces.
- Seal leaks with UL-rated mastic or foil tape at joints—don’t use duct tape.
- If mold covers more than 10 square feet, get a pro and consider replacing that duct section.
How does moisture ruin insulation?
Why it matters: wet insulation loses R-value and raises heating and cooling bills.
Example: fiberglass batts in an attic that sag and show dark patches after a roof leak, while the house feels colder.
What happens and what to do:
- When insulation soaks, it compacts and the trapped air that provides R-value disappears, often cutting performance by half.
- Wet insulation also becomes a food source for mold and can weigh down structures.
- Inspect after storms or leaks: look for sagging, dark staining, or felt-dampness when you press the insulation.
- Fixes:
- Replace wet fiberglass or cellulose; don’t just dry it in place.
- Dry the underlying structure and fix the leak before installing new insulation.
- For attics, add 12–18 inches of dry fiberglass batts or loose-fill to reach R-38 to R-49 depending on climate.
How does moisture affect finishes (paint, varnish)?
Why it matters: trapped moisture makes finishes blister and peel, which leaves surfaces exposed and unsightly.
Example: painted trim in a bathroom that bubbles and peels a few weeks after a shower remodel with poor ventilation.
What happens and what to do:
- Moisture trapped under paint expands when heated and forms blisters that break the bond between paint and substrate.
- Once peeling begins, moisture gets underneath and the cycle accelerates.
- Inspect visually and by touch: look for bubbles, soft spots, and cracked edges around windows and trim.
- Fixes:
- Remove bubbled paint back to sound material, let the substrate dry 48–72 hours, then prime with a moisture-blocking primer and repaint.
- Improve ventilation: install a 50–100 CFM exhaust fan in bathrooms and run it for 20 minutes after showers.
- For exterior siding, ensure gutters divert water at least 6 feet from the foundation.
Final practical checks you can do this weekend:
- Walk your system: check coils and duct joints for 1–2 minutes each, looking for wet spots or streaks.
- Press insulation lightly in attics and crawlspaces to find damp compression.
- Note any paint blisters and trace them to nearby moisture sources like leaks or poor ventilation.
If you find corrosion, mold over 10 square feet, or insulation soaked through, call a qualified pro within 7 days. Small fixes you can do immediately — cleaning coils, sealing duct joints with mastic, and replacing small insulation patches — will stop bigger problems.
HVAC Moisture Fixes and Maintenance Priorities
If you’ve ever dealt with a leaky HVAC drip pan, this is why.
Why it matters: stopping small moisture problems saves you money and prevents mold that can affect your health. Example: a rooftop unit with a clogged condensate line that overflowed onto ceiling tiles, staining them and growing mold within two weeks.
1) What preventive maintenance should you set up?
Why it matters: regular tasks keep moisture control working as designed. Example: a restaurant that scheduled monthly coil cleanings and saw kitchen humidity drop from 65% to 48% within a month.
Steps:
1.1 Clean evaporator and condenser coils every 3–6 months. If you have heavy use or greasy air, do it monthly. Use a coil cleaner spray and brush, or hire a tech.
1.2 Change air filters every 30–90 days depending on filter type and dust load; replace pleated MERV 8–13 filters at 60–90 days in normal homes, 30 days in dusty or high-occupancy spaces.
1.3 Wipe and flush condensate pans monthly; pour a cup of diluted bleach or vinegar down the drain quarterly to prevent biofilm.
Short step. Do it regularly.
2) How do you check and clear condensate drains?
Why it matters: a blocked drain causes backups and indoor leaks. Example: a blocked PVC trap sent water into a basement office and ruined flooring.
Steps:
2.1 Turn off the unit. 2.2 Remove the pan access cover and look for standing water. 2.3 Use a wet/dry vacuum on the drain line at the overflow or at the outside discharge for 15–30 seconds. 2.4 If vacuuming fails, snake the line with a flexible brush or flush with 1–2 cups of warm water and a tablespoon of chlorine bleach (or use vinegar if you prefer).
Do this every season.
3) When should you seal ducts and why?
Why it matters: unsealed ducts pull in humid air and reduce dehumidification efficiency. Example: an unsealed attic duct made a second-floor hallway feel sticky and increased run-times by 25%.
Steps:
3.1 Inspect accessible ducts for gaps, joints, and crushed sections. 3.2 Use mastic sealant or UL 181 foil tape on joints and seams — avoid cloth duct tape. 3.3 Insulate ducts in unconditioned spaces with at least R-6 insulation.
Seal it well.
4) When should you use a dehumidifier and what RH should you aim for?
Why it matters: keeping relative humidity in range prevents mold without over-drying. Example: a basement that stayed musty at 60% RH dropped to 45% after a 50-pint dehumidifier ran on a humid summer day.
Steps:
4.1 Aim for 30–50% relative humidity; target 40–45% in basements and 45–50% in living areas to balance comfort. 4.2 Choose a dehumidifier sized for the space (pints/day): 30–50 pints for small basements, 50–70 for medium, 70+ for very damp large areas. 4.3 Empty the bucket daily or set up a gravity or pump drain to a floor drain.
Keep humidity steady.
5) What should seasonal inspections include?
Why it matters: finding issues before peak humidity prevents emergency repairs. Example: a tech spotted deteriorating insulation and fixed it before summer, avoiding coil sweating and ceiling stains.
Steps:
5.1 Inspect airflow: measure supply and return temperatures and check that static pressure is within manufacturer spec. 5.2 Check condensate flow visually while the unit runs and verify the float/overflow switches work. 5.3 Inspect insulation on lines and ducts for gaps, condensation, or mold; replace damaged sections immediately.
Inspect early.
6) How do you handle damaged insulation and leaks?
Why it matters: wet or missing insulation causes condensation and energy loss. Example: a split A/C line with torn insulation produced visible sweat and soaked a closet shelf.
Steps:
6.1 Remove wet or moldy insulation with gloves and a mask. 6.2 Replace with closed-cell foam or 1–2 inch nitrile rubber insulation on refrigerant lines and R-6 duct insulation in attics. 6.3 Seal any surrounding air leaks with foam or caulk.
Fix the source.
7) Why keep records and what should you record?
Why it matters: records reveal trends so you can act before failures. Example: filter-change logs showed increasing fan run-time that led to finding a partially blocked coil.
Steps:
7.1 Record date, tasks done (filter size/type, coil clean, drain clear), RH readings, condensate line observations, and any repairs. 7.2 Track run-times and energy use monthly if possible. 7.3 Keep photos of problem areas before and after repairs.
Log it consistently.
Final note: prioritize tasks that remove moisture — coil cleaning, clear drains, sealing ducts, and controlling RH — and address visible damage immediately.
When to Call a Pro: Inspection Thresholds and Next Steps
If you’ve ever walked into a room that smells musty, this is why: unchecked moisture can rot materials and trigger allergies fast.
Why this matters: hiring a pro early stops small problems from becoming costly repairs.
1) When to call a pro
- Call a pro if your indoor relative humidity stays above 55% for more than a week.
- Call if you see visible mold patches larger than 4 square inches (about the size of a smartphone).
- Call after two or more drain backups in a three-month period despite routine cleaning.
- Call if water stains reappear after you’ve painted or patched a ceiling or wall.
Real-world example: a basement with a portable dehumidifier that read 60% for ten days and a 6-inch mold patch behind storage boxes — that homeowner called a prospector and avoided replacing drywall.
2) What a pro will check and why it matters
Why this matters: accurate measurement reveals hidden sources of moisture so repairs actually fix the problem.
Steps they take:
- Measure relative humidity in multiple rooms and inside ductwork using a calibrated hygrometer.
- Inspect evaporator coils, air filters, and condensate drain lines for blockages or leaks.
- Visually inspect duct interiors and vents for mold colonies and surface growth.
- Check the building envelope (windows, roof penetrations, exterior walls) for leaks or failed flashing.
- Test ventilation rates and pressure differentials to see if stale air is being trapped.
Real-world example: a condo where the pro found a clogged condensate drain causing overflow onto the ceiling joists and a weak bathroom fan that never exchanged the moist air.
3) Typical remediation timeline and next steps
Why this matters: sequenced work prevents recontamination and gets your space safe faster.
Steps:
- Immediate fixes (0–3 days): clear clogged drains, patch active leaks, and isolate contaminated areas with plastic sheeting.
- Cleaning and removal (3–14 days): remove moldy materials that can’t be cleaned, HEPA-vacuum surfaces, and clean HVAC components accessible without demolition.
- Targeted repairs (1–4 weeks): repair flashing, replace damaged drywall or insulation, and correct drainage grading outside.
- Verification testing (after repairs): the pro rechecks humidity, surface samples, or air samples to confirm levels are back to normal.
Real-world example: after fixing a roof flashing leak and replacing 2 sheets of drywall, the contractor retested humidity and mold spores three days later and found spore counts dropped by 70%.
4) What you should document and do afterward
Why this matters: records protect you and help prevent recurrence.
Steps:
- Keep dated photos of mold, stains, and the repair work.
- Get written scope of work and clearance test results from the pro.
- Schedule follow-up checks at 1 month and 6 months to verify humidity and no new stains.
- Adopt preventive maintenance: change HVAC filters every 90 days, clean condensate pans annually, and keep indoor humidity between 30–50% with a hygrometer.
Real-world example: a renter kept photos and receipts; when the issue returned, the landlord covered full remediation because the paperwork showed prompt action.
If you follow those thresholds and steps, you’ll know when to call a pro and what to expect.
Frequently Asked Questions
Can Moisture in HVAC Systems Cause Corrosion of Electronic Controls?
Yes: moisture accelerates corrosion, accelerates component degradation, accelerates solder joint failure — I’ve seen moisture-driven corrosion acceleration cause electronic failure in HVAC controls, so I inspect enclosures, seals, and drainage proactively.
Do Standard Home Insurance Policies Cover HVAC Moisture Damage?
Usually no — I’ve found standard home insurance often limits coverage for HVAC moisture damage due to policy exclusions and strict claim limits; I’d recommend checking your specific policy and adding endorsements or appliance coverage if needed.
Can UV-C Lights in Ducts Reduce Microbial Growth Long-Term?
Yes, I think UV C efficacy can reduce microbial growth long-term if I guarantee correct lamp placement for adequate exposure and maintenance; however, moisture, dirty coils, and airflow issues still need addressing to prevent regrowth and system damage.
How Do Smart Thermostats Affect Humidity Control Algorithms?
I’ll tell you: smart thermostats use adaptive setpoints and predictive dehumidification to anticipate humidity swings—imagine one-third of new homes with mold—so I tweak settings automatically, preventing moisture spikes before they damage surfaces.
Are There Safe DIY Tests for Hidden Duct Condensation?
Yes — I’d do simple DIY checks: use moisture meters on accessible ducts, scan seams with thermal imaging for cold spots, tape temporary humidity sensors inside, and inspect condensate drains; call pros if readings stay high.