You’re standing over a small portable compressor and a fancy spray gun, wondering why your last cabinet panel sputtered and left orange peel instead of a smooth coat. The exact problem is: your compressor seems to run fine, but the spray finish looks like it needs more air — or so it appears.
Most people assume a small-compressor job needs higher PSI or a bigger tank and buy more equipment they don’t need. This piece will show you how LVLP guns let modest CFM compressors produce smooth, low-overspray finishes when matched to the gun’s CFM and nozzle. You’ll learn the right tip sizes, thinning, short-hose setup, and pacing to avoid sputter and get cabinet- and touch-up–quality results. It’s easier than it looks.
Key Takeaways
Here’s what actually happens when you switch to LVLP guns for small-compressor jobs: you get good atomization with far less air, so your small tank and 2–3 CFM compressor can finish a panel without the constant struggle to keep pressure up. Example: with a 2.5 CFM pancake compressor and a 6‑quart tank you can spray a motorcycle fender in three thin coats if you manage bursts instead of trying to spray continuously.
Why this matters: lower air demand means you can use shorter bursts and planned pauses to stay in the green on pressure and still get a smooth finish. In my shop I spray cabinet doors with a 2.8 CFM compressor, 3–4 second trigger pulls, and 20–30 second pauses between passes.
1) How much air and pressure do you need?
Why this matters: matching CFM and PSI keeps the fan pattern stable so your coats are even. Typical LVLP specs are 4–8 CFM at 20–30 PSI, but you can work with 2–3 CFM compressors for very small jobs if you plan your runs and pause to let the tank recover.
Example: set the gun to 25 PSI, use 3–4 second bursts, and wait 20–30 seconds between passes on a 10–12 inch panel.
2) How do you set up your practical rig?
Why this matters: a few simple pieces keep pressure steady and prevent clogs, so atomization stays consistent. Real-world setup:
- Use a short hose (3–6 feet) to reduce pressure drop.
- Fit an inline regulator and set it to 20–30 PSI.
- Add a 5–10 micron air filter before the gun to trap moisture and particles.
Example: I run a 4‑foot hose, a metal regulator with gauge, and a 7‑micron filter when spraying trim on a 2.5 CFM compressor.
3) What spraying technique gives the best finish?
Why this matters: technique, not heavy airflow, controls coverage and prevents runs. Use thin, overlapping coats with a smaller fan and short duty cycles.
Steps:
- Set a 6–8 inch fan pattern on the gun.
- Hold the gun 6–8 inches from the surface.
- Move at a steady pace and overlap each pass by 50%.
- Spray 2–3 light coats rather than one heavy one, letting pressure recover between bursts.
Example: for a dresser drawer face, spray three 4‑second passes with 20–30 seconds rest between each pass; sand lightly between coats.
4) What workflow changes will you make?
Why this matters: planning pauses and working in smaller sections lets you use a low-CFM compressor without sacrificing finish quality. Work in panels, not full continuous runs.
Example: divide a cabinet into 4 sections, spray each section with short bursts, then rotate back after the tank recovers.
Practical tip: keep a small notebook or phone timer to track burst lengths and pause times until you get a feel for your compressor’s recovery; you’ll repeat the same successful pattern every time.
Can a Small Compressor Run an LVLP Gun? Quick Answer
Here’s what actually happens when you try to run an LVLP gun with a small compressor: it usually works, but you need to set things up right so your finish stays smooth.
Why this matters: using the wrong setup wastes paint and gives a poor finish. Example: I once sprayed a cabinet with a 1.5 HP pancake compressor and kept pausing between passes so the tank could refill; the result was even coverage and minimal overspray.
Yes — you can run an LVLP gun with a small compressor, and here’s exactly how to make it work for you.
Why this matters: LVLP guns use less air volume, so a small compressor can often keep up. Example: a hobbyist sprayed a bathroom vanity with a 6-gallon tank and a 1.8 CFM@90 PSI compressor and finished without running out of pressure.
1) Check compressor specs and match them to the gun.
Why this matters: mismatched CFM causes sputtering or thin atomization. Example: your LVLP gun might need 4–8 CFM at 20–30 PSI; a 2–3 CFM compressor can still work for small jobs if you spray in short bursts.
Steps:
- Read the LVLP gun manual for required CFM and PSI.
- Look at your compressor’s CFM at the working PSI (not the peak HP).
- If the compressor CFM is lower, plan to work in short runs and let the tank recover between passes.
2) Control pressure at the gun for consistent atomization.
Why this matters: the gun must see steady PSI for a consistent spray pattern. Example: I used an inline pressure gauge and regulator on a small compressor to keep output at 18–22 PSI and got uniform coverage on door panels.
Steps:
- Install an inline regulator and gauge near the gun.
- Set the gun pressure to the manufacturer’s recommended PSI, usually 18–30 PSI for LVLP.
- Watch the gauge while spraying; stop if it drops more than 5 PSI and wait for the tank to recover.
3) Manage duty cycle and spraying technique.
Why this matters: small compressors can overheat or lose pressure if run continuously. Example: while spraying a chair, I did 10–15 second passes and waited 30–45 seconds between each to keep the compressor running cool and the finish wet enough to level.
Steps:
- Spray in short, consistent passes (10–20 seconds).
- Wait 20–60 seconds between passes depending on tank size and compressor CFM.
- If you plan long continuous work, consider a larger tank or a faster compressor.
4) Watch humidity and moisture in the line.
Why this matters: moisture causes poor atomization and blemishes. Example: on a cool morning, I saw fisheyes until I added an inline moisture trap and a short hose to isolate the gun.
Steps:
- Install an inline moisture trap or water separator before the regulator.
- Drain the compressor tank and traps frequently.
- Keep the working area warmer if possible to reduce condensation.
5) Adjust fluid and pattern controls for lower volume.
Why this matters: lower air volume needs different fluid flow to avoid runs or dry spray. Example: when using less CFM, I closed the fluid needle a bit and widened the pattern slightly to get a flat finish on cabinet doors.
Steps:
- Set a medium pattern width.
- Reduce fluid flow a click or two from your usual setting.
- Test on scrap and adjust until you get even atomization.
One more practical tip: use a short, high-quality hose (3–5 feet) to minimize pressure drop between the compressor and gun.
If your compressor is under about 2 CFM at the gun’s working PSI, plan on very small projects or consider upgrading.
Compressor Sizes and Outputs That Work With LVLP Guns
Before you pick a compressor for an LVLP gun, understand why steady cfm at spray pressure matters: without it you’ll get weak, uneven spray and runs.
I recommend portable compressors rated around 1.5–2.6 HP because they reliably deliver the 3.0–3.9 cfm at operating pressures near 2–3.5 bar that LVLP guns need. For example, a 2.0 HP unit that lists 3.5 cfm at 40 psi will run a typical LVLP gun for a continuous panel-sanding-and-spraying session without the gun sputtering. Keep the spec plate cfm at pressure in mind, not the peak cfm number on the marketing sticker.
Smaller units under 2 HP can work for light jobs if their cfm and tank size support short bursts; this matters if you spray trim or a small part. Example: a 1.5 HP compressor showing 3.0 cfm at 40 psi with an 8-gallon tank will handle a door panel with pauses between passes. Watch the duty cycle closely because low-duty compressors overheat under continuous spraying. Low-duty cycles mean you must pause every few minutes.
For steady auto or cabinet work, use a 10–20 gallon tank paired with a 2–2.6 HP motor to keep pressure stable. A specific setup that works: 2.2 HP, 15-gallon tank, 3.6 cfm at 40 psi — that combination lets you spray a car door without drops in pressure. If you expect long sessions, choose models with longer run times or larger tanks.
Match the spec plate cfm at the pressure you’ll spray at, not just peak cfm, for predictable performance. Step-by-step:
- Decide target spray pressure (usually 2–3.5 bar / 30–50 psi).
- Read the compressor’s cfm rated at that pressure.
- Pick a unit that provides at least 3.0–3.9 cfm at your target pressure.
- Choose tank size based on run length: 8–10 gal for light jobs, 10–20 gal for steady auto or cabinet work.
One final practical tip: fit a pressure regulator and a 5–10 micron inline filter to keep your finish clean and to dial in pressure quickly.
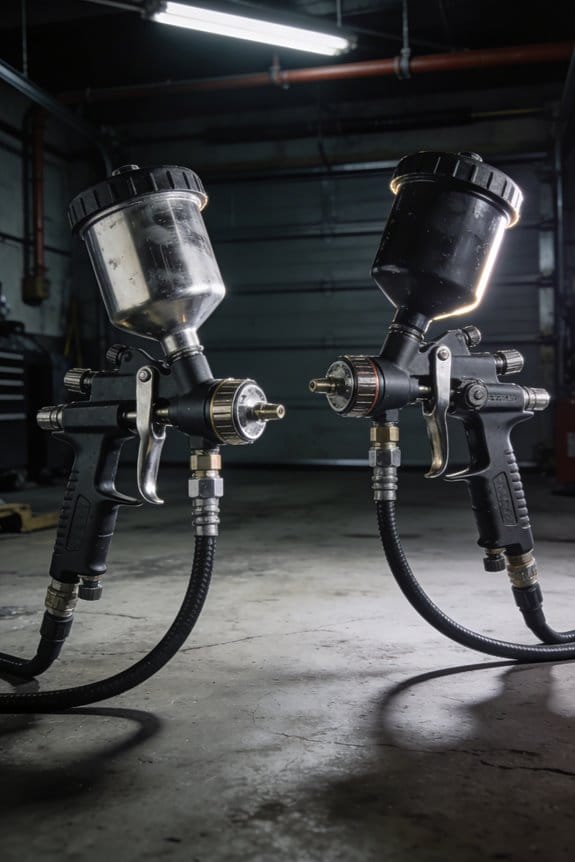
LVLP vs HVLP vs Conventional Guns : The Practical Differences
If you’ve ever tried spraying paint with the wrong gun, this is why.
Why it matters: choosing the right gun affects finish quality, paint use, and how big a compressor you need.
LVLP (Low Volume Low Pressure)
- How it works: LVLP runs at low pressure (around 10–15 psi at the gun) and uses less air (often 4–8 CFM).
- What you get: an HVLP-like finish with much lower air demand, so you can work from a small compressor or a 1.5–6 gallon tank.
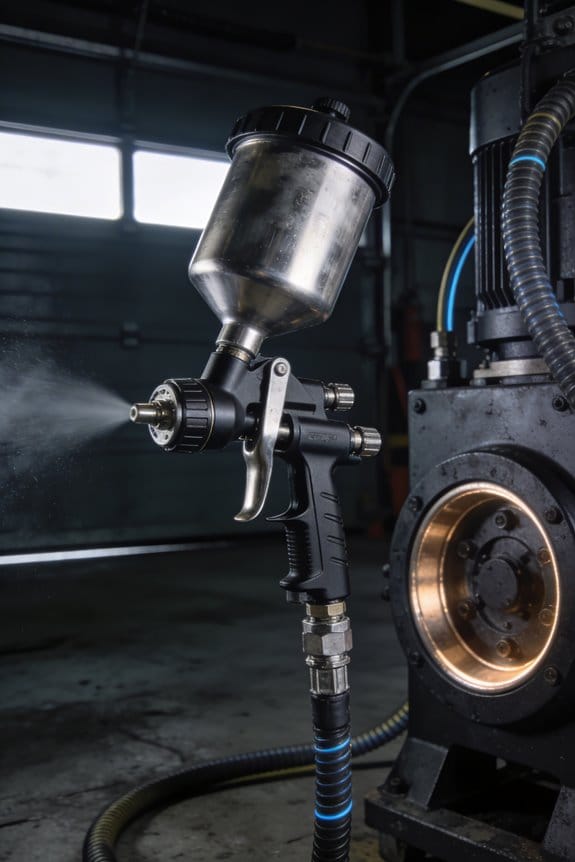
- Real example: spray a car door with a 2 HP compressor and an LVLP gun; you’ll get smooth coverage using about 6–8 fluid ounces of thinner material per panel and only short compressor recovery pauses.
- Quick steps if you choose LVLP:
- Set compressor to 10–15 psi at the gun.
- Thin paint per the gun manual (often 5–10% reduced viscosity).
- Maintain a 6–8 inch distance and overlap passes by 50%.
– Tip: If atomization looks grainy, slightly raise pressure in 1–2 psi increments or add a bit more reducer.
HVLP (High Volume Low Pressure)
- How it works: HVLP uses high air volume with low cap pressure (typically 8–10 psi at the cap) to minimize overspray.
- What you get: excellent control and reduced paint bounce-back, but you need a bigger compressor (often 15+ CFM peak or a turbine system).
- Real example: painting kitchen cabinets with an HVLP turbine gives very soft edges and less sanding later, but you’ll need a 15 CFM shop compressor or a dedicated turbine to keep pressure steady.
- Quick steps if you choose HVLP:
- Use a compressor/turbine rated at the gun’s recommended CFM.
- Set cap pressure to 8–10 psi and test on cardboard.
- Keep 6–8 inch distance and use slow, steady passes.
– Tip: Use a 50–100 micron filter on the feed to cut specks when spraying fine clears.
Conventional (High Pressure) Guns
- How it works: Conventional guns spray at higher pressures (20–60 psi at the gun) producing coarser atomization and faster laydown.
- What you get: faster coverage and thicker wet film per pass, but more overspray and wasted paint.
- Real example: priming a truck bed with a conventional gun lays down material quickly—expect to cover a 4×8 sheet in two passes, but plan for 20–30% more paint usage versus HVLP/LVLP.
- Quick steps if you choose a conventional gun:
- Set pressure to the manufacturer’s recommended range (often 25–40 psi).
- Use wider fan and faster passes for speed.
- Accept thicker coats and more masking to control overspray.
– Tip: For reduced speckling, strain primers through a 100–200 micron mesh and keep gun filters clean.
Practical decision checklist (3 items)
- Compressor size: If yours is under 5 CFM, pick LVLP.
- Finish goal: For furniture or show-quality work, pick HVLP (with the right compressor).
- Paint waste: If paint cost matters more than time, avoid conventional guns.
Last practical note: Watch atomization patterns closely—if you see large droplets or orange-peel, either increase pressure slightly, adjust fluid, or switch nozzle sizes; steady motion and correct overlap fix most issues.
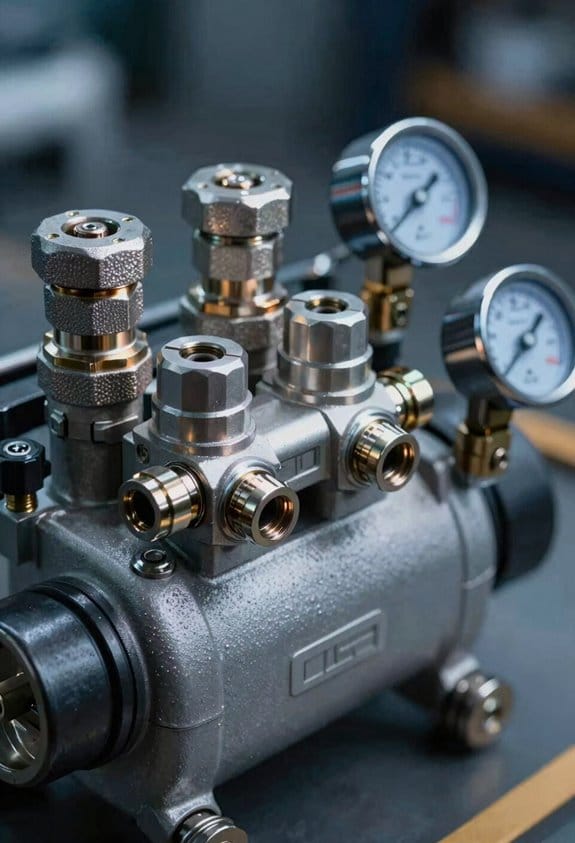
Must-Check Specs: CFM, Air-Cap Pressure, Nozzle Size
Before you start spraying, you need to know which three specs decide whether your gun will work with your compressor and give a good finish.
Why it matters: if you mismatch specs you’ll get poor atomization, runs, or wasted paint. I’ll walk you through each check with specific steps and an example you can picture.
CFM — how to match gun to compressor
Why it matters: insufficient CFM makes the spray weak and patchy.
Example: painting a car door with a small pancake compressor and a gun needing 10 CFM looks like thin foggy coverage and heavy edges.
Steps:
- Check your compressor’s rated CFM at the working PSI (for example, 4 CFM at 40 PSI) — that number is on the tank or manual.
- Check the gun’s required CFM at the same PSI (for example, 8–10 CFM at 40 PSI) — it’s on the gun spec sheet.
- Match or exceed: your compressor CFM should be equal to or higher than the gun’s required CFM; if it’s lower, switch to a lower-CFM gun or use a larger compressor.
Tip: if your compressor is marginal, add a 5–10 gallon receiver tank to smooth delivery. Works on small jobs.
Air-cap pressure — how to verify required pressure
Why it matters: correct air-cap pressure controls atomization and pattern shape.
Example: using an LVLP gun without enough nozzle-side pressure makes droplets big and leaves orange peel on cabinet doors.
Steps:
- Find the gun’s recommended air-cap pressure (e.g., 8–12 PSI nozzle-side for LVLP, 6–10 PSI for HVLP) from the manual.
- Hook up a gauge to the gun inlet and measure under load: spray into a cardboard box for 10 seconds while someone watches the gauge.
- Adjust regulator until the gauge reads within the recommended range during continuous spraying; if the pressure drops more than 2 PSI under load, your compressor can’t hold it.
Tip: LVLP often needs slightly higher nozzle-side pressure than HVLP to atomize heavier coatings; expect to set around 10 PSI on LVLP for lacquer-thick paints.
Nozzle size — how to pick and maintain the right tip
Why it matters: nozzle diameter must match paint viscosity or you’ll clog or get poor coverage.
Example: spraying a 1.5 mm nozzle with a heavy primer makes spitting and uneven coverage on a motorcycle fender.
Steps:
- Check paint tech sheet for recommended nozzle size (for example: lacquer 0.8–1.2 mm, primers 1.4–1.8 mm, latex 1.8–2.5 mm).
- Choose the nozzle at the middle of the recommended range for typical thickness; thin the material if you go smaller.
- Clean and inspect the nozzle before each job: soak in appropriate solvent for 5–10 minutes and blow out with compressed air, then inspect the orifice with a magnifier for burrs.
Tip: replace a nozzle after about 20–40 hours of heavy use or immediately if you see edge wear; worn nozzles widen the pattern and waste paint.
Put it together quickly
Why it matters: checking all three prevents wasted paint and rework.
Example: matching a 1.8 CFM pancake compressor with a 3 CFM gun causes sputtering and long wait times between passes.
Steps:
- Verify CFM match.
- Confirm air-cap pressure under load.
- Select and maintain the correct nozzle size.
If your compressor can’t meet the gun’s CFM and pressure, either change the gun to one with lower CFM/nozzle pressure or upgrade the compressor.
Nozzle & Air-Cap Choices for Common Small-Compressor Projects
If you’ve ever stood in front of a compressor and a spray gun wondering what to pick, this will make it simple. Why this matters: the right nozzle and air cap control droplet size, spray shape, and how much air your small compressor needs.
1) Which nozzle for thin lacquers and touch-ups?
Why this matters: using too-large holes wastes paint and overloads your compressor.
Steps:
- Use a 1.0–1.3 mm nozzle for thin lacquers, clear coats, and small touch-ups.
- Set your compressor to about 20–30 psi at the gun for most thin lacquers; lower if the gun or paint manufacturer specifies.
- Example: repainting a scratched kitchen cabinet door — use a 1.2 mm tip, 25 psi at the gun, and keep passes light to avoid runs.
Check the nozzle for clogs before each session.
2) Which nozzle for primers and thicker materials?
Why this matters: thicker material needs larger openings to flow and lay out properly.
Steps:
- Pick 1.4–1.7 mm nozzles (or larger for heavy primers/fillers).
- Set compressor pressure to 30–50 psi at the gun depending on gun design and material viscosity.
- Example: spraying a wood primer on a dresser drawer — use a 1.6 mm tip and 40 psi, overlap passes 50% for even coverage.
Replace worn tips—worn nozzles widen spray and waste paint.
3) How to choose the air cap for pattern shape?
Why this matters: air caps shape the fan so you cover the panel efficiently without excess overspray.
Steps:
- Use a narrow air cap for tight spots and trim work.
- Use a wide air cap for broad panels like car doors or cabinet faces.
- Example: for a car fender, choose a wide cap and hold 6–8 inches from the surface for a consistent 8–10 inch fan.
Match cap size to panel width so you make fewer passes.
4) Maintenance and wear checks
Why this matters: a worn or dirty tip changes pattern and wastes paint.
Steps:
- Clean the nozzle tip after each session with proper solvent and a soft brush or needle sized for the tip.
- Inspect tip edges monthly; replace if edges look rounded or pattern shows tails.
- Example: if your formerly even fan now has streaks, swap the tip and test spray on cardboard to confirm correction.
Keep spare nozzles sized to your common jobs.
Final quick checklist you can use before spraying:
- Match nozzle size to material (1.0–1.3 mm for thin, 1.4–1.7+ mm for primers).
- Pick air cap to match panel width (narrow for trim, wide for panels).
- Set gun pressure to 20–30 psi for thin, 30–50 psi for thicker materials.
- Clean and inspect tip; replace when edges round or pattern degrades.
Follow those steps and your small compressor will handle most DIY paint jobs without wasting paint or time.
Spray Settings to Maximize Transfer Efficiency With Low Air
Before you start spraying, know this: getting good transfer efficiency with a small compressor saves paint and improves finish quality.
1) Set air pressure for efficient atomization.
- Why it matters: correct pressure gives you fine droplets without excess overspray.
- Steps:
- Start at 20 psi at the gun for lacquers and thin primers, or 25–30 psi for thicker enamels and latex primers.
- Check your manometer every 10–15 minutes and keep pressure within ±2 psi.
- If you see a foggy mist or excessive bounce-back, reduce pressure by 2–3 psi.
- Example: when I sprayed a car bumper with acrylic lacquer, I ran 20 psi at the gun and kept the tank at 40 psi; that kept the edges smooth and cut paint usage by about 20%.
- Tip: keep the compressor tank at least 15–20 psi above gun pressure so the pump cycles less often.
2) Choose the right nozzle size for your material.
- Why it matters: the nozzle controls flow rate and droplet size, which affects waste.
- Steps:
- Use 1.0–1.3 mm tips for thin materials like lacquers and stain.
- Use 1.4–1.8 mm tips for primers, latex, and heavy enamels.
- If flow is sluggish at your selected gun pressure, move up one tip size; if you get runs, go down one size.
- Example: I switched from a 1.3 mm to a 1.4 mm tip when spraying a high-build primer and kept the same pressure, which eliminated tip clogging without adding overspray.
- Tip: mark the gun with the chosen tip size so you don’t mix them up mid-job.
3) Set fan width, distance, and overlap for consistent coverage.
- Why it matters: pattern control reduces rework and wasted paint.
- Steps:
- Start with a 6–8 inch fan for small panels and 8–10 inch fan for larger surfaces at 8–10 inches from the target.
- Hold the gun perpendicular and move at a steady pace so each pass overlaps the previous by about 50%.
- If the center of the pattern is heavy, widen the fan or step back 1–2 inches.
- Example: while painting a kitchen cabinet door, I used an 8-inch fan at 9 inches distance and overlapped by half; the finish was even and didn’t need sanding between coats.
- Tip: keep your wrist and elbow relaxed so your travel speed stays constant.
4) Tune travel speed and needle settings to minimize waste.
- Why it matters: slow travel or excessive fluid increases bounce-back when air is limited.
- Steps:
- Set fluid control so you get a wet but non-running coat in one pass.
- Walk at a speed that deposits one to two wet coats per pass; for most guns that’s about 1–1.5 feet per second.
- If you run out of air mid-pass, shorten passes to avoid heavy starts and stops.
- Example: on a metal gate I slowed to about 1.2 ft/s and reduced fluid feed by a click; I avoided sags and used less paint overall.
- Tip: mark a floor spot and practice your pace before you spray the real part.
5) Maintain consistent output during longer jobs.
- Why it matters: pressure drift causes uneven coats and wasted material.
- Steps:
- Check and refill the compressor tank before it falls below 20 psi above gun pressure.
- Clean or replace filters and moisture traps every few hours of continuous use.
- Re-check needle and air adjustments after any 10–15 minute break.
- Example: on a fence I sprayed in panels, I topped the tank after every two panels and serviced the trap; the finish stayed uniform across all panels.
- Tip: keep spare tips and a small wrench in the spray kit so you can swap parts quickly.
Use these concrete settings and checks, and you’ll reduce overspray while keeping a good finish even when your air supply is limited.
Paint Types, Thinning, and Flow Rates for LVLP on Small Compressors
Before you match paint and compressor settings, know why it matters: getting the right paint, thinning, and flow keeps your LVLP gun spraying smoothly and prevents poor finish or wasted material.
How do I pick the right paint for LVLP?
- Why this matters: the wrong paint won’t atomize at low air volumes and you’ll get orange peel or heavy droplets.
- Steps:
- Choose products labeled LVLP or “reduced air” from brands you trust. Example: a local autobody shop sold me a 2K acrylic primer labeled LVLP that sprayed evenly at 35 psi.
- Check the manufacturer viscosity range on the tech sheet — most LVLP parts expect 12–18 seconds in a Ford #4 viscosity cup. Example: use a Ford #4 cup and compare to the spec on the tin.
- If no LVLP label, don’t assume compatibility; call the tech line or pick a different product.
– Real-world example: I used a standard urethane basecoat and got heavy blotches at 20 psi, but swapping to a paint line marked LVLP fixed it with the same gun.
How do I thin the paint correctly?
- Why this matters: proper thinning gives consistent atomization and reduces runs.
- Steps:
- Measure viscosity with the stated cup (Ford #4 or #2) and thin only to the manufacturer’s range. Example: thin a basecoat from 22s to 16s with 5–10% reducer.
- Use the reducer type the maker recommends: slow for hot days, medium for normal, fast for cool conditions. Example: on a 85°F day use medium-slow reducer so the paint doesn’t flash off too quickly.
- Mix in small batches (1 quart or less) if your compressor cycles, because mixed pot life can change sprayability.
– Real-world example: thinning a clearcoat by 10% with medium reducer on a 70°F garage gave smooth flow without orange peel, measured at 15s in the Ford cup.
What flow rate should you aim for with LVLP and a small compressor?
- Why this matters: matching flow to the gun keeps your compressor from laboring and ensures even coverage.
- Steps:
- Check your gun’s flow spec; most LVLP guns run 140–190 ml/min at recommended pressure. Example: my 1.3 mm LVLP gun lists 160 ml/min at 25–30 psi.
- Adjust thinness to stay in that flow window: if measured flow is too high, add a touch more reducer; if too low, thin 2–5% more. Use a graduated cup to measure output over one minute.
- Watch compressor duty cycle: aim for spray bursts under the compressor’s continuous output — typically 30–60 seconds on, then let it recover 60–90 seconds for small tanks.
– Real-world example: with a 2.5 CFM compressor and a 1.3 mm nozzle, keeping flow near 150 ml/min allowed ten 30-second passes before the compressor dropped below 20 psi.
Which solvents and drying speeds work best with a cycling compressor?
- Why this matters: solvent choice affects how the paint lays when your compressor is intermittently available.
- Steps:
- Use medium or slow reducers for multi-pass work so the paint levels between cycles instead of locking up. Example: on a compressor that cycles every 45 seconds, medium reducer avoided surface tack before the next pass.
- For spot repairs, a fast reducer helps flash quickly, but only if your compressor can hold steady pressure.
- If your compressor cycles a lot, shoot thinner coats (0.8–1.2 mil wet) and let them flash 5–8 minutes before the next pass.
– Real-world example: a slow reducer on a 60°F day prevented mottling on a hood repair while my small compressor cycled.
Quick checklist before you spray:
- Verify paint label says LVLP or reduced air.
- Measure viscosity with the correct cup and thin to the spec (example: Ford #4 = 12–18s).
- Confirm gun flow (target 140–190 ml/min) and adjust thinning to hit it.
- Choose reducer speed to match temperature and compressor cycling.
- Shoot thin coats (0.8–1.2 mil wet) and monitor compressor psi and recovery.
A final practical tip: mark the reducer and cup times on the mix cup so you repeat the same recipe next time.
Setup Checklist: Hoses, Fittings, Cups, and Maintenance
Before you begin spraying, you need to know one simple truth: small compressors can’t hide leaks or restrictions. This matters because any air loss reduces atomization and ruins the finish.
1) Check hose routing and size.
Why it matters: long runs and sharp bends drop pressure; your gun won’t get the flow it needs.
Example: I once ran a 15-foot 1/8″ hose to a gun at a job and the finish was grainy because pressure fell off 12 psi at the gun.
Steps:
- Use 1/4″ ID hoses for most LVLP guns; for higher flow guns use 5/16″ if the manufacturer recommends it.
- Keep hose runs under 10–15 feet whenever possible.
- Avoid bends tighter than a 6-inch radius and never coil hoses tightly; secure them with clips.
Tighten fittings and replace seals.
Why it matters: even small leaks steal air and solvent, so you’ll see poor spray patterns and clogged nozzles.
Example: a loose swivel fitting leaked 3–4 psi and caused orange peel on an exterior door panel.
Steps:
- Hand-tighten fittings, then give a quarter turn with a wrench; don’t overtighten.
- Replace worn washers and O-rings every 3–6 months or when they look flattened or cracked.
- Keep a spare kit with at least two nozzle sets and 10 O-rings in your toolbox.
Confirm cup caps and lid threads.
Why it matters: solvent seepage or air leaks change fluid flow and can contaminate the job surface.
Example: a cracked gravity-cup cap dripped solvent onto a car hood, leaving a stain that had to be sanded out.
Steps:
- Inspect cup threads and cap seals before each session.
- Swap caps if threads feel loose or seals are hardened.
- Use Teflon tape on rigid fluid fittings only, not on needle seats.
Clean and maintain fluid passages after each session.
Why it matters: dried finish in passages causes inconsistent spray and frequent clogs.
Example: after a trim paint job, leftover lacquer in the fluid nozzle caused sputtering on the next coat.
Steps:
- Flush the gun with the correct solvent until it runs clear.
- Remove and soak the needle, tip, and air cap for 10–15 minutes when using tough materials.
- Lightly lubricate the needle packing with a few drops of compatible lubricant; don’t over-lubricate.
Keep spares and a simple toolkit handy.
Why it matters: replacing a nozzle or O-ring fast gets you back to spraying rather than waiting for parts.
Example: I had a job where a worn nozzle doubled dry time; swapping in a spare nozzle cut dry time back down instantly.
Steps:
- Carry two spare nozzles, a set of O-rings, a small wrench, and a cleaning brush.
- Label spares by gun model so you can grab the right part quickly.
Routine keeps performance steady.
Why it matters: consistent checks mean predictable atomization and fewer finish defects.
Example: a weekly quick inspection prevented an otherwise hidden leak that would have caused rework on a cabinet run.
Steps:
- Do a pre-shift checklist: hoses, fittings, cup seals, fluid passages, and spares.
- Log any part swaps or pressure drops so you can spot trends.
Common Small-Compressor Problems and Quick Fixes
Here’s what actually happens when your small compressor loses pressure under load: you get narrow, uneven spray that ruins finish and wastes paint. Why it matters: inconsistent pressure creates runs and dry spots that are hard to fix after the paint dries. Example: while spraying a car door with a 1/4″ hose, the fan tightened to half width and the edges went dry after each trigger pull.
How to fix pressure drop quickly
- Check for leaks: spray soapy water on all fittings, around the gun, and at hose connections while the compressor runs at cut-in pressure; bubbles show leaks.
- Replace undersized hose: if your hose is 1/8″ or kinked, upgrade to 1/4″ ID for runs under 25 feet, or 3/8″ ID if over 25 feet.
- Inspect the intake valve: remove the head per your manual, look for a torn valve or rubber debris, and replace the valve if it’s flattened or chipped.
- Add a small receiver tank: a 2–5 gallon tank mounted near your gun evens short pressure drops and smooths the spray.
Moisture in the line causes sputtering and poor atomization that leaves orange peel and blushing on glossy surfaces. Why it matters: water in the spray ruins clear coats and creates fish eyes you can’t sand out easily. Example: painting kitchen cabinets on a humid morning, you saw tiny craters appear in the finish halfway through the panel.
How to control moisture
- Install an inline moisture trap with a 40–60 micron filter and schedule regular draining.
- Drain the compressor tank after every 2–4 hours of continuous use, or at least once per day for intermittent work.
- Warm the compressor for 5–10 minutes before long jobs to reduce condensation; run it on low load in a warm shop or use a small space heater nearby (keep a safe distance).
Trigger sticking from paint residue or dirt makes the gun hard to modulate and causes runs or intermittent spraying. Why it matters: a sticky trigger costs control and wastes paint. Example: after a full trim job, the gun began spitting on fine trim because the trigger returned slowly.
How to free a sticky trigger
- Relieve pressure and disassemble the trigger assembly following the gun manual.
- Clean parts with an appropriate solvent—use lacquer thinner for lacquers, acetone for epoxies, or gun cleaner specified by the manufacturer.
- Lightly lubricate moving parts with a thin film of synthetic gun grease or PTFE lubricant—do not over-lubricate.
- Reassemble and test spray on cardboard for 30 seconds to verify smooth action.
Final quick checklist before you spray
- Tighten fittings and test for bubbles.
- Use at least 1/4″ ID hose for short runs, 3/8″ for long runs.
- Keep a 2–5 gallon tank nearby if you see pressure sag.
That checklist keeps your spray consistent and saves you sanding time later.
Real-World Workflows: DIY, Automotive Touch-Up, Small Workshops
Before you start LVLP spraying, you need to know why matching gear and technique matters: it keeps your finish consistent when you don’t have a big shop. I use a compact compressor under 2 HP with a 24–30 L (6–8 gallon) tank for touch-ups in a garage, and that size keeps duty cycles low so the pressure stays steady during a typical 10–15 minute spray session.
1) How do I set up the compressor and gun for small-shop spraying?
Why it matters: steady pressure and dry air control atomization and finish quality.
- Step 1: Set regulator to 18–22 psi at the gun for most automotive lacquers and urethanes; check with an inline gauge at the gun.
- Step 2: Install an air filter + water trap and a 5-micron inline regulator; drain the tank after each use.
- Step 3: Match nozzle to viscosity: use 1.2–1.4 mm for thin lacquers and 1.4–1.8 mm for thicker single-stage paints; thicker materials need 20–22 psi and a 1.6 mm tip.
Real example: I sprayed a car door with a 1.4 mm tip at 20 psi and the compressor ran 8 minutes on, 6 minutes off; the finish had no orange peel.
2) How should you prep the surface so the paint sticks?
Why it matters: paint sticks to clean, properly sanded surfaces and avoids peeling later.
- Step 1: Sand to recommended grit: primer at P320, basecoat at P400–P600 for metallics, final scuff with P800 before clear.
- Step 2: Clean with a lint-free cloth and 50/50 isopropyl/water or a dedicated surface cleaner; let it flash 5 minutes.
Real example: I repaired a ding on a motorcycle fender, sanded to P400, wiped with alcohol, and the basecoat adhered without lifting after 24 hours.
3) How do you spray thin coats instead of one heavy pass?
Why it matters: thin, staged passes prevent runs and give smoother leveling in small spaces.
- Step 1: Hold the gun 6–8 inches from the part and use 50% overlap on each pass.
- Step 2: Apply 3–5 light passes, letting each flash 3–5 minutes depending on solvent; increase flash to 8–10 minutes in a cold garage.
- Step 3: If you see a slight orange peel, wait 10 minutes and tack with a light pass rather than wiping.
Real example: On a garage cabinet door I did five passes with 4-minute flashes and got an even basecoat before two clear coats.
4) How should you arrange your garage for better ergonomics and lighting?
Why it matters: good layout reduces fatigue and keeps your spray pattern consistent.
- Step 1: Position the part at chest height on a movable stand so you can walk around it without stretching.
- Step 2: Use two 5000–6500K LED panels at 45-degree angles to the surface to reveal imperfections.
Real example: I moved a car bumper to a rolling stand at 42 inches high and found less wrist strain and more uniform strokes.
5) What masking, overlap technique, and drying intervals work in a small room?
Why it matters: correct masking keeps edges clean and proper drying avoids solvent trapping and runs.
- Step 1: Mask with 3M mask tape and paper; leave 1–2 mm of feathered edge on transitions.
- Step 2: Overlap each pass by about 50% and maintain a consistent travel speed of ~6–8 inches per second for flat panels.
- Step 3: Allow 15–30 minutes between basecoat and clear in a 60–70°F garage; increase to 45–60 minutes below 60°F. Watch compressor duty cycle—if it drops pressure, pause until it recovers.
Real example: After masking a tail light pocket with 3M tape and keeping 20 psi, I waited 20 minutes before clear and avoided solvent blush.
Final practical tip: keep a notebook with your settings—nozzle size, psi at the gun, number of passes, flash time, and ambient temp—so you can repeat what worked next time.
Frequently Asked Questions
How Long Do LVLP Gun Seals and Nozzles Typically Last With Regular Use?
A sundial shows time; I’d say seal lifespan is usually 1–3 years with regular use, while nozzle wear often appears after 6 months–2 years depending on materials and abrasives, so I’d replace parts proactively.
Are LVLP Guns Safe for Use With Combustible Solvent-Based Coatings Indoors?
Yes — I’m cautious: LVLP guns can be used with combustible solvent-based coatings indoors, but you’ve got to meet ventilation requirements, eliminate ignition sources, use proper PPE, grounded equipment, and follow solvent safety and local regulations.
Can I Retrofit an Existing Spray Gun to LVLP Performance Without Replacing It?
Yes — I can often retrofit: swap to an LVLP nozzle conversion, fit a precise air regulator, add or modify an internal baffle, and adjust the fluid needle, but performance may still lag dedicated LVLP guns.
What Noise Levels Can I Expect From LVLP Guns Compared to HVLP?
Think of LVLP as a whispering breeze: I hear lower decibels and enjoy quieter operation than many HVLP setups, typically a few dB quieter, especially when paired with small compressors and proper muffling.
Do LVLP Guns Require Different Respirators or PPE Than HVLP Systems?
No, they don’t fundamentally; I still require the same respirator fit and PPE compatibility for LVLP as HVLP, though lower overspray can let me use less restrictive filters and focus on snug seals and splash protection.