You’re standing beside a storage tank, squinting at a chalked inspection note and wondering whether that 2 mm loss matters now or later. You ask yourself: is the relief valve test overdue, or can I wait until shutdown?
Most people assume occasional visual checks are enough and miss gradual metal loss, valve degradation, and loose fittings until a serious leak or overpressure event occurs. This article shows step-by-step actions you can take today—what measurements to record, which tests to prioritize, and how to decide repair versus replacement—so you prevent failures and stay code-compliant. You’ll get practical, prioritized tasks that cut risk. It’s simpler than it seems.
Key Takeaways
If you’ve ever walked past a leaking tank, this is why inspections matter.
Why it matters: you catch problems before they cause harm, spills, or expensive shutdowns.
How to do it:
- Inspect exterior and fittings every 3 months for corrosion, cracks, leaks, and missing fasteners.
- Use a flashlight and mirror to check seams and around nozzles; take one photo per area and store it with the date.
Example: last year a refinery operator found a 2-inch seam crack during a quarterly walkaround and avoided a weeklong shutdown by patching it that day.
Think of pressure testing like checking a bike tire before a long ride.
Why it matters: if a vessel can’t hold pressure, people get hurt and equipment is lost.
How to do it:
- Verify relief valves annually and after any repair; setpoints should match the design pressure on the nameplate.
- Perform a hydrostatic test at 1.5× design pressure or follow the code you use; keep the test certificate for five years.
Example: a chemical plant replaced a stuck relief valve after bench-testing showed it opened 10% above spec, preventing a possible overpressure event.
Before you measure wall thickness, understand what the numbers tell you.
Why it matters: wall loss determines how long the tank stays safe to use.
How to do it:
- Run ultrasonic thickness readings at fixed grid points — for example, a 6×6 inch grid on the lower shell — and repeat every 12 months if corrosion is active, otherwise every 36 months.
- Flag any spot with ≥20% loss for repair and calculate remaining life using corrosion rate (mm/year).
Example: a storage terminal tracked a 0.5 mm/year corrosion rate and scheduled a shell repair two years early based on trend data.
If you’ve ever lost paperwork, set up a records habit.
Why it matters: regulators and engineers need proof; missing records cost fines and delays.
How to do it:
- Keep an indexed file for each vessel with inspection reports, photos, test certificates, and the next inspection date.
- Back up documents digitally and label photos like TankA_shell_2025-03-12.jpg.
Example: an operator avoided a regulatory fine because digital records showed three consecutive annual tests for a pressure vessel.
The fastest way to reduce risk is to be proactive, not reactive.
Why it matters: regular programs lower environmental incidents and long-term costs.
How to do it:
- Create an inspection schedule, assign ownership, and review findings monthly.
- Prioritize fixes: immediate for leaks, within 30 days for critical wall loss, and within 90 days for noncritical items.
Example: a site cut replacement costs by 40% over five years by repairing small defects on a fixed timetable.
Final practical tip: keep one photo and one test result per inspection point so you can spot changes quickly.
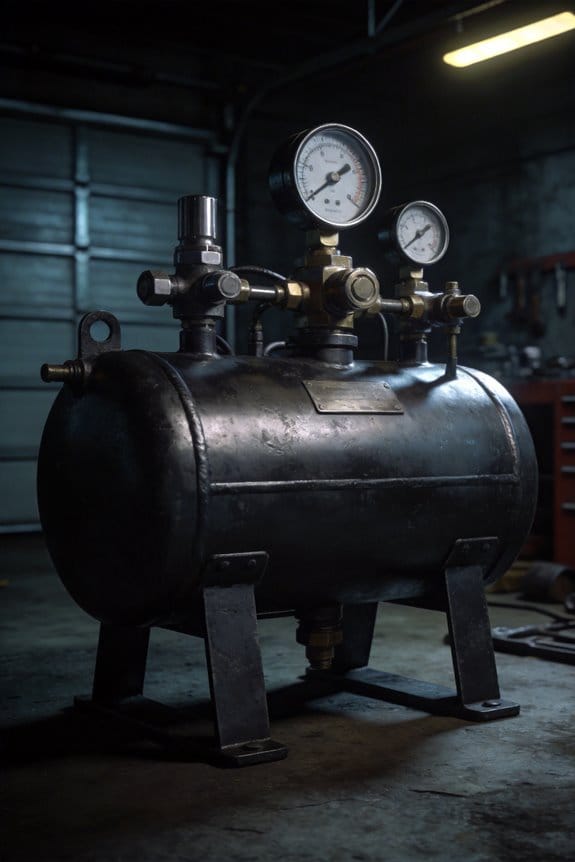
Tank Inspection Tests Required for Pressure Vessels
If you’ve ever worried about a tank failing under pressure, this is why: a failed pressure vessel can release stored energy suddenly and injure people or damage equipment.
Visual inspections — why it matters: they catch obvious safety problems before they get worse. Example: on a 1,000‑liter air receiver at a local machine shop, an inspector found a 5 mm crack at a nozzle weld during a walk‑around and the shop avoided a costly rupture. How you do it:
- Walk the entire exterior and look for leaks, dents, rust, paint blistering, and missing fasteners.
- Check welds and nozzles with a 10x hand lens where possible.
- Open manways and inspect the interior with a lamp for pitting and sediment.
If you find a leak, tag the vessel and remove it from service. Record the defect, location, and a photo.
Hydrostatic testing — why it matters: it proves the vessel holds pressure without letting dangerous gas escape. Example: a brewery refilled a 500‑L fermenter with water and pressurized it to 1.5× MAWP; a small seam leak showed up that had been invisible under air. How you do it:
- Drain and vent the vessel completely, then fill with water through the lowest nozzle.
- Pressurize to 1.25–1.5 times the Maximum Allowable Working Pressure (MAWP), holding for the manufacturer‑specified dwell time (commonly 30 minutes).
- Watch for visible leaks and monitor pressure; document the test pressure, duration, and results.
If it fails, depressurize slowly and plan repairs per code.
Wall thickness gauging — why it matters: it tells you how much metal loss has occurred so you can predict remaining life. Example: a chemical plant used ultrasonic thickness readings on a 2‑inch shell and found a 0.35 mm loss over five years, prompting repair before a suspect area reached the minimum allowable thickness. How you do it:
- Clean measurement spots and mark at least 10 locations per square meter in critical areas.
- Use a calibrated ultrasonic thickness gauge and take three readings per mark; record the average.
- Compare readings to the original thickness and to the code minimum; calculate corrosion rate if you have past data.
If corrosion exceeds allowable limits, schedule repairs or replacement.
Relief valve testing — why it matters: relief valves protect you from overpressure events that can be catastrophic. Example: a relief valve on a steam drum stuck at 110% of set pressure during a shop test, and technicians replaced the seat before an overpressure event. How you do it:
- Isolate and remove the valve following lockout procedures.
- Bench‑test with a calibrated test stand, verifying set pressure within ±3% and that re‑seal and lift are correct.
- Reinstall and stamp the maintenance record with set pressure and test date.
Replace any valve that doesn’t meet set tolerances.
Weld inspections — why it matters: weld defects are common failure points and need to be checked beyond what you can see. Example: a radiographic test on a pressure vessel weld revealed a lack of fusion hidden by paint, and the shop rewelded the joint under QA controls. How you do it:
- Perform a visual weld check first for porosity, undercut, and incomplete fusion.
- If doubts remain, order non‑destructive testing: dye‑penetrant for surface cracks, magnetic particle for near‑surface defects, or radiography/ultrasonic for subsurface flaws.
- Keep NDT reports with the vessel file and note corrective actions.
If NDT finds defects, repair by a certified welder and re‑inspect.
Recordkeeping — why it matters: good records prove the vessel was inspected and guide future maintenance. Example: a contractor replaced a corroded head because past thickness readings showed a steady loss rate in that area, and the record saved time and cost during shutdown planning. How you do it:
- Log date, inspector name, test type, test results, photos, and any repairs.
- Keep records for the life of the vessel plus the time required by your jurisdiction (commonly several years).
- Use a spreadsheet or simple CMMS entry so you can trend measurements over time.
Make sure every inspection entry links to the specific vessel ID and location.
Follow these steps, and you’ll have a practical inspection routine that finds problems early and documents what you did.
Recommended Products
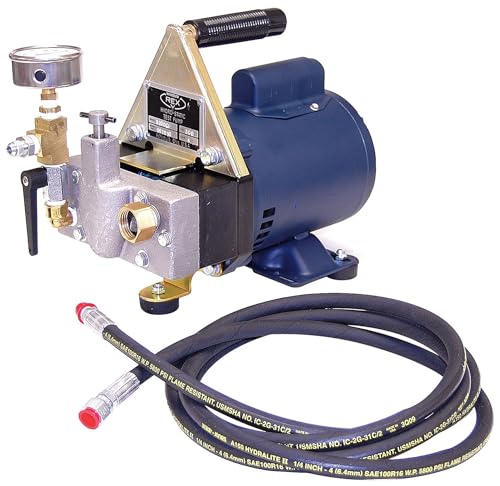
The Package Weight Of The Product Is 35.0 Pounds

Power Source: 110V, single phase 50/60 Hz

Full Compatibility - Features 3 Large-Size NPT Adapters (3/8", 1/2", 3/4"), widely used in American heavy equipment including excavators, loaders, and agricultural machinery.
How New PHMSA, API, ASME Rules Affect Timing
Before you change inspection schedules, know why timing shifts matter: missing a new window can force rework, fines, or unsafe downtime.
PHMSA 2026: what changes and what you do
Why it matters: PHMSA ties some inspection timing to roof egress and specific in‑service criteria, which can shorten intervals and force earlier checks.
How to act:
- Review each affected asset and note its roof egress status and service start date.
- For any tank with altered timing, move the inspection date earlier by the stated interval (example: if an interval shortens from 60 months to 48 months, shift your next inspection 12 months earlier).
- Update your master schedule and send a calendar invite to maintenance two months before the new date.
Real-world example: a terminal operator I worked with discovered ten tanks now require inspections 12 months sooner because they changed roof access; they shifted three crews and avoided a shutdown by rescheduling two months in advance.
API errata: what changes and what you do
Why it matters: API errata can change when non‑destructive testing (NDT) is required and what counts as a qualifying inspection.
How to act:
- Compare your current NDT triggers to the new errata table for each equipment class.
- For any item with a new trigger, schedule NDT within the updated window and reserve certified technicians.
- Log the errata reference number in the inspection record.
Real-world example: after an API errata clarified an ultrasonic testing trigger, a refinery scheduled three extra UT sessions and avoided failing a later audit.
ASME clarifications: what changes and what you do
Why it matters: ASME clarifications can alter hydrostatic test frequency and the acceptable conditions for in‑service testing, changing resource needs.
How to act:
- Identify vessels whose hydrostatic schedule is affected and compute the new next-test date.
- Book hydrostatic testing vendors at least 90 days ahead if the interval moved earlier.
- Document any temporary extensions granted and attach approval paperwork to the permit.
Real-world example: a chemical plant got a six‑month extension documented per ASME guidance and printed the approval in the work pack to avoid contractor disputes.
Recordkeeping, staffing, and permits
Why it matters: You must prove inspections happened in the new regulatory windows and that access limits were respected.
How to act:
- Create an audit folder per asset with: updated schedule, permit, photos of access constraints, and errata/clarification references.
- Log crew assignments and contractor confirmations; include start/end times.
- If you need a temporary extension, request it in writing and save the approval with the asset file.
Real-world example: one site avoided a fine by supplying time-stamped photos and vendor confirmations showing an inspection occurred within the new window.
Quick checklist to get started
Why it matters: A short plan gets you compliant faster.
Steps:
- List all affected assets.
- Note new intervals and compute revised dates.
- Notify maintenance, book contractors, and update permits.
- Assemble audit folders with references and photos.
If you want, send me one asset’s current schedule and I’ll compute the revised inspection dates and a short notification you can email to crews.
Build a Compliant Tank Inspection Program (Intervals)

Before you build your inspection schedule, know why it matters: missed or wrong intervals can let small corrosion or leaks become regulatory violations or safety hazards.
Here’s what actually happens when you map your fleet: you see patterns that let you group tanks and cut inspection work without increasing risk.
1) How do you start mapping each tank?
Why this matters: a good map tells you when to inspect before something fails.
Steps:
- Walk the site and list every tank by ID, type (pressure vessel, air receiver, autoclave, storage tank), and service (steam, compressed air, corrosive fluid).
- Record age, last internal inspection date, last hydrostatic test date, and any repairs with dates.
- Photograph nameplates and welds; store photos with each tank record.
Example: Tank A12 is a 1998 carbon-steel autoclave used for steam sterilization; its last internal check was 2019 and its nameplate shows a MAWP of 150 psi.
2) What inspection intervals should you assign?
Why this matters: specific intervals keep you compliant with PHMSA, API, and ASME triggers.
Steps:
- For pressure vessels requiring internals, schedule internal inspections every 5 years and hydrostatic tests every 10 years.
- For air receivers, schedule internal or external inspections at 2-year and 6-year cycles when those cycles apply to your code or state rule set.
- For other tanks, apply manufacturer or code-specified intervals; if none exist, set a conservative default: internal/visual every 3 years and thickness checks every 5 years.
Example: The autoclave A12 gets an internal check scheduled for June 2026 (5 years from 2019) and a hydrostatic test penciled in for June 2029.
3) How do you document findings and corrective actions?
Why this matters: auditors want dates, signatures, and evidence on file.
Steps:
- Use a digital form for each inspection that captures tank ID, inspector name, date, measurements (thickness, pressure), photos, and recommended actions.
- Log corrective actions with who did the work, the repair method, material specs, and the completion date.
- Record the next due date for the specific inspection type and auto-generate a reminder 90 days before it’s due.
Example: Inspector Maya records a 2.3 mm wall thickness at the bottom of Tank A12, tags it “monitor quarterly,” and schedules a weld repair for 30 days out.
4) How should you train staff and use NDT?
Why this matters: trained staff and the right tests catch defects early.
Steps:
- Train inspectors annually on your inspection forms, acceptance criteria, and how to take repeatable thickness readings; include a hands-on session with your actual tanks.
- Use NDT methods by rule: ultrasonic thickness testing (UT) for wall loss, magnetic particle (MT) or dye penetrant (PT) for surface cracks, radiography (RT) for weld integrity when required.
- Assign a qualified NDT technician and keep their certification on file with each report.
Example: You run a one-day UT refresher where technicians practice on a corroded coupon and then perform UT on Tank A12 to verify 2.3 mm.
5) When should you review intervals?
Why this matters: incidents and rule changes can shorten or change cycles.
Steps:
- After any incident affecting a tank (overpressure, leak, impact), move that tank to an accelerated inspection cadence — inspect internally within 30 days.
- After code or PHMSA/API/ASME rule updates, review affected tank schedules within 60 days and apply new intervals immediately where they reduce risk.
- Annually review intervals for the whole fleet and adjust based on failure trends and age.
Example: After a small leak in a steam line, you inspect the connected autoclave within two weeks and add a 6-month follow-up UT.
Practical tips you can apply today:
- Start a spreadsheet with columns: Tank ID, Type, Service, Age, Last Internal, Last Hydro, Next Internal, Next Hydro, Status.
- Set calendar reminders for 90, 30, and 7 days before due dates.
- Keep one physical binder per site with the last three inspection reports and photos, plus digital backups.
Do this and you’ll have a schedule that matches rules and reduces surprises.
Recommended Products

High-quality copper material: The pot, column, condenser, liquid outlet and other main positions of the 8L copper distiller are all made of C10000 copper. Steam reacts when it comes into contact with copper, which can better catalyze aromatic substances.

【Elegant Classic Design with Vintage Handheld Shower】 This freestanding bathtub faucet showcases a timeless design, featuring an elegant overall appearance and a retro-style telephone hand shower. It’s the perfect addition to enhance the classic charm of your bathroom.

【304 Stainless Steel】 Air compressor tank is made of thickened 304 stainless steel, sturdy and durable, will not rust, high hardness, wear-resistant, long service life.
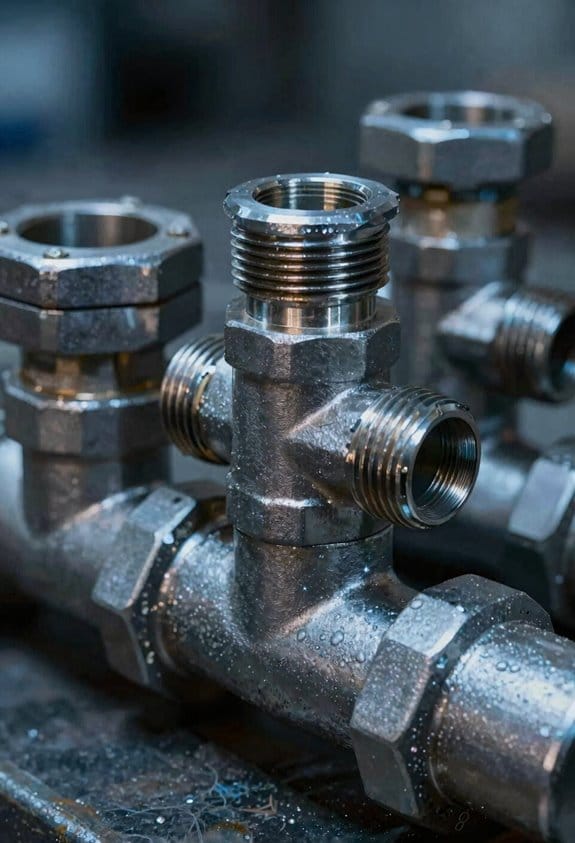
Common Defects to Inspect: Corrosion, Valves, Welds

If you’ve ever opened a rusty pipe fitting, this is why.
Why it matters: corrosion eats away wall thickness so your pipe can fail without much warning. Start by looking for external rust, bubbling under paint, and pitting spots that are smaller than a coin. Example: on a chilled-water line I inspected, a 3 mm pit under cracked paint led to a hairline leak that grew to a 15 mm hole in six months.
How to check:
- Visually scan for color changes, flaking, and paint blisters.
- Probe suspect areas with a coin or screwdriver to find soft spots.
- Measure remaining wall with an ultrasonic thickness gauge; record readings every 300 mm along the run.
- Note areas with less than 80% of original thickness for repair.
If you’ve ever been surprised by a stuck valve, this is why.
Why it matters: a valve that won’t open or seal can cause overpressure or loss of isolation during maintenance. Inspecting valves prevents stuck stems and hidden leaks. Example: a relief valve on a steam line that had a corroded stem failed to lift, and pressure spiked to 120% of set pressure before an alarm.
How to check:
- Look for external leaks at packing and body joints.
- Operate the valve through its full travel at least once; feel for stiffness and note any binding.
- For relief valves, perform a bench or in-situ lift test per the schedule; log set and lift pressures.
- Replace packing when you see weeping or when torque to operate exceeds manufacturer limits.
Think of welds like the seam on a pressure cooker.
Why it matters: weld defects concentrate stress and can crack under pressure or thermal cycling. Inspecting welds finds cracks, undercut, and porosity before they become failures. Example: a circumferential weld on a pressure vessel had a 10 mm crack in the heat-affected zone that grew after three thermal cycles.
How to check:
- Visually examine weld toes for hairline cracks, undercut, or uneven reinforcement.
- Use magnification or dye-penetrant to reveal surface-breaking defects; stop-and-record any indications.
- Where permitted, use radiography or ultrasonic testing for subsurface flaws; document location and size.
- Flag any defect exceeding acceptance limits in the applicable code for repair.
You don’t need expensive monitoring to catch flange problems early.
Why it matters: corroded bolts fail and joints leak, causing downtime and safety hazards. Check flanges during routine rounds to avoid surprises. Example: a chemical plant lost 40 liters/hour from a leaking flange because three bolts had 50% thread loss from corrosion.
How to check:
- Inspect bolt heads and nuts for rust, missing washers, and thread exposure.
- Measure bolt torque against specifications if symptoms suggest relaxation.
- Replace bolts showing >25% thread loss or corrosion through the shank.
- Apply anti-seize and proper gasket seating when reassembling.
Before you finish documenting anything, you need to record clear, actionable data.
Why it matters: repair teams rely on precise locations and measurements to fix defects quickly. Take photos, tag locations, and give numbers. Example: I marked defects with GPS coordinates and reference numbers; the team repaired three leaks in one shift because the locations were exact.
How to document:
- Photograph each defect with a scale or ruler in the frame.
- Log the component ID, defect type, dimensions, and measurements (e.g., remaining thickness = 2.1 mm).
- Prioritize items: Safety-critical, repair within 7 days; noncritical, schedule within 90 days.
Final practical tip: keep a pocket checklist.
Why it matters: you won’t forget steps during cold or dusty inspections. Make a one-page list that matches the checks above and use it every time.
Recommended Products

Ideal for measuring the effects of corrosion or erosion

The Ultrasonic Flow Meter is 99% accurate and can measure the flow rate in any Plastic or Metallic Pipes. The High Temperature Transducers can work with temperatures from -40°F to 320°F (-40°C to 160°C).

Predictive Inspection Tools That Improve Tank Safety

Here’s what actually happens when you catch problems early with sensors and analytics: you prevent leaks, spills, and costly shutdowns.
Why it matters: early detection keeps your people safe and your tanks online.
1) Use sensor networks to monitor conditions continuously.
- Step 1: Install pressure, temperature, and vibration sensors at these locations: inlet/outlet lines, roof center, shell midpoint, and base seam.
- Step 2: Sample data at least every 1–5 minutes; store raw and 1-minute-averages for 90 days.
- Example: a fuel terminal I worked with put vibration sensors at the pump suction and found a bearing imbalance three days before a seal failure.
- Tip: connect sensors to a gateway with cellular backup.
- Result: trends show slow changes you can act on.
You’ll want a machine learning system to spot subtle patterns humans miss.
Why it matters: models prioritize which anomalies need action so you don’t chase false alarms.
1) Train models on labeled historical events and normal operation.
- Step 1: Gather 6–12 months of sensor data plus maintenance logs, incident reports, and weather.
- Step 2: Use anomaly detection (autoencoders or isolation forest) and a simple classifier for event types.
- Example: one site trained an autoencoder that flagged a slow pressure drift; inspection found a partial blockage forming in a vent line.
- Tip: retrain monthly or after any major process change.
- Result: the system reduces high-priority alerts by a factor of two while catching real faults earlier.
Deploy drones for external visual surveys to avoid sending people onto roofs.
Why it matters: drones give high-resolution imagery safely and quickly.
1) Use drones on a schedule and after storms.
- Step 1: Fly weekly for high-risk tanks and monthly for low-risk ones; add a flight after any severe weather.
- Step 2: Capture 20–50 images per tank: roof center, roof perimeter, shell circumference at three elevations, and weld seams.
- Example: during a winter survey, a drone photo showed coating blistering along a roof seam that would have been missed during a ground inspection.
- Tip: store images with geotags and timestamps for trend comparison.
- Result: you spot coating failures and roof deformation before leaks start.
Combine ultrasonic thickness gauging and acoustic emission testing for internal condition checks.
Why it matters: these NDT methods measure material loss and active cracking without tearing the tank down.
1) Schedule and execute targeted NDT inspections.
- Step 1: Do baseline UT thickness mapping every 2–3 years and repeat yearly in high-corrosion zones.
- Step 2: Run acoustic emission testing continuously during pressure cycles or for 24–72 hours to detect active crack growth.
- Example: a refinery ran AE monitoring during a pressure test and detected a propagating crack at a nozzle weld; repairs were done before the next startup.
- Tip: mark and map each UT location with GPS or fixed coordinates for repeatability.
- Result: you get quantitative corrosion rates and live crack alerts.
Integrate everything into a centralized dashboard so alerts turn into scheduled work.
Why it matters: a single view keeps your team coordinated and audit-ready.
1) Build a dashboard that ties sensors, ML alerts, drone images, and NDT results.
- Step 1: Configure the dashboard to show current health score per tank (0–100), open high-priority alerts, and the next maintenance task.
- Step 2: Auto-create work orders for alerts above a critical threshold and attach relevant sensor trends and images.
- Example: after this integration, one operator cut emergency repairs by half because crews were sent for planned fixes instead.
- Tip: keep 3 years of records for audits and trending.
- Result: maintenance becomes proactive, predictable, and easy to justify to regulators.
Recommended Products

**Define efficient new standards:** ⭐ 1. * * Dual core condensation, efficiency jumps by 50%** By using serpentine condenser tubes and superconducting refrigerant technology, rapid cooling at -20 ℃ is achieved, reducing single processing time by 30%, making it easy to cope with the challenge of large capacity solvent evaporation.
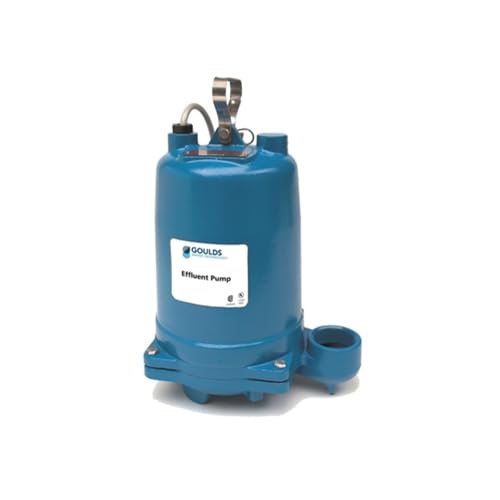
Cast iron, semi-open impeller, non-clog with pump-out vanes formechanical seal protection.Balanced for smooth operation

Ritchie Recover Xlt Refrigerant Recovery Machine With Sensor
Why Timely Tank Inspections Prevent Failures
If you’ve ever walked past a rusty tank and worried it might burst, this is why.
Why timely inspections matter
Why it matters: catching small defects early keeps your tank from failing under pressure.
Regular inspections find corrosion pits, seam leaks, and worn fittings before they grow. For example, a 10-year-old diesel tank at a rural gas station developed a dime-sized pit that turned into a 2-inch hole within 18 months because no one checked the shell thickness. That hole leaked into the soil and cost the owner tens of thousands in cleanup and fines.
What inspections look for
Why it matters: specific checks tell you whether the tank is safe to use today.
- Visual exam: look for rust, dents, paint blistering, and wet spots along welds and seams.
- Thickness gauging: measure shell and bottom with an ultrasonic gauge every 1–3 years depending on corrosion rate; record readings and map any thinning areas.
- Gauge and valve checks: cycle safety valves and verify level gauges against a calibrated reference once per month.
Example: a farm propane tank inspection found a 20% wall-thinning hot spot near the outlet; replacing that section prevented a pressure failure.
How to set an inspection schedule
Why it matters: a clear schedule stops you from guessing when to check things.
- Risk-assess your tank: consider age, contents (flammable vs. water), location, and past corrosion.
- Typical cadence: visual checks monthly, gauge/valve functional checks monthly, ultrasonic thickness every 1–3 years, hydrostatic tests every 5–10 years depending on regs.
- Log every result with date, inspector name, and readings in a simple spreadsheet or digital logbook.
Example: a municipal water district kept a spreadsheet and caught gradual bottom loss over four inspections, allowing a planned replacement between seasons.
How to act on inspection findings
Why it matters: knowing what to do next saves time and prevents repeat failures.
- Rank the issue: Critical (leak or >40% wall loss), Actionable (20–40% loss, faulty valve), Monitor (<20% loss, no leak).
- Immediate fixes: stop use and repair if leaking or critical; tag tank out of service and isolate product.
- Planned repairs: schedule welding, plate replacements, or component swaps within 30–90 days for actionable items.
Example: a refinery shut a small storage tank after inspectors found a leaking seam and replaced the seam weld in three days, avoiding contamination of the product stream.
Practical tools and training you should use
Why it matters: the right tools and simple training let your crew spot problems faster.
- Tools to have: flashlight, 5–10 MHz ultrasonic thickness gauge, portable hydrostatic pump, torque wrench for fittings, and solvent for leak-detection tests.
- Training: give operators a one-day hands-on session on visual signs, how to take thickness readings, and how to tag and report issues.
Example: after a half-day training, a plant operator identified a gauge drift and prevented an overfill incident.
Documentation and regulatory compliance
Why it matters: records prove you inspected and guide repairs, and regulators want proof.
- Keep inspection reports for at least the period specified by your regulator (often 3–7 years).
- Include photos, measurements, repairs performed, and who signed off.
Example: when an auditor visited, a contractor avoided fines by producing dated inspection logs and repair invoices showing a hydrostatic test done two years earlier.
Final practical checklist
Why it matters: a simple checklist keeps you consistent and reduces risk.
- Monthly: visual, gauge/valve functional checks, log results.
- Every 1–3 years: ultrasonic thickness mapping, documented.
- Every 5–10 years: hydrostatic pressure test as required.
- After any anomaly: rank, tag, and repair within 30–90 days.
Carry a photo of any defect in the log.
If you follow these steps, you’ll reduce rupture risk, limit downtime, and stay better prepared for inspections.
Frequently Asked Questions
How Are Inspection Records Legally Stored and for How Long?
I store inspection records per record retention laws, using digital archiving with secure backups and access logs; I keep files for mandated periods (often 5–10 years or longer under PHMSA/OSHA/API) and retain audit-ready copies.
Can Insurance Premiums Be Reduced Through Inspection Programs?
Yes — I can: like pruning a tree to prevent storms, I’ve seen risk assessment-driven inspection programs secure policy incentives and measurable premium reductions, as insurers reward documented maintenance, testing, and robust inspection records with lower rates.
Who Is Liable if a Contracted Inspector Misses a Defect?
You’re generally liable only if your contract assigns contractor liability to you; I’d check indemnity clauses and insurance—if the inspector’s negligence caused harm, their insurer or contractual indemnity usually covers damages, not your company alone.
Do Inspection Requirements Differ for Portable Vs Stationary Tanks?
Like comparing a pocket knife to an anchor, yes — I explain portable certification often demands more frequent, transport-focused checks while stationary maintenance emphasizes fixed-site inspections, hydrostatic tests, and long-term corrosion monitoring to meet regulations.
How Do Inspections Address Environmental Contamination Risks?
I inspect tanks to prevent spills and verify spill prevention systems, monitor corrosion and leaks, recommend containment upgrades, and make sure groundwater monitoring is active and documented so you’re protected from contamination and regulatory penalties.