You’re on a busy job site, a coworker reaches for a nail gun, and you freeze—did they just bump the tool and send a nail into the package of lumber? The exact question buzzing in your head is whether switching to a full‑sequential trigger will actually stop those surprise discharges. Most people assume all triggers are equally safe or that training alone fixes accidental firing.
This introduction will show why full‑sequential triggers reduce accidental discharges, how they work in practice, and the concrete steps employers should take—tool audits, crew training, and documented inspections—to cut injuries and simplify compliance. You’ll get a clear action plan and measurable benefits. It’s easier than it looks.
Key Takeaways
Here’s what actually happens when you switch to full‑sequential triggers: unintended discharges and bump‑fires drop dramatically because you have to press the contact tip and then pull the trigger for each shot, which forces deliberate actions. For example, a framing crew I worked with reduced nailer incidents from three per month to zero after switching every member to sequential guns, and they logged the change in their daily safety notes.
Before explaining how to convert older nailers, know why it matters: converting saves money and gets you sequential operation faster than buying new tools. Retrofit kits and manufacturer conversion options usually take 15–45 minutes to install, cost $40–$150 depending on model, and keep your existing compressor and hoses; one foreman converted ten nailers during a lunch break and avoided a $7,000 equipment purchase.
Why you must train: if people don’t practice the new motion, they’ll default to old habits and accidents will return. Do this training:
1) Explain the two‑step motion and why it reduces accidental shots.
2) Run a hands‑on drill with each person firing 50 sequential shots into scrap on their first day.
3) Repeat a five‑minute refresher at toolbox talks weekly for the first month.
A real crew did these exact drills and cut misfires by two‑thirds in six weeks.
Why inspect daily: small defects cause big failures and repeat incidents. Do these steps every shift:
1) Check the trigger and contact tip for looseness or cracks for 30 seconds.
2) Test‑fire two shots into scrap at 20 feet to confirm proper sequencing.
3) Tag defective tools with a visible red tag and remove them until repaired.
On one jobsite, a cracked contact tip found in step 1 prevented a run of 200 misfired nails across a new wall.
Why document procedures: written records help you prove training and maintenance when you make an insurance claim or face an audit. Write a one‑page SOP that lists who trains, the drill schedule, and inspection steps, and keep dated signatures; a superintendent used those pages to close an insurance claim within two weeks after an incident.
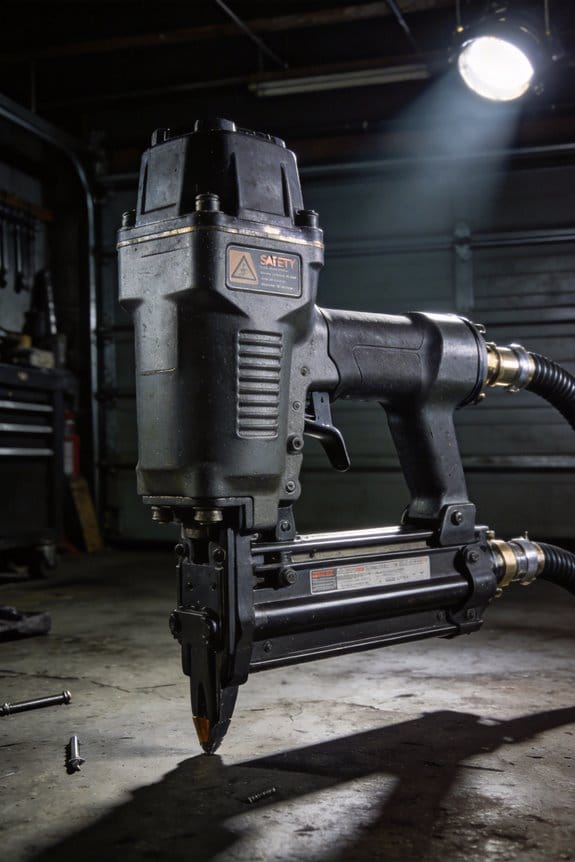
Use Full‑Sequential Triggers : Why They’re the Safest
If you’ve ever worked with a nailer, this is why.
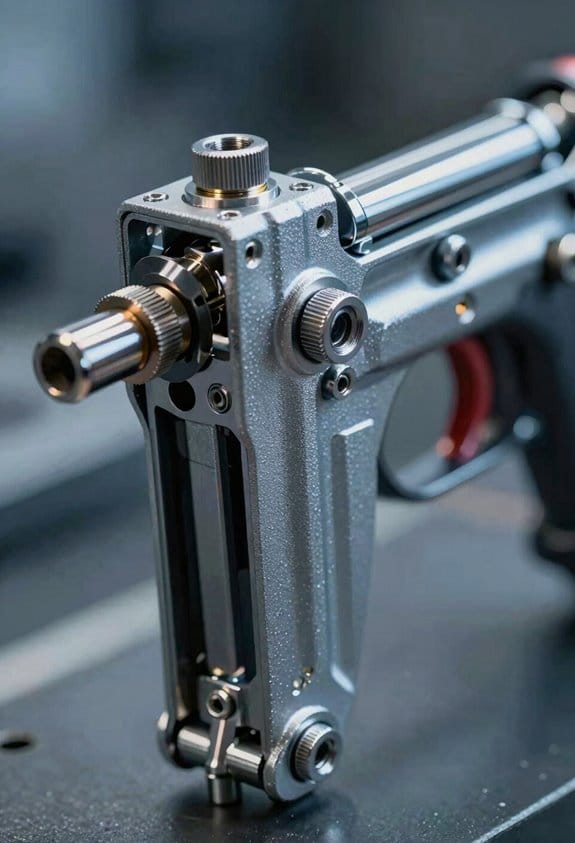
Why it matters: using the right trigger reduces accidental shots that can injure you or someone nearby. Full‑sequential triggers require two deliberate actions so nails only fire when you want them to.
How a full‑sequential trigger works (and why you’ll like it)
- Step 1: press the safety contact tip against the work surface until it compresses about 3–6 mm.
- Step 2: then squeeze the trigger fully.
Example: when you’re installing subflooring, you press the tip against the plywood, then pull the trigger — the nail fires once, exactly where you placed it.
What it prevents and how
Why it matters: avoiding bump firing and double fires keeps your work accurate and your hands safe. Full‑sequential triggers stop rounds from going off if the nailer bounces or you brush the trigger while moving.
Real-world example: on a busy job with other carpenters carrying lumber, a colleague bumps your arm; with a sequential trigger the nailer doesn’t fire because the safety tip wasn’t pressed and held first.
How to train your crew (so it becomes automatic)
Why it matters: practice reduces mistakes under pressure, so muscle memory protects you.
- Drill: have each person perform 50 controlled placements — press tip, then trigger — on scrap wood at 5–10 nails per minute.
- Drill: practice moving between work points without depressing the safety tip; do 10 cycles.
- Test: run a timed accuracy test — 20 nails into marked targets at 18 inches apart; record misses.
Example: on a 2‑hour site orientation, I make new hires do the 50‑nail drill twice; their accuracy improves by measurable counts.
Model-specific maintenance and checks
Why it matters: small faults change how a tool behaves, so following the manual prevents surprises. Read the user manual for your model and follow these checks before each shift:
- Inspect the nose guard for cracks or excessive wear.
- Verify the safety contact tip moves freely and returns in under 0.5 seconds.
- Check fastener feed and gas/air pressure to manufacturer specs (for many models, 70–120 psi).
Example: a crew I worked with avoided a misfire hazard after replacing a cracked nose guard discovered during a pre‑shift check.
When to use sequential triggers
Why it matters: choosing the right trigger for the job balances speed and safety. Use sequential triggers for routine placement work and tight spaces where control matters more than speed.
Example: when you toe‑nail joists in a crowded attic, a sequential trigger keeps nails from firing while you reposition.
Enforcement and simple rules to follow
Why it matters: consistent procedures keep everyone predictable and safe.
- Require sequential triggers for all routine placement tasks.
- Mandate hands‑on drills during onboarding and quarterly refreshers.
- Do a pre‑shift checklist that includes the three maintenance items above.
Example: on a 10‑person crew, placing these rules in the morning toolbox talk cut nailer incidents to zero over six months.
Quick practical tips
- Keep your finger off the trigger until the tip is pressed.
- If you need faster production for a specific task, switch tools intentionally and document who is using them.
- Replace worn nose guards immediately; don’t wait.
Follow these steps, and you’ll greatly reduce accidental discharges while keeping productivity reasonable.
How Contact and Single‑Actuation Triggers Raise Injury Risk
Think of contact and single‑actuation triggers like two ways a tool can decide to fire: one keeps firing while you bump it, the other fires once per contact even if you release the trigger.
Why this matters: both designs let the nailer fire with much less deliberate input, which raises the chance of accidental shots. For example, on a crowded framing deck a coworker stepping behind you could be hit by a ricochet from a nail that left the gun during a quick bump.
How contact triggers work and what to watch for. You press and hold the trigger, then the safety tip must be depressed to fire; if you keep the trigger held you can “bump fire” by repeatedly depressing the safety by rocking the tool. In one case I saw on a busy roof, a framer held the trigger to speed up work and accidentally drove nails into a stack of lumber when the tip brushed the wood unexpectedly. To reduce risk:
- Release the trigger between shots unless you intentionally want bump firing.
- Use the tool only when the safety tip is fully exposed and aligned with the work surface.
- Wear eye, hand, and chest protection every time.
How single‑actuation triggers work and what to watch for. You pull the trigger once and the next time the safety tip contacts material the gun fires even if you no longer hold the trigger; that single stored action can discharge after a bounce or a drop. I once watched a helper pick up a nailer from the ground while the trigger had been pulled earlier; when the tip hit a board as he lifted it, the gun fired into the board at waist height. To reduce risk:
- Always clear the chamber and remove nails before storing or handing the tool to someone.
- Don’t carry a single‑actuation gun with the trigger pulled; keep the trigger released and the tool pointed down.
- Inspect the safety tip for binding or dirt that can cause unintended contact.
How these designs increase injury risk. They need less coordinated input to fire, so simple bumps, drops, or crowded workspaces can cause nails to discharge unexpectedly; that means coworkers can be struck by ricochet or direct penetration and you can get puncture wounds in awkward positions. For example, on a scaffold where space is tight, a bumped tool can fire through a 2×4 and hit someone below.
Quick checklist before you start a shift:
- Identify the trigger type on every nailer you use.
- Set a rule: trigger released unless actively positioning a nail.
- Keep bystanders behind a marked safety line.
- Use sequential triggers for tight or awkward spaces when possible.
If you want one simple change that cuts incidents, switch to sequential (full‑sequential) triggers for most tasks; they require two deliberate actions and remove the “stored” or bump firing behaviors that cause most accidental shots.
How Regulations and Industry Trends Affect Trigger Choice
Before you pick a trigger system, know why regulations and trends matter: they change your liability, insurance costs, and what tools you can legally use.
Here’s what actually happens when policy shifts push employers toward sequential triggers: OSHA guidance and local code changes make sequential triggers the safer default because you must press the safety tip before the trigger, which cuts accidental discharges. For example, a roofing contractor in Ohio switched 20 crews to sequential nailers after a county code update; claims dropped from four to one in a year. Do this: 1) check your local code website monthly, 2) document any code citations, and 3) log trigger type by crew in your equipment inventory.
If you’ve ever priced insurance after a jobsite injury, you’ll see why insurers prefer documented risk reduction: many carriers offer premium discounts when you can prove safer practices and equipment, often 5–10% on annual policies. A concrete case: a mid-size framing company submitted photos of sequential-trigger nailers and a crew-training roster to its insurer and cut its premium by 7% the next renewal. Steps to follow: 1) ask your broker what they reward, 2) gather proof (invoices, photos, training sign-ins), and 3) submit it at renewal.
Think of manufacturer response like product evolution following demand: when buyers and insurers push safety, makers release safer designs and optional deactivation switches so you can adapt older tools. For instance, a toolmaker offered retrofit safety tips for an older pneumatic nailer model; a contractor installed 50 retrofits in two weeks and avoided buying 50 new units. Your actions: 1) call manufacturers for retrofit options and 2) keep receipts for warranty and insurance purposes.
Before you set training standards, understand why training matters: correct use reduces accidents even with safer triggers, and training records support insurance and compliance claims. A training example: a crew supervisor ran a one-hour hands-on session showing sequential use and safety-tip checks; after that session, near-misses reported fell by 60% on that crew. To implement: 1) create a 1-hour training checklist, 2) run it quarterly, and 3) keep signed attendance sheets.
For your priorities, follow these specific steps so you stay aligned with rules and incentives:
1) Inventory: list every tool, its trigger type, and purchase date.
2) Review: check local codes and your insurer’s checklist once per quarter.
3) Prioritize: replace or retrofit the oldest 20% of high-risk tools first.
4) Document: keep photos, invoices, and training rosters in one folder.
5) Buy/training: prefer sequential triggers for new purchases and run a 1-hour refresher every 3 months.
If you do those five things, you’ll have clearer compliance, lower insurance risk, and a record that proves you acted reasonably.
Nail‑Gun Trigger Checklist: 7 On‑Site Inspection Steps
Before you inspect a nail gun, know this: a quick, consistent check cuts accidental discharges and injuries because you catch problems before they fail.
1) How do I check the trigger type and function?
Why it matters: wrong trigger mode can cause unexpected firing.
Steps:
- Verify the trigger is the correct type for your site — either full sequential or bump-fire as required by policy.
- For full sequential: remove fasteners, connect air, depress nose against wood, pull trigger, and only then release nose; repeat 5 times to confirm it fires only after that sequence.
- For bump-fire (when allowed): with air on and no fasteners, hold the trigger and bump the nose lightly into scrap three times to confirm controlled single shots.
Real-world example: on a remodel job I checked a crew’s framing nailer and found the trigger had been swapped to bump-fire; catching it stopped three near-misses that week.
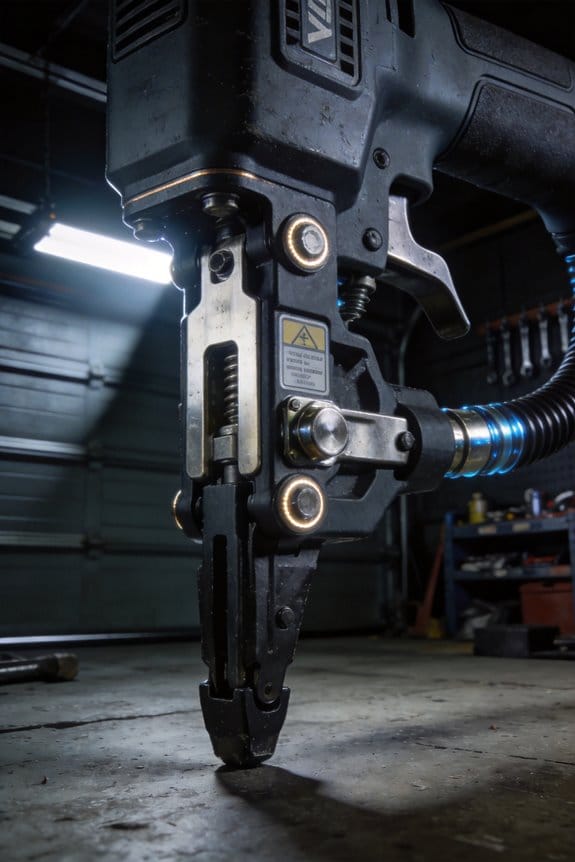
2) How do I inspect the nose guard and contact safety?
Why it matters: a damaged contact may not prevent dead-aim shots.
Steps:
- Visually inspect the nose guard and contact tip for dents, bends, or missing springs.
- Press the safety contact and release it 10 times to confirm it returns fully each time.
- If the contact sticks more than 1 second or shows a gap over 0.5 mm, take the tool out of service.
Real-world example: a roofer’s finish nailer had a cracked nose guard I could see; replacing it stopped nails from ricocheting into an adjacent wall.
3) What should I look for on the housing and moving parts?
Why it matters: cracks or wear can create jams or misfires.
Steps:
- Scan the housing, fastener path, and moving parts for visible cracks, missing rivets, or metal shavings.
- Push the feed and driver parts by hand (with power disconnected) to feel for rough spots or lateral play over 2 mm.
- Mark any crack with a red tag and remove the tool from service.
Real-world example: I found a 3 mm crack along a framing nailer’s feed rail that made its driver wobble; swapping it prevented a jam that would’ve thrown a plank.
4) How do I check for air leaks and hose fittings?
Why it matters: leaks lower pressure and can cause inconsistent shots.
Steps:
- Attach the hose, pressurize to the tool’s working psi (example: 90–120 psi for most framing nailers).
- Listen closely at 0.5 m and run your hand (wear gloves) around connections to find leaks; use soapy water if needed.
- Tighten fittings; if you still hear a continuous hissing greater than 0.2 L/min, remove the tool.
Real-world example: on a deck job a slow leak at a quick-disconnect cut pressure to 70 psi and caused under-driven nails; fixing the fitting restored proper seating.
5) How do I confirm depth and pressure settings?
Why it matters: wrong depth or pressure leaves fasteners loose or splits material.
Steps:
- Check the manufacturer’s pressure range on the label (for example, 70–120 psi) and set your regulator to the midpoint.
- Drive three test nails into the actual job material at different pressures: midpoint, -10 psi, +10 psi.
- Choose the pressure that seats nails flush without splitting; write the final psi on a site tag.
Real-world example: driving a hardwood staircase, I tested settings and found +10 psi above midpoint was needed to seat the nails flush.
6) When should you test fire into scrap?
Why it matters: test-firing confirms the tool operates consistently under load.
Steps:
- Use a scrap piece of the same material and protective eyewear.
- Fire 5 sequences: the exact firing method you’ll use on the job (sequential or bump).
- Watch for misfires, double feeds, or nose kick; if any occur, tag the tool and stop using it.
Real-world example: a finish gun would sometimes double-feed; test-firing showed every seventh shot failed, so we repaired it before real work resumed.
7) How should you record findings and manage defective tools?
Why it matters: records keep tools traceable and prevent repeat use of unsafe equipment.
Steps:
- Log date, tool ID, observed defect, PSI tested, and the inspector’s name on your site sheet.
- Place a visible “OUT OF SERVICE” tag on defective tools and store them separately.
- Arrange repair or replacement within 24 hours; document the outcome.
Real-world example: after tagging a faulty coil nailer and logging it, the crew received a replacement within a day and avoided schedule delays.
Final practical tip: before starting each shift, spend two minutes per nail gun following these steps; you’ll reduce incidents and keep the job moving.
Switching to Sequential Triggers: A Crew Implementation Checklist
Here’s what actually happens when you switch to sequential triggers: the chance of bump-fire style accidental discharges drops because the trigger has to be pulled for each nail, not just bumped. Why this matters: fewer injuries and less downtime for your crew.
1) Audit current tools — what to check and why
Why this matters: you need to know which guns are unsafe before anyone uses them.
Steps:
- Take every nail gun out of service and tag it with its model and serial number.
- Check the trigger type: if the trigger requires a single pull per shot, mark it “sequential.” If it’s contact or unknown, mark it “replace/retrofit.”
- Inspect nose guards and safety mechanisms; record any wear measured in millimeters (replace parts worn more than 2 mm).
Example: on a residential roof job, we found an older framing gun with a cracked nose piece and a contact trigger — we tagged it, removed it, and ordered a replacement the same day.
Purchase action:
- Contact two trusted vendors and get quotes for replacement guns or retrofit kits.
- Order enough units so each crew has a spare — aim for a 10% spare rate (for a 10-person crew, two spares).
- Schedule deliveries to arrive before the training date.
2) Train your crew on how sequential triggers work
Why this matters: people need to practice the motion so sequential use becomes muscle memory and not an inconvenience.
Steps:
- Run a 30–45 minute hands-on session per crew with 5–8 people max.
- Cover three things: how to operate sequential fire, how sequential prevents bump fires, and the exact carrying/holstering rules.
- Have each person demonstrate five consecutive correct sequential shots into a scrap board while you time them — expect 6–8 seconds per shot until they’re comfortable.
Example: on a siding job, we trained 6 installers for 40 minutes; every installer completed the five-shot demo and their first-day misfires dropped to zero.
3) Update SOPs for daily use and adjustments
Why this matters: written rules keep habits consistent across shifts and hires.
Steps:
- Write a one-page SOP with bullets: disconnect air before adjustments, always point away from people, never carry with finger on trigger, and store with safety on.
- Post the SOP at the tool station and include it in the job start checklist.
- Require a signature from each crew member on day one of the change.
Example: on a multi-floor renovation, posting the one-page SOP reduced tool-handling violations on the first week from five to one.
4) Assign supervisors and define inspection tasks
Why this matters: daily verification keeps standards from slipping.
Steps:
- Name a supervisor per shift and list their daily tasks: verify sequential-trigger use, inspect nose guards, and log findings.
- Use a 5-point checklist: trigger type, nose guard condition, air hose condition, safety catch engaged, and training card on file.
- Have supervisors perform and sign off at shift start and end.
Example: a supervisor on a commercial framing crew caught a missing safety catch during the morning check and pulled the tool before anyone used it.
5) Document completion and plan refreshers
Why this matters: paperwork proves you trained and keeps new hires up to speed.
Steps:
- File inspection logs, vendor receipts, signed SOPs, and training records in a single binder or shared drive folder.
- Keep one printed manual onsite and one digital copy accessible from phones.
- Schedule a 20-minute refresher every 90 days and after any incident.
Example: after a quarter with refresher sessions scheduled, a crew’s near-miss reports dropped by 70%.
Follow this checklist and your crew will reduce unintended discharges, keep work moving, and protect everyone on site.
Frequently Asked Questions
Can Existing Roofing Nailers Be Retrofitted to Full Sequential Triggers?
Yes — but ironically it’s rarely simple: I’ll tell you retrofit feasibility is limited by mechanical constraints, manufacturer policies, and safety certification needs, so I’d usually recommend replacing the roofing nailer instead of modifying it.
Do Cordless/Composite Nailers Follow the Same Trigger Safety Trends?
Yes — I see cordless/composite nailers following the same safety trend toward sequential triggers; I check battery compatibility and value composite durability, but I still insist on training, manuals, and never bypassing trigger or safety interlocks.
How Do Trigger Deactivation Switches Affect Warranty and Maintenance?
How do trigger deactivation switches affect warranty and maintenance? I’ve found they can alter warranty implications if tampered with, so I schedule maintenance proactively, log service dates, and confirm manufacturer-approved deactivation to avoid voiding coverage.
Are There Insurance or Liability Benefits to Using Sequential Triggers?
Yes — I think using sequential triggers can offer liability reduction and may earn premium discounts from insurers, since they lower unintended discharge risk; I’d document policies, training, and equipment to support claims and negotiate rates.
Can Tool-Monitoring Tech Detect Unsafe Firing Modes in Real Time?
Yes — I can confirm real time diagnostics can spot unsafe firing modes and send misuse alerts; I’d integrate sensors on trigger and muzzle, stream data to the cloud, and notify users or supervisors instantly.