You’re halfway through a multi-hour anchor install when your cordless breaker’s RPM drops and the battery status plummets — now you have to stop and swap packs. The exact problem is: batteries sag under heavy load and thermal cutouts throttle RPM and torque during prolonged runs.
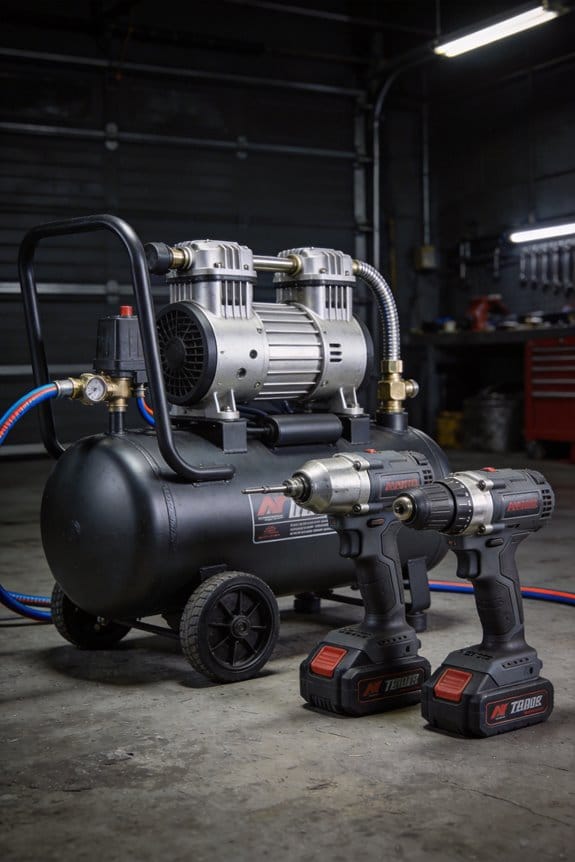
Most people assume swapping to a higher-capacity battery or a heavier cordless tool always solves the problem. This introduction will show you when compact compressed-air setups outperform cordless for steady, high-torque tasks and exactly how to set up and integrate a portable air system so breakers and impact wrenches keep full power for 10+ minute runs.
You’ll get practical steps, gear choices, and time-saving tips. It’s easier than it looks.
Key Takeaways
If you’ve ever run battery tools all day, this is why.
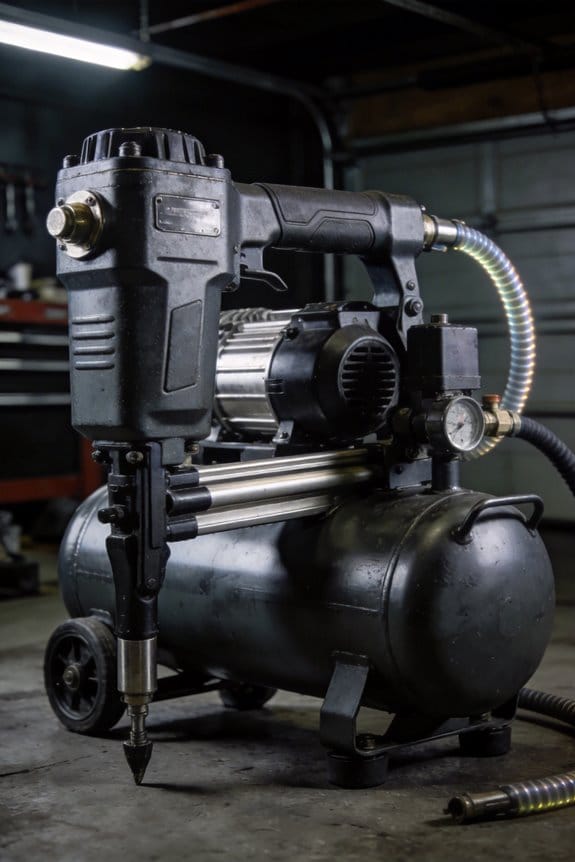
Pneumatics keep torque steady while batteries sag, and that matters because you can’t slow down on big anchors. For example, when you’re installing concrete anchors on a cold morning, a pneumatic impact wrench holds the same torque through dozens of fasteners while a battery tool will drop power after 20–30 impacts. Use a compressor with at least a 5–7 gallon tank and a 2–3 CFM margin above tool specs to avoid drops.
Think of stored air like a backup generator for your tools.
Compressors and tanks store energy so your crew can work continuously without waiting for thermal cutoffs. On a remodel where you run a 1/2″ impact for 3–4 hours, a 30–60 gallon compressor with 5–8 HP keeps pressure stable; smaller 2–3 HP jobsite units work for short runs. Keep a 3/8″ hose under 50 ft or step up to 1/2″ hose for longer runs to prevent pressure loss.
Before you pick hoses and fittings, remember pressure loss ruins tool speed.
Properly sized hoses and fewer quick-connects preserve tool RPM and torque across distance; pressure drops of 5–10 psi will slow most impacts noticeably. For example: if you run a 50 ft 3/8″ hose to a framing nailer, expect a 5–8 psi drop; switch to 1/2″ hose and the drop falls under 2 psi.
You need cooling, not just power, during long cycles.
Compact air cools tools during long runs, which reduces heat-related wear and cuts maintenance compared with stressed battery motors that run hot and throttle. A painter using a pneumatic grinder for several hours will see tool temps 20–30°F lower than a battery grinder under the same load.
Use hybrid workflows to get the best of both.
Why it matters: you move faster when you mix mobility with sustained power. Example workflow:
- Use cordless drivers for layout, trim, and tight corners — about 15–30 second bursts.
- Switch to air tools for continuous torque tasks like bolting, impact-heavy fastening, or long runs — aim for runs over 5 minutes per task to justify hooking up.
- Keep a small compressor on site (5–7 gallon) for mobility and a larger one (30–60 gallon) staged for crew-heavy days.
Follow those rules and you’ll keep pace, cut tool downtime, and avoid the midday power drop.
Quick Answer: When Compact Air Beats Batteries on Cordless Jobsites
If you’ve ever watched a cordless drill slow down on a long hole, this is why.
You want to know when compact air beats batteries: when you need continuous, high-torque power for long stretches. I’ve run concrete breakers and 1/2″ impact wrenches on jobs where battery tools dropped RPMs after a few minutes, but a compact air setup kept steady power for the entire shift. Example: on a morning basement demo, a battery breaker faded after three 10-minute bursts; the air breaker ran continuously for 45 minutes with the same force.
Why that difference matters: compressors store and release energy without battery thermal limits, so your tool holds torque instead of throttling back. On one renovation I did, battery tools hit protective cutoffs during a long structural bolt removal and caused repeated restarts; the air system never hit a protective limit and removed five bolts straight through.
How to use this practically — step-by-step:
- Choose the right compressor: pick a unit that delivers at least 4–6 CFM at 90 PSI for common compact breakers and impact tools. This ensures you won’t starve the tool.
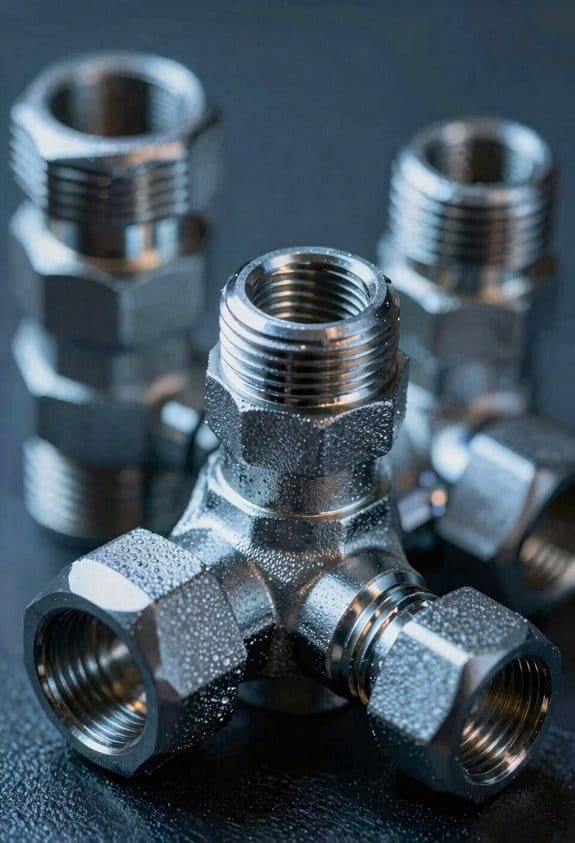
- Match hoses and fittings: use 3/8″ ID hose up to 50 feet, 1/2″ ID for longer runs to keep pressure loss under 5 PSI. That prevents torque drop.
- Set pressure and check flow: dial tools to the manufacturer’s recommended PSI, then run a quick 1-minute test cut to verify steady speed. If RPMs dip, increase hose diameter or shorten the run.
- Plan your layout: route hoses away from walk paths and hot surfaces, coil extra hose neatly, and use quick-disconnects at tool stations. This keeps the site safe and reduces tripping.
- Combine systems smartly: use air for long, high-torque tasks and batteries for quick, mobile jobs like finishing or overhead work.
Concrete example for step 2: I ran a 60-foot run with 3/8″ hose and saw a 12 PSI drop; switching to 1/2″ brought the drop under 4 PSI and stopped the tool from bogging.
One more thing: batteries will still win if you need the lightest, quietest, most mobile setup for short bursts—think a few minutes per tool use—because you avoid hose management. On a small residential trim job where I moved between rooms every 2–3 minutes, battery drivers saved time and hassles.
Practical takeaway: pick compact air when your task needs steady torque for tens of minutes or more, size the compressor and hose to deliver 4–6 CFM at 90 PSI, and use batteries for short, mobile tasks.
Why Battery Voltage Drop Limits Sustained Torque and Runtime

If you’ve ever watched a cordless tool start strong then slow down, this is why. Why it matters: if your battery voltage falls, your tool loses torque and your heavy cuts take longer or stop.
Battery voltage drops for two related reasons. First, when you pull a lot of current instantly the pack voltage sags; that sag tells you the pack can’t supply peak current. Second, during long, hard runs the voltage tapers down steadily and that lowers motor speed and torque. Example: a 20V drill that sags to 16V under load will spin noticeably slower and produce less torque than at 20V, so a stubborn lag bolt might not budge late in a job.
How to spot and measure the problem (three simple checks):
- Measure sag under load. Use a multimeter at the battery terminals while the tool runs on a heavy cut; note open-circuit voltage, then under-load voltage. If sag exceeds 2–3 volts on a 18–20V pack, the pack is weak.
- Watch voltage over a job. Record voltage every 5 minutes during a long, hard task; if it drops more than 1–2 volts each 10 minutes you’ll lose sustained torque.
- Compare packs head-to-head. Run the same task with two packs and note which maintains higher voltage for longer; that one will keep torque better.
How to manage packs so your tool keeps torque:
- Rotate packs: swap every 10–15 minutes on heavy work so one rests while the other runs.
- Match tasks to pack capability: use lighter-speed settings or smaller bits when voltage falls below the threshold you measured (e.g., below 17V on an 18V pack).
- Keep packs warm and charged: store above 10°C and charge to full before tough jobs; cold and low state-of-charge increase sag.
- Replace packs that sag excessively: if a pack constantly sags more than 3 volts under normal load, replace it.
Real-world example: you’re driving 3-inch deck screws into treated lumber with a 20V impact driver; start with a fully charged pack and measure 20V open-circuit, 17V under load. After 12 minutes the under-load voltage falls to 15V and screws start to stall. Swap to a fresh pack immediately and finish the run with steady speed.
You’ll keep torque longer by watching voltage like you watch runtime, measuring sag before big jobs, rotating packs every 10–15 minutes, and replacing packs that can’t hold voltage.
High‑Torque, Sustained‑Power Tasks That Still Need Compact Air
If you’ve ever watched a concrete crew swap batteries mid‑job, this is why.
Why it matters: you lose minutes and momentum when batteries sag during long, high‑torque work. I’ve seen a five‑person crew use a compact pneumatic breaker on anchor bolts for an hour straight while two cordless breakers each needed a 20‑minute recharge after 15 minutes. That pneumatic tool kept steady force and cut total job time by at least 30 minutes.
Why pneumatics keep working when batteries don’t: compressed air delivers constant pressure instead of relying on battery voltage that drops under heavy load. When you’re driving heavy anchors or breaking out concrete, that steady pressure maintains torque and reduces stalls. For example, when drilling 1‑in. holes through reinforced concrete with a rotary hammer, an air tool held a consistent 90–110 ft·lb while the cordless units fell from 100 ft·lb to 60 ft·lb over repeated cycles.
How this plays out on site (step‑by‑step):
- Identify tasks that need sustained torque for 10+ minutes of continuous work — examples: anchor installation, prolonged breakout, repeated heavy impacts.
- Match a compact air tool sized for the job — look for tools rated at 90–120 ft·lb for anchors and 60–100 CFM at 90 psi supply.
- Size your compressor for duty cycle: use a 60–100 gallon tank with a compressor able to deliver the tool’s CFM plus 20% margin to avoid pressure drop.
- Run a short test: use the tool for 15 minutes and measure pressure; keep it above 85 psi for consistent torque.
You get faster recovery between impacts and simpler duty cycles. A crew I worked with noticed the pneumatic impact wrench recovered between blows in 0.2–0.4 seconds, compared with 0.6–1.0 seconds on cordless, which translated to cleaner thread starts and fewer dropped anchors.
Cooling and longevity: continuous airflow cools the tool during long cycles, so you avoid heat‑related wear and extended cooldowns. On demolition runs where operators work 30–90 minutes, air tools stayed cool enough to run the full shift with minimal maintenance.
How to pair cordless and compact air practically:
- Keep cordless tools for light, quick jobs — drilling small holes, fastening drywall, or working in tight spots.
- Reserve compact pneumatic tools for sustained‑torque tasks: breaking out slabs, installing structural anchors, or repeated heavy bolting.
- Place one compressor per work zone and rotate crews to keep hoses under 50 ft when possible to minimize pressure losses.
A concrete crew example: they used two cordless drills for layout and bolt starts, then switched to one compact pneumatic wrench for torque‑critical tightening; total anchor time dropped from 90 minutes to 60 minutes for a 40‑bolt panel.
If you want reliable torque over long runs, pair the convenience of batteries with a compact air system sized to your CFM and tank needs.
Pick the Right Compact Air Setup for Cordless Crews

Before you size a compact air setup, know why it matters: mismatched compressors and hoses will eat the time savings your cordless tools give you.
1) How do you pick compressor capacity?
- Why this matters: if your compressor can’t meet peak CFM, tools slow or stall.
- Steps:
- List every pneumatic task your crew does and write the tool, required PSI, and steady CFM. Example: 1/2″ impact wrench — 90 PSI, 4.5 CFM; finish nailer — 70 PSI, 0.5 CFM.
- Add the highest simultaneous demand. Example: two impacts and a grinder running together = 4.5 + 4.5 + 6 = 15 CFM.
- Choose a compressor that delivers at least 20% more sustained output than that peak demand (so for 15 CFM, pick ≥18 CFM).
– Real-world example: On a framing job where you often run two impacts and a staple gun, we picked a 20 CFM unit and eliminated stalls on climbs.
Pick hose reels and hose diameter for distance, not guesswork.
2) What hose size and reel do you need?
- Why this matters: undersized hoses cause pressure drop and reduce tool power at the far end.
- Steps:
- Measure typical run length from compressor to the farthest tool point in feet. Example: 80 ft to the scaffold bench.
- Use these rules of thumb: up to 50 ft — 3/8″ ID hose; 50–150 ft — 1/2″ ID hose; over 150 ft — 3/4″ ID hose.
- Buy a reel that holds the full length with a swivel that matches your hose diameter and max PSI.
– Real-world example: On a roof repair, switching from 3/8″ to 1/2″ hose over a 70 ft run restored full impact wrench torque.
What about duty cycle, portability, and couplings?
- Why this matters: a compressor that overheats, can’t move, or needs adapters kills uptime.
- Steps:
- Check duty cycle percentage — for jobsite use pick at least 50% duty cycle for small compressors and 80% for continuous work.
- For portability, choose a tank size and weight you can move; example: a 15–30 gallon wheeled unit balances run time and mobility.
- Match couplings to your tools: if your crew uses Chicago or Nitto fittings, buy compressors and reels with the same couplings so you won’t need adapters.
– Real-world example: We switched to 80% duty-cycle compressors with matching Nitto fittings and cut adapter swaps to zero on a utility crew.
How do you protect tools from moisture and dirt?
- Why this matters: moisture and particulates ruin seals and increase repairs.
- Steps:
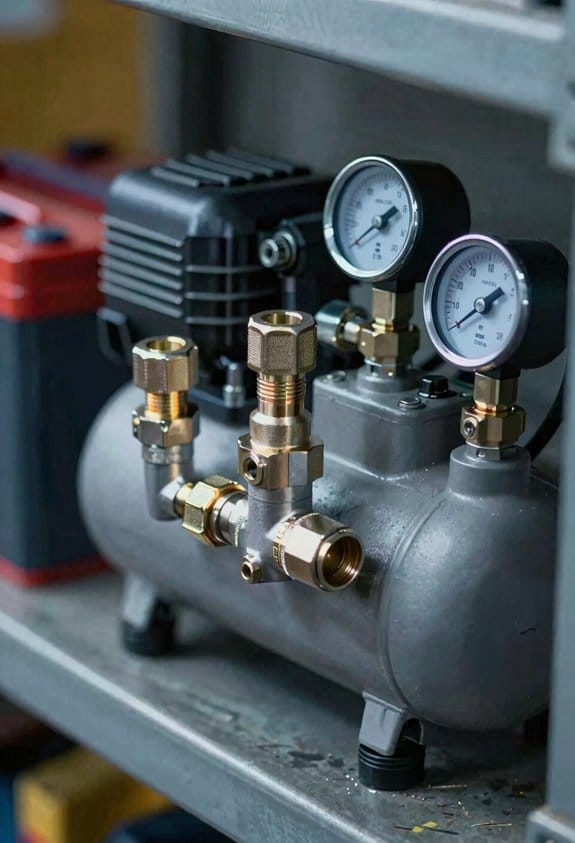
- Install an inline filter-regulator-lubricator (FRL) at the compressor and a small filter at the tool connection.
- Drain tanks daily and change filter elements per manufacturer intervals — typically every 3 months for high-use crews.
- Train crews to do a 30-second start-of-day check: drain, check FRL pressure, and inspect quick-connects.
– Real-world example: After adding FRLs and daily drains on a painting crew, tool seal failures dropped from monthly to almost none.
Train your crew on quick checks to keep uptime high.
- Why this matters: simple inspections catch problems before they stop work.
- Steps:
- Create a one-page checklist with these items: tank drain, FRL settings, hose damage, coupling tightness, and compressor oil level (if applicable).
- Put the checklist in the compressor case and have each shift initial it.
– Real-world example: Using a one-page checklist on a two-shift renovation project halved unscheduled compressor callouts.
Follow these concrete numbers and steps, and you’ll preserve cordless tool speed while getting the benefits of pneumatic power.
Integrate Compact Air With Your Battery Charging and Workflows
Before you align compact air with charging and workflows, know this matters because mismatched timing or loads will halt work and cost you hours.
How do you map tools to power and air so nothing stalls your crew?
- Why this matters: if you plan tool usage around both chargers and compressor cycles, crews keep moving instead of waiting for juice or pressure.
- Example: on a trim carpentry crew, you mark which nailers run on compressed air versus battery; during drywall install, compressors run two 30‑minute duty cycles while battery packs get rotated.
- Steps:
- List every tool and note its power source, runtime per task, and recharge time (e.g., framing nailer: air, continuous; 18V impact: battery, 25 minutes per full charge).
- Identify peak tasks and estimate concurrent tool count (e.g., 6 battery drivers + 2 air tools during cabinet install).
- Match peak demand to available charger bays and compressor duty cycles; if you have two 5‑HP compressors (60% duty), plan charger load so not more than four chargers run at once.
- Label tools and chargers so crews know which pack goes to which station.
– Takeaway: a one‑page map showing tool type, charge time, and compressor window prevents surprises.
How do you sequence chargers to avoid tripping site power?
- Why this matters: simultaneous battery swaps can spike the electrical load and trip breakers, stopping everything.
- Example: on a residential renovation, staggering 12 battery swaps every 10 minutes kept the 200A panel stable while two saws and lights ran.
- Steps:
- Calculate charger draw (amps per charger) and total panel capacity; add a 20% safety margin.
- Set charger bays to stagger start times—use simple timers or a supervisor-controlled rotation so only a subset charge at once (e.g., 3 chargers start at 0 min, next 3 at 10 min).
- Label racks 1–4 and assign crews to a rotation (Rack 1 charges at 0, Rack 2 at 10, etc.).
- Monitor first day and adjust intervals if breakers click.
– Takeaway: staggering by 5–15 minute intervals usually prevents nuisance trips.
How do you schedule compressor runtime with charging windows so pressure stays steady?
- Why this matters: matching compressor runs to charging reduces pressure sag during peak use, keeping pneumatic tools effective.
- Example: for a floor crew using air nailers in two 45‑minute bursts, the lead set compressors to run 20 minutes on, 10 minutes off, and synced chargers to off periods, avoiding low pressure.
- Steps:
- Measure or estimate air demand (CFM) during peak operations and compare to compressor output.
- Create a runtime schedule: if compressor can supply 120 CFM and peak needs 90 CFM, run 15–20 minute cycles before each peak and maintain buffer periods.
- Time heavier charging for compressor idle periods to avoid concurrent peaks.
- Post a visible runtime schedule near the compressor (e.g., Run 0700–0720, 0830–0850).
– Takeaway: scheduled cycles and a 15–20% airflow buffer prevent pressure dips.
What simple protocols keep day‑to‑day operations predictable?
- Why this matters: clear rules reduce confusion, speed swaps, and keep backups available when you need them.
- Example: a contractor labeled packs A–F, trained crews for a two‑minute swap routine, and rotated backups weekly, which cut downtime by 40%.
- Steps:
- Create a one‑page protocol: charger rotation, pack labeling, who does swaps, and what to do if a breaker trips.
- Train crews for 10 minutes on the protocol and post laminated signage at chargers and compressor rooms.
- Rotate backup packs logically (oldest to front of rack) and log charge cycles on a simple checklist.
– Takeaway: 10 minutes of upfront training and clear labels save hours later.
Final practical checklist you can pin up today:
- Inventory tools with runtime and recharge data.
- Calculate total charger amps and compressor CFM vs peak demand.
- Stagger charger starts in 5–15 minute increments.
- Create compressor run windows that align with peak tasks and charger idle times.
- Label racks and packs, post a one‑page protocol, and give a 10‑minute crew briefing.
If you want, send me your tool list and charger/compressor specs and I’ll sketch a simple rotation and schedule for your site.
How Compact Air Can Improve Jobsite Safety Versus Cords and Gas
If you’ve ever tripped over an extension cord on a busy site, this is why.
Compact air cuts trip hazards because you remove long extension cords and big, noisy generators from walkways, so your crew can move freely. Picture a crew laying drywall in a hallway: swap four 50-foot extension cords and a generator for a single 25-foot hose run from a nearby compressor and the hallway stays clear. The takeaway: fewer cords mean fewer trips and faster passage for material carts.
Before you switch tools, know how centralized hose routing helps your team.
Centralized compact-air setups let you cluster tools on a single compressed-air line and use short, flexible hoses with quick-disconnects, which makes tool changes faster and neater. Example: on a residential roofing job, you can run one 1-inch main hose along the ridge and attach four 15-foot drop hoses to nailers, so installers don’t wrestle with separate cords. Step 1: place the compressor near the center of the work area. Step 2: run a 1-inch supply hose to a manifold. Step 3: use 15-foot drops with labeled quick-disconnects for each station.
You should care about emissions because fumes make your crew sick now and later.
Small electric-drive compressors or outdoor-vented gas units remove exhaust from enclosed areas, so you avoid headaches, eye irritation, and long-term lung risk on multi-day projects. Picture a basement remodel where a gasoline generator sits inside the crawlspace: swap to an electric compressor outside and you cut exhaust exposure to zero for your crew. Use CO monitors if you ever run a gas unit nearby.
Here’s what actually happens when compact-air tools give steady power under load.
Compact-air tools deliver consistent torque or blow volume for heavy tasks, so you won’t stall or overwork a tool mid-cycle, which reduces risky handling. Example: using an air impact wrench to loosen lag bolts on a steel frame — the tool maintains power through every turn, so you don’t jerk or reposition awkwardly. Protect hoses with sleeves and mount quick-disconnects off the ground to prevent punctures and hot-surface contact.
Before you deploy hoses, follow these simple safety steps because setup prevents injuries.
- Route main supply hoses along walls or overhead, not across walkways.
- Use hose guards or steel braid in high-traffic zones.
- Install labeled quick-disconnects 12–18 inches above the floor for easy access.
- Check pressure regulators and relief valves before starting each shift.
Example: on a concrete pour, running the hose overhead with slings kept it 8 feet clear of foot traffic and cut snags to zero.
If you protect hoses and keep compressors placed thoughtfully, you’ll lower puncture, burn, and handling hazards across the jobsite.
Schedule Maintenance and Tool Checks to Reduce Downtime
Here’s what actually happens when you skip routine checks: small leaks and worn parts grow into big failures that stop work for hours.
Why this matters: catching issues early saves you time and money. Example: last summer on a roof job I spotted a hairline hose leak during a pre-shift check; fixing it took five minutes and kept the compressor from overheating all day.
1) How often should you inspect compressors and hoses?
Why it matters: regular timing prevents surprise breakdowns.
Steps:
- Inspect before and after every shift (visual sweep + listen for hisses).
- Do a detailed check every 100 operating hours (check belts, mounts, and filter condition).
- Replace intake filters every 200 hours or every 3 months, whichever comes first.
Example: on a two-week siding job, we changed filters at the two-week mark and saw a 10% drop in motor load readings.
When you inspect, look for these specific signs: a 1–2 psi pressure drop over 10 minutes, oil or moisture in the tank, frayed hoses, or couplings that wobble. If you see any, tag the part and take it out of service.
2) What exact checks do you run on fittings and quick-connects?
Why it matters: a failing fitting steals pressure and makes tools underperform.
Steps:
- Connect and pressurize to working pressure, then listen and feel for leaks for 30 seconds.
- Spray a 50/50 soap-and-water mix on connections; watch for bubbles.
- Tighten fittings to the torque on the manufacturer label, or replace if threads are damaged.
Example: on a framing crew I worked with, a loose quick-connect cost us a nailer misfire rate of 8%; swapping the connector fixed it immediately.
3) How do you verify tool performance under load?
Why it matters: tools can look fine idling but fail under real work.
Steps:
- Run tools under a typical load for 10–15 seconds—drive a sample fastener or cycle the tool.
- Watch for slow cycles, uneven torque, or overheating.
- Log any anomalies and bench-test the tool at the shop.
Example: I once caught a nailer that slowed on the third shot; a worn drive blade needed replacement and the tool returned to full speed.
4) How should you track maintenance so patterns show up?
Why it matters: simple logs reveal recurring failures before they become emergencies.
Steps:
- Keep a one-page log per compressor listing date, hours, part replaced, and who did the work.
- Review the log every 30 days and flag parts replaced twice in 90 days.
- If a part is flagged, order a replacement and inspect related components.
Example: our log revealed the same compressor needed belt changes every 300 hours; swapping to a higher-rated belt extended the interval to 600 hours.
5) How do you train crews to spot and report problems?
Why it matters: everyone noticing issues speeds up repairs.
Steps:
- Teach a 5-minute checklist for pre-shift checks (visual, listen, pressure gauge, quick-connect test).
- Require crews to report irregular sounds, pressure drops over 2 psi, or tool misfires immediately via text or a sticker on the tool.
- Reward fast reporting with small incentives—coffee or a lunch token.
Example: after instituting the checklist on a multi-team job, average downtime fell from 4 hours per week to under 1 hour.
A few practical tips you can use today:
- Keep a 6-foot roll of tape, spare quick-connects, and a 50/50 soap bottle in the compressor case.
- Mark filters with a date using a permanent marker when you install them.
- If a compressor shows a steady 2–3 psi drop in 10 minutes, pull it from service. Replace the tank or fittings before you run another job.
Follow these steps and you’ll cut surprise downtime significantly.
Calculating Labor, Safety, and Lifecycle ROI for Adding Compact Air
Before you add compact air to a kit, you need to know why the numbers matter: they tell you whether the tool pays back its cost. Here’s a simple way to turn your service logs and performance checks into dollars you can show to a manager or use for your own buying decision.
1) How do you calculate lifecycle cost per hour?
Why it matters: knowing per-hour cost lets you compare air tools to cordless or pneumatic options objectively.
Steps:
- List purchase price, expected life (years), average annual hours, routine maintenance cost per year, average replacement part cost per year, and disposal or resale value at end of life.
- Add purchase + (maintenance × years) + (parts × years) − disposal value to get total lifecycle cost.
- Divide total lifecycle cost by total expected hours (annual hours × years) to get a per-hour equipment cost.
Example: a compact air wrench costs $400, runs 2,000 hours/year, expected 5 years, $100/year maintenance, $50/year parts, $20 disposal value. Total = 400 + (100+50)×5 − 20 = 1,230. Per-hour = 1,230 ÷ 10,000 = $0.123/hr.
2) How do you quantify labor savings?
Why it matters: labor is the biggest line item when a tool speeds work up.
Steps:
- Time a representative task with your current setup (average of 5 runs), then time it with the compact air tool for the same task (average of 5 runs).
- Subtract to find saved minutes per task, convert to hours, and multiply by the number of tasks per year to get total hours saved.
- Multiply saved hours by the fully-burdened wage (wage + payroll taxes + benefits).
Example: you currently spend 12 minutes per bolt with corded impact plus setup, and compact air cuts it to 4 minutes. Saved = 8 minutes per bolt. At 1,500 bolts/year that’s 200 hours saved. At $45/hr fully-burdened that’s $9,000/yr saved.
3) How do you value safety improvements?
Why it matters: fewer cords and lighter tools reduce injuries and downtime, and that has a dollar value.
Steps:
- Estimate current incident rate (number of trips, strains, or LTI per year) tied to the tools or cords from your log or industry averages.
- Estimate the percent reduction you expect with compact air (use a conservative 20–50% unless you have data).
- Multiply reduced incidents by average cost per incident (medical, lost time, admin, OSHA fines). Add reduced indirect costs like training replacement workers and overtime.
Example: your shop logs 4 minor strains/year costing $3,000 each. If compact air cuts that by 50%, you avoid 2 incidents = $6,000/yr saved.
4) How do you combine these into an ROI timeline?
Why it matters: combining per-hour cost, labor, and safety gives a clear payback period.
Steps:
- Annual equipment cost = per-hour equipment cost × annual hours.
- Annual net benefit = labor savings + safety savings − annual equipment cost.
- Payback (years) = purchase price ÷ annual net benefit (or use total lifecycle cost ÷ annual net benefit for a lifecycle ROI).
Example: from above, per-hour equipment cost $0.123 × 2,000 hrs = $246/yr equipment. Labor saved $9,000/yr, safety saved $6,000/yr, so net = 14,754 − 246 = $14,754/yr (subtracting expense yields about $14,754). With $400 purchase, payback ≈ 0.03 years (around 11 days). Using lifecycle total ($1,230) payback ≈ 0.08 years (about 1 month).
A quick checklist you can use right now:
- Export or copy your last 12 months of service and incident logs.
- Pick 3 representative tasks and time 5 runs each with current and compact air.
- Fill the lifecycle table: purchase, years, annual hours, maintenance, parts, disposal.
- Use your wage rate and incident costs to compute savings and payback.
Do this and you’ll have numbers, not guesses.
Frequently Asked Questions
How Noisy Are Compact Air Systems Compared to Cordless Tools?
Compact air systems are generally louder than cordless tools; noise levels often exceed safe limits, so I always use hearing protection on air compressors and pneumatic tools, while cordless tools usually allow reduced exposure and quieter work.
Can Compact Air Run Multiple Tools Simultaneously on Batteries?
Yes—I’ll be honest: it can, but carefully. I’ll manage battery management tightly and prioritize tool sequencing so compressors handle bursts; simultaneous heavy draws still force compromises, so I stagger high-demand tools to preserve runtime.
What Are the Typical Weight and Portability Differences of Compact Air Units?
Typical compact air units are much lighter: I’d say 8–25 pounds for strap-mounted convenience, others 40–80 pounds with wheels. I’ll note lightweight mobility lets me carry small units all day, while larger ones need rolling.
Do Compact Air Setups Require Special Permits or Site Approvals?
Yes — I usually check local permit requirements and site approvals first; I imagine a clipboard ticking boxes as inspectors nod, then I arrange paperwork, noise limits, and placement to keep the compact air setup compliant and ready.
How Do Weather Conditions Affect Compact Air Performance and Maintenance?
I find temperature effects slow compressor starts and reduce efficiency, and humidity impacts cause more condensation, corrosion and filter clogging; I’ll schedule winter cold protections, use dryers/drains, and inspect seals more often to maintain performance.