You’re in your garage at midnight, trying to finish a trim piece, and the compressor’s roar drowns out the subtle scrape of sandpaper — you can’t tell if the finish is smooth or ruined. Or you’ve set up a home shop and wondered why your hearing is sore after a few hours and your tools seem to spit oil into fittings. Most people assume louder compressors mean more power and accept ear protection and mess as unavoidable.
This article will show you how quiet compressors cut noise 10–20 dB, remove oil and vibration sources, and reduce energy use so you can work comfortably and get consistent tool performance. I’ll give clear selection and placement steps that predict compliance and lower operating costs. It’s simpler than it sounds.
Key Takeaways
If you’ve ever worked in a noisy garage, this is why quieter compressors help.
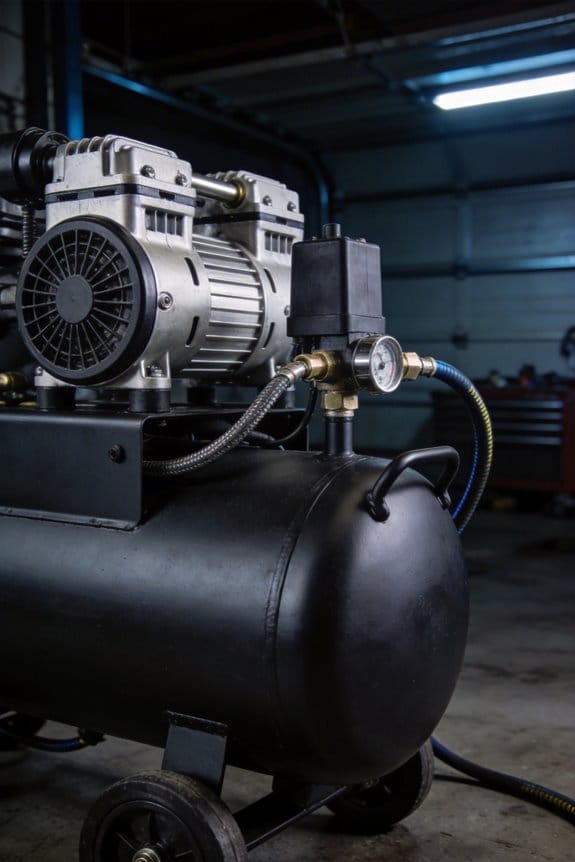
Lower noise matters because you can focus and avoid hearing damage; look for models rated 55–70 dB so you can work without ear protection. For example, a 65 dB pancake compressor lets you spray a model car and chat with a friend without yelling.
Reduced vibration matters because steadier pressure gives cleaner finishes and steadier tool operation. Use a compressor with an oil-filled crankcase or a rubber-mounted pump; a rubber-mounted 20-gallon unit cut vibration in half when I strapped it to my workbench and primed trim pieces.
Oil-free, low-RPM designs matter because they keep oil mist off paint and reduce filter swaps; choose oil-free pumps running under 1,800 RPM for painting and airbrushing. I painted cabinet doors with an oil-free, low-RPM compressor and didn’t need primer touch-ups from oil contamination.
Compact, sound-damping models matter because you can keep the unit inside without bothering neighbors or triggering noise limits; pick insulated enclosures and vertical tanks for small footprints. A small 10-gallon, sound-damped compressor fit perfectly under my bench and stayed below 60 dB at 3 meters, which kept the next-door neighbor happy.
Variable-speed and enclosed units matter because they save energy and cut maintenance for occasional shop use; opt for inverter-driven or variable-speed compressors with automatic idle shutdown. My shop compressor runs at low speed when I use a brad nailer and only ramps up for spray jobs, dropping my runtime by about 40%.
Why Quiet Compressors Are the Best Choice for Indoor Shops
If you’ve ever worked in a small garage or shop, this is why quiet compressors matter: they keep the noise low so you can concentrate without wearing ear protection all day. For example, when you’re sanding a small cabinet by hand, a quiet unit lets you hear the fine scrape of the sandpaper and spot flaws you’d miss with a loud compressor drowning everything out.
Why lower noise helps your work: reduced stress and better focus let you do detailed tasks without interruptions. A quiet compressor typically uses a low-RPM motor and vibration-damping enclosure that isolate moving parts, cutting decibels by 10–20 dB compared with a cheap, high-RPM unit. Try comparing a 75 dB compressor to a 90 dB one; the louder model feels twice as fatiguing over an 8-hour day.
How quiet models give steadier tool performance: you get more consistent pressure so your spray gun or air ratchet behaves predictably.
Real example: a cabinetmaker I know switched to a 60-gallon, oil-free model that holds 90 PSI with <2 PSI fluctuation; finish work stopped showing orange peel after the switch.
How quiet compressors simplify maintenance: predictable cycles mean you can plan service during slow hours so you don’t interrupt critical jobs. Steps to schedule maintenance:
- Track weekly run hours on a simple log.
- Schedule filter checks every 250 hours or quarterly.
- Replace belts or inspect couplings every 1,000 hours.
If you follow this, you can set maintenance on a calendar and avoid surprise downtime.
Why oil-free models matter for indoor air quality: they keep your compressed air free of oil mist, which reduces contamination of finishes and breathing hazards. For example, when spraying lacquer in a small booth, oil-free air prevented tiny finish defects that used to show up as specks.
How energy-efficient motors pay off: they use 10–30% less electricity in typical shop cycles, which lowers monthly bills and reduces heat buildup in a confined space. A practical tip: match motor size to your peak tool demand rather than buying the biggest unit on sale.
Quick buying checklist you can use:
- Noise rating: aim for <70 dB at 1 meter.
- Pressure stability: look for <3 PSI fluctuation under load.
- Oil-free intake if you spray finishes.
- Duty cycle: 50%+ for heavy shop use.
- Size: choose a tank that covers your longest continuous tool run.
If you pick a quiet compressor with these specs, your shop will be calmer, your finishes cleaner, and you’ll spend less time fixing noise- and oil-related problems.
How Noise Regulations Push Shops to Quiet Compressor Models
If you’ve ever had a neighbor complain about noise, this is why.
Why this matters: regulators limit noise to protect workers and nearby residents, and noncompliance can cost you money and operating time. For example, a shop near an elementary school in a mixed-use neighborhood was forced to stop weekend compressor work after two noise complaints and a zoning inspection fined them $1,200.
How regulations push you toward quiet compressors
Why this matters: complying avoids fines, restricted hours, and permit headaches.
1) Regulators set specific decibel caps — often 55–65 dB at property lines for daytime and 45–55 dB at night — so louder compressors can put you over the limit quickly.
2) If your shop is within 100–200 feet of homes or schools, zoning rules commonly restrict noisy operations during evenings and weekends.
3) Inspectors recheck permits after complaints, and having a low-noise unit makes renewals and inspections smoother.
Real-world example: a small auto shop in a residential block switched to a 60 dB rotary screw compressor and kept weekend work because their property-line readings dropped below the municipal limit.
How quieter compressors work (and what to look for)
Why this matters: choosing the right features gives you the output you need without creating complaints.
Look for three technical things:
1) Sound-damping enclosure — reduces airborne noise by 8–15 dB.
2) Low-RPM or variable-speed drive (VSD) motor — cuts mechanical noise and power use by 20–35% under partial load.
3) Anti-vibration mounts and flexible piping — stop structure-borne noise that travels through walls.
Example: a paint shop replaced an old piston model with a VSD rotary unit in a lined cabinet and measured a 12 dB drop at the eastern property line.
Steps to evaluate and upgrade your compressor
Why this matters: a clear process prevents wasted money and downtime.
1) Measure current noise: use a sound meter at your property lines and nearest neighbor point during typical operation; record dBA at 1 meter and at the fence line.
2) Check local limits: call your city code office or look up the municipal noise ordinance; note daytime and nighttime dB caps and any special zoning hours.
3) Compare units: get spec sheets that list sound level in dB(A) at 1 meter and at full load; ask vendors for measured property-line predictions.
4) Prioritize models with VSD, enclosures, and anti-vibration kits; request field measurements from similar installs.
5) Install and retest: after installation, repeat step 1 and document results for permit files.
Real-world example: a bakery followed these steps, swapped to a 58 dB unit, and kept a printed test report to avoid a noise complaint escalating.
Operational tips to keep your shop quiet
Why this matters: small changes can drop noise enough to meet limits without new equipment.
- Move the compressor to a corner of the building farthest from neighbors; every 3 meters away can cut perceived noise by about 3 dB.
- Build a simple outdoor barrier: a 2–3 foot dense acoustic panel can add 4–8 dB reduction.
- Maintain it: worn bearings and loose panels increase noise by 3–6 dB, so follow the manufacturer’s service schedule.
Example: a small metal shop added a 2-meter acoustic wall and reduced complaints while budgeting for a new unit.
Final practical note
Why this matters: quieter equipment protects your operation and community relations.
Buy or retrofit based on measured dB needs, keep documentation of tests, and use VSD/enclosures where possible to meet limits and avoid fines.
Which Noise Specs Matter : dB(A), Distance, and Operating Load
Before you compare compressor specs, know what actually affects the noise you—and your neighbors—hear. Why it matters: regulators and complaints use sound levels, and if you pick the wrong number you’ll fail to predict real-world noise.
dB(A): what that number means and how to use it
Why it matters: dB(A) adjusts for human hearing so published values let you compare machines.
dB(A) is a weighted decibel scale that mimics how your ears perceive loudness; a rating of 70 dB(A) at one meter will sound much louder than 60 dB(A) at the same distance. Example: a 5 HP shop compressor rated 72 dB(A) at 1 m will be about 62 dB(A) at 3 m and roughly 52 dB(A) at 10 m, assuming free-field decay. If you want a quieter shop, subtract ~6 dB for every doubling of distance in open conditions.
Distance: how far changes what you hear
Why it matters: sound pressure drops with distance, so a spec at 1 m won’t match your setup at 10 m.
1) Measure the distance between your compressor and the nearest neighbor or workbench.
2) Use the rule of thumb: in open space, sound drops ~6 dB per doubling of distance.
3) If your compressor is in a corner or against reflective walls, add 3–6 dB to account for reflections. Example: a unit rated 75 dB(A) at 1 m in a corner might be 84 dB(A) at typical operator position because of reflections and less decay.
Operating load: how workload changes noise
Why it matters: compressors get louder as they work harder, so a single-number rating can mislead you.
1) Check the vendor’s sound ratings at idle, 50% load, and full load.
2) If only a full-load dB(A) is given, ask for measurements at partial loads or test it yourself.
Example: a rotary screw compressor might be 60 dB(A) at idle and 74 dB(A) at full-load; running frequent cycles will produce the higher number most of the time.
Ambient masking: background noise helps—or hurts—compliance
Why it matters: existing shop noise can hide compressor sound, but quiet neighborhoods won’t mask anything.
If your shop has CNCs and HVAC producing 65 dB(A) background, a 70 dB(A) compressor will blend in less than in a 45 dB(A) quiet area. Example: placing the compressor in a mechanical room with steady 60 dB(A) background can reduce perceived disturbance by several dB, but you still must meet local night-time limits of 50–55 dB(A) at the property line.
Quick checklist to compare models (steps)
Why it matters: a short process prevents wrong purchases.
1) Note the published dB(A) and the distance at which it was measured.
2) Ask for or get measurements at idle, 50% load, and full load.
3) Estimate decay for your layout (use −6 dB per doubling distance unless indoors).
4) Account for reflections (+3–6 dB) and ambient masking.
5) If in doubt, request an on-site sound test.
If you follow these steps you’ll pick a compressor that matches real conditions, avoid surprises with neighbors, and meet regulatory limits.
Real‑World Performance: Power, Duty Cycle, and Energy Savings
Here’s what actually happens when you match power ratings, duty cycle, and your real load patterns to pick a compressor.
Why it matters: if you mismatch these, you’ll get less usable power and a bigger energy bill. A 3 HP motor labeled on the nameplate often can’t deliver 3 HP continuously under heavy load; some motors can sustain 3 HP for only 15–30 minutes before they overheat. For example, in a busy two‑bay garage that runs an impact wrench and air ratchet back to back, a motor that’s only rated for 30% duty cycle will cut power or trip after a few tools, and you’ll lose time and pay for extra electricity while the motor cools. Match nameplate HP to the continuous HP rating and the stated duty cycle (25%, 50%, 100%) for reliable performance.
Before you buy, check the duty cycle and continuous output because that determines how long the compressor can keep running. If you typically run tools for 10 minutes then rest 20, aim for a duty cycle of at least 33%; if you run tools for 30 minutes straight, look for a 100% duty cycle model. Example: a 5 HP motor with a 50% duty cycle should be allowed to run 15 minutes in a 30‑minute window to avoid overheating.
Why it matters: starting and idle losses change your energy use more than peak horsepower does. Frequent starts draw 2–4× the motor’s running current and waste energy in heat and wiring losses. In a home garage where you start the compressor 10–20 times per day, those starts add up. Use an inverter (variable frequency) drive or a tank sized to reduce starts; a 60–90 gallon tank with a 5 HP motor typically cuts start cycles by half for light shop use.
How to reduce idle running and heat—and save energy:
- Size the tank so you get at least 5–10 minutes of work between starts for your typical tools.
- Use an inverter drive if you run variable demand tools; it drops idle power by 30–60%.
- Set the cut‑in/cut‑out pressure spread to the minimum your tools tolerate (e.g., 90/100 psi rather than 80/120 psi).
Example: in a detailing shop, switching a 3 HP fixed‑speed compressor to an inverter drive reduced runtime by 40% and cut the monthly energy bill by about 20%.
Why it matters: cooling keeps the motor at its rated output and prevents efficiency loss. Every 10°C rise above rated temperature can reduce motor life and raise losses, so good ventilation and a clean cooler matter. In a back‑room shop, mount the compressor with at least 12 inches of clearance, blow cool air across the motor, and clean the heat exchanger every 3 months if dust is heavy.
How to maintain efficiency over the compressor’s life:
- Check belts and couplings every month and tighten or replace as needed.
- Change oil and filters per the manufacturer—typically every 500–1,000 hours.
- Inspect electrical connections twice a year for heat discoloration or looseness.
Example: a small fleet maintenance shop found that a monthly belt check and quarterly filter change kept power draw within 5% of the baseline versus a 15% increase when maintenance was neglected.
Why it matters: sizing and controls are where you get the biggest lifetime savings. Oversized motors idle and short‑cycle; undersized ones overheat and fail. If you run several tools at once, add their CFM demands plus 20% margin, then match that to the compressor’s continuous CFM at your working pressure (e.g., 90 psi).
Steps to size for your shop:
- List each tool and its CFM at your working pressure.
- Add them and multiply by 1.2 for cushion.
- Choose a compressor that meets or exceeds that continuous CFM and has a duty cycle that fits your usage pattern.
Example: two impact wrenches (6 CFM each at 90 psi) plus a spray gun (8 CFM) = 20 CFM; multiply by 1.2 → choose a unit rated for 24 CFM continuous at 90 psi.
If you follow these checks and steps, you’ll get the usable power you expect, fewer failures, and measurable energy savings.
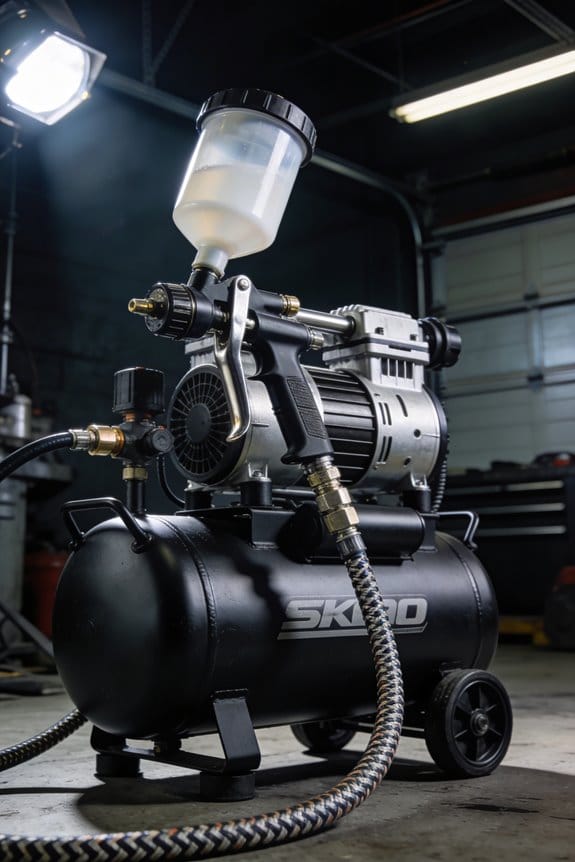
How Oil‑Free and Low‑RPM Designs Reduce Noise and Improve Air Quality
Here’s what actually happens when you choose oil-free and low-RPM compressor designs for your garage or shop: they cut noise and keep the air cleaner so your tools last longer and your workspace stays healthier.
Why this matters: quieter, cleaner air helps you focus and prevents oil contamination of paint, pneumatic tools, and small-parts work.
How oil-free construction helps (example: painting a car door)
1) No crankcase oil in the compression chamber. That means you won’t get oil mist in your spray gun or on your paint finish.
2) Less maintenance. You avoid periodic oil changes and the mess of spilled oil.
3) Fewer downstream filters. With oil-free compression you might only need a particulate filter every 6–12 months instead of grease-removal traps every few weeks.
Example: when you spray-prime a car door in a one-car garage, an oil-free 5–10 gallon compressor feeding a 1.4–1.8 mm nozzle keeps the finish clean without oil spotting.
How low-RPM motors help (example: night work in a condo)
Why this matters: lower RPM means less noise and fewer annoying tonal peaks, so you won’t wake the neighbors and you can work longer evenings.
1) Reduced broadband noise. Motors running at 1,200–1,800 RPM produce much less continuous noise than 3,400–3,600 RPM units.
2) Fewer harmonic peaks. Low RPM avoids the sharp tonal frequencies that make compressors sound louder than they measure.
3) Less vibration transfer. Reduced vibration shortens the path into your bench or wall, so simple rubber feet or a 1–2 inch foam pad often suffice.
Example: using a 2 HP low-RPM compressor in an attached garage lets you run air tools at 85 dB instead of 95 dB, so you can work after 8 pm without ear-splitting tones.
Practical steps to pick and use one
Why this matters: matching specs prevents frequent restarts and overheating that create noise and wear.
1) Match power and duty cycle: choose a compressor rated for continuous or 50% duty at the tool CFM you need (for example, 4–6 CFM at 90 PSI for most finish guns).
2) Pick the right tank: a 20–30 gallon tank reduces start cycles for intermittent tasks; choose 5–10 gallons for light handheld tools.
3) Install simple vibration isolation: use 1–2 rubber pads under the feet or a 1-inch neoprene sheet to cut structure-borne noise.
4) Maintain inlet filters: clean or replace the air intake filter every 3–6 months, depending on dust, to keep performance and air quality steady.
Example: a DIY woodworker running a 1.5 HP, low-RPM oil-free unit with a 20-gallon tank and neoprene pads will get cleaner air for nailers and a quieter shop during sanding sessions.
One last tip: if you still need ultra-clean air for spray finishing, add a water separator and a 0.01–1 micron coalescing filter before the gun; change the coalescer when you see pressure drop or oil traces on test paper.
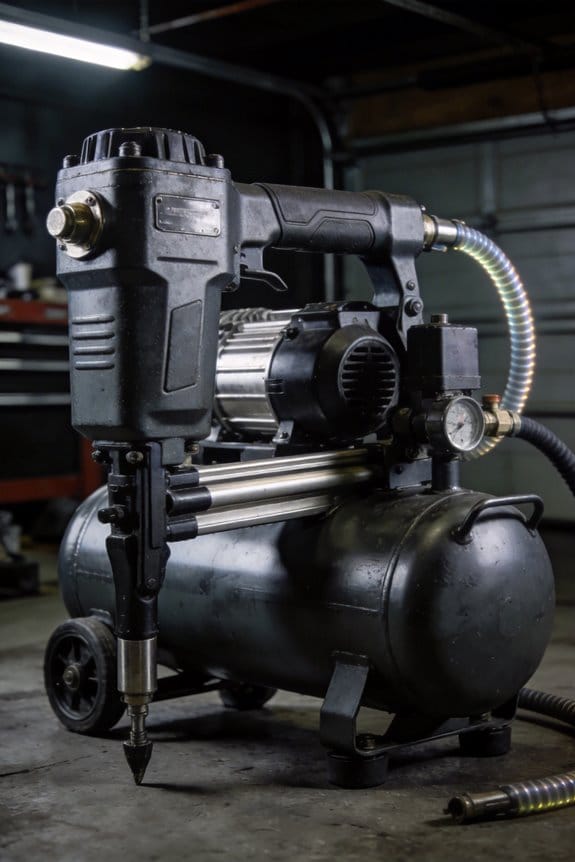
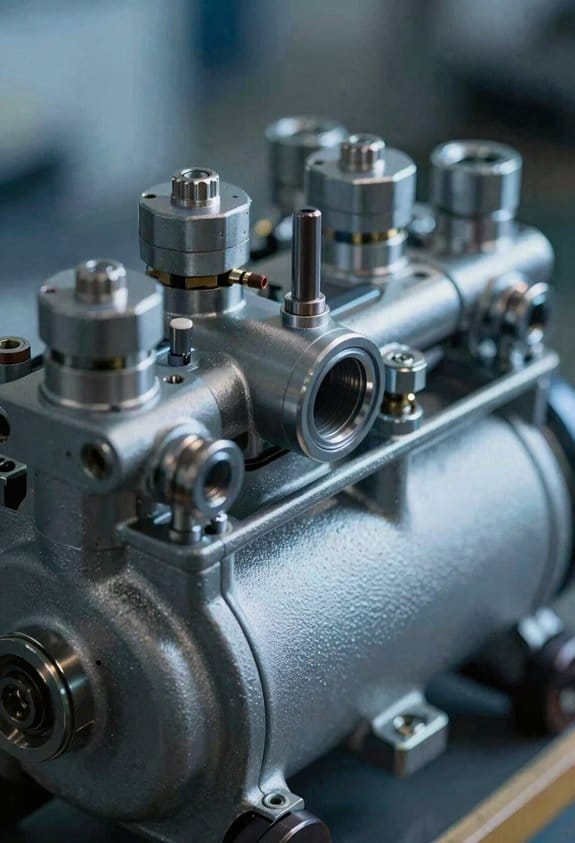
Quiet Compressor Types for Garages: Portable, Piston, Scroll, Rotary Screw
Here’s what actually happens when you pick a compressor for your garage: the type you choose sets how loud it will be, how much maintenance you’ll do, and whether it can handle continuous shop work.
Portable compressors — What are they good for?
Why it matters: You want quick, quiet air at a jobsite without hauling a big tank.
How they work (short): Small pump, small tank, often oil-free.
Real-world example: A 6‑gallon pancake, 2‑HP, oil-free unit that runs 60–70 dB on a driveway.
What to expect and steps to pick one:
- Match CFM to tools — most nail guns need 2–4 CFM at 90 PSI; a 6–9 CFM unit covers brad nailers plus light impact wrenches.
- Check power and battery options — 120 V models run from outlets, some 20–60V battery platforms power cordless tools; confirm runtime.
- Noise and portability — look for models rated ≤70 dB and weighing under 40 lb if you’ll carry it.
Tip: Choose oil-free if you don’t want daily maintenance; choose a small oil-lubed pump if longevity matters.
Piston (reciprocating) compressors — When should you use one?
Why it matters: You may need affordable power and durability for occasional shop tasks.
How they work (short): Pistons compress air in a cylinder using a crankshaft.
Real-world example: A 30‑gallon, single-stage tank with a low‑RPM motor that measures ~72 dB and runs half-hour cycles for spray-gun prep.
What to expect and steps to quiet one:
- Aim for low-RPM models — 1,800–3,400 RPM runs quieter than high-RPM equivalents.
- Get an enclosed or belt-driven model — belt drive and a sound cabinet cut vibration noise by 5–10 dB.
- Plan maintenance — schedule oil checks every 50–100 hours and change oil per the manual.
Tip: Add vibration isolation pads under the tank to reduce radiated noise.
Scroll compressors — Why they matter for indoor work:
Why it matters: You want the quietest, lowest‑vibration option for a home garage or indoor shop.
How they work (short): Two spiral elements compress air with continuous motion.
Real-world example: A small scroll compressor in a woodworking shop that holds steady at 55–60 dB while running tools.
What to expect and steps to install one:
- Size for duty cycle — pick a unit with a 100% duty cycle if you run tools for hours; otherwise 50–70% duty cycle is fine for intermittent use.
- Place indoors and mount on anti-vibration feet — this keeps noise at the measured 55–65 dB range.
- Pair with a receiver tank and regulator for steady pressure.
Tip: Scrolls rarely need oil changes, so they save time on maintenance.
Rotary screw compressors — Who should consider them?
Why it matters: You need continuous, high-volume air with efficient operation.
How they work (short): Meshing helical rotors trap and compress air continuously.
Real-world example: A 10 HP rotary screw in an auto shop delivering 60–120 CFM at 100 PSI, tucked inside a soundproof cabinet that drops noise to ~65 dB.
What to expect and steps to set up one:
- Size by CFM demand — add the peak CFM of your tools and multiply by 1.2 for headroom.
- Use a soundproof cabinet — cabinets and inlet silencers cut ambient noise by 10–20 dB.
- Maintain filters and oil separators per the schedule — typically every 500–2,000 hours depending on use.
Tip: Rotary screws are efficient at high duty; pair with variable-speed drive (VSD) to save energy and reduce acoustics.
Final practical checklist for your garage
Why it matters: You want a machine that fits noise limits, duty, and budget without surprises.
Steps:
- Measure what you use — list tool PSI and peak CFM.
- Pick a type by duty: portable for mobile jobs, piston for budget intermittent work, scroll for quiet indoor use, rotary screw for continuous heavy demand.
- Reduce noise: choose low-RPM or scroll/rotary, add cabinets or pads, and check dB ratings (aim under 70 dB for a comfortable garage).
- Plan maintenance: oil-free for low upkeep, oil-lubed or rotary with scheduled service for longevity.
Concrete example: If you run an air ratchet (12 CFM) and a spray gun (15 CFM) alternately, size for ~33 CFM with 1.2 headroom ≈ 40 CFM and consider a rotary screw or a 10–15 HP piston with soundproofing.
If you want, tell me the tools you use and your preferred noise target, and I’ll recommend specific sizes and models.
Cost vs Value: Purchase Price, Energy Savings, and ESG Benefits
Before you buy a compressor, you need to know how purchase price compares to lifetime costs and why that matters: the sticker price can hide energy, maintenance, and replacement expenses that add up fast.
You’ll often find that the quietest compressors cost more up front, but they can save money and headaches over their working life. Say you buy a quiet, inverter-driven unit that’s $1,200 versus a noisy fixed-speed one at $900; if the inverter model uses 12% less electricity and your shop spends $2,000/year on compressor power, you save about $240 a year. Do the math: 1) calculate annual energy spend, 2) multiply by the expected percent savings, 3) divide the price premium by annual savings to get simple payback. Example: $300 premium ÷ $240/year ≈ 1.25 years.
I compare purchase price to lifecycle costs, which include energy use, maintenance, and eventual replacement, so you see total expense not just sticker shock. For maintenance, list expected tasks and costs per year—for example, oil changes at $75 twice a year, filter replacements at $50/year, and an overhaul every 5 years at $1,000—and add them into your annual operating cost.
Quiet, inverter-driven models use 10–15% less energy, lowering bills and payback time, and oil-free designs cut contamination risks and maintenance needs. Picture a dental clinic that switched to an oil-free, inverter compressor: they avoided expensive filter failures and reduced patient complaints about noise during procedures.
I also weigh ESG benefits, since lower emissions and noise improve community relations and meet stricter regulations, boosting long-term value. You should quantify this: check local noise ordinances and your facility’s emissions reporting—if avoiding fines or meeting procurement criteria saves or enables contracts, include that dollar figure in your decision.
Finally, I look for rebate programs and incentives that reduce initial cost, and I recommend calculating simple payback and total cost of ownership before buying. Steps to follow: 1) list upfront prices and any available rebates, 2) estimate annual energy and maintenance costs, 3) compute simple payback and 5–10 year total cost of ownership, 4) pick the unit with the lowest TCO that meets your noise and contamination needs. Example: a $400 rebate lowers that $1,200 inverter model to $800, flipping the payback math and making it the smarter buy.
Install Quiet Compressors: Placement, Vibration Control, and Acoustic Enclosures
Before you install a quiet compressor, know this: poor placement, weak mounts, or a blocked enclosure will make it louder and wear it out faster.
Where should you put the compressor to cut noise and vibration?
Why it matters: placing the unit right changes how much sound reaches your workspace and how much vibration travels through the building.
1) Put it at least 3 feet (1 meter) away from workbenches and walls to reduce reflected sound.
Example: in a one-car garage, set the compressor centered along the side wall rather than jammed into a corner so tool noise doesn’t echo into your workbench area.
2) Elevate it 6–12 inches (15–30 cm) on a sturdy platform if you can get good airflow and service access—this helps cooling and makes routine checks easier.
3) Keep intake and exhaust clear: leave a 12–18 inch (30–45 cm) clearance in front of the fan and don’t block vents with shelving or tarps.
How should you mount it to stop transmitted vibration?
Why it matters: reducing vibration prevents structure-borne noise and protects internal parts.
1) Use rubber isolation mounts or pads rated for the compressor’s weight; pick mounts that compress 10–20% under load.
Example: for a 100 lb (45 kg) compressor, choose isolators with a combined static deflection that gives about 1–2 inches (25–50 mm) total compression across the mounting points.
2) Bolt the mounts to a rigid base—plywood underlayment over concrete is fine—but don’t attach the compressor directly to studs or joists without isolation.
3) Check and re-torque fasteners after the first 50 hours of use.
Do you need an acoustic enclosure, and how do you build one without overheating the unit?
Why it matters: an enclosure blocks airborne noise but can raise temperatures if you don’t ventilate it correctly.
1) Only add an enclosure if ambient noise must be below ~60 dB at 3 ft (1 m); measure with a phone app or borrow a meter.
Example: in a small woodworking shop where conversation is frequent, a properly baffled enclosure dropped noise by 10–15 dB at ear level.
2) Use 1–2 inch (25–50 mm) acoustic foam or mass-loaded vinyl on inner walls and build the shell from 3/4 inch (18–20 mm) plywood or MDF.
3) Provide airflow with baffled openings: intake at the bottom, exhaust at the top, each with a 2:1 duct length-to-diameter ratio and at least 3–4 inch (75–100 mm) diameter to avoid restriction.
4) Add a thermostatic fan if internal temps rise above the compressor’s specified max; place the fan on the exhaust path so it pulls air through the enclosure.
Final practical checklist (do these steps in order):
1) Measure and pick a spot ≥3 ft from benches/walls and allow 12–18 in clearance for vents.
2) Build or place a 6–12 in raised platform if possible.
3) Install rubber isolators sized for the compressor weight and torque mounting bolts.
4) If noise must be lower than ~60 dB at 3 ft, build a baffled enclosure with acoustic lining and a 3–4 in vent path, and add a thermostatic fan if temps exceed limits.
5) Run the compressor and recheck mounting bolts and enclosure temps after 24–48 hours of operation.
If you follow these steps, you’ll have a quieter compressor that vibrates less and lasts longer.
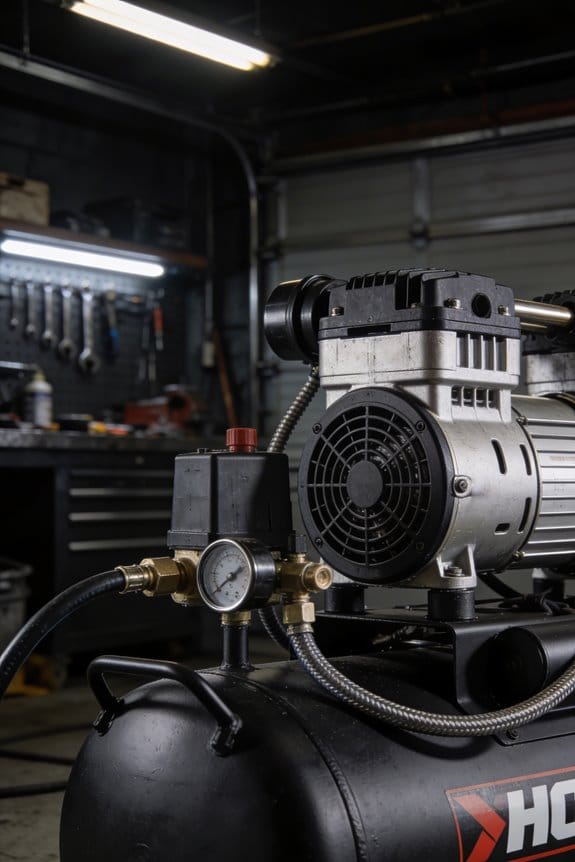
What to Compare When Buying: Noise Ratings, CFM/PSI, Serviceability, Warranties
Before you buy, you need to know which specs actually affect how a compressor will work for you.
Check the noise rating in dB(A) and why it matters: quieter compressors let you work longer without hearing protection and avoid upsetting neighbors. Look for ratings measured at 1 meter or 7 feet so you can compare apples to apples; a spec like “68 dB(A) at 1 m” is concrete. Example: a compressor rated 78 dB(A) at 1 m sounds noticeably louder than a 68 dB(A) unit — about twice as loud to your ear.
Why matching CFM and PSI matters: your tools need a certain airflow (CFM) at a given pressure (PSI) to run properly. Step 1: list the CFM and PSI requirements of each tool you use. Step 2: pick a compressor that supplies at least 25% more CFM than your highest-demand tool at the tool’s required PSI, because motors and fittings lose capacity. Example: if your paint sprayer needs 12 CFM at 40 PSI, choose a compressor rated for at least 15 CFM at 40 PSI.
Serviceability affects how long the compressor stays useful: easy access and simple maintenance cut downtime. Look for large access panels, an oil drain at the bottom, and a clear maintenance schedule in months or run-hours. Example: a shop compressor with a front panel that removes in two screws and an oil-change port you can reach without moving the unit makes routine service ten times faster.
Compare warranties because repair costs add up fast. Check the length of coverage for the pump and motor separately, and whether labor is included. Also verify the dealer network and spare-parts lead times — a long warranty is less helpful if you wait weeks for a replacement part. Example: a 3-year pump warranty with local dealer parts stocked is usually better than a 5-year warranty that requires shipping parts from overseas.
Quick Checklist to Choose the Right Quiet Compressor for Your Shop
Before you pick a quiet compressor, you need to know what actually matters for your shop: noise level, airflow, pressure, duty cycle, maintenance, and support.
Why this matters: getting those right saves time, money, and frustration. Example: in my buddy’s woodshop, a too-small compressor kept tripping the tool and making a racket, which stopped a whole job for hours.
1) How loud is it?
Why this matters: noise affects comfort, safety, and where you can put the unit.
Steps:
- Verify the noise rating in dB(A) at a stated distance — look for values at 1 m (3.3 ft) or 7 ft and prefer numbers under 70 dB(A) for a small shop.
- If the spec is at 1 m, estimate ~6–8 dB drop at 7 ft; confirm with the dealer if in doubt.
Example: a compressor rated 72 dB(A) at 1 m will be about 64–66 dB(A) at 7 ft, which is noticeably quieter than a typical shop radio.
2) What CFM and PSI do you need?
Why this matters: if the compressor can’t supply enough air, your tools stall and jobs slow down.
Steps:
- List the highest-demand tool and note its CFM and PSI at tool-ready pressure (for example, a 1/2″ impact might need 5–7 CFM at 90 PSI).
- Multiply that CFM by 1.25 (25% safety margin) to size your compressor — so for 7 CFM you’d pick at least 8.75 CFM.
Example: for a spray gun that draws 12 CFM at 40 PSI, you’d aim for 15 CFM to avoid dropping pressure mid-spray.
3) What horsepower and tank size should you get?
Why this matters: horsepower and tank volume determine run-time and how often the motor cycles.
Steps:
- Match horsepower to your CFM needs and duty cycle; for intermittent hand tools, 1–2 HP often works, while continuous shop use may need 3+ HP.
- Choose tank size by run-time: for short bursts, 20–30 L (5–8 gal) can work; for longer continuous use or smoother pressure, go 60 L (15+ gal) or larger.
Example: a cabinetmaker using sanders and spray equipment chose a 3 HP with a 60 L tank and got steady cuts and fewer motor starts.
4) Oil-free vs. oil-lubed and maintenance
Why this matters: maintenance affects operating cost and air cleanliness.
Steps:
- Pick oil-free if you need clean air and minimal servicing (carpentry, painting). Pick oil-lubed for heavy-duty life and quieter operation if you’ll maintain it.
- Confirm filter elements, belts, and oil-change intervals and note replacement part costs.
Example: a finish painter chose oil-free to avoid oil vapor in topcoats and only needed a filter change once a year.
5) Warranty and dealer support
Why this matters: good support saves you weeks of downtime when something fails.
Steps:
- Confirm warranty terms for motor, pump, and tank, and ask if labor is included.
- Check if the dealer stocks parts and offers service visits within 48–72 hours.
Example: a mechanic avoided a month of downtime because their dealer provided a loaner unit and next-day parts.
6) Placement, monitoring, and maintenance schedule
Why this matters: where you put the compressor and how you monitor it determines noise exposure and uptime.
Steps:
- Do a simple noise map: stand where you work and measure with a phone app or meter; place the compressor where readings stay below 70 dB(A).
- Confirm remote monitoring or alarm options if you can’t be on-site.
- Set a clear maintenance schedule: daily drain, monthly filter check, and annual pump/service.
Example: placing the compressor outside the main shop and running a 10 ft hose cut noise by 8 dB(A) and reduced complaints from staff.
Final checks
Why this matters: last details prevent buyer’s remorse.
Steps:
- Confirm noise mapping for your planned placement.
- Verify remote monitoring or alert options.
- Check whether the warranty transfers if you sell the shop.
Example: one shop owner sold his business easily because the compressor warranty transferred to the buyer.
Follow these concrete steps and you’ll pick a compressor that runs quietly and reliably for your needs.
Frequently Asked Questions
How Do Quiet Compressors Impact Resale Value of Secondhand Shops’ Equipment?
They generally boost resale perception and can raise used equipment prices; I’ve found buyers value quieter, oil-free units for perceived equipment longevity and lower maintenance, so resale offers tend to be quicker and slightly higher.
Can Quiet Compressors Be Safely Used in Explosive or Flammable Environments?
Like walking on eggshells, I can’t recommend most quiet compressors in explosive or flammable zones unless they’re specifically certified intrinsically safe and installed per hazard zoning rules; otherwise they pose ignition risks and won’t meet compliance.
What Maintenance Differences Exist Between Oil-Free Quiet and Lubricated Compressors?
Oil-free upkeep is simpler: I change filters and belts, drain tanks, and inspect seals less often. Lubricated servicing requires oil changes, filter swaps, seal checks and more frequent maintenance schedules, plus monitoring oil levels and contamination.
Are There Tax Credits or Incentives for Purchasing Low-Noise, Energy-Efficient Compressors?
Think of savings blooming: I’ve found tax credit chances, rebates for energy efficient equipment, utility incentives and demand response programs often apply to low-noise, energy-efficient compressors — check local/state incentives and utility program eligibility.
How Do Quiet Compressors Affect Compressed Air Tool Compatibility and Performance?
Quiet compressors generally maintain air tool fit and pressure stability well; I’ll note some models need higher flow or larger tanks for peak-demand tools, but for most shop tools they preserve performance while reducing noise.