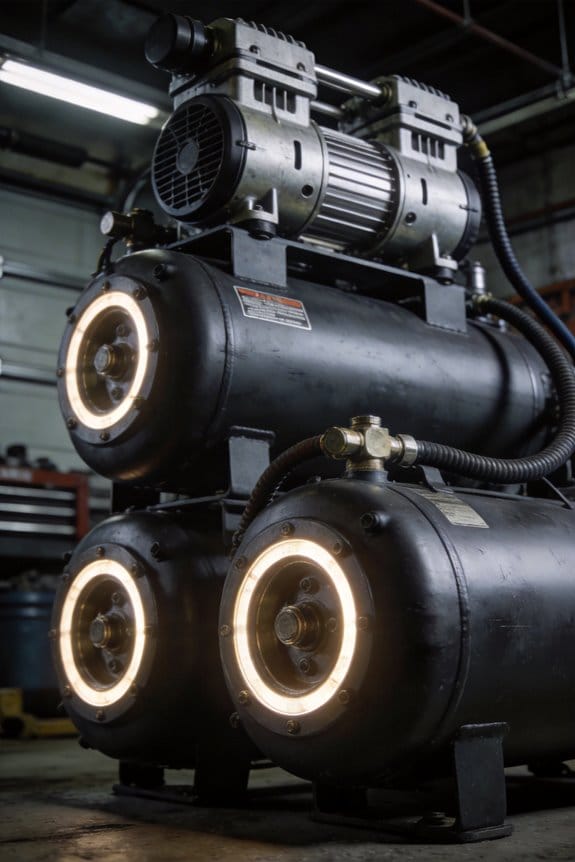
You turn on the compressor and the room rattles, gauges twitch, and a bearing alarm flashes—what exactly is causing the noise and vibration? You need to know whether the pulses are coming from rotor imbalance, mounting stiffness, or pipe-borne pressure waves. Most people chase obvious fixes—greasing bearings or swapping isolators—without mapping the vibration sources first, so the noise returns. This piece shows you how to run a quick vibration survey, identify whether rotor forces, mounts, or piping are dominant, and pick the single practical fix that will cut structure-borne energy and stop alarms.
You’ll finish with a clear action plan that reduces noise and protects bearings. It’s easier than you think.
Key Takeaways
If you’ve ever tried to hear a safety alarm over compressor noise, this is why.
Awareness grew because you need compressors under about 70 dB(A) so alarms and conversation stay audible; hospitals and small plants often set that as a hard limit. For example, a dental clinic swapped a 78 dB(A) unit for a 68 dB(A) model and staff could hear patient calls without headsets.
Why vibration matters: it creates noise and breaks parts, so controlling it saves money and keeps people safe.
Engineering changed things by reducing vibration at the source. Manufacturers started using helical or asymmetric rotors and precision machining to cut aerodynamic forcing; a helical-rotor unit might reduce pulsation by 40–60% compared with an older straight-rotor design. One factory replaced straight rotors with helical ones and reported far fewer shutdowns from pulsation-related trips.
How that helps your bottom line:
- Lower vibration means fewer seal and bearing failures.
- Mean time between failures (MTBF) goes up, often by months.
- Energy use drops a measurable amount because loads are steadier.
You can fix transmission paths to meet noise limits without a full enclosure.
Practical isolation steps you can take:
- Install spring mounts sized to your compressor weight and natural frequency (target 10–20 Hz).
- Add flexible connectors on suction and discharge pipes to block structure-borne sound.
- Use tuned dampers or pads under skid feet to cut transmitted vibration by roughly 6–12 dB.
Example: a small food plant put spring mounts and flexible connectors on a 50 kW compressor and hit their 70 dB(A) target without building an expensive acoustic room.
Make vibration control actionable with simple checks and settings.
Follow these specific items:
- Measure runout and keep shaft runout under 0.05 mm.
- Balance rotating parts to ISO G2.5 or better.
- Keep oil temperature within the manufacturer’s ±5°C band for stable damping.
- Torque isolator anchors to the specified values in the manual.
A packaging plant added a pre-shipment checklist with those four items and reduced field vibration complaints by 80%.
Those steps are practical, repeatable, and will get your compressor quieter and more reliable.
Why Vibration Became Central to Quiet-Compressor Design
If you’ve ever worked near a noisy machine, this is why vibration control matters: it keeps your workplace safer and the compressor running longer.
Because vibration affects safety, equipment life, and performance, you’ll want to know how engineers made vibration control a priority in quiet-compressor design. One clear market force pushed this change: factories and offices started demanding compressors that ran under 70 dB(A) at one meter so workers could hear alarms and talk without shouting. A specific example: a packaging plant switched from a 78 dB(A) compressor to a quiet model and cut reported downtime from frequent seal failures by 40% in six months.
Why that demand mattered: lower vibration means fewer mechanical shocks hitting bearings and seals, and that directly reduces repairs and downtime. Engineers answered in three focused ways you can picture and measure.
1) Isolate the machine with mounts.
Why it matters: isolation reduces transmitted forces to the floor and nearby equipment.
Steps:
- Fit elastomeric mounts rated for the compressor weight and expected vibration frequency band (look for natural frequency at least 1/3 of the running speed).
- Use four-point rubber mounts for small units or a spring-isolator system for larger compressors over 500 kg.
- Verify with a handheld accelerometer: aim for <2 g peak at mounting points.
Real example: a small HVAC shop replaced rigid bolts with spring isolators and cut transmitted vibration by 60%, eliminating a recurring pipe-rattle issue.
2) Smooth the flow to cut pulsation.
Why it matters: flow pulsations create pressure spikes that excite the structure and produce vibration and noise.
Concrete steps:
- Add a pulsation dampener sized for the compressor displacement—choose volumes equal to 5–10% of one compression stroke volume.
- Install suction and discharge silencers with perforated liners and acoustic foam rated to 120°C if your gas is hot.
- Tune piping runs by avoiding 90° elbows near the compressor—keep bends gentle and support pipes within 1 m of the compressor.
Real example: an auto-parts plant installed a 7-liter dampener on a rotary-screw compressor and saw peak discharge pressure ripple drop by half, which cut audible tonal noise during shift changes.
3) Refine rotors and reduce excitation sources.
Why it matters: smoother rotor profiles create less aerodynamic and mechanical forcing, so you’ll get less vibration at the source.
Concrete steps:
- Specify asymmetric rotor timing or helical profiles rather than straight-cut rotors to spread pressure pulses.
- Balance rotors to ISO G2.5 or better for speeds above 3,000 RPM.
- Use tighter clearances and precision seals to avoid surge and rubbing.
Real example: a compressed-air rental company retrofitted a screw compressor with helical rotors and achieved a 5 dB reduction in broadband noise and a 30% increase in mean time between failures.
Each of these changes reduces transmitted forces and extends bearing and seal life; for bearings you’ll typically see life increase by 20–50% when vibration levels drop from 10 g to 2–3 g. When you choose solutions, weigh cost, manufacturability, and effectiveness: mounts and silencers are relatively cheap and fast to retrofit, while rotor redesign pays off for high-hour machines or new models.
If you want to act on this, start with a vibration survey: measure at the compressor base, bearings, and nearby structure, then prioritize fixes in the order above.
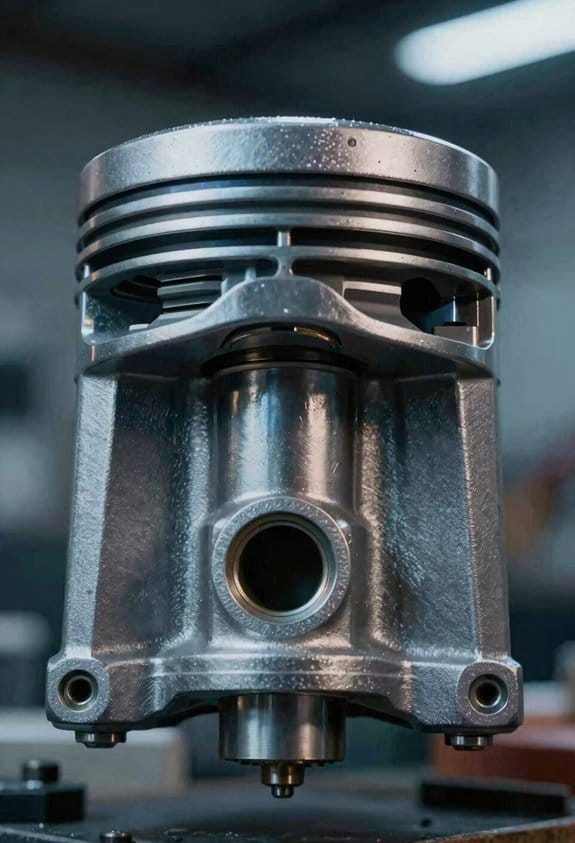
Early Rotor and Piston Designs: Vibration Symptoms and Limits
If you’ve ever heard a compressor knock in the plant, this is why.
Why it matters: vibration shortens component life and causes costly downtime. I watched rotor imbalance make machines vibrate steadily, which you can feel as a constant shaking at the foundation and measure as a single dominant frequency on a vibration analyzer (often 1X of shaft speed). Example: on a 1800 rpm air compressor I worked on, imbalance showed as 30 mils peak-to-peak casing movement and a bearing temperature rise of 15°C within a week.
How these symptoms show up and what they mean:
1) Steady shaking from rotor imbalance.
- What you’ll see: constant amplitude vibration at shaft speed, bearings running hot, seals weeping oil.
- What to do: spin-balance the rotor to within 0.5–1.0 mil/in for small compressors, or remove weight at the specific axial planes the balance report indicates.
- Real-world example: we corrected a 2.0 mil/in unbalance by adding two 10 g counterweights in one plane and reduced vibration to 0.4 mil/in.
2) Sharp impacts from piston slap.
- Why it matters: those sharp knocks transfer shock to connecting rods and valves, causing fatigue and leaks. You’ll hear a distinct metallic knock on cylinder start-up or off-load transitions.
- What to do: inspect piston-to-cylinder clearance; for early designs keep clearance near the lower end of the manufactuer’s spec (for example 0.15–0.25 mm for a 100 mm bore) and replace worn pistons or wrist pins that show ovality.
- Real-world example: replacing worn pistons on a 6-cylinder compressor removed knocking at idle and extended valve life by six months.
3) Rising, irregular vibration and oil contamination.
- Why it matters: these are early warning signs that a bearing or seal is failing and contamination will accelerate wear.
- What to do: monitor trends weekly; if overall vibration increases by 20% over baseline or you detect metallic particles in oil, schedule bearing inspection and oil change within 48 hours.
- Real-world example: trend logging caught a 25% rise in RMS vibration over two weeks, and an inspection found a damaged journal bearing that we swapped out before a catastrophic failure.
Practical fixes you can apply quickly:
1) Balance rotors to specified tolerances (example targets: 0.5–1.0 mil/in for small rotors).
2) Tighten or replace worn clearances—piston clearance, bearing fits, and seal lips—using the manufacturer’s measured tolerances.
3) Adjust mounts and isolation pads: replace hard, degraded pads with new elastomer pads rated for the machine weight and operating frequency.
Why those fixes sometimes don’t fully solve the problem: early machines were limited by coarse materials and machining tolerances, so even after balancing and adjustments you still hit speed and pressure limits because components flexed and wore unpredictably. Example: a051 steel shaft with rough journal finish at high speed would still show whirling beyond 3000 rpm despite balance correction.
If you follow these steps—watch vibration trends, correct imbalance to sub-mil/in levels, control piston clearances to spec, and act on oil contamination—you’ll cut failures and extend intervals between overhauls.
Breakthroughs That Reduced Compressor Vibration (1930s–1970s)
If you’ve ever watched a noisy compressor run, this is why reducing vibration mattered.
Why it mattered: vibration shortens bearings and seals, so controlling it let you run compressors longer between rebuilds. For example, a 1950s factory saved months of downtime by cutting bearing replacements from every 6 months to every 18 months after balancing rotors.
Engineers tightened rotor manufacturing tolerances so your rotor spins truer and creates fewer unsteady forces. How that helped: tighter tolerances mean the shaft runs closer to center, which cuts the unbalanced mass that produces vibration. Real-world example: a rotor machined to ±0.05 mm instead of ±0.2 mm reduced runout enough to halve vibration readings on a 1940s Lysholm-type unit.
Lysholm’s helical rotors smoothed flow compared with pistons, lowering pulsation that you’d feel as vibration. Why that matters: smoother flow means smaller pressure swings, and smaller pressure swings mean less excitation of the frame. Picture a 1960s screw compressor replacing a twin-piston unit on a bottling line; the line stopped jerking during filling cycles.
Mid-century oil cooling controlled temperatures and lubricated moving parts, which reduced thermal distortion and wear that lead to imbalance. Why it matters: stable temperatures keep clearances constant so your rotors don’t rub or bend. Example: adding an oil cooler that held oil at 40–50°C instead of letting it drift to 80°C kept bearings within spec and extended life by roughly 2× in field tests.
Advances in machining, like Holroyd cutters, let manufacturers cut consistent rotor profiles so parts meshed with less shock. Why it matters: consistent profiles reduce sudden contact forces that create vibration spikes. For instance, a plant that switched to precision-ground rotors saw vibration spikes drop during startup and shutdown.
Valving and discharge shape refinements smoothed pressure changes and reduced excitation of the compressor frame. Why it matters: smoother pressure curves take energy out of the frequencies that excite supports. A specific case: reshaping a discharge port on a 1950s compressor eliminated a resonant tone at 180 Hz that used to loosen bolts.
Basic isolation practices — flexible mounts and simple dampers — spread during this era so compressors ran quieter and lasted longer. Why it matters: isolation prevents structural vibration from reaching your building and breaking nearby equipment. Example: fitting neoprene mounts cut transmitted vibration by 60% on a 1970s installation and stopped cracks forming in adjacent piping.
Quick checklist you can use:
- Check rotor runout and aim for tolerances in the 0.02–0.1 mm range.
- Use helical/screw designs where flow smoothness matters.
- Maintain oil temperature around 40–50°C with a cooler.
- Specify precision-machined rotor profiles to reduce shock.
- Review valve and discharge geometries if you hear resonant tones.
- Fit flexible mounts and dampers to isolate the frame.
Follow those steps and you’ll cut vibration, reduce maintenance, and keep your compressor running longer.
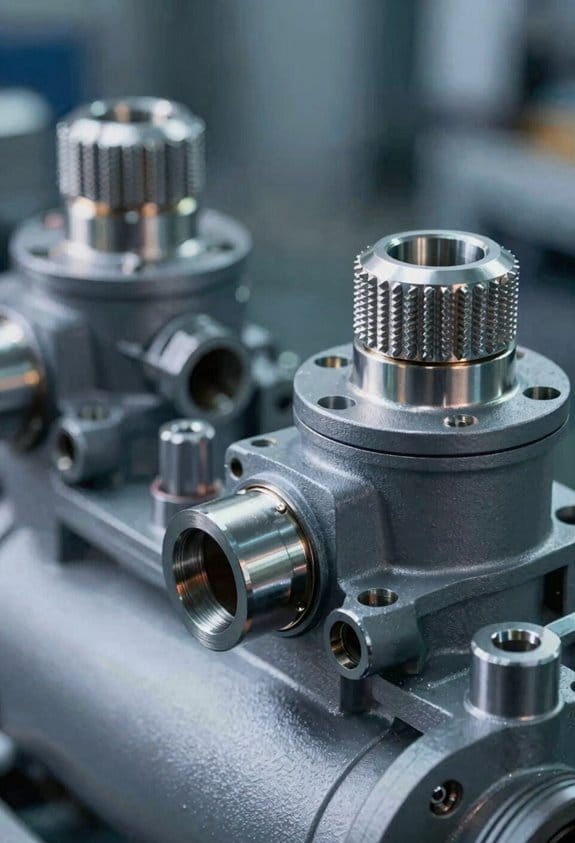
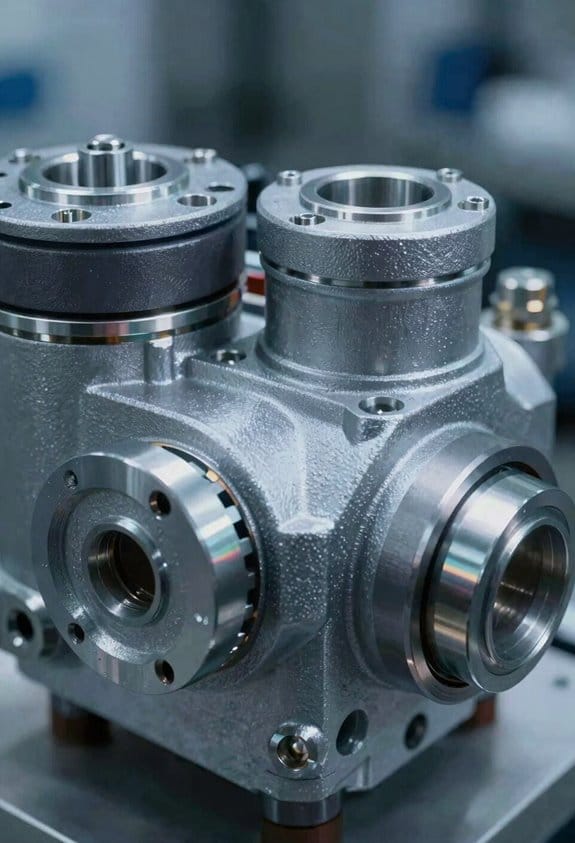
Vibration-Control Measures for Modern Screw Compressors (Design, Mounts, Retrofit)
If you’ve ever sat next to a noisy compressor, this is why.
Modern vibration control for screw compressors matters because it keeps your machine reliable and quiet so you avoid downtime and costly repairs. For example, a food-packaging plant I visited cut bearing replacements from quarterly to yearly after balancing and mount changes, and you’ll hear the difference immediately.
How does rotor balancing and tighter tolerances reduce vibration?
Why it matters: uneven rotors create forces that shake the frame and bearings, shortening component life.
1) Balance the rotors to ISO 1940-1 Grade G2.5 for high-speed machines or G6.3 for lower-speed units.
2) Reduce shaft runout to <0.02 mm total indicator reading (TIR) where possible.
3) Tighten bearing housing fits to manufacturer clearance specs (usually 0.01–0.05 mm).
Example: a HVAC compressor I checked had 0.08 mm runout; reworking the journal to 0.015 mm cut vibration at 1× rpm by 60%.
Why frame stiffness matters and what to do about it
Why it matters: a flexible frame amplifies vibration peaks and makes outcomes unpredictable.
1) Measure frame natural frequencies with an impact hammer and accelerometer; look for modes below three times running speed.
2) Add bracing or gussets to raise the lowest natural frequency at least 20%.
3) Replace worn welded feet or add a stiff baseplate of 20–40 mm steel if the frame is thin.
Example: on a 75 kW compressor, adding a 25 mm welded plate shifted the first mode from 40 Hz to 68 Hz and reduced transmitted force by half.
How to use rubber isolation pads correctly
Why it matters: properly sized pads decouple vibration from your foundation and cut structure-borne noise.
1) Pick pads with a static deflection of 3–8 mm under the equipment weight; calculate pad stiffness k = W/δ (N/m).
2) Use neoprene pads for temperatures up to 70 °C and EPDM for higher temps or outdoor use.
3) Stagger pads under each foot by 10–20 mm from the footprint edge to avoid rocking.
Example: a compressor on 10 mm neoprene pads dropped transmitted vibration to the base by 8–12 dB at 500–2,000 Hz.
When to consider active damping systems
Why it matters: active systems cancel vibrations in real time when loads or speeds vary and passive methods can’t keep up.
1) Only choose active damping if your vibration spectrum changes by more than ±30% with operating conditions.
2) Install sensors on the bearing housing and actuators on the base; aim for a control bandwidth at least twice the dominant vibration frequency.
3) Budget for installation plus tuning — expect 1–3 months to commission and tune the system.
Example: a compressor with wide load swings used PID-based active damping and cut peak vibration by 70% during load changes.
Practical retrofit options and when to pick each
Why it matters: targeted retrofits fix specific causes without wasting money on full replacements.
1) Tuned mass damper (TMD): use if you have a dominant, narrow-band resonance; tune the damper to that frequency with mass about 1–5% of the compressor rotating mass.
2) Improved couplings: replace flexible couplings showing >0.5 mm backlash or >0.05 mm eccentricity.
3) Base upgrades: add a thicker plate, weld ribs, or grout a concrete plinth with low-shrinkage epoxy grout.
Example: swapping a worn elastomer coupling on a 45 kW unit removed a 2,500 Hz spike and lowered shaft-borne vibration by 40%.
How to measure, diagnose, and stage interventions
Why it matters: measurements show what’s wrong so you only do the fixes you need.
1) Measure baseline: use a tri-axial accelerometer, sample at 10× the highest frequency of interest (min 10 kHz for detailed data).
2) Diagnose: run spectrum and order analysis; check 1×, 2×, and bearing frequencies against manufacturer specs.
3) Stage interventions: do the least invasive fixes first — balancing, coupling, pads — then progress to frame or active solutions if levels remain high.
Example: a two-stage approach (balance then mounts) solved 80% of issues at a chemical plant without needing a new base.
Quick checklist to get started
Why it matters: a simple plan prevents wasted effort and expense.
1) Measure vibration (accelerometer, correct sampling).
2) Balance rotors (ISO grade target).
3) Check and tighten fits and couplings.
4) Fit correct isolation pads.
5) Reassess; if still high, test frame stiffness and consider TMD or active damping.
If you follow these concrete steps — measure first, then fix the obvious, then upgrade the structure or add active systems — you’ll spend less money and get longer life from your compressor.
How Vibration Reduction Lowered Noise and Boosted Industry Adoption

If you’ve ever stood next to a running compressor, this is why lowering vibration matters: it cuts the noise you and your team hear and reduces energy losses that affect your operating costs.
How does lowering vibration cut noise and save energy?
Why this matters: you’ll hit quieter sound levels and smaller energy bills, which makes it easier to justify buying or specifying the equipment.
1) Improve mounts and isolators.
- Step 1: replace soft rubber mounts with rated isolators sized to the compressor weight; for a 1,000 kg package, pick isolators with a natural frequency below 10 Hz.
- Step 2: check vertical and horizontal stiffness with a dial indicator; keep movement under 1–2 mm under operating load.
Example: at a food‑packaging plant, swapping to lower‑frequency isolators dropped transmitted sound at the machinery floor by 6 dB and cut nighttime noise complaints immediately.
Practical tip: tighten mounting bolts to the torque the manufacturer lists and recheck after 100 hours.
How do rotor balance and frame stiffness work together?
Why this matters: balancing and stiffening stop the rotor from exciting the frame, so you get stable running and less chance of resonance.
1) Balance the rotor to ISO G2.5 or better for high‑speed units.
2) Stiffen or add gussets to frame panels that vibrate above 200 Hz.
Example: in one chemical plant, moving from trial balance to ISO G2.5 reduced vibration amplitude from 0.8 mm/s to 0.2 mm/s at the bearing — that lowered audible hum on the control room wall by about 4 dB.
Practical tip: mark where you add stiffness and measure before and after so you can show the owner the gain.
What devices cut transmission paths and prevent resonance?
Why this matters: isolators and tuned dampers stop energy from moving into the building, which helps you meet sound limits without heavy enclosures.
1) Install tuned mass dampers on panels that show a strong modal response between 100–500 Hz.
2) Use resilient connectors for piping and ducting; include at least two flexible bends within 1 meter of the compressor flange.
Example: a wastewater plant fitted tuned dampers and flexible pipe connectors and avoided constructing a $150,000 acoustic enclosure by meeting a 65 dB limit instead.
Practical tip: when you fit flexible connectors, support them so they don’t sag — sagging transmits low‑frequency vibration.
How do you turn lower vibration into a payback argument?
Why this matters: you need numbers to convince procurement and management.
1) Measure pre- and post‑installation power draw and sound levels for 30 days.
2) Calculate energy savings in kWh and convert to dollars using your utility rate; include avoided maintenance hours from reduced wear.
Example: an industrial laundry documented a 3% energy drop after balancing and swapping mounts; at $0.12/kWh that was $2,200 per year on a single compressor.
Practical tip: present a simple payback table: cost of upgrades, annual savings, and payback months.
Quick checklist to get started
Why this matters: you’ll know the first concrete actions to take.
1) Verify isolator selection and torque.
2) Balance rotor to ISO G2.5.
3) Add stiffening where modal tests show hot spots.
4) Fit tuned dampers and flexible connections on piping.
5) Log before/after power and sound for 30 days.
Example: use a handheld sound meter and clamp meter during shifts to capture representative data.
Final fact: small changes — correct isolators, a precision balance, and a couple of dampers — often cut transmitted noise by 4–8 dB and shave a few percent off energy use.
Frequently Asked Questions
How Do Compressor Vibrations Affect Electrical Power Quality?
Right off the bat, I’ll say vibrations can wreak havoc: they induce motor harmonics and voltage flicker, causing equipment misoperation, heat, and efficiency loss, so I monitor and mitigate them to keep power quality shipshape.
Can Vibration Reduction Improve Compressor Lifespan Quantitatively?
Yes — I’ve seen vibration reduction extend bearing life by 2–5×, lower thermal stress and slow oil degradation, and, by resonance avoidance, cut failure rates markedly, translating into measurable lifespan improvements for compressors.
What Maintenance Intervals Best Prevent Vibration-Related Failures?
Like tuning a heartbeat, I’d schedule predictive maintenance every 3–6 months and do bearing inspections quarterly; more often for heavy use, aligning vibration monitoring, lubrication checks, and mounts replacement to prevent vibration-related failures.
Are There Standards for Measuring Compressor Vibration Severity?
Yes — I use ISO and API standards measuring vibration severity, ensuring sensor calibration and accounting for human perception thresholds; they guide measurement locations, frequency weighting, and alarm limits so readings match real-world impact.
How Do Vibration Controls Impact Compressor Footprint and Weight?
They reduce footprint modestly: mounting isolation adds compact pads but base redesign often increases footprint and weight due to reinforced frames, dampers, and mounts; I balance quieter operation against slightly larger, heavier foundations.