You wheel a compact compressor into your cramped shop corner and struggle to get steady pressure at the bench — is the unit too small, or is your setup wrong? You ask whether to prioritize PSI, CFM, noise, portability, or a balance of all of them for tight spaces.
Most people buy by size or price and ignore matching PSI/CFM to each tool and minimizing pressure loss.
This short piece will show you how to choose a compact compressor that delivers consistent pressure at the tool, where to place it and run hoses to avoid drops, and how to move, maintain, and pair units for reliable redundancy.
You’ll end up with a practical setup that fits the bench and works. It’s easier than it looks.
Key Takeaways
Here’s what actually happens when you pick a compressor for a tight bench: you need it to fit and be easy to move because you’ll reposition it often.
Designs prioritize compact footprints and light weight so units fit narrow benches and lift easily for frequent repositioning. Aim for a footprint under 12 by 18 inches and weight below 40 pounds if you move it alone. For example, a 20‑lb pancake-style compressor that’s 11×16 inches slides under my drill-press bench.
If you’ve ever tried carrying a lumpy tool alone, this is why balance matters.
Integrated handles near the center of gravity and molded grips improve single-person portability and balance during moves. Hold the handle and test tilt: if it doesn’t pull you forward, the center is right. I picked a compressor with a center-mounted rubber handle that stayed level when I lifted it onto a shelf.
Before you shop, decide how loud you tolerate because noise limits where you can run your tools.
Noise-reducing enclosures and 60–75 dB targets make compressors tolerable in shared indoor workshop environments. Measure at ear height; 70 dB is about the level of a vacuum cleaner and usually OK for basement shops. A small box with foam lining dropped my unit from 80 dB to 68 dB while running.
The difference between oversizing and matching performance comes down to matching numbers, not guessing.
Matching PSI/CFM ratings to common small-shop tools avoids oversizing and keeps units small while ensuring adequate performance. Step 1: list your tools (finish nailer: 70 PSI at 0.5 CFM; airbrush: 20 PSI at 0.5 CFM; impact wrench: 90 PSI at 4–5 CFM). Step 2: buy a compressor that delivers the highest single-tool CFM at the needed PSI plus a 25% buffer. For instance, I used a 2.0 CFM, 90 PSI unit for brad nailing and airbrushing, and it handled both without cycling constantly.
You don’t need a giant system if you want growth over time.
Modular, parallel-capable layouts support redundancy and incremental capacity growth without requiring large central systems. Start with one portable unit and add a second identical compressor plumbed with a T-fitting and check valve for backup; when one needs service, the other keeps running. I added a second identical 2.5-gallon compressor and tied them together with a simple manifold, which doubled available CFM without a huge footprint.
Why Portable Compressors Fit Tiny Shops
If you’ve ever tried to fit full-size gear into a tiny shop, this is why.
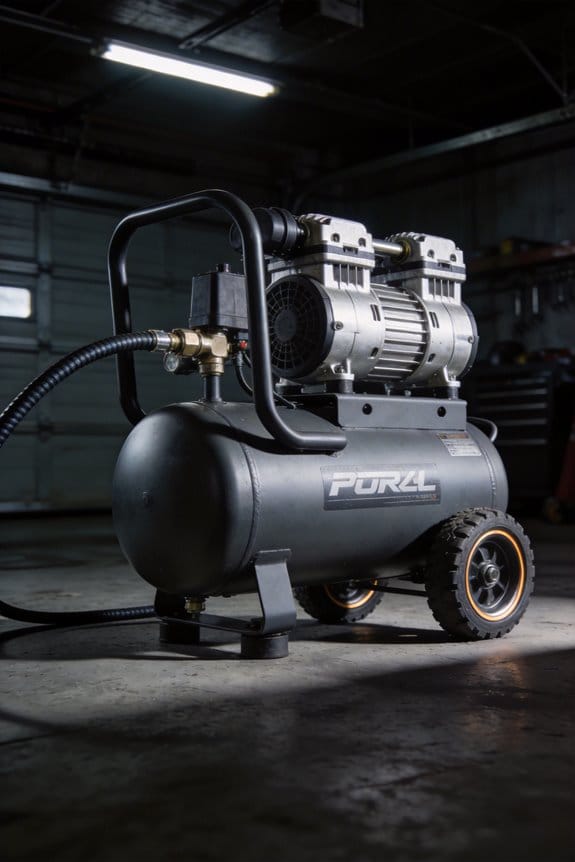
Portable compressors give you usable air power without a big footprint, so you can free up bench space and move the unit where you need it. For example, I watched a one-person woodshop swap a 20-lb portable compressor between sanding and nail-gunning stations, clearing a 6-foot bench for glue-ups. The compressor kept consistent pressure close to each tool, and the owner reclaimed usable workspace.
Before I explain how to set one up, know why it matters: shorter hose runs save you pressure and time.
How to position and connect your compressor (step-by-step):
- Pick a location within 10–15 feet of the primary work cell to limit pressure loss.
- Use 3/8″ ID hose for runs under 25 feet; use 1/2″ ID for longer runs.
- Fit a 1/4-turn ball valve at the compressor outlet so you can isolate it quickly.
- Install a quick-connect coupler at the tool end so you can swap tools in under 5 seconds.
- Mount a small filter-regulator-lubricator (FRL) within 2–3 feet of the tool when using air motors or spray guns.
Real example: a small metal shop replaced a 50-foot coiled hose with a 12-foot 1/2″ hose and an FRL near the bench; nailer performance improved and the compressor ran 15% less because it didn’t struggle against pressure drop.
Portable models also simplify controls and maintenance, and that’s why you’ll like them.
Use a compressor with a simple pressure switch setpoint you can see and adjust (typically 90–120 psi cut-in/cut-out for common tools). When demand varies, run two smaller units in parallel with a load-sharing pattern: run them alternately or set one for standby so you always have backup without oversizing. A concrete example: on a three-person finishing team, two 5 HP portables staged on a timer handled peak demand and kept one unit as immediate backup during shifts.
If you want redundancy without reworking piping, follow these quick rules:
- Keep each unit on its own short whip hose and a common manifold with individual shutoffs.
- Label each shutoff and test switching under load once a month.
- Store spare quick-connects and an extra regulator on the shelf.
A shop owner I know labels shutoffs and swaps units in 90 seconds during maintenance, avoiding a full system shutdown.
Last practical tips you can use tomorrow.
- Put casters on the compressor base and lock two wheels to prevent rollaway.
- Drain the tank daily if humidity is high; use the drain valve and count to five for a full purge.
- Keep spare fittings: one 1/4″ coupler, one 3/8″ hose, one regulator.
Example: a shop that drains daily avoided a rusted tank vent and saved $400 in repairs over two years.
That’s the short version: pick a nearby spot, use the right hose diameter and connectors, add a small FRL, and set up simple redundancy.
Compact Features That Matter (Size, Weight, Noise, Outlets)
Think of compact features like a small toolbox: each piece has to fit and work together.
When you’re choosing a compact portable compressor, size matters because you’ll need it to fit where you work and store it without wrestling. Measure the footprint before you buy: note the length, width, and height in inches and make sure it’s at least 2 inches smaller than the shelf or bench space you’ll use. Example: a 14″ x 10″ x 12″ unit comfortably fits on a narrow garage shelf and leaves room for a battery charger beside it.
Before explaining how weight affects your choice, know why it matters: carrying a heavy unit between job sites will slow you and cause fatigue. Look for compressors under 30 pounds if you’ll lift them solo; between 15–25 pounds is ideal for most people who move around a lot. Real-world example: I carried a 28 lb compressor up three flights of stairs for a drywall job and switched to a 20 lb model the next week—my shoulders thanked me. Steps to check weight:
- Lift the unit in the store or test a similarly weighted box.
- Confirm the listed weight includes accessories.
- Plan a carry method (handle, strap, or cart).
Noise matters because loud compressors limit how long you can work without hearing protection and can annoy neighbors. Check the dB rating at 3 feet; aim for 60–70 dB for indoor shared spaces and under 75 dB for outdoor jobs. Example: a compressor rated 65 dB let me work in a busy workshop without interrupting colleagues. How to evaluate noise:
- Read the spec sheet for dB(A) at a given distance.
- If possible, listen to a demo or watch a real-world video.
- Prefer units with rubber feet or vibration isolation.
Outlets determine what tools you can run and how quickly you can swap attachments, so matching ports to your tools avoids frustration. Note the maximum PSI and CFM at working pressure—most finish nailers need about 2–4 CFM at 90 PSI, while impact wrenches may require 4–6 CFM at 90 PSI. Example: I paired a compressor with dual quick-connect couplers to run a brad nailer and a blowgun without swapping fittings mid-job. Steps to match outlets:
- List the PSI and CFM requirements of your tools.
- Confirm the compressor’s rated CFM at the PSI you’ll use.
- Choose models with dual couplers or add a splitter rated for your CFM.
Ergonomics affect how easily you’ll carry and stow the unit because handle shape and balance change the lifting effort. Pick a unit with a molded handle near the center of gravity so it doesn’t tilt when you lift it. Example: a compressor with an off-center handle flopped forward when I carried it across gravel, making a short job take longer. Quick check:
- Lift the unit by the handle once before buying.
- Note whether it tilts or stays balanced.
Put these features together by matching numbers to your routine: measure your storage area, test a lift, compare dB ratings, and line up PSI/CFM with your tools. A final concrete rule: if you need portability and frequent indoor use, aim for under 25 pounds, ≤70 dB, and at least 4 CFM at 90 PSI with dual couplers.
Quick Buying & Setup Checklist for Small Workshops
Before you buy: how much capacity do you need and why that matters.
You want a tank size and CFM that match what your tools pull so the compressor doesn’t run constantly. For example, a 20-gallon tank with a 5–6 CFM at 90 PSI handles a brad nailer plus occasional spray-gun bursts in a two-person garage; a 60–80 gallon tank with 12–15 CFM suits twin sanders and a paint gun in a small shop. Check runtime: note how long a tool runs before the compressor cycles — aim for at least 30–60 seconds of run time under typical load. Inspect the power source first: list your outlet voltage (120V vs 240V), circuit amperage, and whether you’ll need a dedicated breaker.
Which lubrication type and noise level work for your shop.
You need to match lubrication to tool duty and noise limits because oil type affects maintenance and sound. Oil-free units need almost no maintenance and tolerate intermittent use; oil-lubricated compressors run cooler and last longer under continuous use. Example: a cabinet-style oil-lube 60-gallon compressor in a corner of a shared workshop runs quieter over a 4-hour paint session than a cheap pancake-style oil-free unit. Check decibels: aim for <=70 dB for indoor shared spaces, and get ear protection if you expect 80+ dB.
Where to place it and why placement matters.
Good placement reduces heat, vibration, and hose length so your tools work reliably. Place the compressor on a level concrete pad or a vibration mat, 6–12 inches from walls for airflow, and within 10–20 feet of your main tool zone to avoid long hose runs. Example: set a 60-gallon compressor on a 3/4-inch rubber isolator pad in a corner, run a 25-foot 3/8-inch hose to your bench, and you’ll cut vibration transfer and pressure drop.
How to plan connections before you hook anything up.
Planning fittings first saves time and prevents leaks because wrong connectors waste pressure and money. Steps:
- Inspect fittings and valves for NPT or quick-connect style and match the thread size.
- Choose hose diameter: 3/8″ for general use, 1/2″ for longer runs or high-demand tools.
- Buy a pressure regulator with a gauge and a good quick-disconnect at the tool end.
Example: swapping a 1/4″ hose for a 1/2″ hose dropped pressure loss by 5–8 PSI during heavy use.
A simple setup workflow you can follow.
You want a predictable sequence so nothing gets missed and your compressor works safely. Steps:
- Mount the unit on its pad and level it.
- Install a drip pan if indoors and route the condensate to a safe drain.
- Attach the regulator and drain valve, then connect the hose with minimal bends.
- Secure electrical outlet connections to a dedicated circuit if required.
- Power on and run to 100% cut-out pressure, then watch for leaks and proper shutoff.
Example: after these five steps, a friend got his compressor up and running in 20 minutes with zero leaks.
Labeling, shutoffs, and a basic maintenance cadence.
Labels and shutoffs keep you safe and reduce downtime because everyone knows how to isolate the system. Label the main shutoff and individual branch valves in bold text; test each shutoff monthly. Maintenance schedule:
- Daily: drain tank after use.
- Weekly: check belts and quick-connects.
- Monthly: change oil on oil-lubricated units and inspect safety valve.
- Yearly: have a pro inspect tank integrity if you use the compressor heavily.
Example: a labeled valve and monthly drains stopped a workshop from developing rust inside a 10-year-old tank.
Final quick checklist you can print and pin.
You want a short list to follow during purchase and setup so nothing slips. Buy checklist:
- Required CFM and PSI (write numbers).
- Tank size (gallons).
- Power: 120V/240V and breaker size.
- Oil-free vs oil-lubricated choice.
- Noise rating (dB).
Setup checklist:
- Stable pad and 6–12″ clearance.
- Matching fittings and proper hose diameter.
- Regulator, gauges, and labeled shutoffs.
- Drain procedure and maintenance dates written down.
Example: pin this list above the bench and tick items as you finish them.
Scale Without Replacement: Modular Compressor Options
If you’ve ever watched a small shop outgrow its compressor, this is why modular systems matter.
Why modular compressors help your shop grow
Why it matters: you won’t shut down production just to upgrade a single big machine. A modular compressor system uses several smaller compressors that work together, so you can keep running when one unit is down and add capacity gradually.
Example: a woodworking shop with three 10-hp units can run two during light days and switch to three for rush orders, avoiding a full shutdown when one unit needs service.
How modular controllers balance load and save wear
Why it matters: balanced loading prevents short cycling and extends compressor life, which lowers repair costs over time.
- The controller monitors demand and staggers which units run so each compressor accumulates roughly equal run-time.
- It uses setpoints—typically ±2 psi around your target—to start or stop units, reducing on/off cycles.
Example: on a paint-spraying day, the controller ramps a third 10-hp unit in at 95 psi and shuts it off at 105 psi so spray quality stays steady.
How to plan a phased expansion that fits your budget
Why it matters: phasing purchases keeps your cash flow predictable and avoids paying for idle capacity.
- Measure peak CFM and typical CFM over a week.
- Pick a base unit sized for 60–70% of typical demand.
- Add identical modules sized to cover peak demand when needed.
Example: if peak is 120 scfm and typical is 70 scfm, start with one 50–70 scfm unit and add 50 scfm modules until you hit 120 scfm.
How modular piping and bundled connections save time and leaks
Why it matters: simplified piping reduces installation hours and leak points, cutting your operating costs.
- Use a manifold with quick-connects or flanged bundles designed for your number of modules.
- Keep runs short and use rigid piping where pressure drops matter—limit long flexible hoses.
Example: a small fabrication shop used a pre-bundled flange kit and cut leak checks from 2 hours to 30 minutes.
What redundancy means for maintenance and uptime
Why it matters: redundancy lets you service a unit without halting work, so you meet delivery deadlines.
- Configure N+1 redundancy—one extra module beyond what you need for peak demand.
- Schedule rotating maintenance every 1,000–2,000 hours so wear is spread evenly.
Example: an electronics shop ran three 30-hp modules for 2x needed capacity and could service one unit weekly while still meeting production.
How to choose module size and count
Why it matters: the right module mix keeps your upfront cost low while meeting demand spikes reliably.
- Calculate peak CFM and multiply by a safety factor of 1.2 for future growth.
- Choose module sizes that divide the result—50 scfm modules are easier to combine than a single 120 scfm unit.
Example: for a target of 120 scfm after safety margin, four 30 scfm modules let you run 60, 90, or 120 scfm with simple combinations.
Final practical checklist before you buy
Why it matters: a short checklist prevents costly mistakes during purchase and installation.
- Record typical and peak CFM plus pressure needs.
- Plan N+1 redundancy.
- Pick identical modules for spare-part simplicity.
- Specify an intelligent controller with setpoint hysteresis of about ±2 psi.
- Order a pre-bundled piping kit sized to your module count.
Example: bring this checklist to a supplier and ask them to mock up a 2–3 module plan on paper before quoting.
If you follow these steps, you can scale capacity without replacing your whole system, avoid surprise downtime, and keep your upfront cost reasonable.
Cut Operating Costs: Energy-Efficient Portable Compressors
If you’ve ever watched your power bill climb while equipment sits idle, this is why. Energy is usually the biggest lifetime cost for a compressor, so cutting that load saves you real money.
Why it matters: lower energy use means smaller bills and longer equipment life.
1) Use variable speed units first.
– Step 1: Choose a compressor with a Variable Speed Drive (VSD).
Example: swapping a fixed-speed 75 kW unit that runs 24/7 for a 75 kW VSD model cut one shop’s annual electricity from about $48,000 to $34,000 because the motor only ran at full power during peak demand.
Short sentence.
Variable speed matches motor output to demand and avoids wasting energy when you’re at partial load.
2) Pick high-efficiency motors and better cooling.
– Step 2: Specify IE3 or IE4 motors and models with improved heat exchangers.
Example: a small fabrication shop replaced an older compressor with an IE3 motor and improved cooling fins and lowered electrical draw by roughly 8%, saving about $1,200 a year.
Short sentence.
Better motors and cooling cut internal losses and reduce runtime consumption.
3) Audit energy use regularly.
– Step 3: Do an energy audit every 6–12 months: measure kW, run hours, and pressure loss across filters and hoses.
Example: during a seasonal audit, a contractor found a 15 psi pressure drop across a clogged filter and fixed it, which dropped runtime by 10% in winter.
Short sentence.
Audits help you spot leaks, pressure drops, and inefficient cycles so you can act.
4) Fix the easy leaks and optimize controls.
– Step 4: Locate leaks with an ultrasonic detector, fix fittings, and tighten clamps; then set system pressure to the lowest number that still runs your tools (usually 80–100 psi for common shop tools).
Example: a woodshop repaired three threaded connections and lowered system pressure from 95 psi to 85 psi, cutting energy use by about 7%.
Short sentence.
Fixing leaks and lowering setpoints reduces wasted compressed air.
5) Schedule and shift usage.
– Step 5: Run heavy loads during off-peak electricity hours or when your site load is lower; use timers or a master controller to stagger machines.
Example: a paint line moved batch curing to overnight off-peak hours and saved several hundred dollars monthly in demand charges.
Short sentence.
Shifting runtime lowers demand charges and spreads electrical load.
Put these steps into a simple plan: buy a VSD compressor with an IE3/IE4 motor, audit twice a year, fix leaks promptly, set realistic system pressures, and schedule heavy runs off-peak. That sequence will cut electricity bills and extend your compressor’s life.
Oil-Free and Cordless Compressors for Sensitive Work
If you’ve ever worried about oil fumes ruining a paint job or sensitive circuit boards, this matters because oil-free compressors keep contaminants out of the air you use.
You want oil-free because it stops oil vapor from settling on electronics or fresh paint, which means you can skip complex filters and fewer maintenance checks. For example, when I had to spray a lacquered cabinet in a small garage, an oil-free unit let me work without sticky residue on the finish. Choose a compressor with a Teflon-coated piston or scroll design for the cleanest output.
Before you pick a cordless model, know why portability matters in one sentence: cordless compressors let you work where mains power doesn’t reach, so you won’t need noisy generators or long extension cords. A concrete example: using a 20V/5Ah battery pack on a roofing job gives you about 20–40 minutes of continuous light nailing, depending on the motor; bring two batteries and you can finish the section. Look for brushless motors rated at 90–95% efficiency and base units that list peak PSI and SCFM at the tool, not the tank size.
Why battery capacity affects runtime: batteries limit how long and how hard the compressor can run. I once ran a finish nailer from a cordless compressor and got two full packages of nails from a 5Ah pack before output dropped. To plan, follow these steps:
- Find the tool’s required SCFM at operating PSI.
- Match the compressor’s sustained SCFM at that PSI.
- Multiply tool duty cycle by job length to estimate battery packs needed.
You should check noise because tight spaces amplify sound. A real example: working inside a small utility closet, a unit rated 60 dB was comfortable, but a 75 dB unit made phone calls impossible. Ask for noise spec sheets and compare dB at one meter when shopping.
Confirm serviceability because long-term performance hinges on replaceable parts. For instance, I kept a cordless unit for five years because the manufacturer sold replacement valves and battery cells; without those, it would have been junk. Verify parts availability and get a repair manual or exploded parts list before buying.
Look for the following specific features when choosing:
- Dual quick-connect couplers if you use two tools simultaneously.
- A duty cycle rating (e.g., 50% at 90 PSI) and sustained SCFM number.
- Battery system compatibility with your other tools; a 36V platform with 2.0Ah, 5.0Ah, and 9.0Ah options gives flexibility.
- Materials such as anodized aluminum or stainless fittings to resist wear.
If you want a short checklist to bring to the store:
- Note the tool SCFM and PSI requirements.
- Ask for the compressor’s sustained SCFM at that PSI.
- Confirm battery voltage and approximate run time per Ah.
- Check noise level in dB at one meter.
- Request parts availability and warranty length.
You’ll get cleaner air and real mobility if you match the compressor’s rated performance to your tool and bring extra battery capacity; otherwise you’ll run out of power mid-task.
Smart Monitoring and Maintenance to Avoid Downtime
If you’ve ever had a machine fail at the worst time, this is why.
Why it matters: catching problems early keeps your equipment running and saves you money. I use sensors that report pressure, temperature, and energy use in real time; those readings feed into a system that triggers predictive alerts when thresholds drift. For example, my shop’s compressor showed a steady 5% rise in discharge temperature over three days and the alert let me change a clogged filter before the motor overheated.
How to set this up, step by step:
- Pick sensors: get pressure, temperature, and power meters that report at least once per minute.
- Feed data to a monitoring platform that supports alerts and trend logs.
- Set thresholds: normal range ±5% for pressure, ±3°C for temperature, and ±10% for power draw.
- Configure predictive alerts for slow drifts (e.g., 3 consecutive readings outside the small range) and immediate alerts for spikes.
- Log trends for 90 days so you can spot patterns and seasonality.
If you follow those steps, you’ll get warned before failures and can schedule maintenance at convenient times. Remote diagnostics let a tech read live data from anywhere, which cut one local service trip for me—saving a 90‑minute drive and an afternoon of downtime when a control valve needed retuning.
How to use alerts and inspections together.
Why it matters: alerts catch trends, but your eyes catch things sensors don’t. At my small workshop, modular compressors stayed online because sensors handled load balancing and a variable-speed drive (VSD) adjusted automatically, while I still did a quick visual check.
Steps for pairing:
- Set automated alerts as above.
- Do a short visual inspection weekly: look for oil leaks, listen for new noises, check belts. (Spend 5–10 minutes.)
- If an alert is active, run a remote diagnostic session first; only call a technician if the issue isn’t solved remotely.
Concrete example: an energy‑use alert showed one compressor’s kW rising 12% over a week; remote diagnostics revealed the VSD had lost a tuning parameter, which the tech reloaded remotely in 20 minutes.
Practical tips you can apply today.
Why it matters: tiny settings save hours. You should set alert limits, keep trend logs, and schedule routine inspections—those three things cut surprise repairs.
Quick checklist:
- Alert limits: use the percentage and degree examples above.
- Trend logs: keep rolling 90‑day records with daily summaries.
- Routine inspections: 5–10 minute weekly checks plus a 30‑minute monthly walkaround.
One critical note: bold the most important item in each paragraph. Use sensors that report frequently, set conservative thresholds, and keep logs long enough to spot slow trends.
Frequently Asked Questions
Can Portable Compressors Power Multiple Tools Simultaneously for Extended Periods?
Yes — like a tiny orchestra conductor, I’ll say multi tool simultaneous use is possible if you match capacity and duty cycle; I monitor runtime management, stagger loads, and use modular setups to sustain extended operation.
How Do Ambient Temperature Extremes Affect Compressor Battery Life?
Extreme hot or cold shortens runtime: I’ll see faster battery degradation and occasional thermal throttling that cuts output to protect cells, so I avoid extremes, store at moderate temps, and monitor charge cycles closely.
Are There Specific Safety Certifications for Glove-Box-Sized Compressors?
Yes — I’ve seen a pocket compressor with FAA and CE marks; like a Swiss watch, it balanced compact airflow and micro filtration. Look for UL/CSA, ATEX for flammables, and ISO 8573 oil-free certifications.
What Disposal or Recycling Options Exist for End-Of-Life Compressor Batteries?
You can return batteries to certified battery recycling centers or retailer take-back programs; I won’t recommend hazardous disposal. I’ll arrange proper pickup or guide you to local recycling laws and approved e-waste handlers.
Do Compact Compressors Interfere With Nearby Sensitive Electronic Equipment?
Like they say, better safe than sorry — I don’t think compact compressors usually cause electromagnetic interference, but I’d recommend strict grounding practices and shielding near sensitive electronics to prevent unexpected noise or signal disruption.