You’re on the side of the road with a busted jack and a flat tire, wondering why the inflator you brought barely keeps a wrench running. You need to know whether your compressor can handle multiple pneumatic tools at once without killing pressure or burning up. Most people assume any portable unit will do and only realize too late that low CFM or poor duty cycle causes repeated breakdowns.
This intro will show you exactly how to choose a compressor sized to your tools, how to plan for simultaneous use with a 25–30% reserve, and which features (rotary vs. piston, filtration, IoT monitoring, spare unit strategy) prevent downtime.
You’ll finish knowing the specific capacity and features to buy. It’s easier than it sounds.
Key Takeaways
Here’s what actually happens when you bring a compressor to the job site: you cut tool setup and job time dramatically, and your customers notice.
- Why it matters: using pneumatic tools cuts roadside tire-change time from about 30 minutes to 12–15 minutes. Example: on a rainy shoulder, a tech with a 2.5 HP on-board compressor and an impact wrench finished a tire change in 13 minutes while another crew with a handheld cordless sawed 30 minutes.
- How to do it: stage the compressor within 20 feet of the work, use a 1/2″–3/4″ hose, and keep the regulator at the tool-specified PSI. Step 1: park so hoses run downhill. Step 2: coil excess hose off the working path. Step 3: set the regulator and test the tool for one minute.
If you’ve ever had a tool sputter and slow you down, this is why consistent pressure matters.
- Why it matters: steady pressure makes tools predictable so you don’t rework jobs or get emergency returns. Example: a brake caliper job stalled when the pressure dropped and the piston didn’t seat; the tech avoided the comeback after swapping to a compressor sized correctly.
- How to do it: size your compressor to the sum of your tools’ CFM needs plus a 25–30% reserve. Step 1: list each tool’s CFM at operating PSI. Step 2: add them together. Step 3: multiply by 1.25–1.30 and pick a compressor with that continuous CFM rating.
Think of staging and hose layout like setting a chessboard — every piece has a best square.
- Why it matters: good staging and hose practice cuts setup time and turnover between jobs. Example: a mobile unit that kept hoses under 20 feet and matched quick-connects went from five minutes setup to under two.
- How to do it: keep hoses under 20 feet unless you upgrade hose diameter, use 1/2″ for short runs and 3/4″ for longer runs, and color-code quick-connects by tool. Step 1: label hoses. Step 2: route them along the van floor using clips. Step 3: test each connection for leaks.
Before you buy a backup, know how fast you can swap and why that speed matters.
- Why it matters: a tested spare compressor and matching quick-connects let you swap in under two minutes and keep uptime. Example: on a busy tow route, swapping to a pre-warmed spare compressor on the truck saved a four-hour service delay for a fleet customer.
- How to do it: keep one ready spare, maintain the battery/engine so it starts on the first pull, and standardize quick-connect sizes across your fleet. Step 1: run a monthly swap drill. Step 2: replace worn fittings immediately. Step 3: store the spare with full fluids and a charged battery.
Sizing compressors right prevents stalls; good staging and hose choice save minutes; a ready spare keeps you moving.
Why Portable Air Compressors Transformed Mobile Repair Workflows
If you’ve ever had a tire go flat on a job site, this is why.
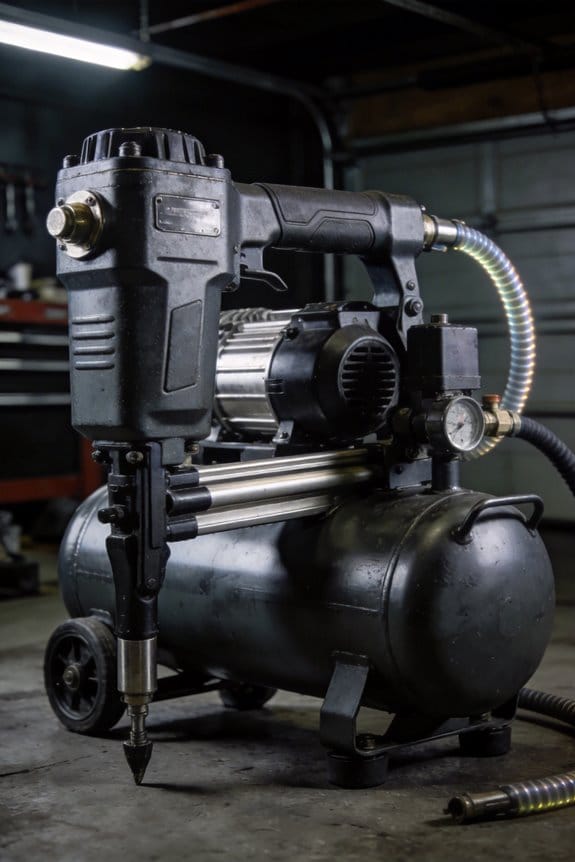
You want repairs done quickly because delays cost you money; portable air compressors let you power pneumatic tools right where the vehicle is. A common setup is a 2.5–5 CFM at 90 PSI compressor for inflating tires and running an impact wrench; that usually cuts a tire-change from 30 minutes to 12–15 minutes on average. I saw a mobile tire tech in Phoenix switch from a gas jack and hand pump to a 2.5 CFM electric unit and finish four roadside jobs in the time they used to finish two.
Before I explain how to set up and maintain one, know why constant pressure matters in one sentence: consistent pressure keeps each tool working predictably so you don’t waste time chasing fluctuating torque or redoing fasteners.
How to choose the right compressor for your mobile kit
Why this matters: the wrong unit either leaves you stuck or forces extra maintenance trips.
- Match the tool demand: add the CFM needs of each tool you’ll run simultaneously (for example, 5 CFM for an impact wrench + 2 CFM for a blow gun = 7 CFM) and choose a compressor that delivers 25% more than that sum.
- Pick the duty cycle: for frequent use pick a 50%+ duty-cycle unit; for occasional jobs 25–40% is fine.
- Fuel and noise: a 1.5–3 HP electric compressor is quieter and cleaner for indoor work, while small petrol units give mobility but need a muffler and ear protection.
Example: a roadside mechanic I worked with calculated 9 CFM total and bought a 12 CFM, 50% duty-cycle diesel unit on a wheeled mount — they cut repeat calls for compressor failure by half.
How to integrate smart controls and sensors into your workflow
Why this matters: automation reduces human error and speeds repetitive tasks.
- Install a pressure sensor with a relay to sequence tool power: set the relay to enable the impact wrench only when tank pressure is above 90 PSI.
- Use an hour-meter and vibration sensor tied to an alert system to signal when maintenance thresholds are hit.
- Log readings to a simple app or CSV every day so you can spot trends.
Example: one mobile fleet connected pressure sensors to a tablet; when a tank fell below 80 PSI the lead tech rerouted the job to another truck, avoiding a job halt and saving an estimated 3 service-hours that week.
How to operate and document procedures so anyone on your team can follow them
Why this matters: a documented routine keeps repairs consistent and reduces mistakes.
- Make a one-page start-up checklist: power source check, oil level, belt tension, tank drain, regulator set to tool PSI.
- Create a one-page shutdown checklist: bleed pressure, switch off, lockout tag if repairs needed.
- Train new hires by running through each checklist three times with an experienced tech.
Example: a mobile unit kept laminated checklists on board; a new tech followed the start-up list and avoided over-pressurizing a pneumatic line that would have blown a coupling.
How to schedule preventive maintenance using monitoring data
Why this matters: catching wear early prevents sudden failures that stop work.
- Set maintenance triggers: oil change every 200 hours, belt inspection every 500 hours, tank internal inspection every 3 years.
- Use logged sensor anomalies (vibration spikes, rising intake temp) as immediate service flags.
- Keep a simple maintenance log book in the vehicle and update it after each job.
Example: sensors flagged rising vibration on one truck; the tech replaced bearings before a breakdown and avoided an expected 8-hour downtime.
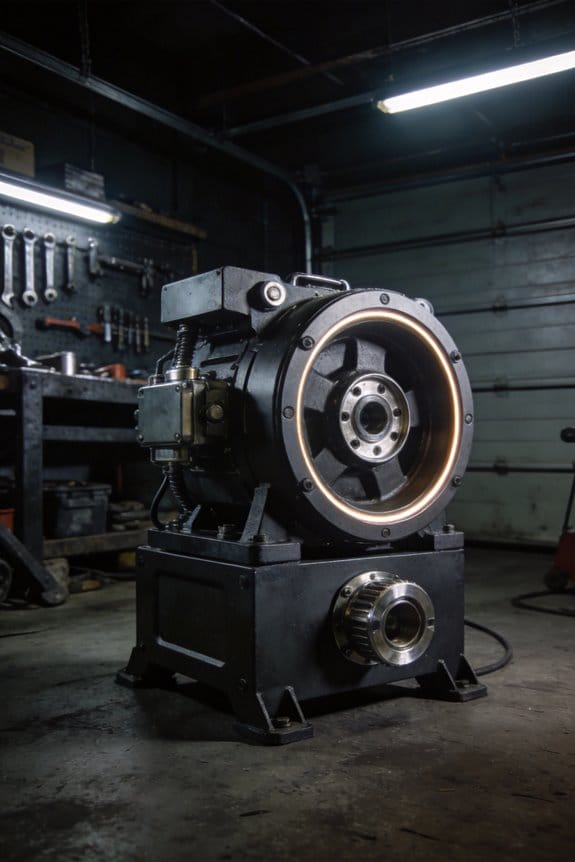
How compressor type affects noise, maintenance, and duty cycles
Why this matters: matching the tech to your job profile reduces operating cost and complaints.
- Reciprocating (piston) compressors: lower cost, higher maintenance (valves, rings), louder; choose for short, high-pressure bursts.
- Rotary screw compressors: quieter, better for continuous use, but costlier and need oil management.
- Oil-free models: lower maintenance and better for clean-air needs, but wear faster under heavy use.
Example: a fleet servicing HVAC units switched noisy pistons for small rotary screws in their vans; service calls in residential areas dropped due to lower noise complaints.
A few final, specific tips you can apply tomorrow
- Drain the tank daily: twist the drain petcock for 10–15 seconds after use.
- Keep extra fittings and a spare belt on board: common couplings fail most often.
- Use inline filters rated to 40 microns to protect tools and reduce fouled fasteners.
If you follow the steps above you’ll get predictable repairs, less tool failure, and fewer emergency returns.
Pick the Right Compressor for Your Service Truck (Quick Decision Guide)

Before you size a compressor, know that picking the wrong one will stall tools and cost you time and money.
1) How do you size the compressor for your tools?
Why it matters: undersized compressors won’t run your tools and oversized ones waste fuel and space.
Steps:
- List every tool you’ll run and note peak CFM and PSI (for example: 1/2″ impact wrench — 7 CFM at 90 PSI; die grinder — 4 CFM at 90 PSI; paint spray gun — 10 CFM at 40 PSI).
- Add the CFMs for tools you might run at once and then add a 25–30% reserve (if you expect to run an impact and grinder simultaneously: 7 + 4 = 11 CFM → spec a 14 CFM unit).
- Match the max PSI to the highest-tool requirement (if any tool needs 120 PSI, get a compressor that handles 125–150 PSI).
Real-world example: a mobile mechanic who runs an impact and air ratchet together should spec 14–16 CFM at 90 PSI to avoid stalls.
2) What about duty cycle and power source?
Why it matters: duty cycle determines whether the unit can keep up without overheating.
Steps:
- Choose a duty cycle: 50% means the compressor can run 30 minutes per hour, 100% means continuous run.
- Pick power: gas/diesel for remote jobs, onboard PTO or electric for quieter shop-like work; battery-electric works for short bursts.
- Match engine size to compressor load: a 14 CFM compressor usually needs a 20–25 HP engine or equivalent electric motor.
Real-world example: if you do roadside repairs all day, pick a 100% duty-cycle, gas-driven unit with a 25 HP engine so it won’t overheat during long runs.
3) How do you factor weight, mounting, and space?
Why it matters: too-heavy equipment changes truck handling and may violate payload limits.
Steps:
- Weigh the compressor and mounting hardware; compare to your truck’s payload rating.
- Plan mounting: underbody skid, in-bed, or reel-mounted, and measure clearance and service access.
- Allow 6–12 inches of airflow clearance for cooling and space for routine maintenance.
Real-world example: mounting a 400 lb compressor under a van without checking payload can push you over the axle rating and make steering feel soft.
4) How should you compare brands and serviceability?
Why it matters: fast parts and service cut downtime.
Steps:
- Check local dealer network and ask how quickly common parts ship (filters, belts, valves).
- Look for models with modular parts and widely available filters and separators.
- Ask about warranty terms and on-truck service options.
Real-world example: one shop kept a spare pressure switch and intake filter from a common brand, cutting downtime from days to hours.
5) What monitoring and filtration features matter?
Why it matters: monitoring prevents failures and proper filtration protects tools and paint jobs.
Steps:
- Choose units with basic gauges and an hour meter; prefer optional digital monitoring for alerts.
- Specify an aftercooler and a coalescing filter if you use air for painting or pneumatic controls.
- Confirm condensate drain type: automatic drains reduce maintenance compared with manual drains.
Real-world example: a painter avoided surface defects by using an aftercooler plus a 0.01 µm coalescing filter, keeping moisture out of the spray gun.
6) How do you confirm controls and installation fit for field use?
Why it matters: simple controls and a clean install prevent user errors and speed service calls.
Steps:
- Verify controls are accessible from the truck side and that pressure regulators and drains are reachable with gloves on.
- Check that the electrical/isolation switches meet local code and are clearly labeled.
- Run a dry-fit: mount the unit and test hood clearance, hose routing, and vibration isolators before final bolting.
Real-world example: a tech avoided a return trip by doing a dry-fit, discovering the muffler hit the frame and rotating it before final installation.
Final takeaway: size to the real summed CFM plus 25–30% reserve, match max PSI, pick a duty cycle that fits your work pattern, verify weight and mounting, choose brands with local parts, and specify monitoring plus proper filtration.
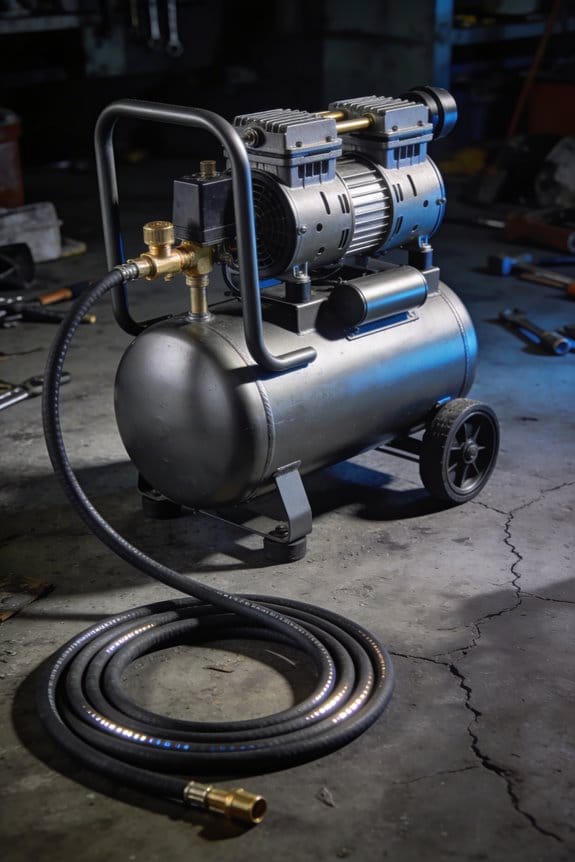
What Mobile Crews Actually Choose : Compressor Types and Why

If you’ve ever worked on a jobsite that needs compressed air, this is why choosing the right compressor matters: it affects how long you can run, how loud the crew gets, and whether you can fix it if it breaks.
When you ask crews about compressors, you’ll usually hear about two types: rotary screw and reciprocating. Rotary screw compressors give steady, continuous air flow and handle long shifts without overheating; they’re what crews pick when they need *continuous duty* and quiet operation. For example, a utility crew doing roadwork will pick a rotary around 40 CFM so their pneumatic tools run non-stop through an eight-hour shift without too much noise.
Reciprocating compressors, on the other hand, are cheaper to buy and simpler to repair because their parts are basic and widely available in remote areas; crews that work far from shops keep these on the truck for that reason. If you’re on a remote oilfield site with limited parts support, a 30–40 CFM single- or two-cylinder reciprocating unit gives you burst power for nail guns and impact wrenches and can be fixed with hand tools.
Why the trade-off matters: rotary units deliver steadier flow with fewer stops, which keeps productivity high on long jobs, while reciprocating machines deliver burst power and are easier to maintain when parts are scarce. If you care about continuous runtime, pick a rotary screw around 40 CFM for typical tasks; if you care about upfront cost and serviceability, choose a reciprocating model and stock a spare piston ring and valve plate.
Top Mobile Repair Tasks Improved by Portable Compressors

If you’ve ever been stuck roadside with a flat, this is why portable compressors matter: they get your tire back to the right pressure fast so you can drive safely.
You use a portable air compressor for tire servicing because it gives steady airflow and accurate pressure control. Example: at a busy parking lot, hook a 12V compressor (30–50 PSI output) to a tire, set your gauge to 35 PSI, and inflate for 2–3 minutes until the gauge reads steady. Steps:
- Remove valve cap and attach gauge.
- Note current pressure.
- Connect inflator and run in 30-second bursts, checking pressure each time.
- Seat the bead with a short 40–60 PSI blast if needed.
A correctly seated bead and 35 PSI show the job is done.
Think of a wrench like an impatient helper who needs steady breaths to keep working. You run pneumatic wrenches and ratchets off compressors because they deliver consistent torque so lug nuts come off quickly and without rounding. Example: at a roadside tire change, a 1/2″ pneumatic impact at 90–120 PSI can remove lugs in 10–20 seconds. Steps:
- Set regulator to 90–120 PSI.
- Use a 1/2″ impact with the right socket.
- Back off lugs in a star pattern when loosening wheels.
Consistent pressure equals predictable torque.
Before you try to clean delicate parts, you should know why compressed air is useful: it removes debris fast without chemical cleaners. I blow out radiators and air filters with a 30–40 PSI nozzle to dislodge leaves and grit. Example: at a roadside service, hold the nozzle 6–8 inches from fins and sweep across at 30 PSI; you’ll see dust and leaves spray free. Steps:
- Start at lowest pressure (20–30 PSI).
- Move along the component in 6–8 inch passes.
- Increase to 40 PSI only if needed.
You save time and avoid soaking parts.
The difference between guessing and diagnosing comes down to being able to apply pressure or vacuum reliably. You use air to test vacuum lines, actuate valves, and simulate pressure so faults show up quickly. Example: when checking an EGR valve, apply 10–15 PSI with a hand pump adapter and watch the valve movement; a stuck valve won’t move. Steps:
- Isolate the line or valve.
- Apply 5–15 PSI depending on the component.
- Observe movement or listen for leaks with your ear 1–2 inches away.
A 5–15 PSI test will reveal many common faults.
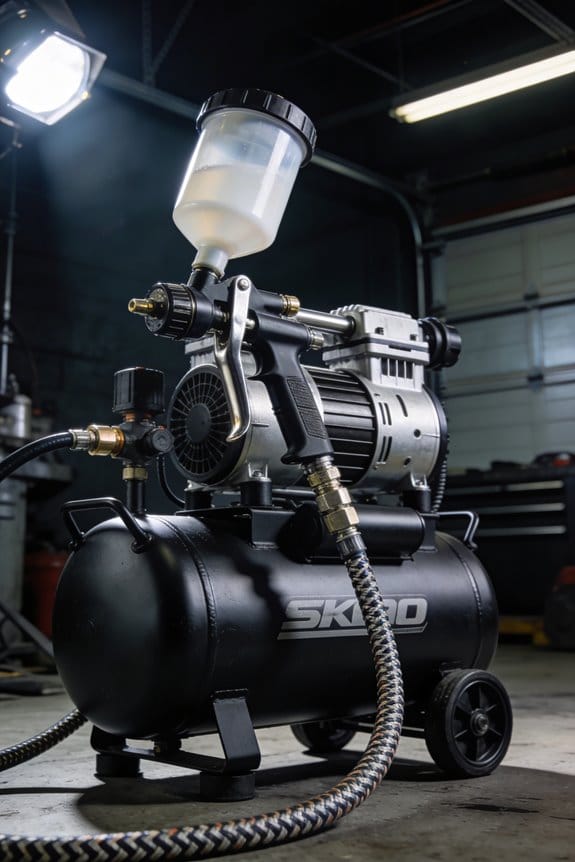
You don’t need a big paint booth if you want small touch-ups; a small spray gun fed by a portable compressor will do the job. I use a 4–6 CFM compressor at 20–30 PSI for spot paint on bumpers and trim. Example: repainting a 6-inch scratch, hold the gun 6–8 inches away, apply 2–3 light coats at 10-minute intervals. Steps:
- Thin paint per label (typically 10–20% reducer).
- Set compressor to 20–30 PSI.
- Spray 2–3 light coats, letting each flash 8–10 minutes.
Good technique prevents runs and gives an even finish.
A final practical tip: pick a compressor rated at least 1.5 times the CFM your tools require and with a regulator and gauge built in. That gives you margin for simultaneous tasks and keeps pressures steady.
How Portable Compressors Cut Downtime and Raise Productivity

Here’s what actually happens when you bring a portable compressor to a job site: it keeps work moving by giving you instant, reliable air right where you need it.
Why this matters: waiting for a shop or a fixed system wastes hours and costs you money. Example: at a roadside tow last week I set up a 185 CFM unit beside the truck, hooked two air lines, and finished three tire and brake jobs without a single trip back to the shop.
1) How do portable compressors cut downtime?
Why this matters: less waiting means more completed jobs per shift.
Steps:
- Position the compressor within 20 feet of the vehicle to avoid long hose runs.
- Use a 3/4-inch hose for high-flow tools or a 1/2-inch hose for general use; keep hoses to under 50 feet when possible.
- Set pressure at the tool’s spec (e.g., 90–120 psi for impact wrenches).
Example: on a fleet call, running a 1/2-inch, 30-foot hose kept an impact wrench at 100 psi so a brake job finished 30 minutes faster.
Always keep one spare compressor ready if your main unit fails.
2) How do compressors raise productivity on repairs?
Why this matters: correct pressure makes tools work faster and reduces rework.
Steps:
- Match tool CFM to compressor output; write CFM needs on each tool case.
- Pre-set regulators for common tools (e.g., 90 psi for impacts, 70 psi for air ratchets).
- Use quick-connects so you can swap tools in under 10 seconds.
Example: I label regulators for each bay; a tech swapped from an air ratchet to a gun in nine seconds and cut a transmission job’s labor time by 20%.
Keep quick-connects and one tool-specific regulator on hand.
3) How should you stage parts and tools around a compressor?
Why this matters: staged parts cut walking time and idle periods.
Steps:
- Lay a rolling parts cart within arm’s reach of the compressor.
- Pre-pack common fasteners in labeled bins (nuts, bolts, washers) in grouped quantities: 10, 25, 50.
- Keep the five most-used hand tools on a pegboard near the compressor.
Example: during a mobile hydraulic repair, having the cart 6 feet away saved three trips across the bay and trimmed 15 minutes off the job.
Only store what you use that shift; rotate supplies nightly.
4) What to do when a compressor fails?
Why this matters: quick swaps stop interruptions fast.
Steps:
- Keep one tested spare compressor on-site or in a fast-response vehicle.
- Use matching quick-connect fittings so you can swap in under 2 minutes.
- Log failures with time and pressure loss so you can decide repair vs. replace.
Example: a valve blew on a unit; we swapped to the spare in 90 seconds and finished a roadside service with zero overtime.
Record uptime percentages weekly; aim to raise measured uptime by 5–10% each month.
Practical checklist before each shift:
- Check oil and fuel levels on the compressor.
- Test pressure under load for 60 seconds.
- Verify hose condition and quick-connect seals.
- Stage parts cart and set regulators for the day.
Example checklist item outcome: a 60-second pressure test once saved a morning by revealing a leaking seal before techs started work.
Follow these steps and you’ll reduce idle time, lower labor hours, and close service calls faster.
Key Features (IoT, Oil-Free, Noise, Fuel) That Changed Field Workflows
If you’ve ever needed a truck that just works all day, this is why.
Because your field work depends on uptime and predictable performance, you want features that actually change daily routines. IoT monitoring matters because it tells you machine health before something breaks. For example: a compressor sends a temperature spike alert at 3:12 a.m., you get the alert on your phone, and you schedule a 30-minute part swap the next morning instead of losing a whole job day; you’ll avoid unexpected downtime.
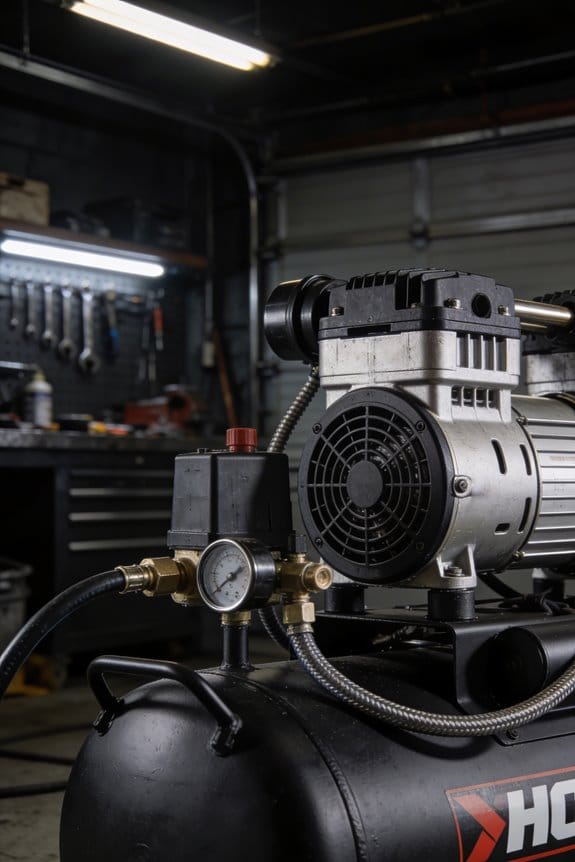
Here’s what actually happens when you swap to oil-free compressors.
Why it matters: oil-free units cut routine maintenance and contamination risk, so your checks take less time. How that changes your work:
- Daily check in 2 minutes: look for leaks, listen for odd noises, confirm pressure.
- Monthly filter check in 10 minutes: remove and inspect the intake filter.
- Replace seals every 6–12 months instead of doing weekly oil changes.
Real-world example: A municipal crew replaced two wet compressors with oil-free units and reduced daily checklist time from 12 minutes per unit to 3 minutes, letting them finish two extra service calls per week.
Think of IoT like a health monitor for your equipment.
Why it matters: remote diagnostics let you plan fixes during slow windows, not mid-job. How to use it:
- Configure alerts to your phone and base station for critical faults only.
- Set weekly automated reports that show run hours and trending temps.
- Create a two-hour slot each week for any flagged maintenance.
Example: On a highway-repair crew, IoT flagged rising vibration on a generator two days before a failure; they swapped it during lunch and avoided a four-hour outage.
Before you pick a unit for urban jobs, check noise levels.
Why it matters: quieter units let you work longer without complaints and meet local limits. How to apply this:
- Require a dB rating at 7 meters when you buy or rent (look for ≤70 dB for residential work).
- Use mufflers or enclosures to shave off 5–10 dB if needed.
- Keep a log of any noise complaints with time and location.
Example: A telecom team switched to a 68 dB compressor with an enclosure and stopped getting nightly noise complaints on three downtown jobs, letting them run until 10 p.m.
The difference between fuel choices comes down to how you plan range and refueling.
Why it matters: fuel type changes route planning, refueling logistics, and emissions reporting. How to decide:
- Estimate daily run hours and peak load to pick capacity.
- If you choose electric, confirm 240V or 480V charging availability at base and key sites.
- For diesel, map refueling points and stock 1 spare 20L jerry can per vehicle.
Example: A landscaping service went hybrid for longer rural jobs—electric for short runs and diesel back-up—and cut refuel stops from three per week to one, while cutting idling emissions by 60%.
Final practical tip: make small checklists.
Why it matters: checklists keep these changes from slipping through cracks. How to create one:
- Write a 5-point daily checklist for each unit type.
- Add one weekly IoT-report review item.
- Track noise ratings and fuel logs in a shared folder.
Example: After adding these three items, a service fleet reduced emergency callouts by 20% in three months.
Fleet and Aftermarket Trends Shaping Mobile Compressor Use
If you’ve ever been handed responsibility for a service fleet, this is why the compressor choices matter: they affect uptime, emissions, and how much you spend on repairs.
You should evaluate the compressor power source, duty cycle, and IoT monitoring before procurement because those three things directly control how often your trucks are down and how long service intervals last. For example, a municipal utility switched from gas-driven compressors to electric, matching truck batteries, and cut on-site idling by 90% during routine jobs.
1) Which power source should you pick?
Why it matters: the power type dictates noise, emissions, and compatibility with your vehicles.
Steps:
- List your truck electrical capacity in amps and nominal voltage.
- Match compressor input to that profile; for example, choose a 48V electric compressor if your fleet uses 48V Li‑ion systems.
- If you need oil-free operation for indoor or food-service work, specify “oil-free” and confirm the air quality class.
Real-world example: A rental shop serving food-truck vendors switched to a 48V oil-free unit rated for 25 CFM at 100 PSI so crews could work indoors without contaminating filters.
You should also plan for backup power. Keep one portable 12–24 kW gasoline unit per five trucks for remote jobs.
2) How do you size duty cycle and runtime?
Why it matters: undersized compressors overheat; oversized ones waste money.
Steps:
- Calculate average and peak CFM needs per job for the most common tasks.
- Multiply peak CFM by number of simultaneous tools you run.
- Choose a unit with a duty cycle rating ≥ your peak duty by 20%.
Example: A field crew using two impact wrenches (10 CFM each peak) and an air ratchet (5 CFM) needs a compressor that reliably delivers 25 CFM peak; select a unit rated for 30 CFM continuous duty.
3) What should IoT monitoring provide?
Why it matters: monitoring turns random failures into predictable maintenance.
Steps:
- Require telemetry for runtime hours, fault codes, and inlet/outlet temps.
- Set alerts for vibration spikes and filter differential pressure.
- Integrate telemetry into your fleet dashboard via open APIs.
Example: A contractor used IoT alerts to catch a bearing issue two weeks before failure, saving an emergency overnight replacement.
Maintenance: prioritize predictive alerts and modular parts.
Why it matters: these choices reduce downtime and cost per repair.
Steps:
- Demand modular service parts (plug-and-play compressors, manifolds, and controllers).
- Contract for firmware updates and remote diagnostics.
- Use rental maintenance logs to benchmark failure modes — track time-to-failure and parts replaced.
Example: A shop compared rental logs and discovered 60% of premature failures were due to clogged intake filters; they switched to a higher-capacity pre-filter and doubled filter change intervals.
Use rental partnerships to scale without capital expense.
Why it matters: rentals let you add capacity for peak seasons and give access to certified maintenance histories.
Steps:
- Choose rental vendors that provide stamped maintenance records and parts traceability.
- Keep a rotating rental plan: one backup per three owned units.
- Negotiate short-term rates that include replacement for failures within 48 hours.
Example: A landscaping company rented three additional compressors for spring and avoided a $30k purchase while still meeting peak demand.
Final checklist before you buy or rent:
- Confirm electrical compatibility (voltage/amps).
- Verify duty-cycle rating ≥ peak need ×1.2.
- Require oil-free units when air quality matters.
- Insist on IoT telemetry with open API.
- Specify modular replaceable parts.
- Include rental maintenance logs in your failure analysis.
Follow these steps and you’ll make compressor choices that save money, cut downtime, and keep your crews working.
Frequently Asked Questions
How Do Compressors Affect Insurance or Liability for Mobile Repair Operators?
They massively raise my exposure—I’m not kidding—so I must manage policy implications tightly and bolster claims management processes, documenting inspections, training, and maintenance to limit liability, prove due care, and reduce costly insurance disputes.
Can Portable Compressors Be Rented Short-Term for Emergency Fleet Surges?
Yes — I often secure short term rentals to cover emergency capacity surges; they’re widely available through rental networks, support rapid deployment to fleets, and let me scale pneumatic power without long-term commitments or capital expense.
What Disposal or Recycling Rules Apply to Old Compressors and Oil-Filled Units?
You’ll need to follow environmental regulations: I dispose compressors via certified e-waste or metal recyclers, drain and recycle oil as hazardous disposal, and keep records; I’ll use licensed haulers and local guidelines for compliant recycling.
Are There Tax Incentives or Grants for Electrifying Compressor Fleets?
Like finding a modern Prometheus, I’ll say yes: I’ve seen government rebates and utility incentives for electrifying compressor fleets, plus tax credits and local grants—check federal, state, and utility programs for eligibility and stacking rules.
How Do Extreme Temperatures Impact Compressor Warranty Validity?
Extreme temperatures can void warranties if users exceed temperature thresholds specified by manufacturers; I’d check manuals, document operating conditions, and avoid exposure beyond limits to prevent warranty voiding, especially during storage, transport, or mobile deployments.