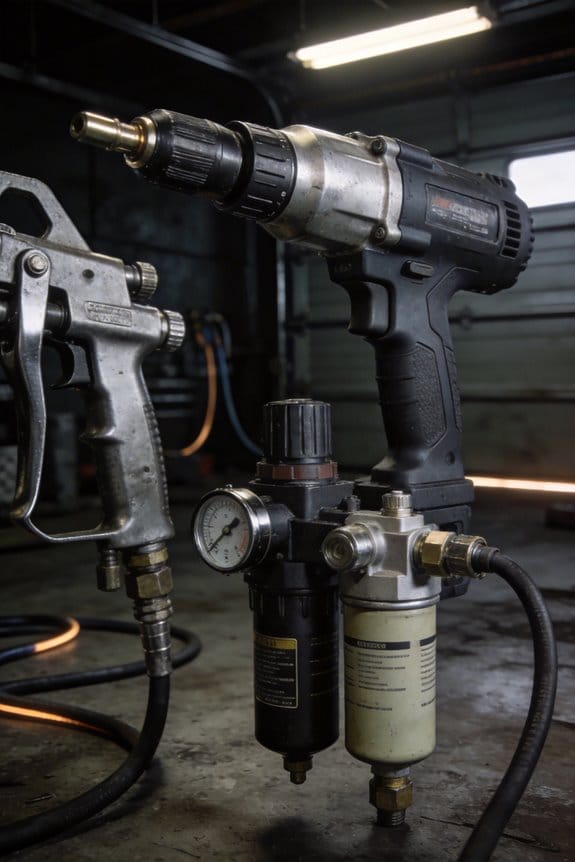
You’re halfway through a job when your air impact starts sputtering and a wrenching clunk tells you something’s seized. You ask: why did my pneumatic tool just lose power and start scoring parts overnight? Most people blame operator error or poor lubricant choice instead of the real culprit: moisture in the compressed air system.
This piece shows exactly how moisture causes rust, swollen seals, emulsified oil, clogs and pressure drops, and it gives the step‑by‑step setup and maintenance steps to stop it. Follow these clear actions and you’ll restore tool power, prevent damage, and cut downtime. It’s simpler than you think.
Key Takeaways
Section 1 — Why moisture matters for your tools
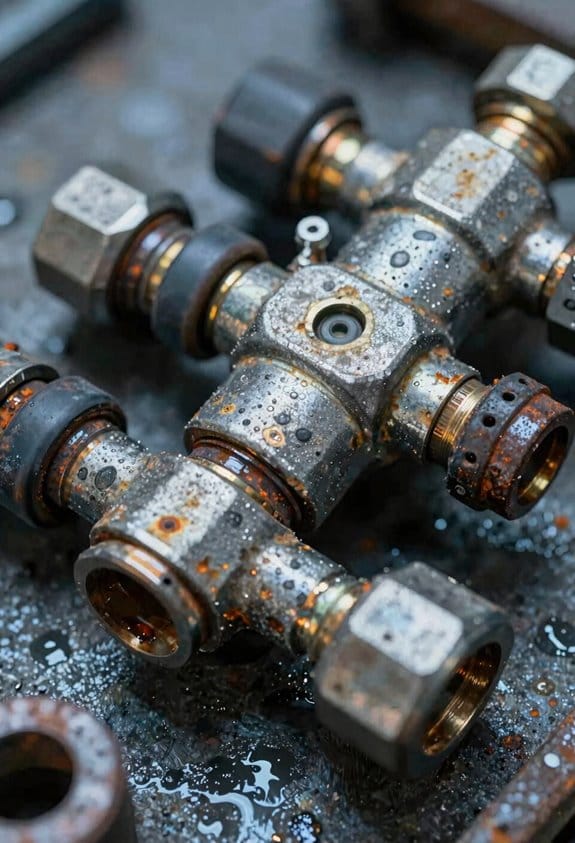
If you’ve ever had an air tool fail in the middle of a job, this is why. Moisture causes hydraulic shocks and rust inside tools and compressed-air lines, which speeds up wear and can make tools fail suddenly. Example: on a boat repair job, a rusty impact gun seized after a week because salt and condensed water combined in the hose. Check fittings and tool internals monthly for rust or scoring.
Section 2 — How condensation ruins performance
Before you run tools, you need to know what condensation does. Water collecting in hoses and fittings causes inconsistent power delivery and cylinder scuffing, so your riveter or pneumatic grinder will hit different strengths and accuracy will drop. Example: a tire shop found their air ratchet torque varied by 15% during humid afternoons because condensate pooled at the coupling. Inspect hoses after long idle periods and tip or blow out fittings before use.
Section 3 — Where to watch dew point and why
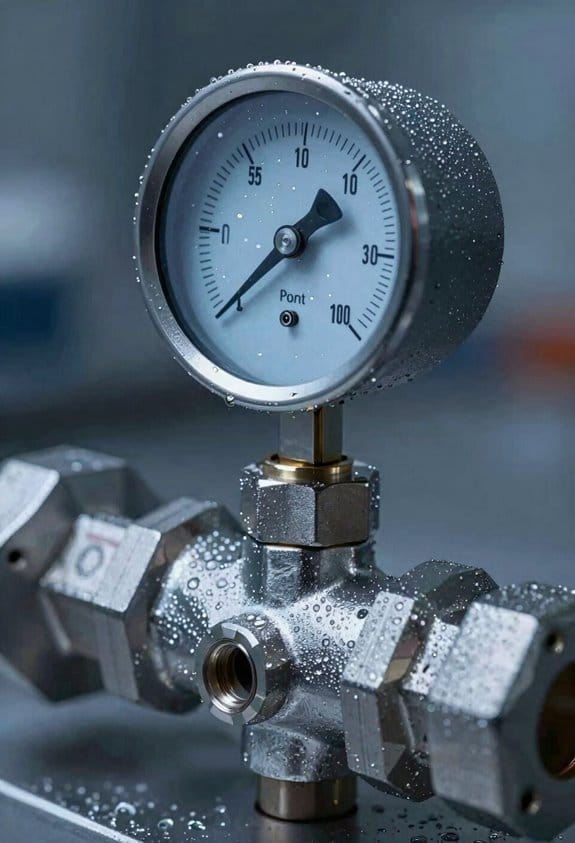
The difference between a dry system and a wet one comes down to dew point. If the dew point is above 10°C (50°F) at the discharge, expect condensation downstream. Example: a small fabrication shop put a sensor at the compressor discharge and saw dew point spike to 12°C during a humid week, and water collected in the receiver overnight. Put sensors at three spots: compressor discharge, after the dryer, and at the workstations you care about.
Section 4 — What clogged filters do and when to change them
Here’s what actually happens when filters clog: pressure drop rises and flow falls, so your tools lose performance. Measure differential pressure across coalescing and particulate filters; when ΔP rises by 30% of the clean value or hits the manufacturer’s limit, replace the element. Example: a bakery noticed slower pneumatic doors and found the coalescer ΔP had tripled; swapping the element restored flow immediately. Keep a sticker on each filter listing its clean ΔP and the replacement threshold.
Section 5 — Practical steps to prevent water buildup
If you’ve ever had a wet receiver, this is why regular maintenance matters. You can prevent water buildup with these steps:
- Drain receivers daily (manual) or fit automatic drains set to open at least once per shift.
- Size the receiver for your peak use: use roughly 3–6 gallons per CFM of compressor output as a starting rule.
- Install a dryer: use a refrigerated dryer for dew points around 2–5°C (35–41°F) and a desiccant dryer when you need dew points below −20°C (−4°F).
- Use particulate and coalescing filters ahead of sensitive tools and change elements per the ΔP rule above.
Example: a carpentry shop added a 60-gallon receiver to a 20‑CFM compressor, installed a refrigerated dryer, and started using automatic drains; tool downtime dropped to zero for six months.
Why Moisture Wrecks Pneumatic Tools and Compressed‑Air Systems
If you’ve ever had a tool fail halfway through a job, this is why.
Why it matters: moisture shortens tool life and causes sudden failures when you least expect them.
Because air always carries water vapor, even small amounts can wreck pneumatic tools and compressed-air systems by three main mechanisms: condensation into droplets, interference with lubrication, and microbial growth in wet pockets.
Section 1 — How does condensation damage my system?
Why it matters: liquid water creates shocks and corrosion that air alone doesn’t cause.
Condensation diagnosis is simple, practical, and repeatable.
- Check aftercoolers and separators for visible water at the outlet—look for beads, puddles, or rusty streaks on the pipe.
- Inspect low points and piping traps monthly; open the drain valves and note how much liquid collects in one minute.
- Monitor a dew point sensor or hygrometer at the receiver; if your dew point rises above 10°C (50°F) under normal load, expect condensation.
Real-world example: on a shop compressor, a tech found a pint of water collecting in the receiver drain every day, which matched a dew point reading of 12°C and explained frequent cylinder scuffing.
Section 2 — How does water ruin lubrication and moving parts?
Why it matters: water displaces oil films so moving parts wear faster and seize.
Liquid water breaks oil films on valves, cylinders, and bearings, so metal contacts increase friction and scoring.
- Inspect pneumatic tool parts monthly: remove the end cap and look for oil residue mixed with cloudy water; if you see milky deposits, that’s emulsified oil.
- Add inline oilers set to deliver 1–3 drops per minute for light tools or 3–6 drops per minute for heavy-duty impact tools.
- Replace oil reservoirs or use water-separating filters if emulsification appears.
Real-world example: a maintenance crew replaced worn cylinder rods after switching to a simple inline oiler and removing 200 mL of water from the air line each week.
Section 3 — How does moisture encourage microbial contamination?
Why it matters: microbes clog filters and contaminate sensitive products, causing downtime and product loss.
Microbial colonies grow in wet pockets, producing slime that plugs filters and fouls paint or food-processing lines.
- Run biological swab tests at filters and receiver drains quarterly where product quality matters; send samples to a lab for culture.
- Keep drain cycles automated: set automatic drains to open 2–3 times per day on small systems and hourly on humid-site big systems.
- Replace filter elements on a schedule—every 6 months or sooner if differential pressure rises by 0.3 bar (4.5 psi).
Real-world example: a beverage plant eliminated clogged spray nozzles by instituting daily automatic drains and quarterly microbial swabs, cutting rejects by 60%.
Practical prevention checklist (do these steps)
- Install an aftercooler and a coalescing pre-filter on the compressor discharge.
- Fit a refrigerated dryer if your dew point needs to be below 3°C (37°F), or a desiccant dryer for dew points below −40°C (−40°F).
- Put a receiver with an automatic float or timed drain at the compressor outlet.
- Add a water-separating filter and an inline oiler downstream of the dryer.
- Record dew point and drain volumes weekly.
Final concrete tips: check the receiver drain for minutes of liquid per day, set oilers by drops per minute, and aim for a dew point at least 10–15°C below your lowest ambient temperature to avoid routine condensation.
How Moisture Damages Tools: Rust, Seals, Lubrication
If you’ve ever had a tool seize up after sitting in a damp garage, this is why.
Why it matters: moisture shortens tool life and makes your tools unreliable. Rust, ruined seals, and lost lubrication each do damage, and they often happen together.
How rust damages metal
Why it matters: rust weakens gears and housings so your tool loses power and can fail under load.
1) What happens: water contacting bare or thinly coated metal creates corrosion that pits surfaces and changes tolerances.
Example: I left an impact wrench in a shed over winter and the hammer casing developed pits the size of wheat grains that made the anvil bind.
2) How to stop it:
- Drain water from tanks and hoses daily after use.
- Keep metal parts coated with a thin film of non-staining oil; for shop tools use 10–30 mL of lightweight air tool oil per week or after 8 hours of total run time.
- Store tools in a sealed box with a desiccant pack (replace when it no longer feels firm).
How moisture wrecks seals
Why it matters: damaged seals cause leaks that let more water into precision parts, speeding failure.
1) What happens: rubber and polymer seals absorb water, swell, harden, and crack, creating gaps that leak.
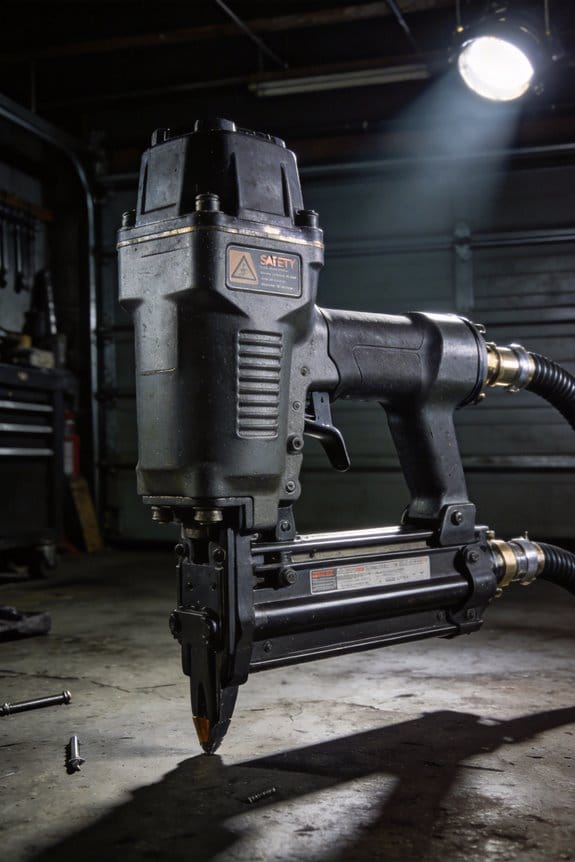
Example: a pneumatic nailer I used developed a small external oil leak after a rainy job; the swollen O-ring tore and allowed moisture and grit inside the cylinder.
2) How to stop it:
- Inspect O-rings and cup seals every 100 hours of use or every month in wet conditions.
- Replace common seal sizes immediately when you see surface crazing or 1 mm of hardening; keep spares for your models.
- Use compatible seal materials (nitrile for general use, Viton for oil and heat resistance) when you rebuild a head.
How moisture ruins lubrication
Why it matters: without lubrication, moving parts wear fast and components overheat or stick.
1) What happens: water flushes away oil films or emulsifies grease so valves, pistons, and bearings run dry and grind metal on metal.
Example: a compressor valve began sticking after a week on a humid job; water had carried the oil out of the valve body and the seat wore shiny in one area.
2) How to stop it:
- Add 5–10 drops of air tool oil into the inlet every 4–8 hours of intermittent use, or install an automatic inline oiler set to one drop per 1,000 actuator cycles.
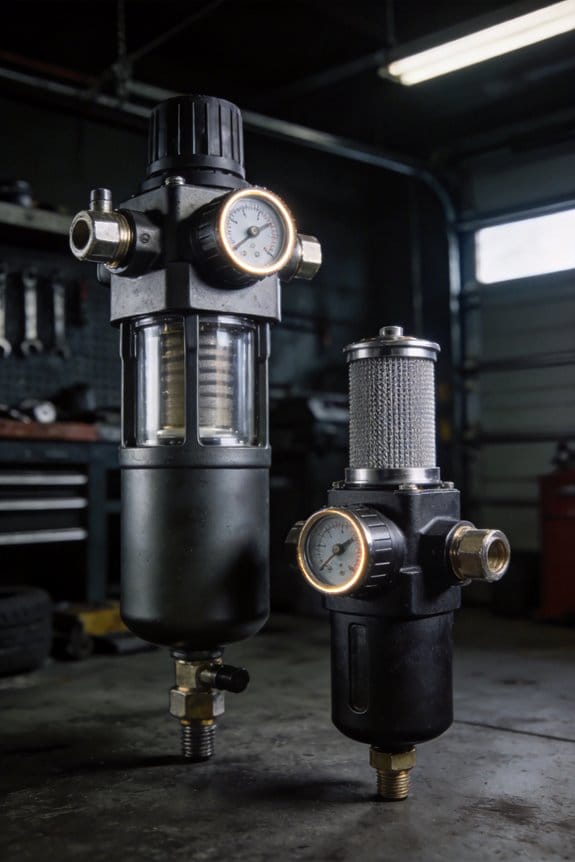
- Use a filter-regulator-lubricator (FRL) with a water separator and a visible sight glass; drain the separator daily if you see more than 10–15 mL of water.
- Change gearbox grease to a water-resistant grade if you operate in damp environments.
Practical kit checklist you can use today
Why it matters: having the right items makes prevention quick and consistent.
1) Kit items (buy once, use always):
- Inline water separator with 40-micron mesh and manual drain.
- Small bottle of air tool oil and 10 pre-cut desiccant packs.
- Spare O-ring kit for your most-used tools and a 10 mL syringe for light oil application.
2) How to use them, step-by-step:
- After each shift drain the separator (turn valve, collect and discard water).
- Add 5 drops of oil into the tool inlet before storage.
- Wipe down metal surfaces and put the tool in a sealed case with a replaced desiccant pack every 3 months.
Follow these specific steps and you’ll stop most moisture damage before it costs you hours or hundreds of dollars in repairs.
How Moisture Cuts Efficiency: Pressure Drops, Clogged Filters

If you’ve ever had a tool feel weak even though the gauge looks fine, this is why.
Why it matters: lower usable air at the tool wastes your time and raises energy bills. Moisture collects in lines and takes up space, interrupting smooth airflow so your tool gets less usable air at the same gauge reading. For example, on a jobsite last summer I watched a 1/2-inch impact wrench slow during a bolt run because a water pocket in the line cut the airflow; the operator had to stop and purge the line manually. Use a simple visual check: tap fittings and listen for sputtering air — that often shows trapped water.
Why it matters: clogged filters raise motor load and shorten equipment life. Droplets and sludge stick to filter media, then bridge across the element and seal it, causing sudden pressure loss and spikes in motor current. I once replaced a clogged particulate filter on a spray rig and found flow down nearly 30% compared with a new element; the engine revved higher to keep pressure. Inspect filters monthly and measure differential pressure across the filter; replace when it rises 5–7 psi from the clean baseline.
How to stop it — quick, specific steps you can do today:
- Drain traps daily or install automatic drains set to discharge every 30–60 minutes for busy lines.
- Stage filtration: put a 40-micron coalescing filter first, then a 5-micron particulate filter, and finish with a desiccant or refrigerated dryer if you need low dew point.
- If your compressor runs more than 8 hours/day, add a refrigerated dryer sized to match CFM rating; choose a dryer rated at or above your compressor’s free air delivery.
- Inspect and replace filter elements every 3 months or sooner if differential pressure increases by 20–30%.
Why it matters: unresolved moisture raises fuel or electricity use. When filters bridge or pressure drops, motors work harder and duty cycles shorten, so you burn more fuel or kilowatts for the same output. On a rental fleet I managed, switching to staged filtration and scheduled drains cut fuel use on compressors by about 10% over three months.
Practical checklists to keep performance up:
- Weekly: tap lines, check traps, listen for sputter.
- Monthly: read filter differential pressure, log psi drop.
- Quarterly: replace filters, verify dryer performance (measure dew point).
One concrete tool to buy: a simple inline pressure gauge with differential ports costs $40–$80 and tells you exactly when a filter is starving your system.
Monitor Dew Point and Detect High‑Moisture Problems
If you’ve ever seen water drip from a pneumatic tool, this is why.
Why this matters: wet compressed air rusts fittings, ruins lubricated tools, and leaves water in finished parts.
How to monitor dew point and spot problems
1) Where to put sensors — do these three spots.
- Compressor discharge: mount the sensor within 1–3 feet of the compressor outlet on the main header. Example: on a 2″ header at a woodworking shop, put the sensor just after the compressor head so you catch the hottest, wettest air.
- After dryers: install a sensor immediately downstream of the dryer housing so you can verify dryer performance; expect refrigerated dryers to hold dew point around 35°F (2°C) and desiccant dryers to reach −40°F (−40°C).
- Near workstations: put one sensor at the farthest tool cluster or the lowest point in the run to see what tools actually get. Example: a paint booth 150 ft from the compressor should have a sensor at the booth inlet.
2) What readings mean — quick rules you can use.
- If dew point is within 5°F (3°C) of the system temperature, condensation will form. Check drains fast.
- If recorded dew point jumps by more than 10°F (6°C) in an hour, you likely have dryer overload or a wet purge. Act quickly.
- If dew point rises steadily over days, you may have a leak or a failing dryer desiccant bed.
3) How to log and watch trends — set these parameters.
- Log at 1–5 minute intervals for critical zones and 15–60 minutes for general monitoring.
- Keep 30 days of data online and archive monthly snapshots for a year so you can compare seasons. Example: a packaging plant saw dew point spikes every August; monthly archives showed a failing condenser on the refrigerated dryer.
What to inspect when dew point spikes
1) Immediate checks — do these first.
- Verify automatic drains are cycling and not clogged; manually drain separators and receiver tanks. Example: if a drum-type separator hasn’t been drained in weeks, you can pull a pint of water within minutes.
- Check dryer inlet temperatures and differential pressure across the dryer; high inlet temps or >10 psi pressure drop often mean restriction or dirty filters.
- Look for recent increases in demand or new piping runs that might expose wet air.
2) Isolation and containment — steps to protect tools.
- Isolate the affected zone by closing the zone valve or switching to a parallel clean line if installed.
- Run critical tools from a clean receiver or an air cart until repairs are complete. Two quick moves can keep a high-value tool safe.
Preventive checks you should schedule
1) Monthly: inspect and clean prefilters, check drains, and review last 30 days of dew point logs.
2) Quarterly: measure pressure drop across dryers and replace desiccant if dew point creeps above spec.
3) Annually: service dryers, test sensors against a portable chilled-mirror meter, and verify calibration.
One real example
At a small metal shop, dew point sensors after the dryer showed occasional spikes to 50°F while the dryer outlet was supposed to be −40°F. The owner followed step 1 checks, found a blocked coalescing filter that caused a wet bypass, replaced the filter, and the spikes stopped within an hour.
If you follow these placement, logging, and inspection steps, you’ll spot high‑moisture problems before tools get ruined.
Control Options: Dryers, Filters, Traps, Heated Lines

If you’ve ever had a tool fail because of water, this is why.
Why it matters: moisture causes corrosion, lubricant washout, and tool misfires, so fixing it at the source saves downtime and repair bills.
Choose a dryer type based on the dew point you need and your flow rate. Example: a small paint-sprayer booth drawing 10 scfm needs a point-of-use membrane dryer; a 500 scfm plant mainline needs a refrigerated or desiccant dryer.
1) Refrigerated dryers — Use these when you need to drop pressure dew point (PDP) to around +35°F (+2°C). They handle moderate flows (10–2,000 scfm) and are energy-efficient. For a 200 scfm shop line, pick a unit rated slightly above that flow (25% margin) and install it after your upstream filter. Short sentence.
– Real-world example: a machine shop running 150 scfm switched to a refrigerated dryer rated 200 scfm and cut condensate by 80%.
2) Desiccant dryers — Use these when you need very low PDPs (–40°F to –100°F) for critical instruments or painting. They require purge air (4–20% of flow) and regular cycle checks. For a 300 scfm requirement, spec a dryer that manages regeneration air and add a purge economizer to reduce waste. Short sentence.
– Real-world example: an aerospace paint line needed –40°F PDP, so they installed a twin-tower desiccant dryer with a 350 scfm capacity and halved paint rejects.
3) Membrane dryers — Use these for point-of-use drying at low flows (1–50 scfm). They’re compact, have no moving parts, and suit intermittent tool use. Place them within a few feet of the tool and keep inlet pressure within the membrane spec (typically 60–120 psi). Short sentence.
– Real-world example: a single CNC machine with 15 scfm demand got a membrane dryer mounted at the machine and eliminated finish blemishes.
Use filters to remove droplets and particulates before they reach tools. Why it matters: filters stop solids and oil/water aerosols that wear valves and ruin finishes.
1) Use a coalescing filter upstream of the dryer to remove oil and liquid droplets, then a particulate filter after the dryer to catch fines. Size filters to match the same scfm rating as your dryer and place a pressure gauge before and after each filter. Short sentence.
– Real-world example: a fabrication shop added a 5-micron coalescer rated for 250 scfm ahead of the dryer and cut downstream valve failures by half.
Maintain filters on a schedule. Why it matters: clogged or bypassed filters let moisture and grit through.
Steps:
- Check differential pressure weekly for the first month, then monthly once stable.
- Replace elements when ΔP reaches the manufacturer’s limit (commonly 8–15 psi) or every 6–12 months depending on contamination.
- Inspect seals and housings whenever you change elements; use the specified gasket material. Short sentence.
– Real-world example: weekly ΔP checks caught a blown gasket before it caused a weekend shutdown.
Install traps and automatic drains at low points to remove condensate. Why it matters: pooled condensate corrodes piping and ruins product.
1) Put mechanical or timed drains at each low point and install an alarm or sight glass on high-capacity receivers.
2) Size the receiver (gallon capacity) based on system pipe volume and expected condensate; a common rule is 1–5 gallons per 100 scfm for plant mains.
3) Test automatic drains monthly for proper cycling. Short sentence.
– Real-world example: a bakery added electronic drains on its 300 scfm line and avoided a freeze that previously stalled production.
Consider heated lines where ambient cold causes freezing. Why it matters: frozen condensate blocks lines and bursts fittings.
1) Use trace heating or insulated rigid piping in outdoor runs and keep line temperature above freezing (maintain 40–50°F at minimum).
2) Insulate and slope lines to low points toward drains, not traps. Short sentence.
– Real-world example: an outdoor compressor feed used 20 W/ft trace heating and prevented winter blockages.
Sizing and placement rule: put your dryer after the main particulates and coalescing filter, then a particulate filter after the dryer, and drains at each low point and receiver. Why it matters: correct order and sizing keep tools dry and running.
1) Match all components to the peak scfm plus 25% safety margin.
2) Keep critical point-of-use dryers within 3–6 feet of sensitive tools.
3) Label each component with install date, capacity, and next maintenance date. Short sentence.
– Real-world example: relabeling and standardizing capacity across one plant reduced filter mis-matches and cut failures by 30%.
Follow these concrete steps and you’ll stop moisture from causing repeat problems.
Maintenance and Seasonal Adjustments to Keep Tools Reliable
Before you schedule seasonal checks, know why it matters: moisture can ruin tools fast, causing rust and seal failure that stop jobs cold.
1) When should you inspect tools?
Why: catching problems early keeps tools running and avoids emergency repairs.
Example: Last spring I caught a cracked seal on a rivet gun after a humid week; fixing it took 20 minutes and saved a full shift of downtime.
Steps:
- Do inspections twice a year — once in spring (March–May) and once in fall (September–November).
- Pick specific dates and put them on your calendar now.
- Allow 30–60 minutes per tool for a basic check.
What to check each inspection:
- Look for surface rust and pitting.
- Squeeze hoses to find soft spots and check fittings for leaks.
- Inspect seals and O-rings for cracks; replace any that show even hairline splits.
- Run the tool under load (see section below).
2) How often should you change lubricants and why?
Why: moisture flushes oil from moving parts, so more frequent lubrication keeps parts sealed and moving smoothly.
Example: In a coastal shop, we doubled oil changes in summer and reduced valve sticking by 70%.
Steps:
- Follow the manufacturer’s baseline, then double the frequency during humid months (June–August).
- Mark lubricant change dates on your calendar and record them on a sticker on the tool.
- Use the specified oil grade; if none is listed, use ISO VG32 for pneumatic tools unless the manual says otherwise.
3) How do you manage air moisture and filters?
Why: removing condensate prevents water from washing lubricants away and corroding internal parts.
Example: I installed a refrigerated dryer on a compressor line at a small shop and stopped seeing water in tool reservoirs within 48 hours.
Steps:
- Service inline filters and drain traps every month; inspect them weekly during humid spells.
- Test heated lines and traps by feeling for warmth and checking that no water pools at fittings.
- Replace desiccant when dew point rises above -20°C (-4°F) at the dryer outlet.
4) How do you monitor dew point and tool performance?
Why: dew point tells you how much moisture is in the air, and torque testing confirms tools work under load.
Example: After a week of high dew points, I verified a torque wrench still hit specified values and re-lubed its gearbox when it didn’t.
Steps:
- Check dew point at the compressor outlet weekly when humidity is high; aim for a dew point below -20°C (-4°F) for pneumatic tools.
- Replace desiccant cartridges when saturation is within 10% of capacity (use color-change indicators or weight measurements).
- Test tool torque under load: run three full-load cycles and record the readings; if readings vary more than 5%, service the tool.
5) Quick daily and monthly routines
Why: small regular tasks stop small problems from becoming big ones.
Example: A tech I trained wipes down and runs each tool for 30 seconds before shift start and caught a sticking valve before it failed that afternoon.
Daily (takes 5 minutes per workbench):
1. Wipe tools clean, check for leaks, and quick-run each tool for 30 seconds.
Monthly (takes 15–30 minutes per compressor line):
1. Empty condensate bowls, check filter elements, and inspect heated lines.
Follow these steps consistently and you’ll reduce downtime and extend tool life.
Frequently Asked Questions
How Does Moisture Affect Electro-Pneumatic Tool Electronics and Sensors?
Moisture quietly undermines electronics: I see electrical corrosion eating contacts and connectors, and sensor drift skewing readings, so I advise sealing, drying and monitoring dew point to keep circuits stable and controls reliable.
Can Moisture Control Affect Warranty Coverage for Pneumatic Tools?
Yes — I’ll tell you: neglecting moisture control can lead to warranty voidance; I’d document maintenance and dew point records as claim documentation, showing filters, dryers, and drains were properly managed to support any claim.
Do Different Compressor Oils Interact With Moisture Differently?
Absolutely — like oil and water dancing, I’ll say yes: oil chemistry and additive interaction change how moisture behaves, so some oils resist emulsifying, others let water strip additives, altering lubrication, corrosion protection, and seal compatibility.
What Are Safe Shutdown Procedures When Water Is Found in a System?
I’d isolate source, vent pressure slowly, drain condensate and remove affected filters, tag and lock out the compressor, inspect dryers and lines, repair or replace corroded parts, then restart gradually while monitoring dew point and system performance.
Can Moisture Control Solutions Be Retrofitted to Mobile or Temporary Setups?
Yes — I recommend retrofitting portable dryers and temporary filters to mobile or temporary setups; I’ve installed compact refrigerated or desiccant dryers, inline coalescing filters, and heated hoses to reliably prevent moisture-related tool failures.