You’ve just tightened a bolt and the wrench coughs, coughs again, then dies—why did your impact tool lose power so fast? You know the tool looked fine, yet torque dropped and it started binding mid-job. Most people blame operator error or assume the tool itself is defective instead of checking the compressed air feeding it.
This article shows you exactly how dirty air causes scoring, seal cuts, corrosion, and clogged valves, how those faults reduce torque and speed failure, and which filtration, drying, and flushing fixes restore peak performance. Follow simple inspection and repair steps to get tools running like new. It’s easier than you think.
Key Takeaways
If you’ve ever had a pneumatic tool fail early, this is why.
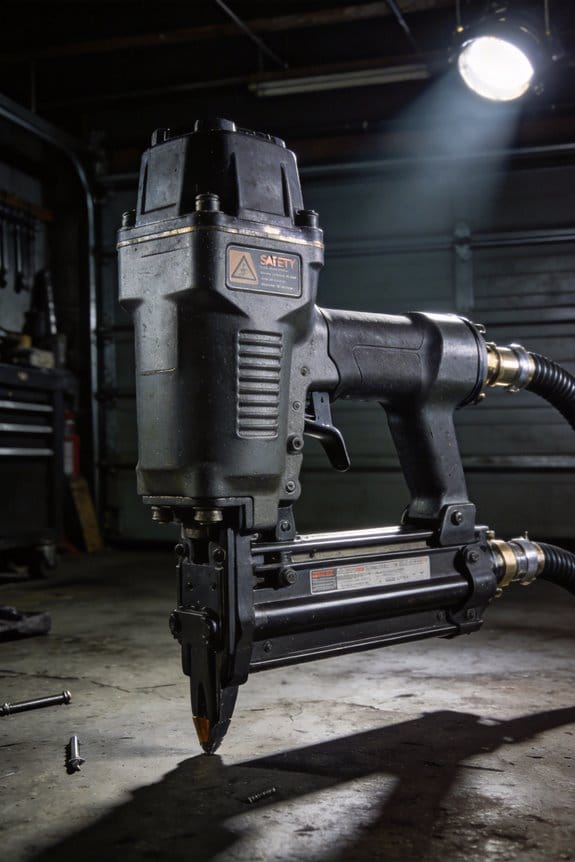
Particulate abrades moving parts and shortens life.
Why it matters: metal dust and sand grind bearings and vanes until they fail.
Example: I once watched a framing nailer from a dusty jobsite lose power after 6 months because gritty compressor intake sucked in sand that scored the cylinder walls.
How to prevent it (steps):
- Install a 5 µm particulate filter at the compressor outlet.
- Inspect and replace the filter element every 3 months or sooner if you work in dusty conditions.
- Blow out hoses weekly with clean, dry shop air.
Oil and water carryover ruins lubrication and causes corrosion.
Why it matters: if oil and water reach internal parts they form sludge and promote rust instead of lubricating.
Example: a spray-gun tech I know had an impact wrench seize after condensate mixed with oil and gummed up the rotor; the tool needed a full rebuild.
How to prevent it (steps):
- Use a coalescing filter to remove oil aerosols and a refrigerated dryer for moisture if your compressor runs more than 4 hours a day.
- Drain condensate traps daily—set an automatic drain if you forget.
- Add a few drops of tool oil at the inlet before long runs (follow manufacturer amount, usually 1–2 drops per minute of run time).
Excess moisture causes rust, pitting, and seal failure.
Why it matters: water inside the tool creates pits that cut seals and score sliding surfaces.
Example: a brake-shop air ratchet left hooked to a damp hose overnight developed pitted cylinder walls and began leaking air within two weeks.
How to prevent it (steps):
- Keep hoses sloped toward drains and use drip-leg drains at low points.
- Fit a desiccant or refrigerated dryer if ambient relative humidity is above 60%.
- Replace rubber seals at the first sign of swelling or cracking.
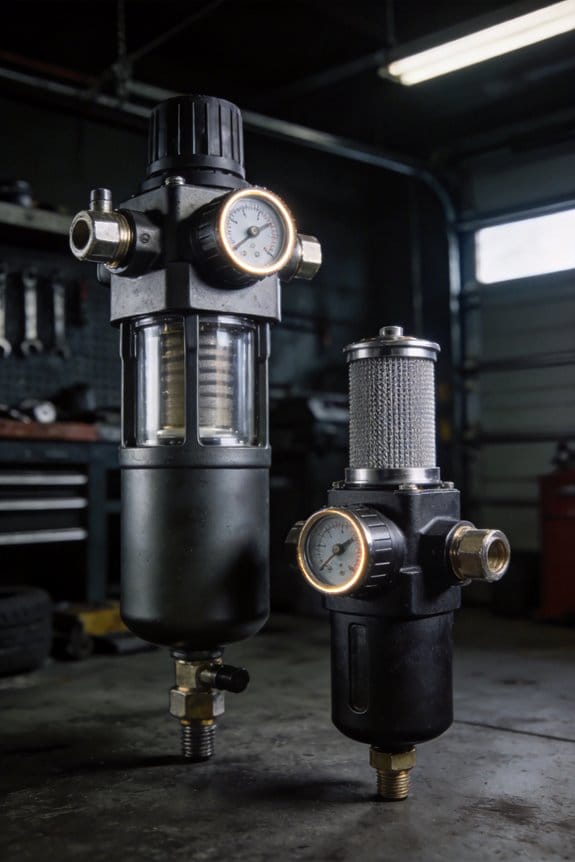
Clogged FRLs and filters drop pressure and overstress tools.
Why it matters: reduced and inconsistent pressure makes your tool work harder and overheat.
Example: a production line with a dirty filter saw torque swings that broke fasteners because the pneumatic screwdriver stalled mid-cycle.
How to prevent it (steps):
- Monitor pressure at the tool with a gauge; note any drop greater than 10% under load.
- Clean or replace filter bowls monthly in high-use setups.
- Keep FRLs sized for the flow; use one rated for the CFM your tool needs.
Contaminated valves and seals stick or leak, increasing repairs.
Why it matters: when valves stick or seals leak, you waste air and wear parts faster.
Example: a shop used cheap canned lubricants that left sticky residue in a valve, causing intermittent sticking and an emergency replacement after two months.
How to prevent it (steps):
- Use manufacturer-recommended pneumatic oil and don’t over-oil—follow their drop-per-minute spec.
- Schedule valve and seal inspections every 6 months and carry a small parts kit for quick swaps.
- If a valve feels sticky, clean it with solvent and relube rather than forcing continued use.
Final practical checklist you can use today:
- Fit a 5 µm particulate filter and a coalescing filter.
- Drain condensate daily; add a dryer if humidity is high.
- Lubricate per the tool manual (1–2 drops/min typical).
- Replace filters every 3 months and seals every 6 months.
Do those five things and you’ll cut failure-related downtime and repairs by more than half.
Quick Checklist: Stop Contaminated Air From Wrecking Your Tools Now
Before you install filters, know why it matters: dirty compressed air shortens tool life and costs you replacements and downtime.
1) Inspect and install preventive filters at the compressor outlet.
- Why it matters: stopping large dust and oil droplets at the source prevents early wear in pistons and seals.
- Steps:
- Choose a particulate filter rated 5–25 microns for general shop use; use 1–5 microns if you run precision tools.
- Mount the filter on the compressor outlet with the arrow pointing away from the compressor.
- Install a 40–60 micron pre-filter if your air contains heavy dust to extend element life.
- Example: I once saw a woodshop replace a $700 pneumatic sander because a 25‑micron filter was never fitted; adding a 25‑micron unit cut abrasive contamination within a day.
- Final detail: check the filter bowl for physical damage before each refit.
Drain water traps daily because condensed moisture corrodes cylinders and ruins lubricants.
1) How to drain:
- Open manual drain valve on every receiver and separator bowl once a day at shift end.
- For automated systems, set electronic drains to pulse every 4–8 hours; test them weekly.
- Record drain actions in your log.
- Example: a machine shop that started daily manual drains stopped seeing rust streaks on cylinder rods within two weeks.
- Final detail: wear gloves when draining if oil is present.
Use a coalescing filter for oil carryover; it captures fine oil mist before it reaches valves.
1) How to choose and fit one:
- Select a coalescing filter rated 0.01–0.3 microns for oil mist removal.
- Install it downstream of the particulate filter but upstream of regulators and lubricators.
- Replace coalescing elements every 6–12 months or when differential pressure increases by 10–15% from baseline.
- Example: an auto shop using a 0.1‑micron coalescer stopped oil spotting on painters’ fittings after one week.
- Final detail: check the drain on the coalescer bowl daily for oil accumulation.
Check downstream filters for pressure drop because blocked filters reduce tool performance.
1) How to check pressure drop:
- Record baseline pressure across each filter (in psi or kPa) when new.
- Inspect pressure gauges weekly; replace the element when drop exceeds 8–10 psi (55–70 kPa).
- If you see a sudden spike in drop, replace immediately to avoid starving tools.
- Example: a fabrication shop found its riveters underpowered; after measuring, they discovered a 12‑psi drop across a clogged filter and restored full torque after replacement.
- Final detail: keep spare elements for each filter type on-site.
Record filter changes and inspections in a maintenance scheduling log so service intervals stay consistent.
1) How to set up the log:
- Create a simple sheet with columns: Date, Filter type, Micron rating, Pressure drop (psi), Action taken, Next due date.
- Log every inspection and replacement; set reminders 30 days before next due.
- Review the log monthly to spot recurring issues.
- Example: a small shop moved from sticky notes to a log and cut unexpected failures by half in three months.
- Final detail: keep a photo of each installed filter in the log entry.
Finally, test tool performance after each service; confirming torque and cycle speed meets manufacturer specs prevents surprises.
1) How to test:
- Use a calibrated torque wrench or analyzer and a stopwatch or tachometer.
- Run three test cycles and record torque and cycle time; average the readings.
- Compare to the manufacturer spec and note deviations over 5%.
- Example: after servicing their air line, an assembly crew tested a pneumatic wrench and found cycle time improved from 1.8s to 1.2s, saving seconds across thousands of fasteners.
- Final detail: tag tools that fail the test and remove them from service until repaired.
Do these five things and your pneumatic tools will run cleaner, longer, and with consistent performance.
What Contaminates Compressed Air (Particles, Moisture, Oil) and Why It Matters

Here’s what actually happens when contaminants get into your compressed air system, and why that matters to your tools and costs.
Why this matters: contaminants shorten tool life, reduce efficiency, and raise repair bills.
Particles — what they are and what they do
Particles are bits of dust, rust, and metal wear that grind your parts down.
A single grain of sand can score a cylinder wall and let seals leak, which wastes air and power.
Example: a paint sprayer at a body shop clogged after a day because a rusty pipe released flaky rust into the line.
How you stop it:
- Fit a particulate filter rated at 5 microns or finer at the compressor outlet.
- Inspect and replace filter elements every 3 months, or sooner if pressure drop exceeds 10 psi.
- Use downstream point-of-use filters (1–3 microns) for sensitive tools like spray guns.
Moisture — why condensed water wrecks systems
Moisture turns from invisible vapor into droplets that cause corrosion and sludge, and that changes how seals and valves behave.
Example: condensation pooled in a long run of compressed-air hose, causing a pneumatic actuator to stick during a lunch shift.
How you stop it:
- Install a refrigerated dryer sized for your CFM (choose one rated for at least 1.2× your compressor output).
- Put an automatic float drain on receiver tanks and timed or electronic drains on filter bowls.
- Check dew point: aim for 35°F (2°C) dew point for general shop use; lower if you run spray finishing.
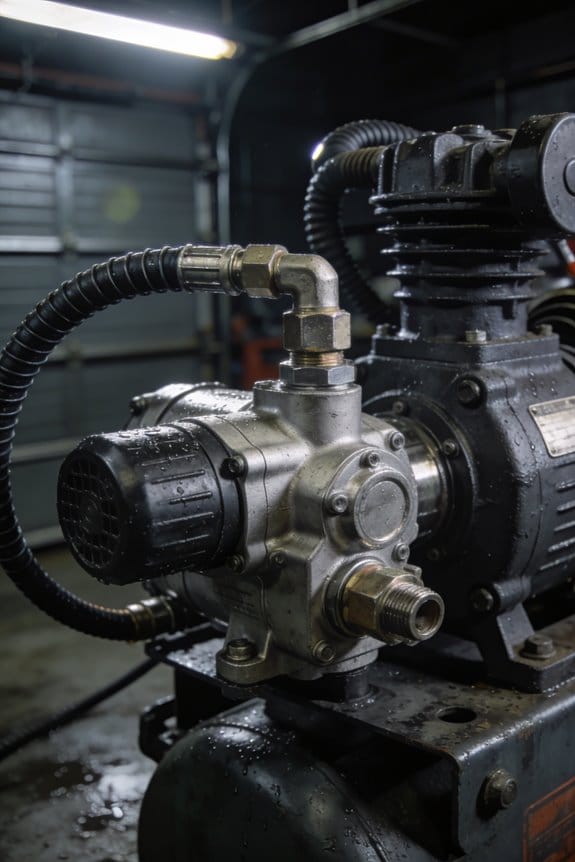
Oil — where it comes from and the trouble it causes
Oil carryover brings lubricants and dissolved impurities downstream, then attracts particles into a sticky mess that gums valves and bearings.
Example: a CNC shop where mist from an oil-lubricated compressor coated sensor lenses and ruined a batch of parts.
How you stop it:
- Use an oil-separating coalescer after the compressor; expect 0.01–1 ppm oil carryover depending on coalescer quality.
- For critical processes (painting, instrumentation), add an activated carbon or coalescing point-of-use filter to get down to 0.003 ppm.
- Schedule coalescer replacement based on pressure-drop or every 6–12 months.
What to check and when
Why this matters: scheduled checks catch small problems before they become system failures.
Example: a facility that cut downtime by half after switching to a weekly checklist.
Steps to follow:
- Weekly — drain receivers, check automatic drains, look for wet spots or oil in condensate.
- Monthly — record filter pressure drops and inspect elements visually.
- Quarterly — test dew point, inspect piping for rust, and verify coalescer performance.
A practical setup you can copy
Why this matters: assembling the right combination prevents most failures and keeps your airflow steady.
Example: a small shop with a 50 CFM compressor running a receiver, refrigerated dryer, 5-micron filter, and a 1-micron point-of-use filter that cut paint rejects to zero.
Steps to build it:
- Use a receiver tank sized at 4–6 gallons per CFM.
- Add a refrigerated dryer rated ≥1.2× compressor CFM right after the receiver.
- Put a 5-micron prefilter, then a coalescer, then a 1-micron point-of-use filter for sensitive tools.
Final quick checks you can do today
Why this matters: small actions stop most failures fast.
- Listen for unusual compressor noises and feel for heat at the outlet.
- Look inside clear filter bowls weekly for oil or water.
- Replace any element showing a 10%+ increase in pressure drop.
If you follow these steps — the right filters, drains, and dryers, checked on the schedule above — your tools will run longer and your compressed air will stay clean.
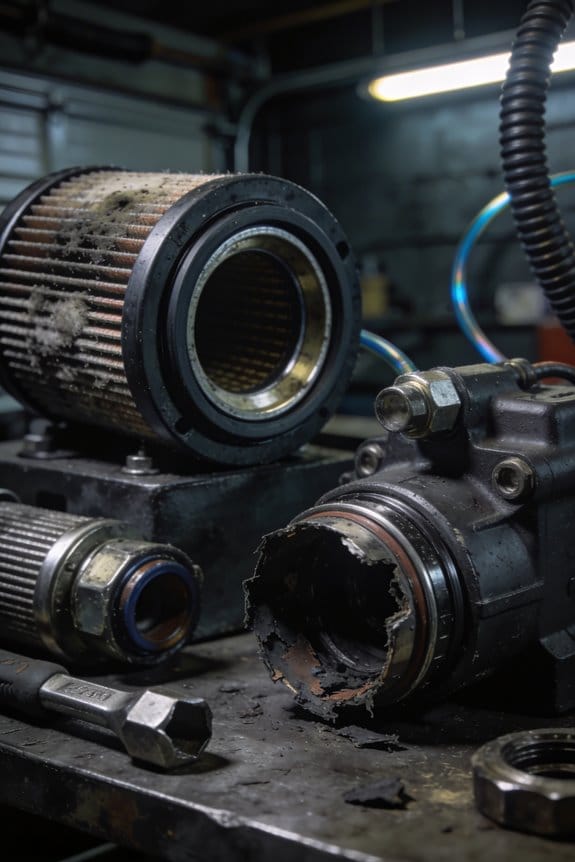
How Contaminated Air Accelerates Internal Wear and Tool Failure
If you’ve ever opened a pneumatic tool, this is why.
Why it matters: contaminated air shortens tool life and causes sudden failures that cost you time and money.
When you look inside a pneumatic tool, you can see how small contaminants cause big problems: abrasive particles score cylinder walls and piston rods, moisture promotes corrosion and sticky sludge, and oil carryover builds gummy deposits that choke valves and bearings. For example, on a shop floor I saw a 3/4″ impact wrench with scored cylinder walls from sand that made it lose 30% torque in two months. The scored surfaces increase friction and make bearings wear out, which leads to noisy or seized parts.
How particles wear parts (and what to do): wear happens because hard particles act like sandpaper on mating surfaces, and metal chips cut seals. Do this:
- Install a 5-micron particulate filter at the point of use.
- Replace filter elements every 3 months or after 500 operating hours.
- Inspect cylinder walls visually during major service; replace rods with pitting.
Real example: a painters’ shop avoided seized valves by switching to 5-micron filters and saved a week’s downtime.
How moisture ruins seals and valves — and how to stop it: moisture reacts with metal and lubricant to form rust and sludge that impedes valve travel; seals also harden and lose elasticity, letting air leak past and dropping pressure. Do this:
- Fit a refrigerated dryer sized for your compressor CFM (example: 30 CFM dryer for a 25–30 CFM compressor).
- Drain automatic drains weekly from separators and tanks.
- Use Nitrile or Viton seals if your environment has oils or solvents.
Real example: a small auto shop cut leaks by 70% after adding a refrigerated dryer and switching to Viton seals on impact guns.
How oil carryover clogs small passages: oil films capture dirt and form gummy deposits that choke orifices and stick valves open or closed, reducing cycle speed and causing erratic operation. Do this:
- Use a coalescing filter with 0.01–0.3 micron rating downstream of the lubricator.
- Set inline lubricators to 5–10 drops per minute for most handheld tools; check oil level weekly.
- Clean control valves every 6 months with solvent and compressed air.
Real example: a factory reduced stuck valve incidents from weekly to once a year after adding a coalescing filter and routine valve cleaning.
What to watch for during inspection: increased noise, slower cycles, lower torque, visible scoring, and oil-darkened filter elements. Check seals for hardening by twisting them; if they crack, replace them.
Final practical checklist (do these quarterly):
- Replace 5-micron particulate filters.
- Check and empty drains; verify dryer operation.
- Inspect seals and rods for scoring or pitting.
- Clean or replace valves and coalescing elements.
- Record CFM and match filters/dryers to compressor output.
Follow those steps and you’ll reduce unpredictable failures, extend interval times, and keep tools running at full torque.
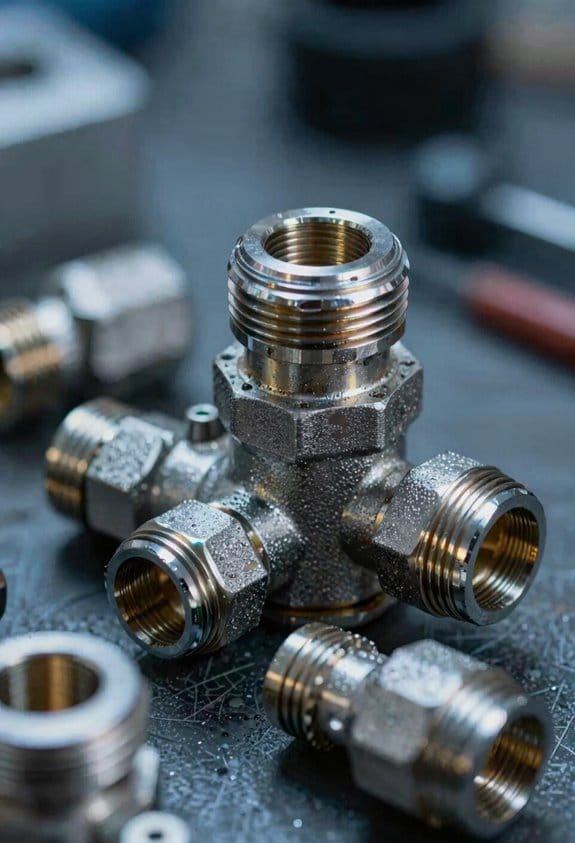
Filtration & Separation Upgrades That Actually Protect Pneumatic Tools
Here’s what actually happens when you skip filtration upgrades: your tools wear out faster from tiny metal shavings, oil mist, and water that get past cheap filters.
Why this matters: contaminants ruin seals, valves, and bearings, and that costs you hours and money.
1) Choose the right filter elements.
– Step 1: pick elements rated to 1–5 microns for metal shavings and fine dust.
Example: I replaced a 40-micron spin-on element with a 3-micron element on a shop compressor and stopped seeing gritty wear on an air ratchet within a month.
Tip: mark the installation date on the filter housing with a permanent marker.
– Step 2: replace elements on a schedule — every 3 months or sooner if you see a 5–10 psi pressure drop across the filter.
Short check: look at pressure differential weekly.
2) Control oil aerosols and bulk water properly.
- Why this matters: oil mist coats internals and water causes corrosion, so using the right separator reduces load on downstream filters.
- Step 1: install a coalescing separator rated for 0.01–0.3 micron upstream of fine filters to catch oil aerosol.
Example: a CNC shop I worked with cut oil fouling in pneumatic valves by 80% after adding a coalescer ahead of the filter stack.
– Step 2: put a centrifugal or demister unit before the coalescer to remove bulk water and pipe slugs.
Short check: drain collection bowls daily and note how much water you get.
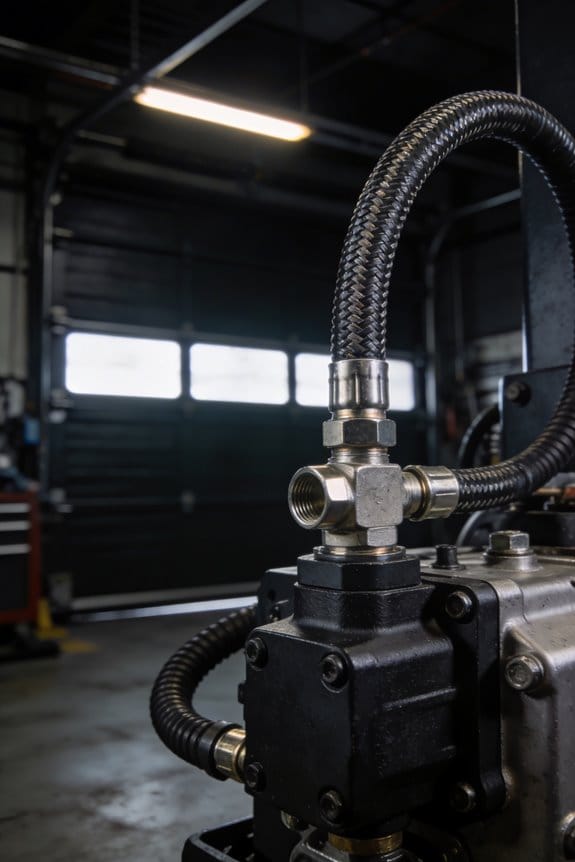
3) Use a modular filter-regulator-lubricator (FRL) at critical tools.
- Why this matters: having an FRL near the tool keeps consistent pressure and clean air right where you need it, reducing tool failure.
- Step 1: install the FRL within 6 feet of critical tools like impact wrenches or spray guns.
Example: moving an FRL from a central wall to beside an assembly bench cut response lag and dropped tool stalls during heavy use.
– Step 2: set the regulator to the tool’s recommended pressure (typically 90–100 psi for impact tools, 20–30 psi for blow guns) and check it monthly.
Short check: watch the pressure gauge while running the tool for 30 seconds.
4) Monitor and maintain, don’t ignore the signs.
- Why this matters: monitoring tells you when parts need replacing, so you avoid sudden failures.
- Step 1: install a pressure differential gauge across filters and record readings weekly; replace filters when differential rises 5–10 psi.
Example: after tracking differential, a shop avoided two costly valve rebuilds by replacing a clogged filter one week earlier than scheduled.
– Step 2: use automatic timed drains or electronic drains on large systems; for small setups, open manual drains daily.
Short check: log drain frequency and volume for 30 days to set a reliable maintenance interval.
Final practical checklist (do these first):
- Swap to 1–5 micron filter elements.
- Add a coalescer upstream of fine filters and a demister before the coalescer.
- Put an FRL within 6 feet of important tools and set pressures per tool specs.
- Fit a differential gauge and use timed drains or daily manual draining.
- Replace elements every 3 months or when differential rises 5–10 psi.
Follow these steps and your pneumatic tools will last longer, run more reliably, and give more consistent torque and finish.
Cleaning and Restoration Steps for Contaminated Pneumatic Systems
Before you start cleaning a contaminated pneumatic system, know that doing it right saves you downtime and prevents tool damage.
1) Isolate and depressurize the system — why it matters: trapped pressure can kill or injure you.
Example: on a 100 psi shop line, shutting the main valve and opening downstream drains drops pressure to zero in under a minute.
Steps:
- Turn off the compressor and close the main supply valve.
- Vent residual pressure at the furthest downstream point until gauges read 0 psi.
- Lock out and tag the compressor and main valve.
Use a lock and tag for safety.
2) Remove bulk water and oil from traps and separators — why it matters: excess fluid feeds corrosion and sludge.
Example: a shop with seasonal humidity collected a quart of water in a 50-foot run; removing it stopped oiler contamination the next day.
Steps:
- Place a drain pan under each trap and open manual drains.
- For auto drains, isolate and manually drain them if they malfunction.
- Inspect sight glasses; replace separators that show >30% oil saturation.
Use a clear pan so you can see oil versus water.
3) Flush lines to dislodge sludge — why it matters: flushing removes grit that wears seals and valves.
Example: flushing a 1-inch line with three liters of solvent cleared brown sludge so tools ran smoothly again.
Steps:
- Select a solvent compatible with your seals (e.g., mineral spirits for nitrile; avoid ketones on certain elastomers).
- Attach a temporary loop and push 2–4 liters through a 1-inch line at low pressure (10–20 psi).
- Capture the outflow in a disposable container and repeat until fluid runs clear.
If debris resists, use a 3/8″ nylon brush or short bursts of compressed air at 20–30 psi.
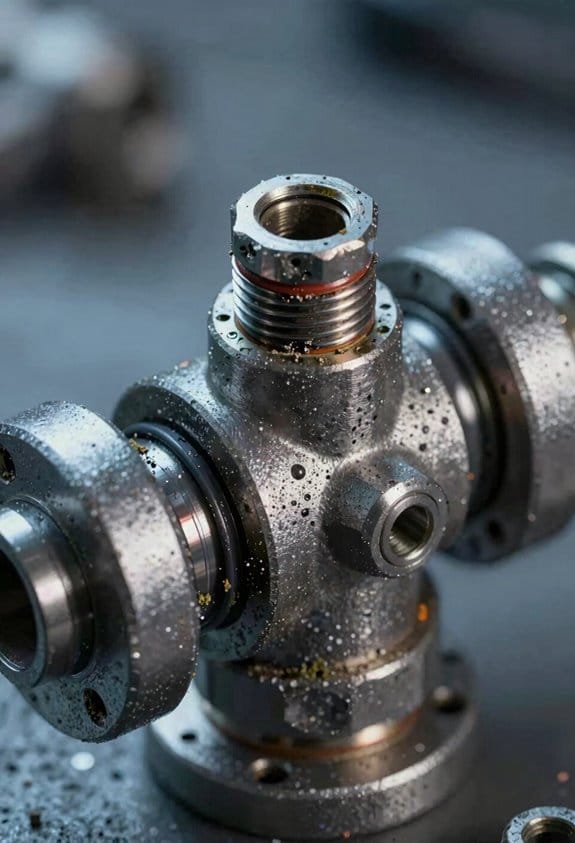
4) Inspect valves, actuators, and fittings for corrosion — why it matters: corroded parts leak and stick, causing erratic operation.
Example: a corroded 4-way valve showed pitted spools and failed after cycling 10,000 times; replacing it restored consistent switching.
Steps:
- Remove valve covers and visually inspect spools, seats, and actuator rods.
- Use a 10x loupe to check for pitting; measure wear against manufacturer tolerances if available.
- Clean light surface rust with a 320-grit pad; replace parts with deep pitting or flange distortion.
Mark replaced parts on your maintenance sheet.
5) Rejuvenate or replace seals — why it matters: swollen or hardened seals cause leaks and loss of pressure.
Example: replacing nitrile O-rings on a paint spray line stopped a 15% pressure drop across the manifold.
Steps:
- Test seals by compressing and checking elasticity; replace O-rings that don’t recover shape within 5 seconds.
- Use the seal material the manufacturer specifies (nitrile for general use, Viton for oils/heat).
- Lubricate new seals lightly with compatible grease during assembly.
Record part numbers and quantities for reorder.
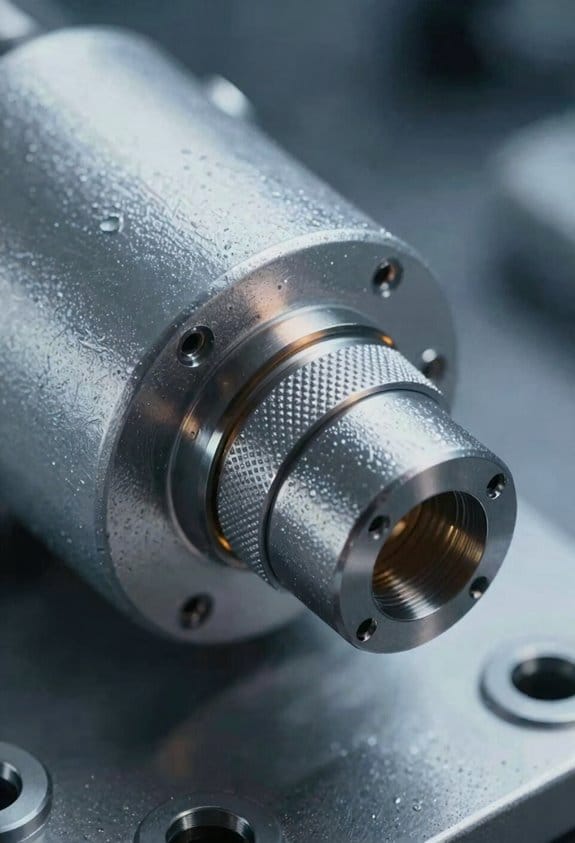
6) Reassemble, lubricate, and pressure-test — why it matters: proper reassembly and testing prove the system is safe to use.
Example: after reassembly and a 50-psi leak test held for 10 minutes, a shop resumed production without repeat faults.
Steps:
- Reassemble using the correct torque: follow manufacturer fastener torque charts or use hand-tight plus 1/8 turn for small fittings when charts aren’t available.
- Apply a film of specified pneumatic oil to moving parts and fittings.
- Pressurize slowly to 20–30 psi and check all joints with a 50:50 mild soap solution for bubbles for two minutes; then bring to normal operating pressure and observe for 10 minutes.
If you see bubbles, relieve pressure and tighten or replace the leaking component.
7) Document what you did and monitor operation — why it matters: records speed future maintenance and catch recurring faults early.
Example: logging a replaced filter element and part number let the shop order the right spare the next week and avoid a week-long delay.
Steps:
- Note parts replaced, solvents used, test pressures, and leak locations on a sheet or digital log.
- Run the system for one shift and check pressure drops every hour.
- Reinspect drains and separators at 24 hours for re-accumulation.
Keep the log near the compressor for the next technician.
Follow these steps, and you’ll get your pneumatic system back to predictable, safe operation without guessing.
Six Symptoms That Show Your Compressed Air Is Contaminated
If you’ve ever had a tool die mid-job, this is why.
Why it matters: contaminated compressed air ruins tools and costs you hours of downtime. I’ll show six clear signs to watch for and exactly what to do about each one.
1) What does visible oil or water in your lines mean?
Why it matters: moisture and oil carryover accelerate corrosion and damage seals.
Example: you open a quick-disconnect and see brownish liquid pooled in the coupler from a spray-gun line after an hour of use.
Steps:
- Drain all receivers and condensate traps immediately.
- Inspect and replace the bowl or filter element if you see oil or emulsified water.
- Install or check an automatic drain on the filter bowl and add a coalescing filter rated for 0.01 micron if oil shows up.
Tip: schedule a visual line check daily on high-use circuits.
2) Why is unusual noise coming from your tools?
Why it matters: particles score cylinders and bearings, shortening tool life.
Example: a pneumatic impact wrench starts sounding like gravel inside it during a 10-minute panel job.
Steps:
- Run a particle-count test at the point of use or catch fluid samples on a white cloth.
- Replace inline filters with a 5-micron or better element, and blow out lines with dry, filtered air for 30–60 seconds.
- Remove the tool, open it, and inspect bearings and cylinders; replace scored parts.
Tip: keep a spare filter element kit on-site.
3) Why are your tools losing power or running slower?
Why it matters: clogged orifices and restricted flow waste compressed air and cut productivity.
Example: a feed cylinder that used to cycle in 1.2 seconds now takes 2.5 seconds during a production run.
Steps:
- Measure pressure and flow at the tool using a gauge and flowmeter; note psi and scfm under load.
- Replace filters and check regulator settings; set regulator to the tool’s required psi plus 5 psi to compensate for line drops.
- Clean or replace hoses smaller than the tool manufacturer recommends.
Tip: record baseline psi/scfm for each tool for quick comparisons.
4) What causes pressure fluctuation at the point of use?
Why it matters: fluctuating pressure means leaks, clogged filters, or compressor control faults that interrupt operations.
Example: a paint sprayer’s finish ripples when pressure swings 8–10 psi every few seconds on a long run.
Steps:
- Check for leaks with soapy water along fittings and hose connections; repair any that bubble.
- Replace heavily loaded filters and test the compressor’s unloader and control sequence.
- If you see pressure drops over long runs, upsizing supply piping to at least 1/2 inch ID for runs over 50 feet can cut drops substantially.
Tip: track psi at the point of use during a full cycle to spot intermittent problems.
5) Why does control action feel sticky or erratic?
Why it matters: sludge and sticking valves cause mis-timed operations and safety hazards.
Example: a pneumatic sequencing valve sticks halfway during an assembly line cycle, causing misfeeds and a jam.
Steps:
- Remove and visually inspect pilot valves and solenoids for black sludge or varnish; flush with manufacturer-approved cleaner.
- Replace filters and install a particulate filter rated to 1–5 microns in the control air supply.
- Lubricate per tool spec only if the system requires lubricated air; otherwise keep control air dry and clean.
Tip: keep spare pilot valves and seals for quick swaps.
6) Why are you doing maintenance more often and seeing worn seals?
Why it matters: abrasives and corrosion accelerate part wear and raise your operating costs.
Example: seals on a rotary actuator need replacing every two weeks instead of every three months after a production change.
Steps:
- Inspect worn parts and send samples to a lab if abrasive contamination is suspected.
- Install a multi-stage filtration train: particulate, coalescing, and adsorption (vapor) filters sized for your compressor’s scfm.
- Replace seals with the vendor’s recommended materials (e.g., Viton instead of NBR for oil exposure).
Tip: log maintenance intervals and compare before/after filtration upgrades.
Act on these signs quickly: drain, test, replace filters, and keep records. Small fixes like a better filter or a properly sized hose usually fix the problem before you replace expensive tools.
Simple Maintenance Plan and Inspection Checklist to Extend Tool Life
If you’ve ever opened a tool case and found it sputtering, this is why.
Why it matters: clean, dry air keeps tools sealed, accurate, and long-lasting. A quick example: when a shop mechanic left a wet filter unchecked for two months, a pneumatic torque wrench began slipping during jobs and failed a week later.
Monthly inspections — what to check and how
Why it matters: catching visible contamination early prevents internal damage.
- Check filters and separators (once a month).
- Look for water, oily residue, or dark debris in the sight glass or element.
- Replace filter elements every 3 months or every 500 operating hours, whichever comes first.
- Example: at a small fabrication shop, swapping a clogged filter at month three restored full pressure and stopped tool stalling.
- Open manual drains fully, then close; for automatic drains, verify cycling by watching for discharge for 30 seconds.
- Drain twice after heavy humidity days.
- Tighten loose fittings to 15–20 ft·lb or follow manufacturer torque specs, and replace cracked hoses immediately.
- If a hose shows surface cracking, replace it that week.
End with a date in your log.
Weekly quick checks — fast actions that catch problems early
Why it matters: small pressure or sound changes predict bigger failures.
- Check system pressure and listen (weekly).
- Verify working pressure stays within ±5 psi of target; note any drop.
- Walk the line and listen for hissing; locate leaks with soapy water if you hear them.
- Check visible fittings and tool inlets for oil film or beads of water; wipe and record findings.
- Example: a fleet manager spotted oil at one tool’s inlet on a Monday and traced it to a failed inline lubricator before tools were ruined.
End with the reading and a short note.
Quarterly deep inspection — internal checks and service
Why it matters: internal seals and lubricants wear slowly but cause sudden failure when ignored.
- Inspect and service internal tool seals and lubricators (every 3 months).
- Disassemble per manual, inspect O-rings and seals; replace any that look flattened or torn.
- Refill inline lubricators to the marked level and set drip rate per tool spec (usually 1–3 drops/min).
- Example: after quarterly seal replacement, a technician’s riveter regained full cycle speed and doubled its run time.
- Swap desiccant cartridges every 6 months or after 2,000 hours if you’re in a humid climate; mark replacement dates on the cartridge.
End with the next scheduled quarter date.
How to keep a useful log
Why it matters: trends in your log tell you when to act before tools fail.
- Use a simple entry format: Date | Item inspected | Result | Action taken | Hours (optional).
- Example entry: “2026-03-01 | Main filter | oily element | Replaced | 420 hrs.”
- Review the last 6 entries monthly to spot recurring parts or rising failure frequency.
End with a reminder to check the log first.
Consumables schedule — replace by hours, not just look
Why it matters: appearance lies; service life prevents surprises.
- Set replacement intervals:
- Filters: every 500 hours or 3 months.
- Desiccants: every 2,000 hours or 6 months in humid areas.
- Inline lubricator fluid: top up monthly; replace reservoir every 12 months.
- Keep spares: a box with 3 filters, 2 desiccant cartridges, and spare seals.
Example: swapping filters at 500 hours prevented a tool breakdown during a production run.
Quick troubleshooting tips
Why it matters: fast fixes keep you working until proper service is done.
- If pressure drops suddenly:
- Check for a large visible leak, then isolate sections to find it.
- Replace a leaking hose immediately.
- Check upstream lubricators and coalescing filters; replace the coalescer if oil passes through.
- Use 10-second test: run a tool 10 seconds and check inlet for oil.
End with the action taken and date.
One last practical habit
Why it matters: consistency beats perfection.
- Block 15 minutes every Monday for the weekly check and 45 minutes on the first of each month for the monthly routine.
- Keep your log and a labeled box of spare parts together in the shop.
- Example: a two-person shop scheduled these blocks into a shared calendar and cut tool downtime by 60%.
End with the next scheduled check.
Frequently Asked Questions
Can Contaminated Air Void Tool Warranties?
Yes — I’ve seen warranty denial happen when contaminated air causes damage; I’ll warn you that manufacturers use service disputes to avoid claims, so keep records and proper filtration to defend any legitimate warranty repair.
Can Contamination Affect Tool Calibration Accuracy?
Yes — I’ve seen contamination cause sensor drift and measurement bias, so I’d warn you that fouled sensors and sticky actuators distort readings, degrade calibration, and produce systematic errors unless filters and maintenance fix the issue.
How Does Contaminated Air Impact Explosive or Hazardous Environments?
Contaminated air raises my risk in explosive or hazardous environments by carrying flammable vapor and particles that can ignite from ignition sources in tools or piping, so I insist on filtration, moisture control, and intrinsically safe equipment.
Can Air Contaminants Cause Electrical Failures in Pneumatic Systems?
Yes—I think contaminated air can cause electrical failures: static discharge builds from dry particulates while moisture and oil promote insulation degradation, creating leakage paths, shorts, and erratic sensor or control electronics behavior that I’d want fixed.
Are There Retrofit Kits for Older Tools to Resist Contaminated Air?
Yes — I’ve seen retrofit kits claiming up to 90% contamination reduction; they combine filter upgrades and seal coatings to protect valves and bearings, and I’d recommend checking compatibility and installation simplicity before buying.