You grab what looks like the right coupler from the bin, tighten it, and hours later a drip appears at the joint — why did that happen? You ask whether the part is the wrong thread, lacks the proper gasket, or simply carries the wrong pressure rating.
Most people assume similar-looking connectors are interchangeable and skip measuring thread type or checking sealing method.
This article will show you how to identify tapered vs. parallel threads, recognize required seals (face gaskets vs. thread-sealing), and verify pressure ratings so you stop mismatches and leaks.
You’ll be able to tell which parts will seal before installation. It’s simpler than it seems.
Key Takeaways
If you’ve ever grabbed the wrong coupler and had a leak, this is why.
Why it matters: using the wrong coupler can cause leaks, pressure loss, or damaged threads that stop your job.
Real example: you grab a coupler from a dusty toolbox, hook it to a compressor hose, and air hisses out under load.
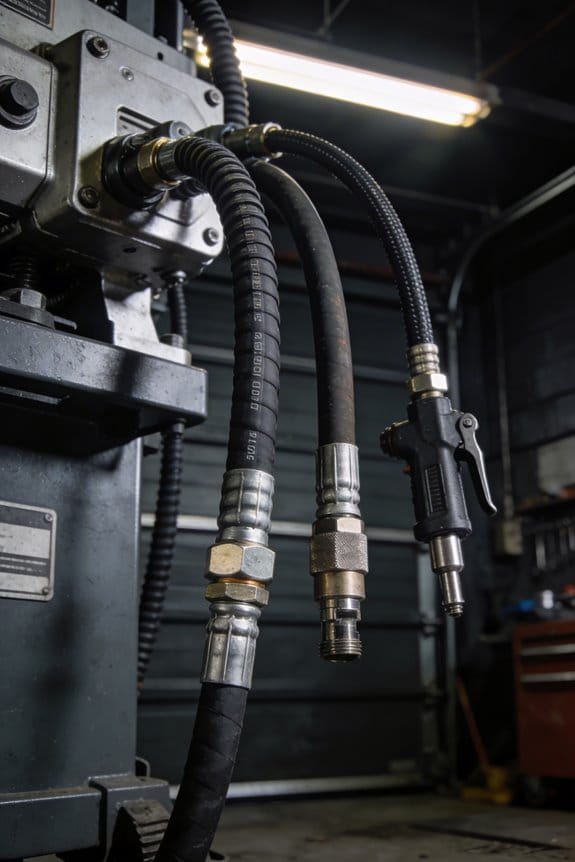
- Multiple similar-looking families: different couplers can have different thread forms, seals, and locking methods even though they look alike.
- How to check: 1) Inspect the thread pitch with a pitch gauge or count threads per inch (TPI). 2) Measure thread major diameter with a caliper to 0.01 in (0.25 mm). 3) Note sealing type — tapered metal seal, O-ring face seal, or gasket face — by looking at the mating face.
Real example: a quick-connect that appears the same might be 1/4″ NPT (tapered, seals on threads) vs. 1/4″ BSPP (parallel, needs an O-ring); the wrong choice will leak.
Faded color codes and grime hide marks.
Why it matters: color and stamped IDs are how you’ll usually identify fittings, and if they’re obscured you’ll misidentify them.
Real example: a red-painted coupler with the size stamp hidden under paint joined a hydraulic line and failed at higher pressure.
– What to do: 1) Clean the fitting with solvent and a small wire brush to reveal stamped codes. 2) Use a flashlight and magnifier to read faint marks. 3) If paint won’t come off, measure the coupling with a caliper and thread gauge.
Tip: write the correct size on cleaned parts with a permanent marker for future use.
Actionable detail: a 1/4″ marking should measure about 0.540–0.550 in major diameter on pipe threads.
Missing labels mean wrong pressure or application.
Why it matters: a coupler rated for 300 psi will fail on a 1500 psi hydraulic line.
Real example: a pneumatic coupler marked only with size but not rated pressure was used on a pressure washer hose and burst.
– How to avoid mistakes: 1) Always verify rated pressure stamped or on the packaging before use. 2) If no rating, assume low-pressure only and test at 1.5× working pressure in a controlled setup. 3) Tag repaired or unknown parts with a permanent label showing tested working pressure.
Concrete number: test at 1.5× working pressure, but never exceed the manufacturer’s max if known.
Universal couplers trade seal perfection for fit.
Why it matters: a universal or “multi-fit” coupler may connect to several types but can leak under high pressure.
Real example: a universal air fitting held at idle but leaked when a sprayer pushed flow through it.
– What you must do: 1) After connecting a universal coupler, run a pressure verification: apply working pressure and inspect for bubbles with soapy water for 60 seconds. 2) If you detect any seepage, replace with a dedicated mating coupler.
Actionable detail: for pneumatic tools at 90–120 psi, bubbles indicate failure; for hydraulics at 1000+ psi, even tiny seepage is unacceptable.
Don’t skip field measurements and thread checks.
Why it matters: guessing wastes time and risks damage.
Real example: a mechanic guessed a thread and cross-threaded a fitting, destroying the port.
– Steps to follow in the field: 1) Clean the part. 2) Measure major diameter with calipers. 3) Count TPI or use a thread gauge to identify pitch. 4) Check sealing style (taper vs. parallel, O-ring vs. metal-to-metal). 5) Match to a verified coupler from a labeled kit.
Concrete numbers: 1/4″ NPT ~ 18 TPI, 3/8″ NPT ~ 18 TPI but different diameter; keep a cheat sheet in your toolbox.
Final practical checklist (3 items):
1) Clean, read, and label the part.
2) Measure diameter and pitch with a caliper and gauge.
3) Pressure-test the connection at 1.5× working pressure or use manufacturer specs.
Do these steps and you’ll avoid most misidentifications and leaks.
What Users Need When Couplers Confuse Them
Before you identify a coupler, you need to know why it matters: using the wrong one can leak, damage tools, or shut down a line.
1) Start by picking the application.
Why it matters: workshop tools tolerate more mismatch than industrial lines with high pressure.
Example: on a woodworking bench you might swap a quick-disconnect for a compressor hose; on an automotive assembly line a wrong coupler can stop production.
Steps:
- Decide if this is for a hand tool, a shop compressor, or an industrial system.
- Note the maximum pressure rating you need (e.g., 120 psi for many shop compressors, 250–300 psi for some industrial uses).
- Write that pressure and application on a sticky note and attach it to the hose.
Here’s what actually happens when you try to identify a coupler by sight.
Why it matters: appearances lie, and a misidentified fitting wastes time or causes leaks.
Example: a brass coupler with a red band looked like a standard ARO-style plug but had metric threads that didn’t seal.
Steps:
- Count visible features: bands, grooves, and locking balls.
- Note thread type visually (male/female) and rough diameter.
- Measure the male or female thread with calipers to the nearest 0.1 mm or 1/32 inch.
If you’ve ever grabbed the wrong fitting, this will save you another mistake.
Why it matters: quick checks prevent high-pressure failures and tool damage.
Example: I tested a repaired hose at 30 psi and caught a slow leak before hooking it to a 100 psi compressor.
Steps:
- After you fit the plug, pressurize to 10–30% of the working pressure (for a 120 psi system, test at 12–36 psi).
- Soak the joint with soapy water and watch for bubbles for 60 seconds.
- If bubbles appear, depressurize and re-thread or use the correct sealant.
The fastest way to train someone on couplers is a single-page reference.
Why it matters: quick guides stop guesswork and speed up fixes.
Example: a 1‑page laminate taped in a shop listed five common plugs with measured diameters and pictures, and apprentices stopped bringing the wrong parts.
Steps:
- Make a one-page chart with photos, measured thread sizes, and rated pressures.
- Laminate it and attach it at the workbench.
- Require new people to read it once before working.
You don’t need expensive test rigs if you’re careful with labeling and records.
Why it matters: good records prevent repeat errors and reduce downtime.
Example: after validating plugs, a mechanic labeled each hose with a vinyl tag showing plug type and max PSI; mismatches dropped to zero.
Steps:
- Label verified equipment with a durable tag showing type, thread size, and max pressure.
- Keep a simple log (paper or a shared spreadsheet) listing compatible plugs and their measured sizes.
- Update the log each time you add or verify a coupler.
If you’re unsure of standards, consult the official spec before using a part.
Why it matters: standards avoid guesswork and legal headaches in industrial settings.
Example: an installer checked the ISO standard for compressed-air fittings, confirmed thread form, and avoided a costly rework.
Steps:
- Look up the relevant standard (e.g., ISO 6150, BSP, NPT) matching your thread measurements.
- Match your measured diameter and thread pitch to the standard chart.
- Order replacement parts that explicitly state the standard and pressure rating.
Final practical checklist you can use right now:
- Identify application and required max pressure.
- Measure thread diameter and pitch with calipers.
- Compare to your laminated chart or a standard.
- Test at 10–30% working pressure with soapy water for 60 seconds.
- Label the verified hose or coupler and log it.
Keep one bold item in mind: always measure before you trust appearances.
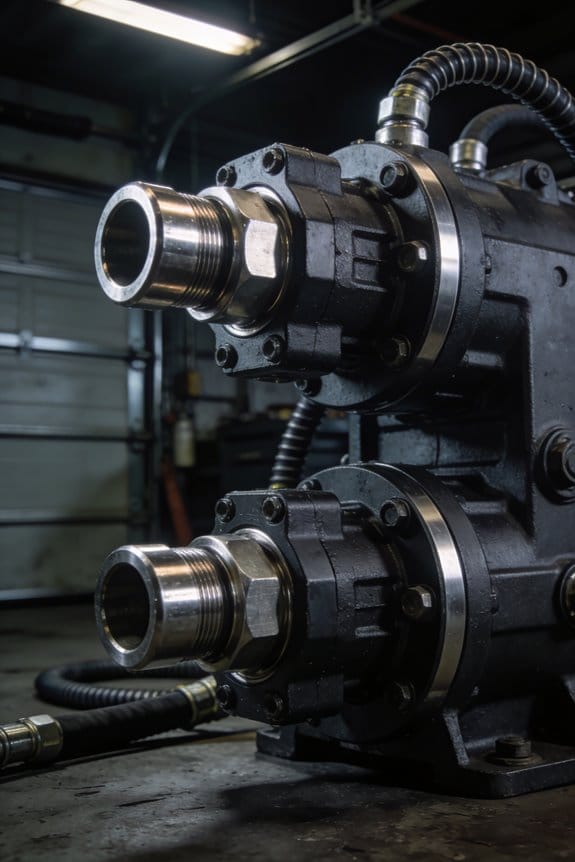
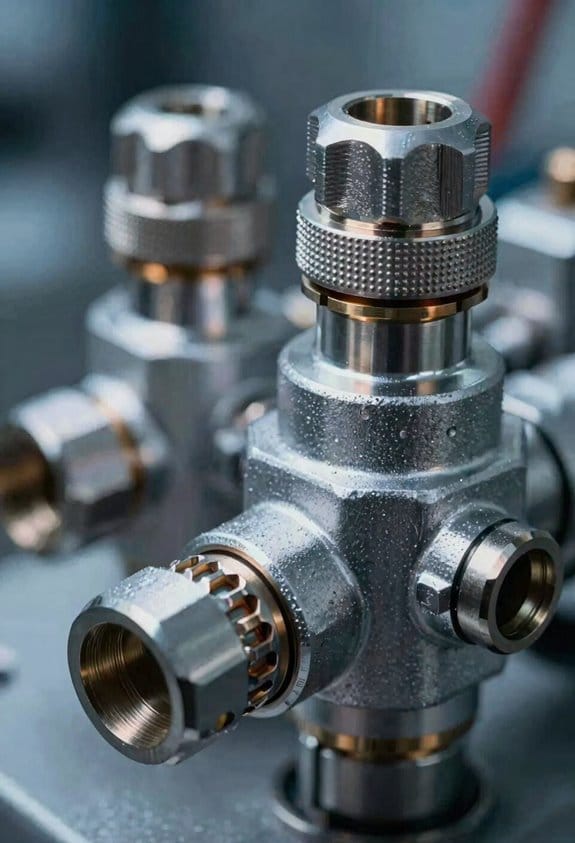
How Many Coupler Types Exist (Industrial, V-Style, Automotive, ARO, Universal)
If you’ve ever grabbed an air hose and wondered which coupler to use, this matters because the wrong choice leaks, won’t mate, or fails under pressure.
There isn’t one single correct count of coupler types because it depends on what you’re grouping. In everyday air and fluid work you’ll commonly see four named families: industrial (Milton‑style sizes 1/4“, 3/8“, 1/2“), V‑style, automotive, and ARO, plus universal couplers that claim to accept multiple plug types but vary by maker. For example, at a garage you might have a 1/4″ industrial plug on a blow gun, a V‑style on a spray rig, and a universal spare that only seals on low pressure.
Why that grouping matters: each family shares mating geometry, locking method, and pressure ratings, so counting types means deciding whether you list mechanical families, thread/size variants, or hybrids that mix features. A quick real test: try fitting a V‑style plug into an industrial coupler — it often won’t latch or will leak.
Industrial varieties and size codes
Why this matters: picking the right size stops leaks and maintains flow.
- Industrial (Milton style) commonly uses three hose/plug diameters: 1/4″ (most common for handheld tools), 3/8″ (medium flow), and 1/2″ (high flow for heavy tools). Example: your shop compressor to a 1/4″ blowgun uses a 1/4″ industrial coupler.
- These use a locking sleeve and ball bearings; replace a worn sleeve if the plug pops out.
- If you measure the plug diameter across the male shank, you’ll know which replacement to buy.
V‑style differences
Why this matters: V‑style couplers lock differently and seal differently.
- V‑style plugs have a tapered seal and a locking notch; they often give a tighter seal on quick connects used in paint or pneumatic tools. Example: an auto body sprayer kit often uses V‑style to reduce tiny leaks that ruin a finish.
- Check the seal shape before buying a replacement — taper vs. flat face matters.
Automotive couplers
Why this matters: automotive fittings are made for rapid tool swaps and shop environments.
- Automotive couplers are common on tire inflators and impact wrenches; they prioritize quick disconnect under dirty conditions. Example: tire shops use automotive style on inflators for fast service of many wheels per hour.
- They can be smaller in diameter and have a different locking profile than industrial types.
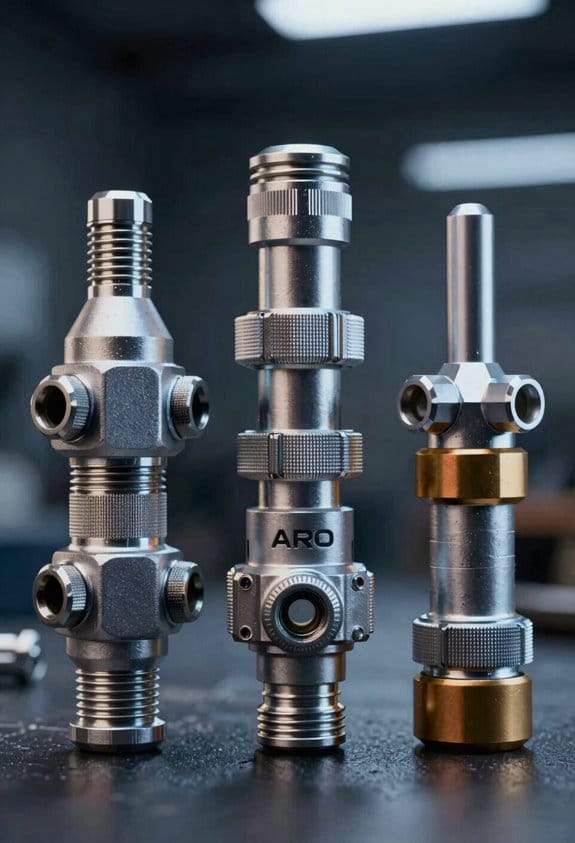
ARO couplers
Why this matters: ARO parts are designed for specific industrial tools and pressures.
- ARO is a brand/type with its own mating geometry and is common in factory pneumatic circuits. Example: an assembly line air tool pack might use ARO couplers so replacements match the system spec.
- Match pressure rating stamped on the coupler to avoid failure.
Universal couplers and tradeoffs
Why this matters: universals look convenient but may not seal at higher pressure.
- Universal couplers try to accept multiple plug shapes; some will hold at low PSI but leak or fail at higher PSI. Example: a universal you toss in your general tool kit might work for a garden airbrush at 30 PSI but leak on a 90 PSI impact wrench.
- If you use a universal, test it at the operating pressure before relying on it.
Plug compatibility limits
Why this matters: assuming interchangeability can damage tools.
– Measure plug diameter, inspect seal shape, and check locking method. Example: before swapping hoses between a compressor and paint gun, run a pressure test with a gauge at the coupler to verify no drop over five minutes.
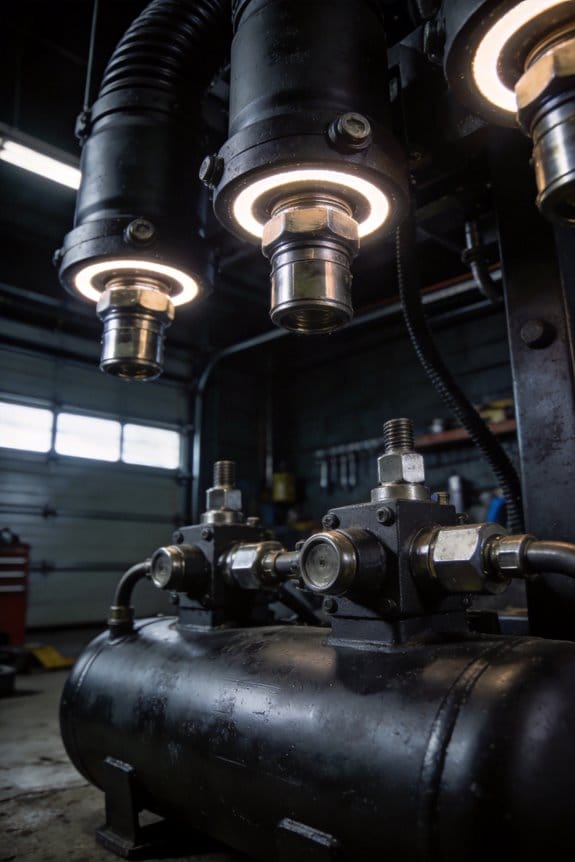
Common coupling methods (three main types)
Why this matters: knowing the method tells you how they’ll behave under load.
- Sleeve/ball (industrial): pull back sleeve to insert plug; secure under pressure up to typical compressor ratings.
- Cam/taper (V‑style): cam locks into notch and uses tapered sealing face for tighter seal.
- Quick push/pull (automotive/ARO variants): designed for fast swaps with a spring mechanism.
Example: if your tool requires 90–120 PSI, use sleeve/ball or cam/taper rated for that range.
Practical steps to choose the right coupler
Why this matters: following steps prevents mismatches and downtime.
- Identify the plug shape and measure shank diameter in inches.
- Check the coupler’s stamped pressure rating and compare to your tool’s max PSI.
- Match seal style (flat vs. tapered) and locking method.
- If using a universal, run a pressurized leak test at actual operating pressure for five minutes.
Remember: universals trade perfect seal for broader fit, so use them only when you verified performance at your working pressure.
Why Visual ID Fails : Stripes, Color Codes, and Inconsistent Marks
If you’ve ever relied on paint or stripes to identify couplers, this is why.
Why it matters: wrong identification causes leaks, downtime, and unsafe fittings. I’ve seen a thick band on one maker look almost identical to a thin line from another, so visual ID can fail fast.
How I check in practice:
- Measure the outer diameter (OD) and thread pitch with calipers; record values to 0.1 mm or 0.004 in.
- Compare those numbers to a reference chart or the sample plug in your kit.
- Inspect thread form: count threads per inch or use a 60°/55° gauge where relevant.
- If dimensions match, do a pressure test at the system’s operating pressure for 1 minute while watching for leaks.
Real-world example: on a farm, a green striped coupler looked right until I measured — OD was 2.15 in instead of the expected 2.00 in, so the plug wouldn’t seal and fluid sprayed when the tractor engaged.
Why color and stripes mislead: dyes fade and dirt masks hues, so color alone is unreliable. Markings on plugs rarely match couplers across brands, which creates false matches if you trust paint.
Practical replacement for relying on paint:
- Carry a laminated reference chart listing ODs, thread pitches, and common maker marks.
- Keep 2–3 sample plugs that represent the coupler types you use; label them with permanent marker.
- Use calipers and a thread gauge as standard tools in your bag.
Real-world example: at a roadside repair, having a sample plug labeled “2.00 in, 12 TPI” let you swap parts and restore service in 12 minutes instead of guessing.
When you’re unsure, test before final installation:
- Fit the plug dry to check mechanical engagement.
- Pressurize at 1.25× operating pressure for 60 seconds in a controlled setup.
- Inspect for seepage; retorque to spec if minor; replace if you see a spray.
Real-world example: during equipment commissioning, a quick pressure test revealed a micro-leak only visible under 1.25× pressure, avoiding a failure that would have occurred after a week in the field.
Final takeaway: don’t trust paint; trust measurements and a quick pressure test.
Thread Standards That Trip People Up: NPT, BSPP, BSPT, ISO (Leak Risks)
If you’ve ever swapped fittings and still had leaks, this is why.
Why it matters: mismatched threads can look like they fit but will leak under pressure. I once watched a maintenance tech put a hydraulic hose into a pump port that spun down tight but leaked until we swapped the adapter — the system lost a liter of fluid in ten minutes.
1) Match the thread type before you install anything.
- NPT (National Pipe Taper) is tapered and seals by metal-to-metal wedging; the threads get tighter as you screw them in. Example: a 1/4″ NPT pipe fitting will feel like it binds as you near full engagement.
- BSPP (British Standard Pipe Parallel) is parallel and relies on a gasket or O-ring to seal, so metal-to-metal contact alone won’t stop leaks. Example: a 1/4″ BSPP hose requires a flat washer or bonded seal at the face.
- BSPT (British Standard Pipe Taper) is tapered but uses a different thread form than NPT; they might screw together briefly but will leak under pressure. Example: a BSPT pump port and an NPT adapter can cross-thread or appear tight but fail at 50–100 psi.
- ISO metric threads use a different profile and pitch entirely and need matching ISO fittings or adapters.
Why it matters: if you mix these, the fittings may screw together yet still leak. I saw a compressor line leak at 120 psi because someone used PTFE tape on a parallel BSPP fitting instead of a proper gasket.
2) How to check and choose the right sealing method.
- Step 1: Identify the thread type. Use a thread gauge or compare the taper visually; measure diameter and count threads per inch (TPI) or pitch in mm. Example: a 1/8″ NPT has ~27 TPI; a 1/8″ BSPP has 28 threads per inch with a different angle.
- Step 2: Match the seal to the thread. For NPT use PTFE tape or pipe dope on the male threads; for BSPP use a flat gasket, bonded seal, or O-ring on the face; for BSPT treat like NPT but use BSPT-threaded counterparts.
- Step 3: Torque to spec. Use the manufacturer’s torque values or common ranges (e.g., 1/4″ fittings often around 10–20 Nm depending on material) and don’t rely on “finger tight plus wrench.” Example: overtightening a brass 1/4″ NPT can crack a fitting; under-torquing a steel 1/2″ NPT can leak at 200 psi.
3) Quick practical checks before you pressurize.
- Visually compare thread angle and if there’s a visible seat face for a gasket. Example: if you see a flat sealing surface around the hole, it’s probably BSPP or requires a gasket.
- Wrap PTFE tape only on tapered male threads and leave the first thread bare to avoid debris getting into the system.
- When in doubt, take the fitting to the supplier or photograph threads and compare to a reference chart; don’t guess.
Takeaway: always match thread type, size, and sealing method; a fitting that “screws in” can still leak at pressure.
When “Universal” Couplers Work : And When They Leak or Fail
If you’ve ever seen a coupler leak even though the threads matched, this is why.
Why it matters: a bad seal can dump fluid, ruin equipment, or injure someone in seconds. I’ve seen leaks start at a coupler on hydraulic lines during a service call when the job looked right on paper.
Start by asking whether a “universal” coupler really fits the job, not just the threads. Universal couplers claim to accept multiple plug types, but fit alone doesn’t guarantee a seal because pressure, vibration, or slight misalignment can push past the sealing surface. Example: on a skid-steer loader I worked on, a universal coupler accepted a tractor hose plug, but under 3,000 psi the coupler’s internal lip shifted and a spray leaked along the seam.
Why test after installation: you won’t know if it holds until you load it. Use one of these two simple tests so you catch problems before the machine runs:
1) Soap-bubble test:
- Pressurize the line to normal operating pressure (for many hydraulic systems that’s 2,000–3,000 psi; check your equipment manual).
- Mix dish soap and water, brush the solution over the coupler seam and connection.
- Watch for steady bubbles or foam forming for 60 seconds. Bubbles = leak.
2) Pressure-hold test:
- Pressurize the circuit to expected working pressure.
- Shut off pressure source and isolate the section.
- Observe pressure gauge for 5 minutes; a drop of more than 5–10% indicates a leak or internal seepage.
On a job where I replaced a universal coupler on a conveyor, the pressure-hold test showed a 12% drop in three minutes, and replacing the coupler fixed a persistent belt-contamination issue.
Check materials before you buy because seals and metals react differently to fluids and environments. Look for these specifics:
- Seal compound: specify NBR (nitrile) for petroleum oils, FKM (Viton) for high temperatures or aggressive chemicals, EPDM for water and glycol.
- Metal finish: choose stainless or plated steel when you expect corrosion, especially near saltwater or chemicals.
Example: a garden irrigation retrofit used a universal coupler with an EPDM seal and failed after weeks because the owner switched to an oil-based pesticide that swelled the seal.
Don’t overlook mechanical stresses: high flow rates and offset connections put extra load on locking mechanisms and sealing faces. Confirm the coupler’s rated working pressure and flow rating with the manufacturer and then do a realistic functional test before you rely on it in service. For instance, if the coupling will see 5 gpm at 2,500 psi, run that flow for several minutes and watch for heat, movement, or leaks.
Quick checklist before installation:
1) Verify thread AND mating-face compatibility.
2) Match seal material to fluid (use the list above).
3) Confirm rated pressure and flow.
4) Install and torque per spec.
5) Perform a soap-bubble or pressure-hold test at operating pressure.
If a coupler fails any of these checks, replace it with a properly rated, material-compatible unit and retest.
Quick On-Site Checklist: Identify the Right Plug and Coupler Fast
Before you start, know why this matters: using the wrong plug or coupler can leak, seize, or create a pressure hazard.
Here’s what actually happens when you inspect body shape and stripe patterns: they give fast visual clues you can act on. Use these steps:
- Look for body shape and stripe counts (example: single thin white stripe on a 1/4″ air coupler vs. two thick black bands on a hydraulic quick-disconnect). This saves you from swapping incompatible sizes on the spot.
- Compare diameters with a 1/4″ caliper or a coin (US quarter ≈ 24.3 mm) if you don’t have gauges.
- Mark the part immediately with a permanent marker: write size and type on the housing. This prevents repeat guessing.
Why check thread type before you torque anything: mismatched threads can strip or leak under pressure.
- Feel the thread pitch: count threads per 10 mm — coarse (≈1.5 mm pitch) often means BSPP/BSPT; fine (≈1.0 mm) often means metric or NPT variants. This tells you what gasket or seal you’ll need.
- Test taper vs parallel by seating a single thread only: if it bottoms out quickly, it’s tapered (NPT/BSPT); if it threads on more, it’s parallel (BSPP). Try this on a spare fitting first, not a live line.
- Example: on a job replacing a compressor hose, you found a male thread that stopped after two turns — that was NPT taper, so you used pipe tape and tightened to the specified 3–4 turns.
Why low-pressure field testing matters: a slow test reveals sealing problems without risking a blowout.
- Pressurize to 10–20% of working pressure (for a 1500 psi system, start at 150–300 psi).
- Watch for bubbles using soapy water or a leak detector spray and listen for hisses for at least 60 seconds.
- If you see bubbles, stop, depressurize, and re-seat or replace the seal.
- Example: on a forklift hydraulic line, a 200 psi test revealed a tiny bubble at the tail; replacing the O-ring fixed the leak before any heavy lifting.
Why you should label and record IDs: it stops repeat mistakes on future jobs.
- Tag both plug and coupler with a durable label or heat-shrink sleeve, writing size, thread type, and test pressure.
- Take a quick photo and store it with the job number on your phone.
- Example: after labeling a set of pneumatic couplers on a rental trailer, the team avoided two mismatched hookups that previously cost 30 minutes each time.
Quick checklist you can follow on site:
- Visually inspect body and stripe counts.
- Measure diameter with a caliper or coin.
- Check thread pitch and whether threads are tapered or parallel.
- Do a low-pressure test at 10–20% working pressure and watch for bubbles for 60 seconds.
- Label both ends and take a photo.
Final practical tip: when in doubt, use the spare fitting technique — find a known-good spare coupler, mate it, and pressure-test before committing.
Standards & Procurement Fixes Manufacturers and Buyers Should Make
Before you buy couplers or plugs, you need to know why supplier info matters: it prevents mismatches that cause leaks or gear failure. For example, a maintenance tech in a food plant who got couplers with slightly different thread pitches found leaks at the first shift; the plant lost a day of production and had to scrap product. Here’s a concrete fix you can ask for:
1) Publish exact dimensions and thread types
- Why this matters: you’ll avoid buying parts that look right but don’t fit.
- Steps:
- Require suppliers to list nominal and actual dimensions (diameter, thread pitch, keyway depth) in millimeters or inches.
- Require a reference drawing in PDF with tolerances (e.g., ±0.1 mm).
- Require thread spec ID (e.g., 1/4″ BSPP 19 TPI or M12×1.5).
– Real example: a compressor vendor supplied a PDF drawing showing M20×1.5 threads and tolerances, which let the plant verify fit before installation.
If you’ve ever had two parts that “looked the same” but didn’t mate, this is why. You should also require suppliers to state tested compatibility with specific models and list any adapter use. One sentence explains the payoff: you won’t install mismatched parts and trigger unplanned downtime.
Before you write labels, you need to know what information saves time: clear, visible type and size reduce field guesswork. On-site electricians at a construction site once spent two hours matching couplers because parts lacked markings and were covered in grease. Ask suppliers for these labeling rules:
2) Standardized visual labeling on plugs and couplers
- Why this matters: you and your team will identify parts at a glance.
- Steps:
- Require laser-etched or stamped labels that survive 500 hours of salt spray and 200 cycles of abrasion.
- Require marking for type, size, and compatible standards (example: “Type A, 1/4″ BSPP, ISO 7241-1”).
- Specify contrasting colors for quick sorting (e.g., blue for hydraulic, green for pneumatic).
– Real example: a rental company used color-coded and etched couplers; crews cut replacement time from 90 to 20 minutes.
Before you accept “universal” claims, you need test proof: contracts must force repeatable tests so claims are verifiable under real conditions. A rental fleet found a “universal” coupling leaked under side load, which hadn’t been tested by the supplier.
3) Specify test criteria and acceptance limits in contracts
- Why this matters: you’ll have measurable pass/fail results to enforce.
- Steps:
- Require leak test at specified pressures (e.g., 150% of rated pressure for 10 minutes with leak rate <0.1 L/min).
- Require side-load test (e.g., apply lateral force of 50 N and inspect for seal failure).
- Require cycle life test (e.g., 5,000 connect/disconnect cycles with performance within spec).
– Real example: an OEM included a 5,000-cycle test in its contract and rejected a batch that failed at 3,200 cycles, avoiding field recalls.
Before you buy many items, you need traceability so you can act fast when something goes wrong: lot info lets you isolate bad batches and run corrective actions. A brewery traced a leak back to one lot number and replaced only 120 units instead of 5,000.
4) Use purchase specs that reference accepted standards and require lot traceability
- Why this matters: you’ll be able to quarantine bad lots and ensure consistent quality.
- Steps:
- Reference recognized standards by number and edition (e.g., ISO 7241-1:2012) in purchase orders.
- Require lot or batch numbers on each shipment and on the certificate of conformity.
- Require supplier to retain test records for at least three years and provide them within 72 hours on request.
– Real example: a food-packaging line used PO references to ISO 7241 and got immediate test records during an audit, preventing cross-contamination.
You can start today with three specific actions:
- Update one purchase order to require PDF drawings with tolerances.
- Add a test-matrix clause with the three tests above and clear acceptance numbers.
- Require lot numbers and a one-paragraph supplier declaration on every shipment.
Do those, and you’ll cut field confusion, reduce failures, and make corrective action fast.
Frequently Asked Questions
Can I Safely Mix Couplers From Different Manufacturers in One System?
No, I wouldn’t mix couplers from different manufacturers without checks: verify material compatibility, matching torque standards, thread types and pressure ratings, test for leaks and performance, and avoid assuming universals work safely under load.
How Do Temperature and Chemicals Affect Coupler Seals Over Time?
I see seals sag like melting wax under heat: I tell you temperature accelerates material degradation, while chemicals cause chemical swelling, hardening or softening seals over time, so inspect, choose resistant elastomers, and replace proactively.
Are There Retrofit Kits to Convert Non‑Compatible Couplers Safely?
Yes — I’ve seen retrofit adapters that let non‑compatible couplers mate, but I won’t use them without verifying safety certifications, manufacturer approval, pressure ratings, and field testing to avoid leaks, failures, or voided warranties.
What Minimal Testing Ensures a Universal Coupler Under Load?
Like a drumbeat, I’d run pressure cycling, burst testing, leak checks, and lateral load trials; I’d monitor flow and coupling wear, record failures, and repeat cycles until results stabilize to verify a universal coupler under load.
Who Is Liable if a Coupler Failure Causes Equipment Damage?
You’re liable based on facts: I check manufacturer liability for defects first, then review contractual indemnity in purchase or maintenance agreements, and I may pursue supplier or operator responsibility if negligence is proven.