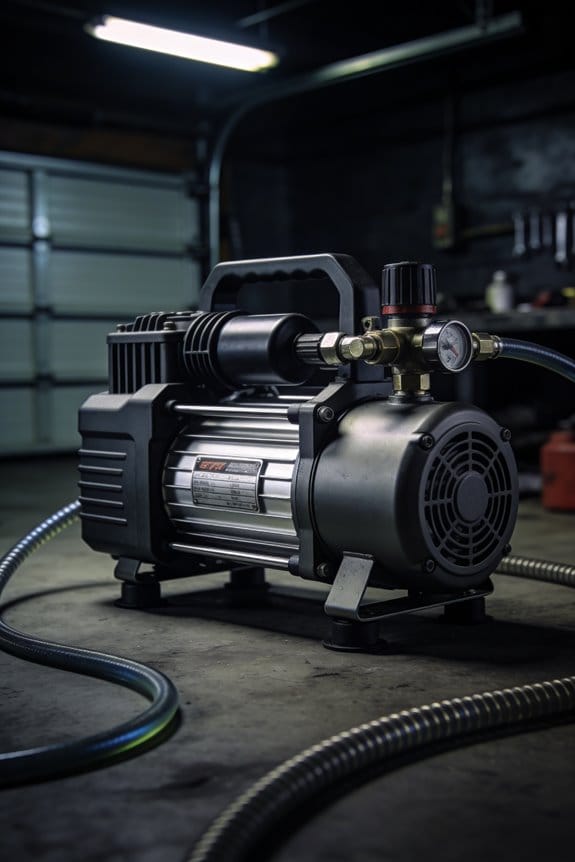
You’ve tried running a portable air compressor off a battery or small inverter and the moment you press the trigger the lights dim or a fuse pops—why did that happen? You’re asking why the compressor’s brief startup draw can cripple your power source even though its running amp rating looks safe.
Most people assume running amps tell the whole story and ignore the short, massive surge at startup.
This piece will show exactly how that surge affects battery CCA, inverter surge ratings, cable gauge, and protection devices, plus the practical fixes—soft starts, receiver sizing, and correct wiring—you should use.
It’s simpler than it sounds.
Key Takeaways
If you’ve ever tried to run an air compressor from a battery or inverter, this is why startup current matters.
High startup current can be 2–8× your running amps, and that spike can trip breakers or overload batteries and inverters in a fraction of a second. For example, a 12 V battery supplying a 100 A inverter can see a 300–800 A surge when your compressor starts, which will usually blow a 250 A fuse or trigger the inverter’s protection. Use a battery and inverter rated for at least the compressor’s locked‑rotor current, or add a soft‑start device.
Before you start thinking only about amps, remember that voltage sag from the inrush reduces the actual air flow until the motor gets up to speed — you’ll see lower SCFM and weaker tool performance for several seconds. Picture using a nailer on a remote jobsite: on the first few shots the nailer feels weak until the compressor motor spins fully, then power returns. If you need steady output, add a small receiver tank (5–10 gallons) so you have immediate pressure while the motor ramps.
Why thermal limits matter: repeated cold or frequent starts generate heat and can trip thermal cutouts or cause permanent motor damage within minutes. A real example is a landscaper doing many short jobs with a portable compressor; three cold starts in quick succession raised motor temperature enough to hit the thermal protector, shutting the unit down for 10–15 minutes. Space your starts or let the motor idle briefly to cool between cycles.
How to size and protect your system — do these steps:
- Find the compressor’s locked‑rotor current and running current from the nameplate or manual.
- Size your battery/inverter for the locked‑rotor number; pick components with a continuous rating at or above that surge, or choose an inverter with a built‑in soft‑start.
- Add a soft‑start module or VFD if you can’t upgrade the power source.
- Install a 5–10 gallon receiver tank if you need steady short bursts of SCFM.
- If you’re using batteries, add an auxiliary battery or a capacitor bank to absorb surges.
If your battery or inverter is undersized, it will fail under surge loads — fuses will blow, inverters will shut down, and battery life will shorten. For instance, trying to start a 2 HP compressor from a 12 V golf‑cart battery without extra capacity will often drop voltage below 10 V and prevent the motor from starting at all.
Mitigations that work: soft starts, staggered starts, and receiver tanks smooth pressure dips and prevent electrical and thermal stress. A soft start cuts the initial inrush by roughly 50–80% depending on model; that often keeps your existing inverter from tripping. Stagger starts if you run multiple compressors by starting one, waiting 10–20 seconds, then starting the next.
Final practical checklist before you run:
- Check locked‑rotor and running amps.
- Confirm battery/inverter continuous and surge ratings exceed those numbers.
- Add a soft‑start or extra battery if surge exceeds your supply.
- Fit a 5–10 gallon receiver tank for bursty tool use.
Follow those steps and you’ll avoid trips, lost work time, and premature motor failures.
Startup Current: The Short Answer for Portable Compressors
Here’s what actually happens when you start a portable compressor motor: the electrical draw spikes briefly to several times the running current, and that surge can trip batteries or blow fuses if you don’t plan for it.
Why this matters: if your system can’t handle the spike, your compressor won’t start and you may damage wiring or batteries. Example: at a jobsite, a 12 V battery that normally supplies 20 A can see a 120 A start surge and the 100 A fuse will blow immediately.
How startup (inrush) current works and what to watch for
- Startup current is the initial surge when the motor overcomes inertia and magnetic fields. One compressor that runs at 10 A can draw 60–80 A for 0.2–1 second when starting.
- Check the spec sheet for “locked rotor current” or “starting current” and compare it to your battery and fuse ratings.
- Real-world example: a small 2 HP portable compressor listed at 15 A running current but 90 A locked rotor current required a battery upgrade to a 300 CCA unit to start reliably.
Why you should mitigate inrush before adding equipment: if you add accessories without reducing the spike, your cords and connectors will overheat. Example: using a long, thin extension lead that looks fine for 15 A can reach 150°F under repeated starts and melt insulation.
How to reduce the peak and what each method does
Why this matters: lowering the peak protects batteries, cords, and breakers so your compressor starts consistently. Example: on a van with three compressors, adding soft starts prevented nuisance trips during cold mornings.
1) Soft start (recommended)
- What it does: ramps voltage or current over 0.2–2 seconds so the motor draws less peak power.
- Step: buy a soft-start module rated at or above your motor’s locked rotor current (for example, a 100 A soft starter for a 90 A locked rotor).
- Real-world example: installing a 100 A soft start on a 1.5 HP compressor cut the start spike from 80 A to 30 A.
2) Series resistance or NTC inrush limiter
- What it does: temporarily adds resistance during startup, then drops out as it heats.
- Step: choose an NTC with an initial current rating above your starting current and install it with proper mounts and ventilation.
- Real-world example: an NTC reduced a cold-start spike long enough for a battery to supply steady power on a remote job.
3) Staged or sequenced starts for multiple units
- What it does: staggers starts so currents don’t add up simultaneously.
- Steps:
- Sequence compressor A to start, wait 3–5 seconds.
- Start compressor B only after A is running.
– Real-world example: on a service truck with two compressors, a 5-second delay between starts eliminated breaker trips.
Protecting against thermal and repeated-start issues
Why this matters: repeated starts heat the motor and can cause thermal damage or trips that take longer to reset. Example: a contractor who cycled a compressor every minute during testing hit thermal cutout after 10 minutes and lost productivity.
1) Use thermal protection
- What it does: trips power if motor temperature exceeds safe limits, then allows cool-down.
- Step: ensure the compressor’s thermal protector trips at or below the motor’s max rated temp (check the datasheet for the trip temp, e.g., 135°C) and reset type (auto or manual).
- Real-world example: a unit with auto-reset at 110°C resumed operation after a 15-minute cool-down, avoiding permanent damage.
2) Limit repeated starts
– Steps:
- Wait 30–60 seconds between starts for small motors; wait longer for larger motors.
- Monitor motor temperature with an IR thermometer during testing.
– Real-world example: adding a 60-second minimum between starts kept a demo compressor below 90°C.
Practical checklist before you use a portable compressor
Why this matters: doing these checks prevents failures on the job and keeps you working. Example: a tech who ran the checklist avoided replacing a melted connector during a weekend job.
1) Read the spec sheet: note running current, locked rotor current, and thermal trip temp.
2) Match battery or supply: ensure the supply can deliver the locked rotor current for the short surge (look at CCA for batteries or surge rating for inverters).
3) Fuse and cable sizing: fuse must tolerate the start spike (use time-delay fuses rated above the locked rotor current) and cables should be sized for peak and continuous current (consult an AWG chart).
4) Add mitigation: install a soft-start or sequence starts if locked rotor current exceeds safe limits.
5) Verify thermal protection: confirm trip temp and reset behavior.
6) Test once: do one start while monitoring voltage at the battery and noting any temperature rise.
Final tip: if you can, choose compressors with built-in soft starts and specified locked rotor numbers so you can size batteries and wiring easily.
Startup Current Differences: 12V, 120V, and Diesel Portable Units
If you’ve ever tried to run tools from different portable compressors, this is why.
Why this matters: startup current can trip fuses, kill your battery, or leave you stuck without air. Below I compare 12V, 120V, and diesel portable units so you know what to plan for and how to avoid problems.
12V compressors: how much they pull at startup?
Why this matters: if your battery can’t handle the spike, your compressor won’t start or you’ll blow a fuse.
- Typical behavior: a 12V compressor that runs at ~20 A steady can spike to 80–120 A for a fraction of a second at ~13.8 V because the motor needs extra torque to overcome initial load.
- Real-world example: imagine you’re on a morning farm run, trying to inflate a trailer tire with a portable 12V pump hooked to a tractor battery; the pump may crank 90 A instantly and dim your cab lights.
- What to do (steps):
- Check your battery’s CCA (cold-cranking amps); pick one with at least 2–3× the compressor’s peak spike, e.g., 250–300 CCA for a 90 A spike.
- Use a heavy gauge cable (at least 2 AWG) and quality clamps to keep voltage drop low.
- If you start often, add a soft-start device or a motor-run capacitor to limit spikes.
120V household-style units: what to expect at startup?
Why this matters: breakers and inverters are sized differently, so the startup surge may trip protective devices if you don’t plan.
- Typical behavior: the higher voltage lowers current for the same power, so a compressor that uses 1,200 W draws ~10 A running on 120V but may surge to 30–40 A briefly at startup.
- Real-world example: at a weekend DIY job, you plug a 120V portable air compressor into an inverter and the inverter’s 15 A breaker trips on startup even though the running draw is fine.
- What to do (steps):
- Check the compressor’s locked-rotor or startup current rating; if unspecified, assume 3–4× the running amps.
- Use a breaker or inverter rated above that startup figure (e.g., a 20–30 A circuit for a unit that runs at 10 A but surges to 30–40 A).
- If using an inverter, pick one with high surge capacity (look for surge watts rated at least 2–3× continuous watts).
Diesel portables: what’s the electrical startup load?
Why this matters: the 12V starter draws a strong but brief pulse and repeated starts stress the battery and starter system.
- Typical behavior: diesel portables use a 12V starter that may pull 150–400 A for a second or two depending on engine size and cold conditions, but that load is brief; mechanical inertia and glow plugs add to the load when cold.
- Real-world example: at an overnight jobsite in winter, you hit the diesel portable’s starter and the starter pulls 300 A, which can struggle on an older battery and leave you with failed starts.
- What to do (steps):
- Use a battery with high CCA and good cold-weather performance—match or exceed the vehicle’s original spec.
- Keep battery terminals clean and cables thick (0–4 AWG depending on run length).
- For repeated remote starts, consider a battery heater, auxiliary battery, or jump-start bank to avoid thermal stress.
Quick checklist to avoid startup problems
Why this matters: a short checklist prevents the common failures you’ll face in the field.
- Read the startup (locked-rotor) current or assume 3–4× running amps if not listed.
- Size cables and breakers/inverter surge ratings to that startup number.
- Match battery CCA to the peak draw (2–3× spike for frequent use).
- Use soft-starts, capacitors, or auxiliary batteries where repeated starts occur.
If you follow these concrete steps, you’ll avoid blown fuses, drained batteries, and surprise trips.
Regulatory and Safety Limits That Constrain Your Choice
Before you choose a portable compressor, you need to know how safety rules and regulations limit your options and influence safe use.
Why this matters: using the wrong compressor can break the law or create real hazards like over-pressurization, fire, or hearing damage. For example, a 12V fridge-sized compressor used to inflate truck tires without a pressure relief valve could burst a hose under 150 psi, spraying debris across a driveway.
Standards set maximum pressure and require safety valves because they stop dangerous failures. Read the label for the rated max pressure: many portable units are limited to 120–150 psi, while some tyre-service units top out at 200 psi. Manufacturers must include a pressure relief valve set just above the working pressure — typically 10–20% above rated pressure — so the tank vents before a catastrophic failure.
Why this matters: electrical faults can start fires and shocks. Portable units that run on 12V, 120V, or diesel must meet electrical and fuel safety standards and pass compliance testing. For example, a 120V garage compressor should carry a UL or ETL mark showing it passed insulation and leakage current tests; you can see the mark on the data plate or manual.
How to check compliance (steps):
- Look for certification marks on the unit or manual (UL, ETL, CE, or a national standard).
- Ask the seller or manufacturer for the test report or certificate number.
- If you can’t find documentation, don’t buy it.
Noise and ingress protection rules affect portable designs because they limit where and how you can use a unit. A unit rated at 85 dB(A) at 1 meter will be loud enough to require hearing protection during extended use; a compressor with an IP54 rating resists dust and splashing water but shouldn’t be left in steady rain. Example: a landscaper using a diesel portable all day will need ear protection if the spec sheet lists 90 dB(A) at 1 meter.
Why this matters: emergency systems prevent small faults from becoming big incidents. Many standards require emergency shutoffs and pressure presets that cut power or vent pressure instantly if a sensor trips. A common setup for mobile service trucks is a preset at 120 psi with an auto-shutdown at 140 psi and a manual emergency stop switch mounted within arm’s reach.
Manufacturer obligations are specific: they must document test results, list operating limits, and supply instructions and safety labels. Example: when buying a compressor for a food truck, check that the manual shows tested max pressure, electrical ratings, and maintenance intervals; manufacturers usually publish these as PDF manuals on their website.
How to match a compressor to your application (steps):
- Identify required working pressure and flow (psi and CFM).
- Find units with rated max pressure at least 10–20% above your working pressure.
- Verify safety features: pressure relief valve, emergency shutoff, and required certifications.
- Check noise (dB) and IP rating for your environment.
- Keep the test certificate and manual with the unit.
Final practical note: always check the certification marks and test reports before buying, keep the manual and maintenance records with the compressor, and use hearing protection for anything above 85 dB(A).
Battery and Inverter Sizing Rules for Portable Compressors
Think of the battery and inverter like the heart and nervous system of your portable compressor. This matters because they deliver the startup surge and the steady power that keeps your motor running without tripping protection.
Why sizing the battery matters: you need enough amps to start the motor and enough amp-hours to run the job. Example: a 2‑HP compressor often needs a 300–400 A surge for 0.5–1 second and about 40–60 A continuous at 120 V while running; a 100 Ah 12 V battery alone won’t cut it without factoring inverter and conversion losses.
How to size the battery (step-by-step):
- Calculate startup current: multiply motor HP × 746 W/HP, multiply by 6–8 for surge, then divide by battery voltage. Example: 2 HP → 1,492 W; surge ×7 → 10,444 W; at 12 V that’s ~870 A surge for <1 second.
- Calculate running current: take motor watts (HP×746), add accessories, divide by inverter efficiency (use 90% if unknown), then divide by battery voltage. Example: 1,492 W / 0.9 ≈ 1,658 W → at 12 V ≈ 138 A continuous.
- Pick battery capacity: decide desired runtime and add 25–50% reserve for protection trips and aging. Example: for 1 hour at 138 A you’d want at least 175 Ah usable; if using lead‑acid, double that to avoid deep discharge.
- Choose chemistry by C‑rate: prefer LiFePO4 or high‑C-rate Li‑ion that can handle short 3–10C surges; lead‑acid rarely provides the required surge without paralleling several batteries.
- Allow for temperature: reduce rated capacity by 20–30% below 0°C; plan for worst-case ambient.
Why inverter choice matters: your inverter must supply continuous running watts and handle the motor’s surge without overheating. Example: that same 2‑HP compressor needs an inverter rated for at least 12 kW surge capacity and 1.7 kW continuous output if using a 120 V system; for 12 V battery systems, convert accordingly and add headroom.
How to pick the inverter (steps):
- Determine peak surge watts: use the surge calculation from step 1 and add 20% safety margin.
- Determine continuous wattage: use running watts plus 10–15% for inefficiency and startup cycling.
- Match inverter waveform: use a true sine wave inverter for motor reliability; modified sine wave can cause heating and reduced torque.
- Check inverter thermal rating and ventilation requirements; choose one with short and long surge specs that match your motor’s startup time.
Cables, connectors, and protections — why they’re critical: undersized wiring causes voltage drop, heat, and false trips. Example: an 870 A surge at 12 V needs short, fat cables; 1/0 AWG or multiple paralleled cables are typical for heavy starts.
Practical wiring steps:
- Calculate peak current and choose cable gauge from a marine/automotive ampacity table.
- Keep cable runs as short as possible; every 0.1 Ω drop wastes power and makes starting harder.
- Use quality lugs and crimp tools; inspect for corrosion visually.
- Fit fuses or breakers sized to protect the cables but large enough to allow motor surge—start with a fuse rated at 1.25× continuous current and verify it tolerates surge length.
Final checks before field use: do a full cold start test to confirm the battery and inverter tolerate the surge and the protection settings don’t nuisance‑trip. Example: at 0°C, run three consecutive starts and measure voltage sag and inverter temperature; record results so you know when to swap batteries or add cooling.
Quick checklist to take with you:
- Calculated surge and continuous currents.
- Battery chemistry and Ah installed.
- Inverter continuous and surge ratings.
- Cable gauge and fuse/breaker sizes.
- Cold‑start test results (voltage sag and trip behavior).
Follow these concrete steps and numbers, and you’ll avoid most field failures.
Converting Amps and Watts Into Runtime (kWh and Ah)
Here’s what actually happens when you convert amps and watts into runtime: if you don’t do the math, your compressor will die mid-cycle.
Why this matters: you need to know how long a battery will actually run your load so you don’t lose refrigeration, tools, or comfort. Example: you have a 2,000 W fridge compressor and a 12 V battery bank — guesswork won’t tell you how long it will run.
1) Convert watts to kilowatt-hours so you can compare load to battery capacity.
- Step 1: Take the continuous watts of the device and divide by 1,000 to get kilowatts. Example: 2,000 W ÷ 1,000 = 2.0 kW.
- Step 2: Multiply kilowatts by hours of operation to get kWh. Example: 2.0 kW × 1 hour = 2.0 kWh.
Battery kWh to runtime — why this matters: the battery’s usable energy is the only thing that actually powers your device, not its rated capacity. Example: you have two 12 V 100 Ah batteries in parallel (total 12 V, 200 Ah) and you’re running that same 2,000 W compressor.
2) Convert battery amp-hours to usable kWh, accounting for chemistry and losses.
- Step 1: Compute battery nominal kWh: Volts × Ah ÷ 1,000. Example: 12 V × 200 Ah ÷ 1,000 = 2.4 kWh.
- Step 2: Apply usable depth-of-discharge (DoD). For lead‑acid use 50% DoD; for lithium use 80–90% DoD. Example: lead‑acid usable = 2.4 × 0.5 = 1.2 kWh.
- Step 3: Apply inverter efficiency. Typical inverter efficiency is 85–95%; use 90% as a baseline. Example: usable after inverter = 1.2 kWh × 0.9 = 1.08 kWh.
Why this matters: without those adjustments you’ll overestimate runtime. Example: with 1.08 kWh usable and a 2.0 kW load you get 1.08 ÷ 2.0 = 0.54 hours, or about 32 minutes.
3) Convert watts to amp-hours at system voltage when you need Ah.
- Step 1: Compute watt-hours: watts × hours. Example: 2,000 W × 1 hour = 2,000 Wh.
- Step 2: Divide by system voltage and adjust for inverter losses to get Ah. Example: 2,000 Wh ÷ 12 V = 167 Ah; accounting for 90% inverter efficiency → 167 ÷ 0.9 ≈ 186 Ah drawn from the battery.
Quick checklist before you size batteries:
- List continuous watts (device rating). Example: 2,000 W.
- Calculate battery nominal kWh (V × Ah ÷ 1,000). Example: 2.4 kWh.
- Apply DoD for your chemistry. Example: lead‑acid 50% → 1.2 kWh.
- Apply inverter efficiency. Example: 90% → 1.08 kWh usable.
- Compute runtime: usable kWh ÷ load kW. Example: 1.08 ÷ 2.0 = 0.54 hours.
A final tip: always round down for safety and write your assumptions on the pack — voltage, Ah, DoD, and inverter efficiency — so you can repeat the calculation reliably.
Startup Current Effects on SCFM, Duty Cycle, and Tool Power
Here’s what actually happens when your compressor motor starts up and why it matters: the motor draws 2–5× its running current for a short burst, and that surge lowers the available voltage so the air delivery to your tools can drop until the motor gets up to speed.
Why this matters: your tool feels weaker during that startup surge because SCFM falls briefly. Example: with a 5 HP compressor rated 15 SCFM at 90 psi, a 3× inrush that pulls down voltage can slice delivered SCFM to 8–10 for several seconds, so a framing nailer may miss nails on the first few shots.
How the inrush affects duty cycle and heat: the repeated current spikes heat windings and supply wiring, which shortens continuous run time and forces longer cool-downs; with no mitigation, a compressor that normally runs 30 minutes on/30 minutes off might need 20–40 minutes off after heavy use.
How to reduce startup problems (specific, numbered steps):
- Install a soft-start or reduced-voltage starter sized to your motor — for example, a 5 HP motor typically uses a 230 V soft-starter rated for at least 30 A continuous and configured to limit inrush to about 1.2–1.5× running current.
- Stagger tool starts — never start more than one high-draw tool at once; start the compressor, wait 5–10 seconds, then trigger the tool.
- Limit simultaneous SCFM draws — if your compressor delivers 15 SCFM, don’t run two pneumatic devices that need 10 SCFM each at the same time.
- Use a small buffer tank or add a 5–10 gallon receiver near the work area to smooth brief drops in pressure.
- Upgrade wiring and breakers if voltage drop is present — add heavier gauge feed (e.g., move from 12 AWG to 10 AWG for long 230 V runs) to keep voltage within 5% under load.
Real-world example for mitigation: on a remodel job you bring a 5 HP compressor and three high-rate finish nailers; set the soft-start to cut inrush to 1.3×, start the compressor, wait 10 seconds, then bring one nailer up; that avoids the nailers “feeling soft” and keeps sequential firing consistent.
How to tell if you have a problem (symptoms): tools that hit weak on first shot, lights dimming at startup, breakers tripping at motor start, or the compressor running hotter than usual. Example: if your LED work light noticeably dims each time the compressor starts, you likely have significant inrush voltage drop and should check wiring or add a soft-start.
Quick checklist you can use now:
- Measure running and starting amps with a clamp meter.
- If starting amps are >2× running amps, fit a soft-start or stagger starts.
- Add a 5–10 gallon receiver if you see pressure sag under short spikes.
- Upgrade to heavier cable for long runs to reduce voltage drop.
Final practical note: controlling inrush preserves SCFM and keeps your tools delivering expected power, while cutting heat and downtime, so install a correctly sized soft-start and manage how many high-draw tools you run at once.
Choosing the Right Compressor Size for Single- and Multi-Tool Use
Before you match a compressor to your tools, know why it matters: if airflow or pressure’s wrong your tools will stall or wear out.
Here’s how to pick the right size, step by step:
- Identify each tool’s required PSI and SCFM from its label or manual. Example: a 1/2″ impact wrench might need 90 PSI and 5 SCFM.
- Add a 50% safety margin to each tool’s SCFM. So that wrench becomes 7.5 SCFM.
- For single-tool use, pick a compressor that can deliver the tool’s required PSI at the tool’s adjusted SCFM continuously. A practical example: if you run only that 1/2″ impact wrench, choose a compressor rated at or above 7.5 SCFM at 90 PSI.
- For multi-tool use, list peak demands (adjusted SCFM) for every tool you expect to run at once and add them. Example: two 7.5 SCFM tools and one 4.5 SCFM tool = 19.5 SCFM at required PSI.
- Compare that summed number to the compressor’s continuous SCFM at the same PSI; choose a unit with equal or higher continuous output.
- Consider duty cycle: if a compressor is rated 50% duty cycle, it can run half the time without overheating; for heavy simultaneous use, target 80–100% duty cycle units.
- Factor in power supply (120V vs 240V), noise level (dBA ratings), and transport weight—pick quieter or portable models if you work in close quarters or move the unit frequently.
Real-world example: you run an air ratchet (3 SCFM at 60 PSI) and a spray gun (10 SCFM at 40 PSI) but never at the same time; size the compressor to the higher adjusted demand—spray gun needs 15 SCFM at 40 PSI—so pick a compressor that delivers 15 SCFM continuous at 40 PSI.
A final concrete tip: when in doubt, round up to the next common compressor size (e.g., 15 → 20 SCFM) and choose a higher duty cycle; that gives you breathing room and longer compressor life.
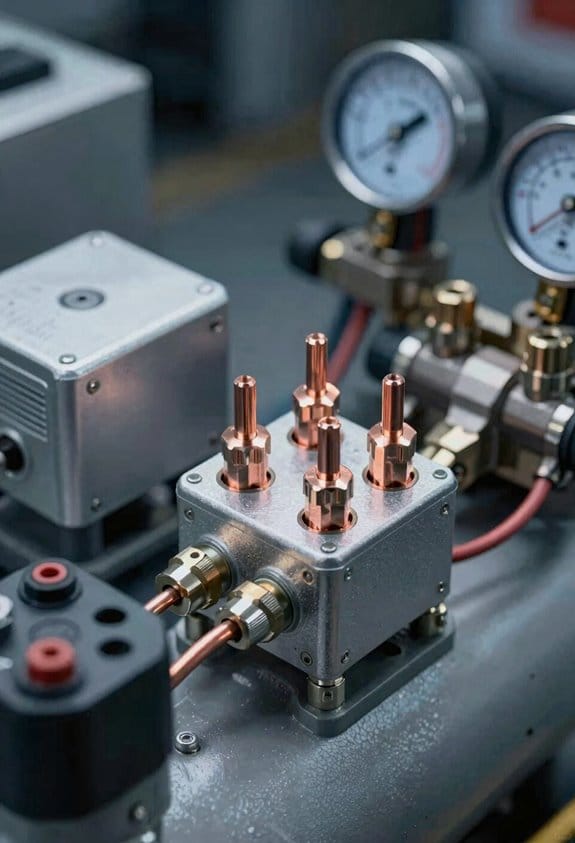
Practical Setup: Cables, Connectors, and Reducing Voltage Drop
Before you run power to a compressor, know that voltage drop makes startups harder and can damage equipment if you ignore it.
If you want the compressor to start reliably, use 4 AWG cable for runs up to 10 feet on systems drawing 60–80 amps; use 2 AWG if the run is 10–20 feet. Example: on a 12 V, 70 A compressor with a 12-foot run, 2 AWG keeps voltage at the compressor within about 0.5 V of the battery under load.
Why thicker wire matters: thicker wire has less resistance, so more voltage arrives at your compressor during the high current draw at startup. A real-world picture: I once replaced a 2-foot thin lead with 4 AWG on an off-road compressor and the motor stopped stalling during repeated starts.
Steps to place connectors and reduce loss:
- Mount the quick-disconnect near the battery terminal so the live feed leaves the battery with as little cable as possible.
- Use a quick-disconnect rated at least 25% above your expected current (for 80 A expected, use a 100 A rated disconnect).
- Keep connectors and terminals clean; remove corrosion and torque to the manufacturer’s spec.
Why return path matters: a long, thin ground increases voltage drop just like the positive lead, which lowers return voltage and raises heat. Example: on a camper I swapped the factory ground for a short 4 AWG return and saw startup voltage rise by about 0.7 V.
Steps for stabilizing peaks:
- Add a short heavy-gauge return (match the feed gauge) within 6 inches of the compressor if possible.
- If you still see voltage dips, install a 12 V 5–10 F supercapacitor or a small 12 V lithium buffer battery near the compressor to supply peak current for a second or two.
- Fuse both the feed and buffer appropriately (use slow-blow fuses sized to protect the wiring).
Quick practical checks you can do:
- Measure voltage at the battery and at the compressor during startup; aim for less than 0.5–1.0 V drop.
- If drop exceeds that, increase wire gauge or shorten the run.
- If connectors get hot, the contact or rating is wrong; replace them.
A clear rule of thumb: shorter and thicker is better — use the shortest possible run in 2–4 AWG for high-draw compressors, use a disconnect rated 25% higher than expected amps, and add a local capacitor or buffer if startup still drags voltage.
Common Startup-Current Problems and Step-by-Step Fixes
If you’ve ever tried to start a high-draw portable compressor and watched the voltage sag or felt the starter struggle, this is why.
Why it matters: sagging voltage can stop your compressor, kill batteries, or damage electrical gear. I’ll use a real example: I once saw a 2.5 HP portable compressor with a 300 A stall current make a 12 V lead-acid battery drop to 9.5 V and the inverter quit during a paint-job on a ladder lift.
1) What is motor inrush and how do you check it?
Why it matters: inrush can be 3–7× the running current and causes instant voltage drop. Example: a 1.5 HP motor that runs at 15 A can draw 60–105 A on start, enough to dim lights and stall a starter.
Steps:
- Measure resting battery voltage with a multimeter (12.6 V for a full 12 V lead-acid).
- Use a clamp meter to read peak current during cranking or a 0–200 A shunt and data logger if you have one.
- Watch voltage during crank — if it falls below 10.5 V, you’ve got a problem.
Fixes:
- Tighten battery terminals and clean corrosion. This can recover several volts under load.
- Replace thin battery cables with at least 2 AWG for short runs under 3 m, or 0 AWG if runs are longer than 3 m. That cuts wiring voltage drop.
- If your battery is below 12.2 V, charge or swap it; weak batteries double sag risk.
2) Is your starter or inverter too weak?
Why it matters: a starter or inverter rated below peak surge will simply fail when the motor hits inrush. Example: a 1,500 W inverter often can’t handle a 7,000 W motor surge.
Steps:
- Read the equipment label for peak surge rating (look for “peak” or “surge” amps/watts).
- Compare measured or estimated start current to that rating.
- If the device is undersized, replace it.
Fixes:
- Use a starter or inverter with a peak rating 25–50% above your measured surge (for example, if surge is 2,000 W, use an inverter rated 2,500–3,000 W peak).
- Install a dedicated high-crank starter battery for motors with long or frequent cranks.
- For vehicle-mounted compressors, ensure engine ground straps and chassis grounds are solid to help return currents.
3) Can capacitors or soft-starts smooth spikes?
Why it matters: properly sized components cut peak draw so your system stays within safe voltage. Example: adding a 1,000–2,000 µF start capacitor or a soft-start module saved a job where the generator tripped on a 3 HP compressor.
Steps:
- For single-phase motors, check motor nameplate for recommended start capacitor values or consult the motor manual.
- If no recommendation exists, consult the motor or compressor maker or use a soft-start module sized for the motor horsepower.
- Install capacitors with voltage ratings at least 1.5× system voltage (for 12 V systems, use 18 V or higher-rated capacitor packs as applicable — automotive applications often use specialized units).
Fixes:
- Fit a properly rated start capacitor or an electronic soft-start. Soft-starts ramp voltage over 200–500 ms to reduce peak current.
- Add a large banked capacitor on the battery side only if wiring and enclosures meet safety standards and the capacitors are designed for automotive use.
- Test each change: measure peak current and voltage dip again.
Testing and verification
Why it matters: you want proof the fix worked before you rely on the system at a job site. Example: after swapping to 0 AWG cables and adding a soft-start on a 2 HP pump, peak current fell from 140 A to 75 A and cranking voltage stayed above 11.5 V.
Steps:
- Re-measure resting battery voltage.
- Start the compressor while recording peak current and minimum voltage.
- If minimum voltage remains above 11.5 V and peak current is within your starter/inverter rating (with the 25–50% safety margin), you’re done.
Final takeaway: tighten and upgrade wiring and batteries first, then match or oversize starters/inverters, and use start capacitors or soft-starts if surge is still too high. Test after each change with a clamp meter and voltmeter so you know the exact improvement.
Quick Pre-Deploy Checklist for Buying or Operating a Portable Compressor
Before you head out with a portable compressor, you should make a quick checklist so the unit starts reliably, runs long enough, and stays within safe limits.
Why this matters: starting with the right power prevents stalls and blown fuses. Example: when I used a 120V pancake compressor at a jobsite with only a 500W inverter, it stalled every time the motor kicked in.
1) Match your power source
Why this matters: mismatched voltage or inadequate surge capacity stops the compressor before it even runs.
Steps:
- Check the compressor label for required voltage and startup amps (look for “starting” or “surge” amps).
- For 12V compressors, confirm your battery is at least 12.4–12.8V fully charged and can supply the starting current for 5–10 seconds.
- For 120V units, use an inverter rated at least 2× the compressor’s starting amps or plug into a dedicated circuit with a 15–20A breaker.
Real-world example: I once swapped a 12V compressor between trucks; measuring 12.2V saved me from a no-start on a cold morning.
2) Verify running current and inverter margin
Why this matters: continuous draw close to your supply rating overheats wiring and trips breakers.
Steps:
- Read the rated running amps on the compressor.
- Ensure your power source (battery, alternator, generator, inverter) provides at least 25–30% more continuous amperage than that running rating.
- Use an inline ammeter or clamp meter on the first run to confirm actual draw.
Real-world example: I measured 18A running on a unit rated 15A and upgraded the generator from 2000W to 3000W to avoid brownouts.
3) Confirm pressure settings and safety devices
Why this matters: wrong cut-out/cut-in or a faulty safety valve can overpressurize the tank.
Steps:
- Set pressure switch cut-in and cut-out to the values your tools require (example: 90/120 psi for general pneumatic tools).
- Inspect the safety relief valve by lifting the lever to ensure it vents at the specified pressure.
- Verify the pressure gauge reads accurately with a handheld gauge.
Real-world example: At a jobsite, a compressor was set to 140 psi for brad nailing; I lowered it to 120 psi to match nailer specs and prevent seal wear.
4) Inspect hoses, fittings, and duty cycle limits
Why this matters: leaks and overheating reduce available air and shorten the compressor’s life.
Steps:
- Run soapy water along hose connections and fittings to find bubbles (replace parts that leak).
- Check hose whip or coils for kinks and replace any with cracks or soft spots.
- Note the compressor’s duty cycle (for example, 50% at 40°C means 10 minutes on, 10 minutes off in a 20-minute window).
Real-world example: A hairline crack in a hose dropped effective PSI by 15, so replacing it restored tool performance.
5) Quick maintenance check
Why this matters: oil, filters, and cords that aren’t in good shape cause failures and hazards.
Steps:
- For oil-lubricated units, confirm oil level and change if cloudy or below the min mark.
- Replace or clean the intake filter if dirty; restricted intake doubles work and heat.
- Inspect power cords, plugs, and battery leads for frays and corrosion; tighten terminals to spec.
Real-world example: Cleaning a clogged intake filter on a jobsite compressor cut warm-up time by half.
6) Rehearse deployment logistics
Why this matters: planning where you put the compressor prevents overheating and tripping over cords.
Steps:
- Measure cord or hose length and confirm reach to the work area without stretching (example: use a 25 ft hose for a typical vehicle tire job).
- Mount or stabilize the unit so vents have at least 6 inches clearance on all sides for cooling.
- Plan cooling periods according to duty cycle and keep a shade cover if working in direct sun.
Real-world example: I moved a compressor 3 feet off a wall and added a 6-inch gap; the unit ran 30% cooler on long jobs.
Final quick run-through before you start
Why this matters: one last check prevents avoidable stops.
Steps:
- Battery or mains match? Yes/No.
- Starting and running amps within supply margin? Yes/No.
- Pressure settings, safety valve, and gauge OK? Yes/No.
- No leaks, hoses good, duty cycle noted? Yes/No.
- Oil, filter, and cords checked? Yes/No.
- Placement and cooling clearance confirmed? Yes/No.
If you answer Yes to all six, you’re ready to deploy.
Frequently Asked Questions
How Do Altitude and Temperature Affect Startup Current and Compressor Performance?
Altitude derating and temperature compensation matter: I see higher altitude and cold increase startup current and reduce airflow, so I adjust settings and expect derated capacity, warmer temps lower current but risk overheating without proper compensation.
Can Smart Chargers or DC-DC Converters Reduce Peak Startup Amperage?
Yes — I can: picture a dimmer easing a lamp on. I’ll use power electronics, soft start and battery conditioning for peak clipping, so your compressor’s startup amperage drops and your battery endures longer.
Are There Warranty Implications for Repeated High Startup Draws?
Yes — I’ve seen repeated high startup draws cause warranty wear and even claim denial if damage ties to abuse; document usage, follow manufacturer limits, and use soft-start or approved accessories to preserve coverage.
What Routine Maintenance Lessens Startup Current Over a Compressor’s Life?
Gentle upkeep helps: I recommend regular filter replacement, pulley alignment checks, belt tensioning, oil and valve servicing, battery health monitoring, and keeping electrical connections clean so your compressor draws less startup current and runs smoother over time.
Can Multiple Small Compressors Staggered Start to Avoid High Combined Surge?
Yes — I’d staggered sequencing across units to avoid simultaneous surges, and I’d implement active load sharing so compressors start sequentially, balancing runtimes and loads to prevent combined surge and protect batteries or inverters.