You’re standing in your shop as a varnished nozzle leaves oily residue on a finished part and you can’t tell whether the compressor is to blame or the filters.
You’re asking whether oil‑free compressors really stop that carryover and if they’ll cut maintenance without sacrificing uptime.
Most people assume swapping compressors is just about buying a quieter or cheaper unit and neglect matching capacity, duty cycle, and controls.
This piece shows you, in plain language, when oil‑free units eliminate oil carryover, how to size for CFM and pressure, what controls and storage you need, and how to estimate payback.
It’s easier than you think.
Key Takeaways
Here’s what actually happens when you switch to an oil-free compressor: you remove contamination risks that can ruin sensitive work. If you make or repair electronics, paint vehicles, or package food and medical supplies, oil carryover can leave invisible films that cause rejects; an oil-free compressor prevents that, so you avoid rework and customer complaints.
Before you buy, know why maintenance drops with oil-free designs: you stop doing oil changes, ditch related filters, and eliminate oily waste disposal. That saves specific technician time — plan on about 1–2 hours saved per month on a small shop compressor — and reduces monthly consumable costs by roughly $20–$60, depending on oil and filter prices.
The difference between fixed-speed and VSD (variable speed drive) units comes down to matching air to demand. VSD-equipped oil-free compressors typically cut energy use by 18–30% because they slow the motor when you need less air, which lowers kWh and your electric bills. For example, a 25 hp VSD oil-free unit running at 60% load can save around 4,000–6,000 kWh per year compared with a fixed-speed model.
If you’ve ever wrestled with condensate and seals, you’ll appreciate that oil-free machines simplify plumbing and disposal. Without oily condensate you often only need a basic separator and a drain to municipal systems, not an oil-water separator and hazardous-waste paperwork; a small bakery I know replaced its oil-laden unit and cut hazardous disposal trips from monthly to zero.
Before you commit, understand warranty and uptime benefits: oil-free compressors give cleaner service records and fewer seal failures, which helps you meet warranty terms and keep equipment running. One auto-shop replaced an older oil-lubricated unit and reported two fewer unplanned shutdowns in a year, translating to about eight extra production hours saved.
Should You Buy an Oil‑Free Compressor for Your Workshop?
Before you buy an oil‑free compressor, you need to know whether your work actually requires oil‑free air. Why it matters: if oil in compressed air would ruin parts or contaminate processes, using oil‑free air prevents that damage and can save you time and money treating rejects.
If you’re doing electronics cleaning or painting small food containers, for example, oil residue will show up on solder joints or paint — so choose an ISO Class 0 unit that guarantees no oil carryover.
How do oil‑free compressors change maintenance and costs for you? Maintenance matters because oil‑free units eliminate regular oil changes and the hassle of disposing of used oil. A real example: a one-man woodshop that used to change oil every 200 hours stopped buying 5‑liter oil jugs and saved about $120 a year on supplies and disposal fees.
Steps to compare lifecycle costs:
- List your compressor runtime per week (hours).
- Multiply by 52 for annual hours.
- Estimate oil and filter costs with an oil compressor ($/year).
- Compare that to the higher upfront price of an oil‑free model.
This will give you a payback window in years.
Does an oil‑free compressor run quieter? It can, and that affects comfort. Why this matters: loud compressors reduce communication and increase fatigue in tight shops. For example, a modern scroll oil‑free unit might run at 60 dB versus 75 dB for an old reciprocating oil‑lubricated unit — you’ll notice the difference while talking across your bench.
Match capacity and duty cycle to your tools so you don’t undersize equipment. Why this matters: a compressor that can’t keep up will stall tools and lower productivity. Example: if your nail gun draws 2.2 CFM at 90 PSI and you use it in bursts, choose a compressor that provides at least 4 CFM at 90 PSI and a duty cycle of 50% or more for continuous sanding work.
Check environmental and regulatory benefits because oil‑free systems lower spill risk and hazardous waste volume. A specific case: a small bakery switching to oil‑free air cut their hazardous waste pickups from quarterly to annual, reducing fees and paperwork.
Quick decision checklist you can use right now:
- Do your parts/processes require oil‑free air? (Yes → prioritize ISO Class 0.)
- Calculate annual hours and current oil/filter spend.
- Compare CFM and duty cycle needs to tool specs (multiply tool draw by expected concurrent use).
- Compare upfront cost versus annual maintenance savings to find payback years.
If you follow those steps, you’ll pick the compressor that fits your shop and budget.
Energy Savings: How Oil‑Free Compressors Cut Power Bills and Payback Time

Here’s what actually happens when you switch to an oil-free compressor for energy use and payback: it lowers your running hours and cuts the kilowatt-hours you buy. Why this matters: less runtime directly reduces your electric bill and shortens the time it takes to recover the purchase cost.
Modern oil-free compressors with variable speed drives (VSDs) match the motor speed to your demand instead of running full tilt all the time. For example, a small woodworking shop in Portland replaced a fixed-speed 7.5 kW unit that ran 10 hours a day with a 7.5 kW VSD oil-free machine and saw average motor power drop from 7 kW to 5.5 kW during typical cycles, shaving about 21% off daily energy use. That’s a concrete saving you can measure on your meter.
Before explaining how to make this work for you, here’s a quick practical checklist so you don’t guess:
- Measure your baseline: log compressor kWh for one week during typical production.
- Size the new unit: pick a compressor whose VSD range covers your observed minimum and peak flow.
- Add storage if needed: a 500–1000 L receiver tank smooths demand spikes for most small shops.
- Set controls: configure pressure bands and minimum speed to avoid short-cycling.
Energy monitoring lets you track use, spot inefficiencies, and quantify savings so your payback math is accurate. A real example: a metal fab shop in Sheffield installed a simple energy meter and discovered their old compressor idled 30% of the day; after fitting a VSD oil-free unit and tightening control bands, their monthly kWh dropped by 28%, and the meter showed payback in 30 months.
Tariff optimization shortens payback further because you can run heavier charging during off-peak windows if you have storage and controls. Why this matters: off-peak rates are often 30–60% lower, so running your compressor at night to fill the receiver tank cuts effective energy cost per delivered cubic metre of air. Example: shifting 3 nightly hours of charging to an off-peak period saved a bakery in Toronto roughly $240 a month.
How to calculate realistic payback in three steps:
- Record current monthly kWh and average cost per kWh.
- Estimate % energy reduction (use 18–30% for properly sized VSD oil-free units; use 10–15% for fixed-speed replacements).
- Divide the net purchase and installation cost by the monthly dollar savings.
If your installation costs $8,000 and you save $200/month, payback is 40 months. If you can combine a 25% energy reduction with tariff optimization that increases savings to $350/month, payback drops to about 23 months.
Practical sizing tips so you don’t overspend: pick a compressor that supplies your peak hourly CFM plus a 10–20% margin, and use a receiver tank sized to cover the longest short-duration peak (500–1000 L for small shops, 2000–5000 L for larger plants). This keeps the VSD in its efficient band and prevents unnecessary starts.
If you follow these steps, oil-free VSD compressors commonly deliver 18–30% energy savings when properly sized and controlled, making a realistic payback possible within a few years.
Maintenance You Can Stop Doing With Oil‑Free Compressors

If you’ve ever dealt with a messy compressor oil change, this is why. You save time and reduce recurring expense when you switch to oil-free equipment, and that matters because less downtime means more production hours.
You won’t need oil changes, oil filter replacements, or oil disposal procedures.
- Why that matters: you avoid scheduled monthly or quarterly oil changes that can take 30–60 minutes each and require materials costing $20–$50 per service.
- Real example: a small machine shop I know dropped 4 hours of monthly maintenance when they switched to an oil-free 15 kW unit.
Belts and tension adjustments often disappear with direct-drive designs.
- Why that matters: you eliminate frequent belt inspections and tensioning every 3 months, which usually take 15–30 minutes and a torque wrench.
- Real example: a print shop replaced a belt‑drive compressor and removed quarterly belt checks from its checklist, saving one technician hour per month.
You won’t have to manage leaks from oil seals as much, and condensate handling is simpler without oil contamination.
- Why that matters: you reduce time spent monitoring seal integrity and you can route condensate to regular drains instead of performing oil/water separation and disposal.
- Real example: a food packaging line stopped using an oil separator and began routing condensate to its sanitary drain, cutting disposal costs by about $40 monthly.
Routine service still includes inlet filter replacements and basic checks.
- Why that matters: filters protect the compressor and typically need replacement every 3–6 months depending on environment; skipping them shortens life and voids warranties.
- Steps:
- Inspect inlet filter monthly for dust buildup.
- Replace filter every 3–6 months (or sooner if visibly dirty).
- Log filter changes in your maintenance record.
– Real example: a dental office replaced filters every 4 months and avoided an expensive motor rebuild.
Keep warranty tracking up to date because simplified maintenance affects coverage.
- Why that matters: warranties often require you to document maintenance even if it’s simpler, and missed entries can void parts coverage.
- Steps:
- Save invoices and maintenance logs digitally.
- Record date, technician, and filters replaced after each visit.
- Submit required reports to the manufacturer per warranty intervals.
– Real example: a brewery saved a $1,200 repair under warranty because it had three years of logged filter and service records.
Bottom line: with oil-free compressors you eliminate oil-related tasks, cut inspection frequency, and simplify condensate handling, but you still must change inlet filters, inspect regularly, and keep warranty records.
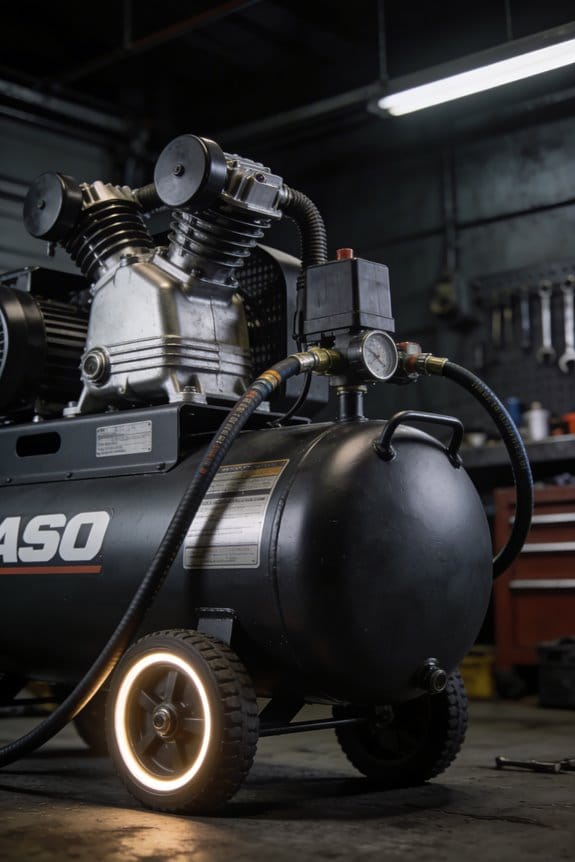
Choosing the Right Oil‑Free Compressor for Your Workshop Needs

If you’ve ever stood in a sticky workshop trying to choose a compressor, this is why.
Start by listing what your workshop really needs, because matching capacity, pressure, and duty cycle to your tasks prevents buying the wrong size. Why this matters: a compressor that’s too small stalls your tools; one that’s too big wastes money. Example: if you run a 1/4″ pneumatic nailer and a 3/8″ impact wrench alternately, write down each tool’s cfm and psi so you get a combined picture.
1) Figure required flow and peak pressure.
Why this matters: flow (cfm) and pressure (psi) determine whether a tool runs properly.
Step 1: Look at each tool’s plate or manual and note idle cfm and working cfm, plus required psi.
Step 2: Add the working cfm of tools you’ll run at the same time, then add 25–30% safety margin.
Example: a finish nailer needs 0.5 cfm at 90 psi and a small sander needs 3.5 cfm at 90 psi; running both needs ~5 cfm, so buy for 6.5–7 cfm.
2) Check duty cycle.
Why this matters: duty cycle tells you if the compressor can run long enough without overheating.
Step 1: Read the duty-cycle rating (e.g., 50% at 100°F means 30 minutes on, 30 minutes off).
Step 2: Match the duty cycle to how long you’ll use tools; if you run tools for an hour straight, choose 75%–100% duty.
Example: an auto-body booth that uses air for continuous sanding should use a 100% duty, oil-free rotary screw or scroll unit rather than a small pancake compressor.
3) Consider flow control and regulation.
Why this matters: controlling flow saves energy and gives consistent tool performance.
Step 1: Look for units with adjustable regulators or variable-speed drives (VFD).
Step 2: Prefer digital or fine-range regulators if you use airbrushes or blow-off kits.
Example: an airbrush artist keeps pressure steady at 20–25 psi with a regulator and uses less air than with a fixed-output pump.
4) Evaluate noise and location.
Why this matters: loud compressors interrupt work and can damage hearing.
Step 1: Check dB ratings at 1 meter; aim for under 65 dB for a shared workshop, under 55 dB for a home studio.
Step 2: If noise is higher, plan for an enclosure or put the unit in a ventilated closet.
Example: a 75 dB belt-drive compressor placed in a corner closet with a vent reduces perceived noise in the shop by 10–12 dB.
5) Check starting method, electrical needs, and footprint.
Why this matters: mismatched power or space problems stop installation before you start.
Step 1: Confirm single‑phase or three‑phase power and minimum breaker size on the spec sheet.
Step 2: Measure floor space and leave at least 12 inches clearance on all sides for cooling.
Example: a 2‑HP unit needing a 20 A circuit won’t run on a kitchen outlet; plan wiring first.
6) Look for simple maintenance access.
Why this matters: easy maintenance keeps the compressor reliable and extends life.
Step 1: Choose models with accessible drains, filters, and service panels.
Step 2: Note whether oil-free design eliminates daily oil checks or if oil-lubed units need scheduled changes.
Example: an oil-free 30-gallon tank with a bottom drain and quick-change filter saves you 10–15 minutes per maintenance visit.
7) Pick a model with headroom.
Why this matters: future tools or projects often increase demand.
Step 1: Add 20–30% capacity beyond your current peak cfm and ensure psi meets the highest tool requirement.
Step 2: Confirm warranty and availability of replacement parts.
Example: if your current peak is 8 cfm at 90 psi, target a 10–11 cfm unit at 100 psi to cover future tools.
Finish by comparing three candidate models against your checklist: cfm with margin, duty cycle, noise, electrical fit, footprint, and maintenance access. Pick the one that meets your numbers and leaves some headroom.
Real Workshop Setups With Oil‑Free Compressors: Space, Power, Installation

If you’ve ever set up workshop equipment, this is why layout and power matter. You need a clear plan so your oil-free compressor runs reliably and doesn’t trip breakers or overheat.
Why it matters: a cramped placement or wrong breaker size will shorten equipment life and create safety hazards. Example: a 5 HP oil-free compressor stuck against a wall without 12 inches of clearance overheats on warm days.
1) How should you map the space?
Why it matters: service access and ventilation keep the compressor running and make maintenance fast. Example: place the unit so the front panel is reachable from a 36-inch aisle for filter changes.
Steps:
- Measure the floor footprint and leave at least 12 inches on each side and 36 inches in front for service access.
- Mark a 3-foot clearance above the unit for ventilation and to remove the motor cover.
- Put the compressor on a rigid pad or 1–2 inch anti-vibration mounts; if concrete, use rubber pads to reduce noise and stress on piping.
2) What electrical checks do you need to make?
Why it matters: incorrect voltage, phase, or breaker size will trip circuits or damage the motor. Example: a 3 HP single-phase motor often needs 230 V on a 30 A circuit with a 125–150% motor starter rating.
Steps:
- Confirm voltage and phase at the panel (e.g., 230 V single-phase or 460 V three-phase).
- Check the motor nameplate for full-load amperage and size the breaker at 125–150% of that value per motor starter guidance.
- Measure locked-rotor/start-up current or request it from the manufacturer; ensure your supply and starter can handle it.
- If using a Variable Speed Drive (VSD), verify the VSD is rated for your motor and supply voltage, and run a dedicated neutral and ground to the VSD.
3) How do you handle VSDs and grounding?
Why it matters: improper grounding or conduit can create interference and trip fault detection. Example: a VSD installed without a separate ground caused nuisance faults in nearby CNC controls.
Steps:
- Use the manufacturer’s wiring chart; run a dedicated ground conductor sized to the motor’s maximum fault current.
- Keep control wiring in separate conduit from power cables when possible, and keep cable runs under 10 meters without filters to avoid EMI.
- Install line reactors or DV/DT filters if the VSD is >5 meters from the motor.
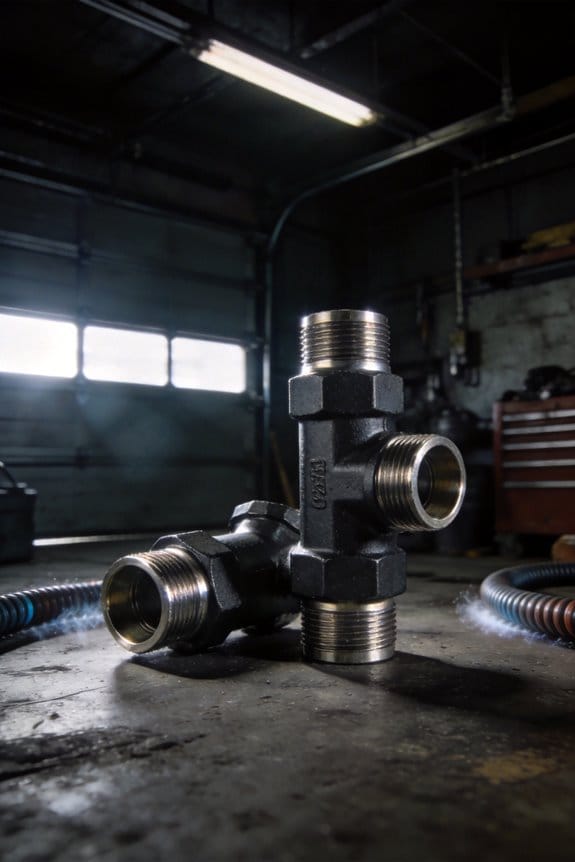
4) Where should receivers and piping go?
Why it matters: reducing pressure drop keeps tools working and reduces compressor runtime. Example: mounting a 60-gallon receiver next to the compressor with a 2-inch header reduces pressure loss to shop tools.
Steps:
- Mount air receivers as close to the compressor discharge as practical—within 3–6 feet—using a 1.5–2 inch pipe for a 5–10 HP system to minimize drop.
- Run pipes as short and straight as possible; avoid long runs with many elbows—each 90° elbow can add the equivalent of several feet of pipe.
- Support piping every 4–6 feet horizontally and every 6–8 feet vertically to avoid sag and stress on connections.
5) What ventilation and cooling do you need?
Why it matters: overheating shortens compressor life and reduces efficiency. Example: a small shop with a compressor in a corner saw discharge temps 20°F higher until a 1,000 CFM exhaust fan was added.
Steps:
- Provide 300–500 CFM of room ventilation per horsepower as a starting guideline for small enclosed spaces.
- If ambient is above 90°F, add forced ventilation or a ducted exhaust to keep intake air below 85°F.
- Keep intake grills clear of dust and debris; filter intake air if the shop is dusty.
Final practical checklist (quick):
- Measure clearances: 12 in sides, 36 in front, 3 ft above.
- Verify power: voltage, phase, breaker at 125–150% of FLA, and locked-rotor current.
- VSD: dedicated ground, separate conduit, EMI filters if long runs.
- Piping: receiver within 3–6 ft, use 1.5–2 in pipe for mid-size systems, supports every 4–6 ft.
- Ventilation: ~300–500 CFM per HP or add exhaust fan above 90°F.
If you follow these steps, your oil-free compressor will start clean, stay cool, and be easy to service.
Common Workshop Concerns: Performance, Lifetime, and Cost Trade‑Offs
If you’ve ever bought a tool only to wish it lasted longer, this is why.
Why it matters: a compressor that underperforms or fails early costs you money and time. I’ll show you how performance, lifetime, and upfront cost connect so you can buy the right unit for your workshop.
How I measure performance and lifespan
Why this matters: matching pressure and flow to your tools prevents bottlenecks and wasted cycles.
1. Check two numbers: required working pressure (PSI) and continuous flow (CFM) at that PSI.
Example: a finish nailer needs ~80–90 PSI and 0.5 CFM per shot; a medium-speed spray gun needs 12–15 CFM at 40 PSI.
2. Estimate duty cycle: what percentage of a typical hour the compressor runs. If you run tools continuously for 30 minutes each hour, plan for a 50% duty cycle or higher.
3. Prefer compressors rated for at least your duty cycle; a 50%-rated pump running at 100% will wear fast and overheat.
Real-world example: I replaced a 1.5 HP garage compressor that overheated after 20 minutes; switching to a 3 HP unit rated 50% duty solved my sanding sessions without pauses.
Upfront cost vs. lifetime costs
Why this matters: a low price today can mean higher bills and earlier replacement tomorrow.
- Calculate lifecycle cost for 5 years: purchase + expected energy + routine maintenance + likely parts replacement.
- Use a simple formula: Annual energy cost = (kW of motor × hours used per year × electricity rate). Add estimated parts and service ($/year). Add purchase amortized over 5 years.
- Compare oil-lubricated vs oil-free: oil-free models save on oil and contamination risk but may wear faster in heavy use; oil-lubed units cost more to maintain but often last longer under heavy duty.
Real-world example: a 2 HP motor drawing 1.5 kW running 500 hours/year at $0.15/kWh costs about $112/year in electricity; upgrading to a premium motor with 10% better efficiency saves ~$11/year.
How to size a compressor for your workshop
Why this matters: correct sizing prevents tool starvation and limits wasted runtime.
- List every tool’s CFM at its working PSI. Add CFM for tools you’ll run simultaneously.
- Add 25–30% margin for peaks.
- Choose a tank size that reduces short cycling: for intermittent use, 20–30 gallons is fine; for repeated bursts or spray work, 60+ gallons helps.
Real-world example: when I added a 60-gallon tank to my shop, my spray gun runs stayed smooth and the pump cycled far less, saving about 20% on wear.
Trade-offs to decide on
Why this matters: picking the wrong priorities gives you regrets.
- If you use tools intermittently and want low buy-in cost, pick a smaller oil-free unit but expect a ~5–7 year lifespan under moderate use.
- If you run long jobs or multiple tools, spend more on a larger, oil-lubed pump with a robust motor; expect 10+ years with proper care.
- If energy bills bother you, prioritize efficient motors and consider VFD (variable frequency drive) models where available.
Real-world example: A friend paid $400 more for an oil-lubed 3 HP compressor; after three years he’d saved on fewer oil changes, fewer parts, and half the downtime compared with the cheaper unit.
Quick checklist before buying
Why this matters: a short decision process keeps you focused and avoids impulse errors.
- Confirm combined CFM at working PSI for simultaneous tools.
- Pick a duty cycle rating >= your expected runtime.
- Choose tank size based on burstiness: 20–30 gal for occasional use, 60+ gal for spray/continuous use.
- Add 25–30% CFM margin.
- Run the lifecycle cost formula for 5 years.
Buy with a plan.
Frequently Asked Questions
Are Oil-Free Compressors Louder Than Oil-Lubricated Models?
Generally no — I’d say oil-free units aren’t inherently noisier; while they can have higher decibels in some designs, modern models use noise dampening, variable speed drives and enclosure engineering so they often run comparably quietly.
Can Oil-Free Compressors Handle Dusty Outdoor Workshop Environments?
Yes — I can: oil-free compressors cope well with dusty outdoor workshop environments when you prioritize dust filtration and weatherproofing, keep intake filters clean, use enclosures or shelters, and schedule more frequent maintenance to protect components.
What Certifications Ensure Compliance for Medical or Food Use?
You might worry about purity — I’d say look for ISO 8573 Class 0 plus NSF 42 certification; I’ll confirm both guarantee oil-free, particulate and water quality compliance for medical and food applications, easing regulatory acceptance.
How Do Oil-Free Compressors Affect Resale Value of Workshop Equipment?
I think oil-free compressors boost resale perception, since buyers value clean, low-maintenance gear; they signal lower maintenance costs and reliability, so you’ll likely recoup more and sell faster compared with oil-lubricated alternatives.
Are Spare Parts and Service Widely Available Locally?
Yes — I’ve found local availability is strong; dealers stock common spares and provide warranty support. Don’t worry about downtime: you’ll picture a technician arriving next morning with parts, fixing your compressor quickly and cleanly.