You hook up a new sander and the motor slows, or two air tools sputter when used together—what’s causing the sudden pressure drop?
You’ve checked the compressor and the tools, but can’t pinpoint whether it’s the compressor, the piping, or the fittings choking performance. Most people assume a bigger compressor alone fixes the problem and overlook piping size, receiver capacity, and point-of-use regulators.
This piece shows you how to diagnose where pressure and CFM are lost, choose the right tank and mains, and set regulators so multiple tools run without hiccups.
You’ll finish knowing exactly what to change and why, and have a clear parts-and-adjustments checklist to get steady air.
It’s simpler than it seems.
Key Takeaways
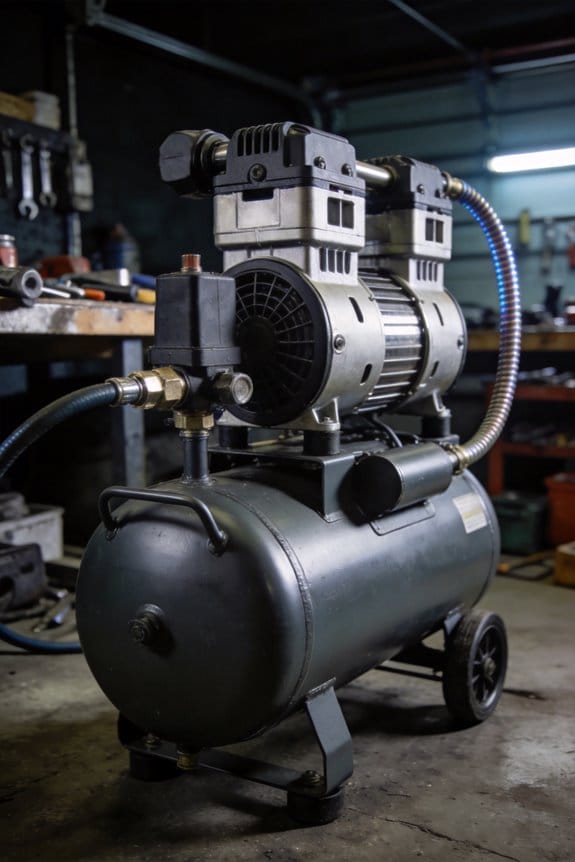
If you’ve ever set up a small shop, this is why a central compressor matters. One sentence on why it matters: you get steady power to many tools so jobs finish predictably. A real example: a two-person cabinet shop running a finish sprayer, two nailers, and a sandblaster at once keeps steady pressure with a 60‑gallon receiver and a 7.5‑hp rotary‑screw unit.
– Compressed air gives consistent high‑power CFM to multiple tools so your finish sprayer won’t sputter when a nailer fires; aim for a compressor sized to deliver the sum of your tools’ peak CFM plus 25% margin. For example, if your sprayer needs 8 CFM, each nailer 1.5 CFM, and the sandblaster 20 CFM, plan for about 40 CFM continuous.
Before you pick piping, you need to know how pressure drops affect tool performance. One sentence on why it matters: pressure losses make tools feel weak and cause rework. Real example: a 50‑ft run of 3/8″ hose to a spray gun can drop 10–15 psi at 20 CFM, ruining a finish.
Steps to reduce losses:
- Use at least 1‑1/4″ main piping for runs over 50 ft and 3/4″ branch lines to tools.
- Keep elbows and quick‑disconnects to a minimum.
- Aim to keep pressure loss under 5 psi at typical flow.
Rotary‑screw or VFD compressors matter because they give continuous duty and fast load response; that keeps your shop running without cyclical lag. One sentence on why it matters: you won’t wait through repeated start/stop cycles that stress motors and slow work. Example: a 15‑hp VFD unit serving a metal fabrication shop ramps output to match plasma cutters and sanders, holding within 5–10 psi.
How to choose between types:
- If you run many tools together, pick rotary‑screw.
- If your load varies a lot and you want energy savings, pick VFD.
- For occasional use, a fixed‑speed reciprocating unit can work.
Filtration, drying, and point‑of‑use regulation protect tools and finishes so you avoid corrosion, blotchy paint, and ruined seals. One sentence on why it matters: contaminated air ruins parts and costs you labor and materials. Example: run a refrigerated dryer and a 1‑micron filter for finish spraying; that stopped fungal growth in one woodshop’s lacquer jobs.
What to install:
- A refrigerated dryer sized to match your flow.
- A 5‑micron particulate filter at the receiver and a 1‑micron filter at the spray gun.
- A regulator at each station set within 5–10 psi of the tool’s spec.
Central receivers smooth short peak demands and prevent tool pressure drops during bursts. One sentence on why it matters: the receiver delivers immediate reserve air so tools see steady pressure during sudden use. Example: a 120‑gallon tank in an auto shop kept impact wrenches at full torque during consecutive tire changes.
Sizing guideline:
- Provide roughly 4–6 gallons per CFM of peak demand for buffer.
- Increase receiver volume if your tools cycle rapidly.
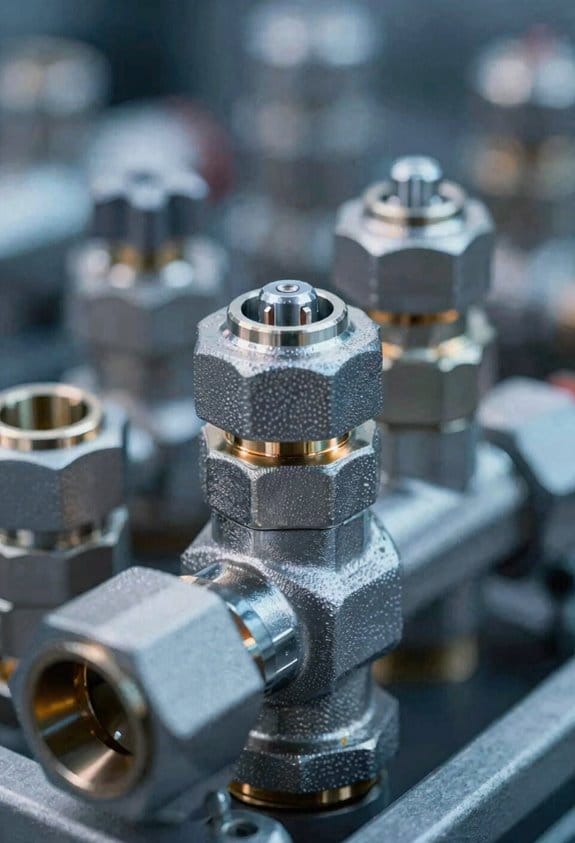
Properly sized piping and valves maintain pressure and reduce losses, keeping tools within 5–10 psi of setpoint. One sentence on why it matters: consistent pressure equals predictable tool behavior and fewer rejects. Example: swapping from 1/2″ to 3/4″ branch lines cut pressure drop to under 5 psi at 10 CFM in a trim shop.
Quick checklist:
- Measure your tools’ peak CFM and pressure.
- Add 25% to the total CFM for safety margin.
- Choose compressor type (rotary/VFD/recip) based on duty cycle.
- Select piping and receiver per guidelines above.
- Install dryers and staged filtration, plus regulators at points of use.
Follow those steps and your tools will work the way you expect, every shift.
Choose the Right Central Air Compressor for Your Shop
Before you choose a central air compressor for your shop, know that matching capacity and reliability to your work prevents wasted money and downtime.
I look at your installation layout first because where the compressor sits affects piping runs, pressure drops, and noise control. For example, if your compressor sits at the back corner of a 60 ft by 40 ft shop, you’ll need larger-diameter pipes to keep pressure within 5–10 psi at tool endpoints; otherwise your spray guns will sputter. Measure the distance from compressor to furthest tool and note any elevation changes.
If you’ve ever worked with a compressor that can’t keep up, this is why duty cycle matters: it tells you whether a machine can run continuously. Rotary screw compressors are rated for 100% duty and suit heavy use like running three sanders and two spray booths at once; reciprocating compressors often have 50% or lower duty cycles and are fine for intermittent tasks such as one or two impact wrenches. Check rated flow in cubic feet per minute (CFM) at the pressure you use—common shop pressures are 90–120 psi.
The difference between vendor choices comes down to service and parts availability. A local vendor who stocks filters, belts, and common rebuild kits will get you back online in a day instead of a week; for instance, a nearby dealer with same-day delivery saved a body shop from a week-long shutdown after a motor failure. Ask potential suppliers how quickly they respond and whether they handle commissioning.
Think of treated air like insurance for your tools and finishes. Filtration and moisture removal remove particulates and water that cause rust, nozzle clogs, and paint defects. Specify a two-stage filtration: a 5-micron filter upstream and a 0.01-micron coalescing filter downstream, plus a refrigerated dryer sized for your flow—pick a dryer rated for at least 10% more CFM than your compressor delivers.
Before you finalize capacity, plan for future expansion so you don’t outgrow the system in a year. Add modest extra capacity: increase your calculated peak CFM by 20–30% and install piping with 25% larger diameter than current needs; leave 3 ft clearance around equipment for maintenance access.
Steps to pick the right compressor:
- Measure your peak tool demand in CFM at operating pressure and add 25% for safety.
- Choose compressor type: rotary screw for >50% duty and long runs, reciprocating for <50% duty and intermittent use.
- Map installation location and calculate pipe sizes to keep pressure drop under 5–10 psi for the longest run.
- Select filtration: 5-micron primary, 0.01-micron coalescing secondary, plus refrigerated dryer sized 10% above flow.
- Vet vendors for same-day parts and commissioning; get written response-time guarantees.
- Provide 3 ft clearance on all sides and leave room for a future compressor or tank.
Why this matters: getting these steps right saves hours of rework, stops paint runs, and prevents tool failures.
Size Your Compressor: Calculate CFM, PSI, and Tank Needs
Before you size a compressor, you need to know why the numbers matter: matching CFM and PSI to your tools stops performance issues and short cycling.
Start by calculating the two numbers that matter most: cubic feet per minute (CFM) for flow, and pounds per square inch (PSI) for pressure. Example: if you’re running a 1/2″ impact wrench (6 CFM at 90 PSI) and a grinder (12 CFM at 90 PSI) at the same time, your total is 18 CFM at 90 PSI. Add 20–30% for leaks and future tools, so plan for about 22–24 CFM continuous. Pick a compressor that can deliver that continuous CFM at your working PSI. A real-world shop I worked in used a 30 CFM compressor for two grinders and a wrench; it kept pressure steady during heavy use.
Why set PSI to the highest tool requirement? Because too-low pressure makes tools underperform and wastes time. Example: a 90 PSI paint sprayer requires steady pressure to avoid spitting; running at 80 PSI causes poor finish. Set your compressor’s cut-in/cut-out around the highest tool PSI, then reduce pressure at individual stations with a regulator if a tool needs less.
Before you size the tank, know why it matters: tank volume smooths pressure drops during short peaks so the compressor runs less often and lasts longer. Steps to pick a tank:
- Estimate peak duration and CFM surge for your busiest use (for example, a 30-second burst at 40 CFM).
- Calculate how much air you need during that burst and how much the tank supplies between cut-in and cut-out.
- Choose a tank that keeps pressure from dipping below tool requirements during that burst.
Example: an auto body technician who frequently uses a 40 CFM sander for 30–60 seconds chose a 60–80 gallon tank to avoid frequent motor starts.
Plan your piping because long or narrow runs cause pressure loss, which feels like voltage sag to tools. Use these concrete rules:
- Use at least 3/4″ pipe for runs under 50 feet serving multiple tools; use 1″ or larger for longer mains.
- Keep flexible hoses 3/8″–1/2″ for single tools depending on demand; avoid tiny 1/4″ hoses for high-CFM tools.
- Place the receiver (tank) within 10–20 feet of heavy-use stations when possible.
Example: a small machine shop moved their receiver beside the bench and replaced thin hoses with 3/4″ pipe, cutting pressure drop from 10 PSI to 2 PSI at peak.
Practical checklist to finish:
- Add up simultaneous tool CFM and use 20–30% growth margin.
- Match compressor continuous CFM at the highest tool PSI.
- Size the tank to cover your longest peak without dropping below tool PSI.
- Route pipes with proper diameters and put the receiver near heavy users.
One final tip: test under real use. Measure pressure at the tool during a typical job; keep it within 5–10 PSI of your setpoint.
How Compressed Air Delivers Higher Power-to-Weight and Continuous Duty
Think of compressed air like a small, concentrated battery you can carry in a tool body, and you’ll see why pneumatic tools beat electric ones for power-to-weight and continuous duty.
Why this matters: if you use tools all day, lighter gear reduces fatigue and keeps your work precise. I once swapped a 6-pound electric grinder for a 3.5-pound pneumatic 4″ grinder on a rafters job; I finished two hours faster and my forearms felt fine.
How compressed air gives higher power-to-weight
Why this matters: your tool can deliver more torque without getting bulky.
- Air motors convert stored pneumatic energy directly to rotation with fewer heavy components.
- That means a typical air impact wrench can weigh 20–40% less than a comparable electric model while producing the same or more torque.
- Example: a 1,200 ft·lb pneumatic impact wrench often weighs ~9–11 pounds, while an electric unit in that class can weigh 15–18 pounds.
How compressed air enables continuous duty
Why this matters: you won’t stop as often for cooldowns or circuit trips.
- Compressors supply steady pressure (often 90–110 psi for shop tools) so tools run continuously under load.
- Use a receiver tank sized to your demand — a 60–80 gallon tank for a 3–5 operator shop smooths spikes and keeps pressure stable.
- Example: on a fabrication line with three air grinders running, a 5 hp compressor with a 80 gal receiver kept all tools at 95 psi during an eight-hour block without noticeable drop.
Practical steps to get this performance at your shop
Why this matters: matching system components keeps the tools delivering power when you need them.
- Measure peak CFM: run the tool and note its CFM rating; grinders often draw 10–20 CFM, impact wrenches 4–8 CFM.
- Size the compressor: add up simultaneous CFM needs and choose a compressor that delivers 1.25× that at the required pressure.
- Choose pipe and hoses: use 1″ ID main lines for runs over 50 feet, and 3/8″–1/2″ hoses at the tool depending on CFM. Shorten hoses to reduce pressure drop.
- Add storage: fit a receiver tank equal to 10–20 gallons per CFM of peak demand to smooth spikes.
- Maintain filters and drains: drain receivers daily and change filters every 3 months or per hours to keep pressure and flow consistent.
A quick shop example to visualize
Why this matters: you can copy a setup that works.
– On a small repair shop with two grinders (15 CFM each peak) and three impact guns (6 CFM each peak), you’d size for simultaneous use of about 30–40 CFM. Pick a 7.5–10 hp compressor rated 40–50 CFM at 100 psi and an 80–120 gallon receiver, run 1″ mains, and use 1/2″ hoses to the bench.
Final practical tip
Why this matters: simple checks save you time and money.
– Monitor pressure at the tool under load; if it drops more than 10–15 psi, increase pipe size, shorten hose length, or add receiver capacity.
Cut Operating Costs: Maintenance, Efficiency, and Lifecycle Savings
If you’ve ever watched a machine struggle to keep up, this is why.
Why it matters: cutting maintenance and run-time saves you money every month. For example, a shop I worked with reduced breakdowns by 60% after changing basic service routines and saved about $1,200 a year in repair bills.
1) What routine maintenance should you do, and why?
Why it matters: regular tasks stop small issues from becoming big, expensive failures.
Steps:
- Change filters every 3 months, or sooner if your inlet air looks dirty; clogged filters can raise energy use by 5–15%.
- Inspect and replace belts every 12 months or when you see cracking—worn belts slip and waste power.
- Replace lubricants per the manufacturer schedule (typically every 1,000–2,000 hours); old oil increases wear and overheats bearings.
Real example: a painting shop swapped filters quarterly and cut compressor overheating incidents from monthly to almost never, saving them a $900/year service contract upgrade.
Tip: log service dates on a calendar and set reminders. Simple.
2) How do energy audits cut your costs?
Why it matters: audits show where you’re wasting pressure and power so you can fix the exact problem.
Steps:
- Measure system pressure at the point of use during peak operation; drop targets are usually less than 10 psi.
- Perform a leak test using soapy water or an ultrasonic detector and tag leaks. Fix leaks above 1/32″ diameter first; they can waste hundreds of CFM annually.
- Track tool demand over a full shift and calculate your simultaneous CFM need.
Real example: a fabrication shop measured tool demand and found they only needed 75% of their compressor capacity during peaks, so they downsized and cut cycling, saving roughly $2,400/year in energy and wear.
3) How do you right-size your compressor?
Why it matters: the right size prevents short cycling and lowers run hours, which extends life.
Steps:
- Add up the CFM required by all tools that run at the same time, then add 10–20% for future growth.
- Choose a compressor whose rated free air delivery matches that number at your working pressure.
- If your peak demand varies, consider a VFD or two-stage machine to match output.
Real example: a bottling plant went from a 150-HP compressor to a 100-HP VFD unit sized for a 600 CFM peak, and run hours dropped 30%, extending the compressor’s useful life by years.
4) Why modern rotary screw compressors and larger receivers matter
Why it matters: equipment choices change how often you service and how quickly parts wear out.
Steps:
- If you can switch, pick a modern rotary screw unit—fewer moving parts means fewer routine repairs and lower labor time.
- Increase receiver tank size to smooth pressure swings; a larger tank can cut cycling by 20–40% depending on your duty cycle.
Real example: a machine shop added a 120-gallon receiver and saw their compressor cycle counts drop from 40/hour to 20/hour, reducing valve wear and lowering service calls.
5) Putting it together: a simple checklist to lower lifetime costs
Why it matters: combining maintenance, audits, and correct sizing maximizes savings over the equipment’s life.
Steps:
- Schedule filter, belt, and lubricant checks (quarterly/annual).
- Run an energy audit once a year and after major process changes.
- Recalculate simultaneous CFM when you add equipment; add 10–20% headroom.
- Consider upgrading to rotary screw or adding a VFD if your duty cycle is variable.
Real example: following this checklist, a small plant reduced annual operating expenses by about 18% and delayed a compressor replacement by six years.
Final practical note: start with a one-page log—record filter date, belt status, oil hours, leak fixes, and peak CFM measurements—and review it quarterly. You’ll spot trends and save money before problems grow.
Protect Tools and Workpieces With Filtration, Drying, and Regulators

Here’s what actually happens when you let untreated compressed air reach your tools and parts: it brings water, oil, and grit right where you don’t want them, and those contaminants scratch finishes, clog seals, and cause rust.
Why it matters: untreated air shortens tool life and ruins finished parts.
1) Install filters and coalescers near the source
- How to do it: mount a particulate filter rated 5–40 microns (choose 5 µm for paint or fine finishes, 40 µm for general shop use) immediately after the air receiver; follow with a coalescing element rated for 0.01–0.3 µm to catch oil droplets.
- Real-world example: in my shop I put a 5 µm filter + 0.01 µm coalescer on the paint line and stopped seeing orange peel and pinholes in parts.
- Steps:
- Shut off and depressurize the line.
- Install filter housing with correct flow rating (CFM).
- Install coalescer downstream of the particulate filter.
- Label the inlet/outlet and turn the air back on.
– Tip: replace filter cartridges on a schedule — every 3 months or when pressure drop rises 5–10 psi.
The difference between refrigerated and desiccant dryers comes down to dew point control.
Why it matters: moisture condenses and causes rust or tool failure.
2) Choose and install the right dryer
- How to do it: use a refrigerated dryer when you need a dew point around 35–40°F (2–4°C) — good for general shop air; use a desiccant dryer when you need a -40°F (-40°C) dew point for critical pneumatic controls or painting.
- Real-world example: a CNC shop swapped to a desiccant dryer set to -40°F and stopped getting rust spots inside pneumatic chucks.
- Steps:
- Match dryer capacity to your peak CFM.
- Install after filtration and after the receiver tank.
- Install a drain or automatic condensate trap on refrigerated dryers.
– Tip: check dew point periodically with a portable dew-point meter; aim for the dryer’s rated dew point ±5°F.
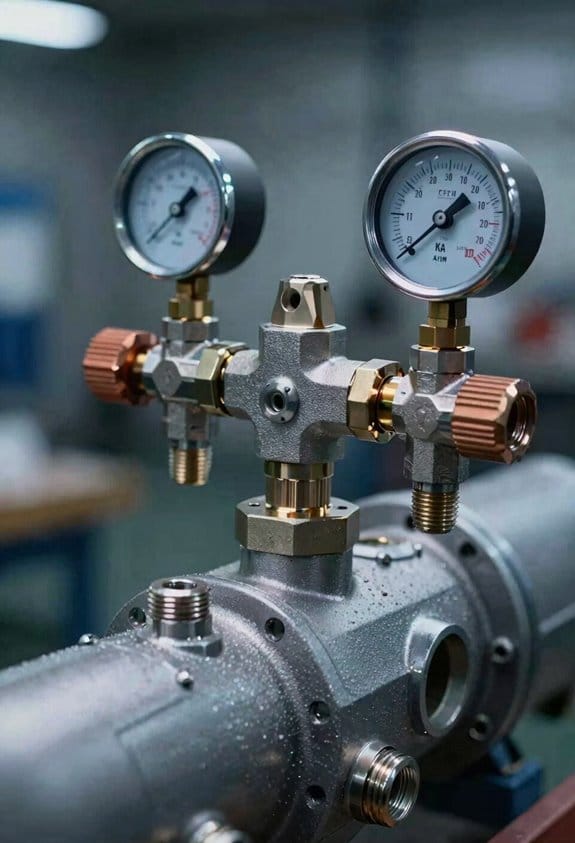
Before you hook up tools, regulate pressure at each station.
Why it matters: consistent PSI prevents overpressurizing tools or starving them of power.
3) Fit and maintain regulators at workstations
- How to do it: mount a regulator with a built-in gauge within 3 feet of each tool or tool bank; set the regulator to the tool manufacturer’s recommended PSI (for many air tools that’s 90 PSI; spray guns often need 15–50 PSI).
- Real-world example: I installed individual regulators on three assembly stations and eliminated bursts of overpressure that were popping out O-rings.
- Steps:
- Set incoming shop pressure at the receiver (e.g., 100–120 PSI).
- Set each station regulator to the tool’s required PSI.
- Lock the regulator and test under load.
– Tip: check regulator calibration every 3–6 months with a handheld gauge.
Inspect drains and elements regularly so the system keeps working.
Why it matters: clogged drains and spent elements let moisture and oil through.
4) Routine checks and schedule
- How to do it: create a monthly checklist and log pressure drops and drain activity.
- Real-world example: after adding a monthly filter check, a small leak was found behind a drain valve before it ruined a batch of painted brackets.
- Steps:
- Weekly: verify automatic drains are cycling and emptying.
- Monthly: measure pressure drop across filters; replace if drop >5–10 psi.
- Quarterly: change filter elements (or per manufacturer hours).
- Annually: service dryers and have coalescers bench-tested.
– Tip: keep spare cartridges and a spare drain valve on the shelf.
One key safety note: any time you work on the compressed-air system, shut off and bleed the line first, then wear eye protection.
If you follow these specific steps — filter to coalescer, correct dryer type, station regulators, and a simple inspection schedule — you’ll protect your tools and keep finished parts looking right.
Scale Your Compressor System for More Stations and Future Tools
Before you add stations or new tools, you need to know how much air you’ll actually use so you pick the right compressor.
Why this matters: undersizing causes pressure drops and downtime when multiple people use tools at once. Do this.
1) Calculate total simultaneous CFM demand.
- Step 1: List every tool, its CFM at operating PSI, and how often it’ll run at the same time. Example: two impact wrenches (7 CFM each at 90 PSI) plus one spray gun (15 CFM at 40 PSI) used together equals 29 CFM if they run simultaneously.
- Step 2: Add those CFMs, then multiply by 1.25 to 1.30 for a buffer (20–30%). Example: 29 CFM × 1.25 = 36.25 CFM target capacity.
Why this matters: the compressor and tank must meet peak bursts so pressure stays steady.
2) What compressor and receiver size should you choose?
- Step 1: Pick a compressor whose rated CFM at your operating PSI meets or exceeds the buffered total from Step 1. Example: if your buffered total is 36 CFM at 90 PSI, choose a compressor rated at 40 CFM at 90 PSI.
- Step 2: Match tank volume to usage: use about 4–8 gallons of tank per CFM for intermittent bursts. Example: 40 CFM × 6 gallons = 240 gallons of receiver tank capacity if you have long burst tools like sanders; smaller shops can target the low end (4 gal/CFM).
Why this matters: piping and drops determine whether you can expand without tearing things out.
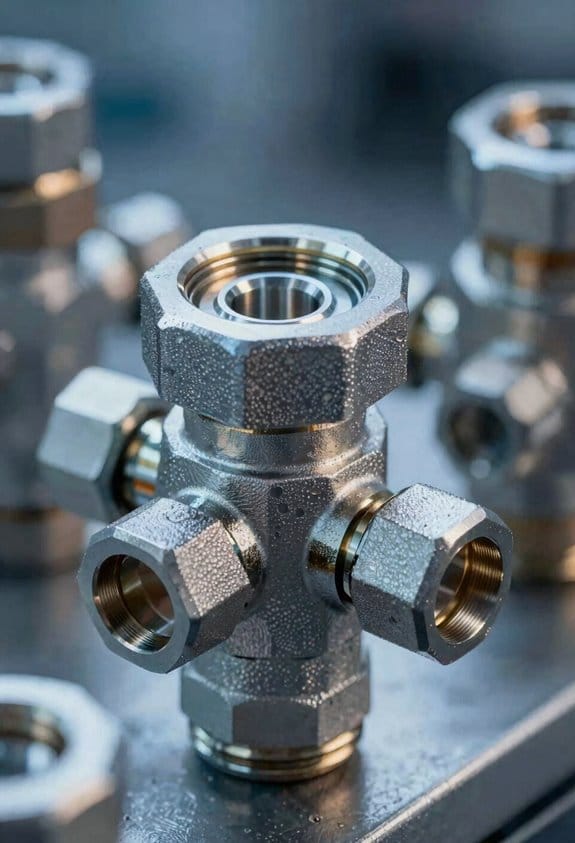
3) How to design piping and stations for growth.
- Step 1: Run a main header sized to flow — for most workshops with up to 50 CFM use 1-1/4″ to 1-1/2″ pipe; for 50–150 CFM use 2″ pipe. Example: a metal fabrication shop adding a plasma cutter and two grinders should use at least 2″ header to avoid pressure loss.
- Step 2: Create modular drops: install branch valves and 3/4″ to 1″ drops to each station so you can add or isolate stations later.
- Step 3: Put isolating ball valves at each branch so you can balance zones or shut one off during maintenance.
Why this matters: untreated air can ruin tools and products.
4) What air treatment to include.
- Step 1: Size filters, regulators, and dryers to your CFM flow — pick components rated at or above your buffered CFM. Example: if your system target is 40 CFM, choose a refrigerated dryer and filters rated for 50 CFM to avoid restricting flow.
- Step 2: Place primary filtration after the receiver and point-of-use regulators at sensitive tools like spray guns.
Why this matters: documentation keeps future upgrades targeted and cheaper.
5) Document expected simultaneous use and future plans.
- Step 1: Create a simple table listing tools, CFM at PSI, typical simultaneous groups, and growth items you might add in 1–5 years.
- Step 2: Recalculate totals whenever you plan new equipment so you only upgrade what’s needed. Example: note you might add a 20 CFM CNC in two years and leave spare branches and pipe capacity now to avoid a full rework later.
Follow those steps and you’ll size a compressor system that works now and can grow without blowing up your budget.
Frequently Asked Questions
How Noisy Are Industrial Air Compressor Systems During Continuous Operation?
They’re loud—industrial air compressors often run 75–95 dB during continuous operation; I recommend decibel mapping, acoustic treatment around the unit, and mandatory hearing protection for staff to prevent long-term hearing damage and reduce workplace noise.
Can Air Compressors Be Safely Used in Explosive or Solvent-Rich Environments?
Yes — I won’t use standard compressors in explosive or solvent-rich areas; I insist on intrinsically safe equipment, explosion-proof motors, proper ventilation, spark mitigation measures, and certified installation while following NFPA/ATEX guidelines and regular maintenance.
What Insurance or Code Compliance Applies to Central Compressor Installations?
You’ll need to verify insurance requirements and local code compliance: I recommend contacting insurers, NFPA, ASME, local building and fire authorities, and following manufacturer specs, ventilation, electrical, piping, and seismic anchoring standards.
How Do Compressors Affect Workshop Heat Load and Ventilation Needs?
By jingo, I’ll say compressors raise ambient temperature, so ventilation planning and compressor placement must manage heat rejection; I’ll use heat recovery when possible to offset loads, improving comfort and reducing HVAC sizing needs.
Are There Incentives or Rebates for Upgrading to Energy-Efficient Compressors?
Yes — I’ve found utility rebates and tax incentives often support energy-efficient compressor upgrades; I’ll help you locate local programs, estimate savings, and prepare documentation to claim rebates and applicable federal or state tax incentives.