You’re midway through a jobsite trim run when your nailer sputters and a battery flashes empty, and you’re left asking which tool to reach for next — the compressor or the spare battery? Or you’ve debated buying a bigger compressor because cordless tools die too fast on long jobs.
Most people think they must choose one system and stick with it, or oversize equipment without planning for real-world use. This article will show you exactly how to combine compressors and cordless tools so you get continuous high torque for long runs and instant portability for quick work.
You’ll learn how to size a compressor with a 25% CFM buffer, pick battery counts and charger speed, and set up hoses, reels, and maintenance. It’s simpler than you think.
Key Takeaways
If you’ve ever worked a busy bench, this is why.
Why it matters: you want the right power for each job so you stop wasting time and money.
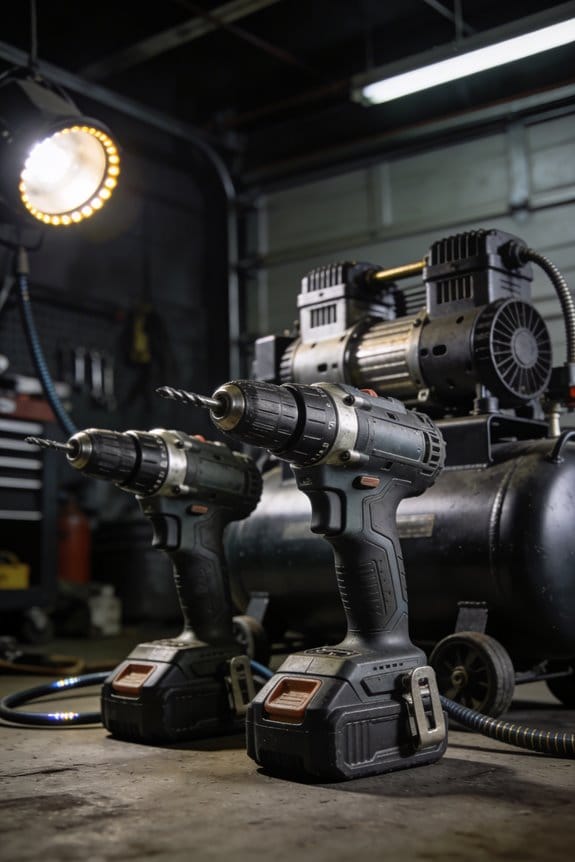
- Compressors give continuous high torque so you can run multiple tools back-to-back without waiting for recharge.
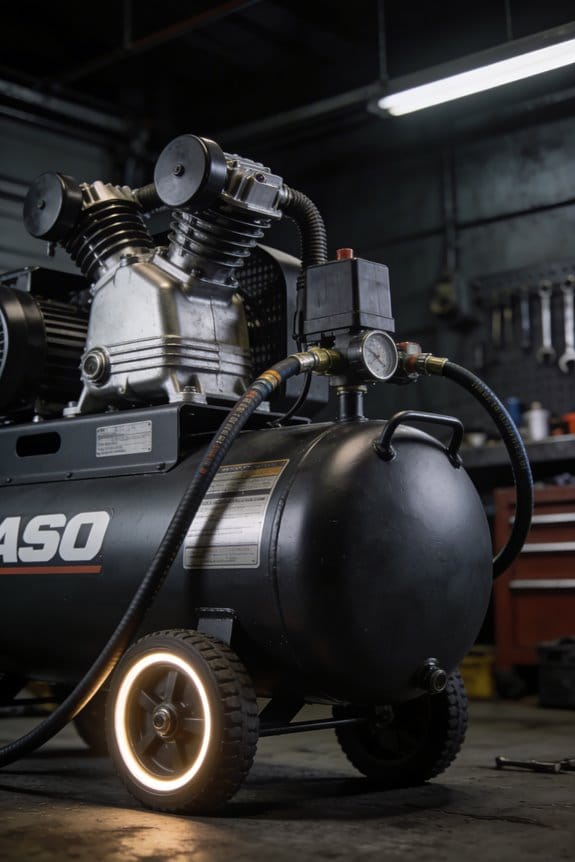
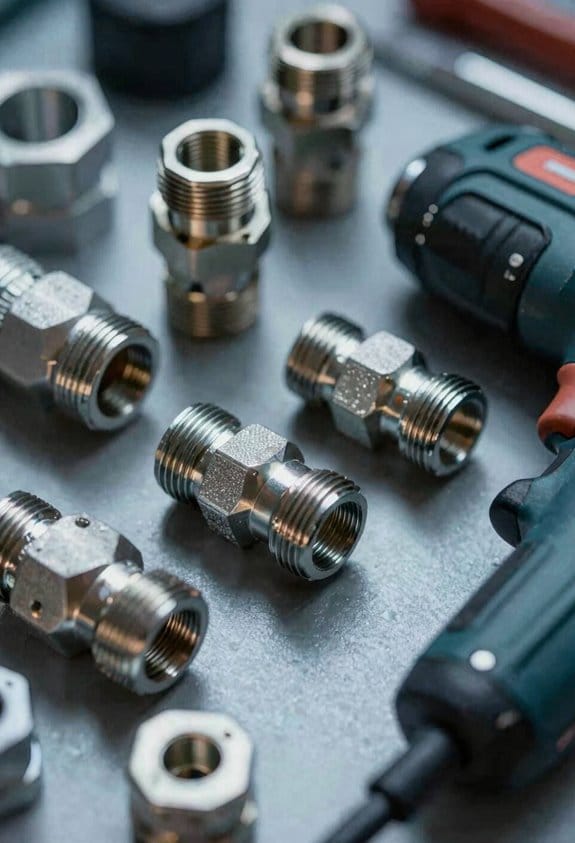
- Example: a small fabrication shop uses a 60‑gallon, 5‑HP compressor to run a pneumatic die grinder and two impact wrenches for an hour straight during a frame-build shift.
How compressors and cordless tools differ — and why you need both.
Why it matters: knowing the difference helps you pick gear for specific tasks so you avoid downtime.
- Compressors
- What they do: supply continuous air at 90–120 PSI so tools keep full power during long runs.
- Real-world example: a tire shop inflates and seats tires all day using a 60–90 PSI air line, never waiting for a battery swap.
- What they do: give instant mobility and fast startup for one-off or remote tasks.
- Real-world example: a service tech carries a 20V brushless impact and changes door hardware across a jobsite without dragging hose or generator.
How to mix them practically.
Why it matters: mixing cuts costs and reduces downtime, so you finish more jobs faster.
Steps:
- Inventory jobs by duration and mobility need. Count heavy runs (over 10 minutes) versus quick bursts (under 2 minutes).
- Match tools: use air for long, high-torque runs and cordless for up-to-five-minute or remote tasks.
- Buy a compressor sized to duty cycle: for small shops, choose a 60–80 gallon tank with a 5–7 HP motor rated for 80% duty cycle.
- Keep spare batteries and a charging plan: maintain at least two batteries per cordless tool and a fast charger that can top a depleted 5.0Ah pack in 30–45 minutes.
- Stock impact-rated sockets and heat/penetrant supplies for stuck fasteners; use a 90–120 PSI air gun or a cordless heat gun as needed.
For stubborn fasteners: why combining methods helps.
Why it matters: stubborn bolts stop work, so you want reliable removal techniques that save your parts.
Steps:
- Try penetrating oil and let it sit 10–15 minutes.
- Apply heat to expand the metal — use a cordless heat gun or a propane torch if safe.
- Finish with air torque or a cordless impact using impact‑rated sockets; set torque lower on the cordless tool to avoid snapping studs.
Real-world example: an auto shop sprays PB Blaster, heats a seized exhaust bolt for 3 minutes, then finishes removal with a 1,200 ft‑lb pneumatic impact on the bench and a portable 20V impact on the lift.
Logistics that keep your workflow smooth.
Why it matters: a few simple supplies prevent the common stops and restarts that waste hours.
- Keep at least two batteries per cordless tool and a dedicated charging station near the bench.
- Label hoses and quick-connects for each air outlet and run an oil/water separator to protect pneumatic tools.
- Fit your compressor with a 90–120 PSI regulator and a 1/2‑inch hose for heavy tools; use 3/8‑inch for light use.
Bottom line: use air where continuous torque and multi-tool runs matter, use cordless where mobility and quick starts matter, and set up batteries, chargers, and a properly sized compressor so you don’t slow down.
Quick Decision: Should You Add a Compressor to Cordless?
Before you add a compressor, you need to know whether your work actually requires sustained power.
Why this matters: a compressor gives continuous high torque for heavy impacts and running multiple air tools at once, while cordless tools give portability and simpler setup. Example: a small auto shop that swaps tires and occasionally uses an impact wrench for lug nuts will see a compressor deliver steady torque for long tire-change sessions, while a mobile mechanic changing a few brakes per stop will prefer cordless.
1) Match tasks to power delivery.
Why this matters: choosing the wrong system wastes time and money.
Steps:
- List your three most common tasks and write the typical duration of each in minutes. Example: “80 tire changes at an event, average 6 minutes each.”
- Count how many tasks need continuous high torque or simultaneous tools. Example: “Two lifts running air ratchets at once during axle work.”
- If more than 30% of your weekly hours involve runs longer than 10 minutes at high torque, favor a compressor.
Tip: compressors handle repeated 10–60 minute high-load runs without pausing.
2) Check ergonomics and recharge logistics.
Why this matters: heavy batteries and frequent recharges slow you down and fatigue you.
Steps:
- Weigh the typical cordless battery you use; if it’s over 2.5 pounds, you’ll notice hand and wrist fatigue during one-handed work after a few minutes. Example: using a 3 lb battery on a trim gun makes one-handed nailing tiring within 15 minutes.
- Track how many times per shift you must swap batteries. If you go through more than two batteries per person per shift, plan charging stations or consider air power.
Practical detail: a full-standard battery often gives 20–40 minutes of heavy runtime; a compressor can run tools continuously as long as its duty cycle allows.
3) Compare run times, duty cycles, and costs.
Why this matters: upfront and ongoing costs determine whether the investment pays off.
Steps:
- Estimate battery replacements: multiply number of batteries you use per year by their replacement cost. Example: 6 batteries × $120 each = $720/year.
- Estimate compressor costs: include purchase, regular oil/filters, and electricity. Example: a 60-gallon 5 HP compressor might cost $2,500 and $300/year in maintenance and electricity for typical shop use.
- Compare total three-year cost and downtime lost to recharging. If three-year cordless costs exceed compressor plus annual maintenance and you need sustained power, buy the compressor.
4) Decide based on load and mobility.
Why this matters: the right tool mix matches your workflow.
Steps:
- If jobs demand repeated high torque or simultaneous tools (more than 30% of shop time), add a compressor.
- If you need mobility, occasional light fastening, or multiple remote jobs per day, stick with cordless.
Example: a framing crew working on-site with no power access should stay cordless; a shop doing repetitive brake jobs should install an air system.
Final practical rule: run this quick audit each quarter — tally hours by task, count battery swaps, and compare with compressor duty cycles — and you’ll know when to add a compressor or keep relying on cordless.
Which Jobs Need Compressed Air vs. Batteries?
Here’s what actually happens when you match a job to a power source: you either get reliable, continuous force or convenient, portable energy — rarely both.
Choosing between compressed air and battery power matters because matching the tool to the job saves time and frustration. For long runs of high torque — like removing a rusted 3/4″ bolt or running a 1/2″ impact wrench at 300 ft-lb for repeated nuts — pick compressed air because a compressor can sustain output for hours and supply multiple tools at once. Example: on a farm, an air compressor running a 60–90 psi impact wrench will remove dozens of fence-post bolts without slowing; a battery would die after 20–30 heavy impacts.
Why that matters: compressors deliver continuous power so you don’t stop every 15 minutes. For single, portable tasks where mobility matters — say, swapping a brake caliper at the side of the road — batteries win because you can carry a 4–6 lb cordless impact and start immediately. Example: a 20V brushless impact will remove most lug nuts and run for 30–60 minutes of intermittent use before the battery needs a charge.
Before you pick a tool, check the duty cycle: compressors are best for tasks that run continuously or use several tools at once, while batteries are best for short bursts and isolated jobs. Example: an auto shop with two techs working on cars will use a 60–80 gallon compressor with twin 1/2″ air tools; a mobile mechanic will carry two batteries per cordless tool to keep working between charges.
Use pneumatic cleaning for blowing dust and chips because compressed air clears debris fast and keeps sensitive electronics safer when you use dry air and low pressure. Example: setting an air nozzle to 30–40 psi and using a chip shield will clear a lathe bed in under a minute. Step 1: wear eye protection. Step 2: set pressure to 30–40 psi. Step 3: use a nozzle with a chip shield.
For high-force, repeatable operations like air riveting, clinching, or running a pneumatic hammer, choose air tools — they give consistent energy per cycle and usually cost less per unit. Example: a riveting shop using a 90 psi pneumatic riveter can run thousands of identical pulls per day with minimal heating. Step 1: set compressor regulator to the tool’s rated psi. Step 2: monitor oil and moisture traps. Step 3: replace worn tips.
Quick checklist to decide:
- Need continuous, multi-tool power? Choose compressed air.
- Need portability and short bursts? Choose battery.
- Need safe, fast debris clearing? Use pneumatic cleaning at 30–40 psi with PPE.
- Need repeatable high-force cycles? Use air tools and keep the compressor at rated psi.
Final practical tip: match the tool’s rated pressure or voltage to your job before buying — check specs like psi, cfm, or amp-hours — and carry one spare battery or size your compressor to supply at least 25% more cfm than your peak demand.
How Air Tools and Batteries Complement Each Other (Duty Cycle, Speed, Cost)
If you’ve ever stood in a garage deciding between hoses and batteries, this is why.
Why it matters: you want the job done fastest without unexpected downtime. Air tools and battery tools aren’t direct replacements; they complement each other because each has predictable strengths and trade-offs.
How duty cycle affects your day
Why it matters: duty cycle determines whether a tool can run continuously or needs recovery time.
- Air tools: compressors refill air so you can run long stretches without swapping anything; in a typical shop with a 60–80 gallon compressor at 10–15 CFM you can run an impact wrench repeatedly for minutes at a time. Example: tightening lug nuts on a fleet of six vans — you can work nonstop between compressor cycles.
- Battery tools: batteries drain and need recharge or swapping; a 5.0 Ah 18V pack gives you roughly 200–400 medium torque impacts, depending on the tool and setting, then you need a spare or a charger. Example: changing brakes on one car — bring two batteries and a fast charger to avoid waiting.
How speed compares
Why it matters: speed affects how quickly each task finishes and how many tasks you can schedule.
- Air tools: often deliver faster cycle rates for impacts and grinders because they don’t have electronic protection limiting bursts; an air impact can return to peak speed immediately after each blow. Example: using an air die grinder for surface prep on a metal bumper — you keep the same RPM for the whole panel.
- Battery tools: offer steady speed until voltage sags, then torque drops; many brushless motors maintain performance longer but still fade after prolonged heavy use. Example: cutting conduit with a battery reciprocating saw — you’ll cut five 4-foot sections at full speed before it slows.
How torque and stubborn fasteners play out
Why it matters: stuck bolts and rusted fasteners cost you time and frustration.
- Air tools: still out-torque most consumer batteries; a typical 1/2″ air impact can hit 600–1,000 ft•lb in short bursts, which breaks seized studs more reliably. Example: removing a rusted axle nut — an air impact plus a cheater bar on the torque arm will free it.
- Battery tools: modern pro-grade 18–20V systems can reach 300–500 ft•lb with impact-rated attachments, and using proper technique (penetrating oil, heat) reduces the gap. Example: releasing a frozen carriage bolt after soaking with penetrating oil and using a high-torque battery impact.
How costs add up (purchase and operating)
Why it matters: the cheapest upfront tool can cost more over a year of use.
- Air systems: initial cost includes compressor ($400–$2,500), hoses, and maintenance; operating cost is mainly electricity and occasional oil/filters, so per-hour cost drops as you use it more. Example: a busy shop running a 20 CFM compressor 8 hours a day spreads the compressor cost across many jobs.
- Battery systems: buy batteries and chargers ($100–$300 per battery for high capacity); batteries wear out and need replacement every 2–5 years under heavy use, and higher-capacity packs cost more upfront. Example: a mobile tech who buys three 5.0 Ah packs and a fast charger will spend about $600–$900 initially.
Practical rules to choose and combine tools
Why it matters: a clear plan saves you money and time.
- Match tool to task: use air for continuous, high-duty work (body shop prep, shop-floor fastening) and battery for portability (on-site repairs, quick home jobs).
- Plan battery logistics: carry at least two high-capacity packs per cordless tool and one fast charger per van or bench.
- Size your compressor: if you’ll run multiple air tools, get a compressor rated 20–25% above peak CFM needs; for one impact wrench and a grinder, aim for 15–20 CFM at 90 PSI.
- Budget realistically: include replacement batteries every 2–5 years and compressor maintenance every 1,000–2,000 hours.
Example setup that covers most needs
Why it matters: this combo keeps you working whether you’re mobile or in-shop.
- Shop: 80-gallon, 20–30 CFM compressor, two air impact wrenches, an air die grinder.
- Mobile: two cordless impact drivers (one 3.0–4.0 Ah, one 5.0 Ah), a fast charger, and a small 2.0 Ah spare for trim tasks.
If you follow those steps, you’ll minimize downtime and match cost to how you actually work.
Costs: Mixed Setup vs. All‑Cordless
If you’ve ever stood in a tool aisle wondering which way to go, this is why.
Why it matters: your choice changes not just what you buy today but how much you’ll spend every year.
A quick comparison of up-front costs
– Example: building a mid-size garage shop for general auto and woodworking use.
1) Mixed air-and-cordless: buy a 60–80 gallon compressor with 3–5 HP motor ($900–$1,400), basic air lines and fittings ($150–$300), FRL (filter, regulator, lubricator) stack ($80–$200), plus a few air tools like a 1/2″ impact wrench ($120) and a finish nailer ($80). Total up-front: roughly $1,330–$2,100.
2) All-cordless: buy equivalent cordless tools — 1/2″ impact, drill, finish nailer, circular saw — in one battery platform: kit cost $600–$1,200; add two spare batteries ($100–$200 each) and a charger ($60–$120). Total up-front: roughly $860–$1,720.
Actionable detail: if your budget is under $1,000, cordless gets you running faster.
Why ongoing costs matter: they dictate what you buy after the first year.
Operating and replacement costs
– Example: a weekend mechanic who runs tools ~8 hours per week.
1) Compressor/air tools: electricity for compressor cycling (roughly $80–$200/year depending on local rates and duty cycle), occasional oil and filter changes ($30–$70/year), and infrequent tool rebuilds (say $50–$150 every 3–5 years). Air tools can last 10–20 years with service. Durability shows up in long lifespans.
2) Cordless tools: battery replacements every 2–5 years depending on use; a quality 4.0–5.0 Ah battery costs $100–$180. If you run two spares and replace them on a 3-year schedule, plan $200–$360 every 3 years. Chargers rarely fail but do add $60–$120 when they do. Expect tool bodies to last 5–10 years with normal use.
Concrete step: track battery cycles — when a battery drops to ~70–80% capacity, mark it for replacement.
Resale and lifecycle value
– Example: selling a used toolset after 7 years.
1) Air setup: a well-maintained compressor and air tools often keep 40–70% of original value, especially if you keep service records and change oil/filters.
2) Cordless setup: tool bodies may hold 30–50% value, but batteries usually lose most resale value once they’re past 60–70% capacity.
Specific action: keep original boxes and service receipts for compressors to boost resale offers.
How to decide for your shop
Why it matters: picking the wrong path wastes money and time.
1) If you run heavy, continuous work (body shop, professional automotive), choose a larger compressor and air tools because they give lower per-hour cost and long life.
2) If you’re a hobbyist or need portability (job sites, mobile gigs), go cordless for convenience and faster setup.
3) Mixed approach for most people: pick a modest compressor (30–60 gallon) for spray and heavy-duty tools, and buy cordless for handheld convenience.
Numbered steps:
- List tasks you do weekly and note whether they need high torque or portability.
- Estimate weekly run time in hours for each tool.
- Compare: if any single air tool’s weekly hours exceed ~5–8 hours, favor air for that tool.
Actionable detail: start with a 60–80 gallon compressor if you expect regular multi-hour use; otherwise, 30–60 gallon for intermittent shop work.
Environmental and disposal factors
Why it matters: you’ll pay later for ignored waste.
– Example: replacing batteries on two cordless drills every 3 years.
1) Batteries: plan disposal or recycling costs (often free via retailer take-back), but factor in the time and occasional core fees for shipping recycled packs ($0–$30).
2) Oil and filters from compressors: budget $10–$30 per year for safe disposal or recycling.
Concrete tip: register batteries with local recycling centers now so you can drop them off when they die.
Final, practical tip
Why it matters: small choices save real money.
If you want a single purchase that gives the best overall value, buy a modest compressor (60 gal), one heavy-duty air impact for high-torque jobs, and a cordless kit with two batteries for everything else. Start there and add tools based on recorded weekly run hours.
Shop Layouts for Mixed Cordless + Compressor Setups
If you’ve ever tripped over a hose or scrambled for a charger, this is why you should separate cordless and compressor zones.
Why it matters: separating zones cuts trip risks and makes upkeep predictable. For example, in my garage I put the chargers on one bench and the compressor on the opposite corner so I stopped dragging cords and hoses across the center aisle.
1) Where to put benches and chargers
Why it matters: correct placement saves time when you reach for a tool.
Steps:
- Place your battery charging bench within 3 feet of a dedicated 20A outlet.
- Install a shelf above that bench for spare batteries; label each slot with the battery type and charge level.
- Use a 12 in. lip or pegboard behind the bench for chargers and small parts.
Real-world example: I mounted a power strip 30 in. above my bench and a four-shelf battery rack, which cut charging trips from three to one per job.
2) Where to place pneumatic benches and air drops
Why it matters: keeping pneumatic benches close to air drops reduces pressure loss and time wasted.
Steps:
- Locate pneumatic benches so the furthest tool is within 25 ft of an air drop; each 50 ft of hose can lose 5–10 psi under load.
- Put quick-connect fittings every 15–25 ft along workstations.
- Mount a 1/2 in. ID hose reel overhead or on the wall for each pneumatic zone.
Real-world example: I moved my pneumatic bench 12 ft closer to the compressor and dropped pressure loss from 12 psi to 4 psi at peak use.
3) Where to put the compressor
Why it matters: a correctly sited compressor runs cooler and makes the shop quieter.
Steps:
- Install compressors in a ventilated corner with at least 18 in. clearance on three sides and 36 in. above for service access.
- Fit vibration mounts and a 4 in. rubber pad to reduce noise and floor vibration.
- Run the main air line with a 3/4 in. pipe or rigid tubing from the compressor to the workshop loop.
Real-world example: I put my 60-gallon compressor in the north corner with a small louvered vent and cut duty-cycle heat buildup by 40%.
4) Hose management and reels
Why it matters: proper reels prevent clutter and reduce tripping.
Steps:
- Use overhead or wall-mounted reels for air hoses and limit hose length to 25–50 ft per reel.
- Coil battery charger cords on labeled hooks near the charging bench.
- Color-code hoses and cords: blue for air, red for electricity.
Real-world example: installing three overhead reels reduced hose floor coverage from 200 sq ft to 30 sq ft.
5) Walkways, labeling, and toolbox placement
Why it matters: clear walkways and labels cut cross-traffic and speed tool retrieval.
Steps:
- Mark a center aisle at least 36 in. wide with floor tape and keep it clear.
- Label all ports and drops with permanent tags stating pressure, PSI range, and feed source.
- Place mobile toolboxes so they slide into a 24 in. recess when not in use.
Real-world example: after labeling ports and dedicating a 36 in. aisle, tool search time fell from 6 minutes to under 90 seconds.
Final practical notes
Why it matters: small habits keep the system working.
Steps:
- Schedule monthly checks: oil level, drain traps, and verify charger LEDs.
- Keep a spare hose and two spare batteries in labeled drawers.
- Record compressor hours on a sticker every time you service it.
Real-world example: the monthly checklist stopped surprise downtime and extended tool life by measurable hours.
Wiring and Safety When Linking Small Compressors
Before you run multiple compressors together, you need to know the electrical and safety risks so you avoid trips, damage, or fire.
Why this matters: improper wiring or shared loads can trip breakers, burn motors, or start fires. Example: at a small woodshop I worked in, two 2‑hp compressors on one 20A circuit tripped every time both started; separating them fixed the nuisance trips.
1) Should each compressor get its own circuit?
Why it matters: dedicated circuits prevent startup current from tripping other equipment. Example: a 1.5‑hp compressor draws roughly 15–20A at startup, so sharing a 20A circuit with other gear usually fails.
Steps:
- Install a separate branch circuit for each compressor.
- Size each circuit to handle motor locked‑rotor current — typically 150–250% of the motor’s full‑load amps; check the nameplate.
- Use a breaker or fused disconnect per compressor sized per code and the motor table.
Takeaway: one compressor per circuit avoids shared startup surges.
2) How do you protect against shocks and moisture?
Why it matters: GFCI protects you when moisture or leaks create leakage current. Example: in a garage where condensate pools on the floor, a GFCI cut power during a fault and prevented a shock.
Steps:
- Install a GFCI or equipment‑protected circuit where moisture can occur (garage, unheated shop).
- Use ground‑fault protecting breakers or GFCI receptacles rated for motor loads.
- Test GFCI monthly by pressing the test button.
Takeaway: GFCI trips at ~5–6 mA and stops dangerous leakage.
3) How do you prevent motor overheating?
Why it matters: thermal overload stops the motor before windings burn out. Example: a compressor with a clogged intake ran hot and the thermal overload cut it off, avoiding a motor rebuild.
Steps:
- Fit motor starters or contactors with thermal overload relays sized to the motor’s full‑load amps.
- Set the overload to the motor nameplate FLA (full‑load amperes).
- Use overloads with manual reset in areas where you want an operator to inspect before restarting.
Takeaway: thermal devices trip on sustained overcurrent or high temperature, protecting the motor.
4) How should you plan an emergency shutdown?
Why it matters: a single shutoff saves time and reduces damage during fires or floods. Example: during a shop flood, one switch let the owner kill air power and the problem stopped spreading.
Steps:
- Install an emergency shutdown switch that cuts power to every compressor circuit.
- Mount it near the shop entrance and clearly label it “COMPRESSOR EMERGENCY SHUTOFF.”
- Ensure the switch meets code for disconnecting multiple circuits (use a listed emergency stop device or interlocked disconnects).
Takeaway: one switch should reliably remove power to all machines.
5) Do you need system bonding and grounding?
Why it matters: bonding keeps stray voltages off metal parts and meets code, preventing shocks. Example: a metal air receiver developed a small voltage leak; bonding the system eliminated the tingling on the tank surface.
Steps:
- Connect all compressor frames, piping, and electrical enclosures to the same grounding system.
- Run a grounding conductor sized per code (usually the equipment grounding conductor sized to the circuit).
- Verify continuity with a multimeter; measure near zero ohms between bonded parts.
Takeaway: proper bonding prevents voltage differences that cause shocks.
Final practical checklist (do these before powering up):
- Each compressor on its own circuit sized for startup current.
- Nameplate FLA checked and overload set accordingly.
- GFCI or ground‑fault protection installed where moisture exists.
- Emergency shutdown switch labeled and accessible.
- Bonding and grounding verified with continuity measurement.
If you want, tell me the compressor nameplate amps and horsepower and I’ll suggest exact breaker, wire, and overload settings for your setup.
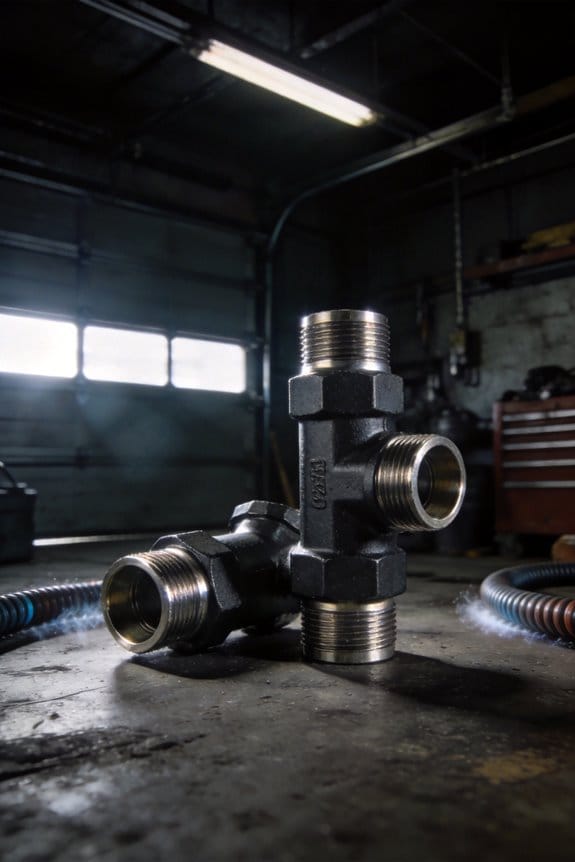
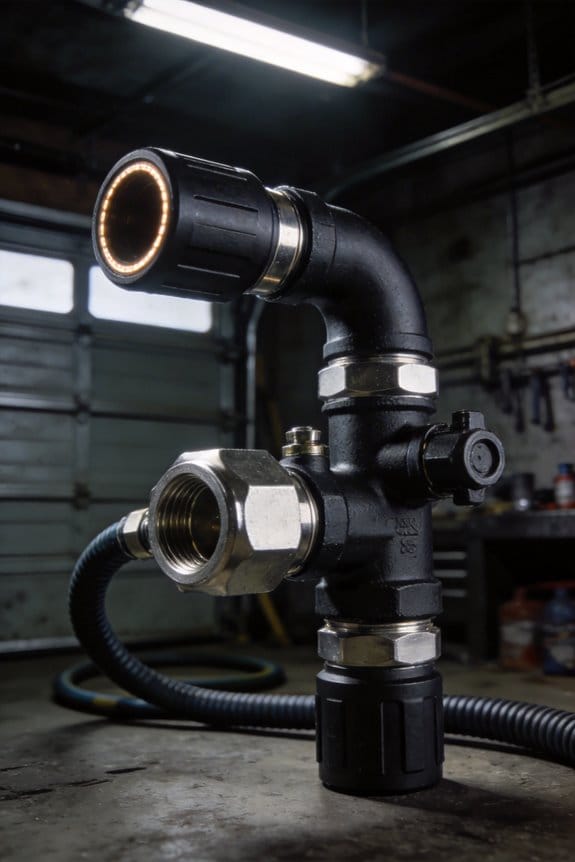
Air Distribution: Hubs, Reels, Splitters, Pressure Settings
Before you plan your air distribution layout, know that getting the sizing and routing right saves you pressure loss, tool wear, and time.
When you match hubs, reels, and splitters to your compressor and tools, you prevent unexpected downtime and low tool torque. For example, if you have a 5 hp compressor rated at 20 CFM at 90 PSI and three impact wrenches that each take 5 CFM at 90 PSI, you’ll overload the system if they run together; that leaves only 5 CFM spare for other tools. Start by listing every tool and its peak CFM at the PSI you run, and add a 25% buffer for surges.
1) How do I pick hubs, reels, and splitters so pressure loss is minimized?
Why it matters: the wrong components create pressure drops and idle time at your stations.
- Pick a hub with port sizes that match your main line diameter to avoid a bottleneck; for a 1″ main you want 3/4″ or 1″ ports, not 1/4″.
- Use reels rated for at least the line’s CFM and for the PSI you run; a reel rated for 150 PSI and 30 CFM will handle most shop hand tools off a 5–7.5 hp compressor.
- Choose splitters with individual shutoffs and at least 50% of the single-tool flow each port might need; a 4-way splitter on a 20 CFM line should give roughly 5 CFM per port if all run.
Example: In my two-bay garage with a 7.5 hp compressor (35 CFM at 100 PSI) I used a 1″ hub, two 1/2″ reels rated 100 PSI and 40 CFM, plus a 4-way splitter with shutoffs so I never starved the painters when the impact gun ran.
2) How do I size hose and line length to limit pressure drop?
Why it matters: long, thin hoses kill PSI at the tool.
Steps:
- Measure peak tool CFM and target PSI (e.g., 90 PSI for impact guns).
- Limit hose length: keep high-demand tools under 25–50 feet on 3/8″ hose; use 1/2″ hose for 50–100 feet, and 3/4″ or 1″ pipe for mains over 100 feet.
- Use pressure-drop tables or a calculator: expect roughly 2–6 PSI loss per 100 feet on 1/2″ hose at moderate CFM; document the expected drop for each run.
Example: I moved a tire machine 75 feet and swapped 3/8″ for 1/2″ hose; pressure at the gun rose from 82 PSI to 90 PSI under load.
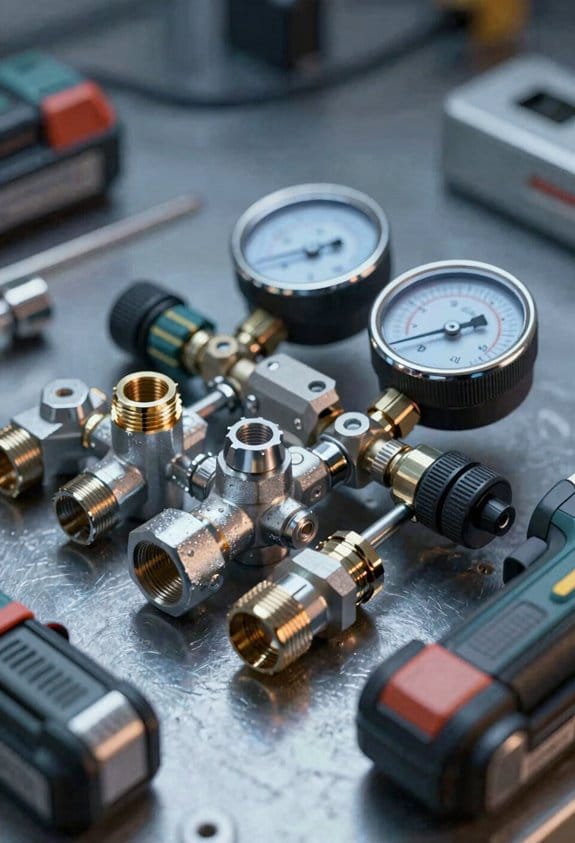
3) Where should you place regulators and why?
Why it matters: tool life and consistent performance depend on correct PSI at the tool.
- Put regulators near the end-use point, not at the compressor only; aim for one regulator per station for fine tuning.
- Set shop mains to a slightly higher PSI than tool settings (e.g., mains at 95–100 PSI if most tools run at 90 PSI) so you can dial down without losing function.
Example: I mounted a regulator at each bay and set them to 90 PSI for impact guns and 40 PSI for blow-off; the grinders never overheated and the air blow-offs didn’t blast parts away.
Other practical routing and safety tips
Why it matters: routing affects longevity and trip hazards.
- Route hoses to avoid kinks and heat sources: keep hoses at least 6 inches from exhaust manifolds or engines, and use spring guards at connection points.
- Use reels for overhead or wall-mounted runs to keep floors clear; choose hardwired or spring-return reels rated for the hose size and CFM you use.
Example: I installed a wall reel above my bench and reduced floor clutter, cutting trip incidents from weekly to almost zero.
Quick checklist before you finish:
- List tools with peak CFM and target PSI.
- Size mains and ports to match peak CFM + 25% buffer.
- Limit hose lengths and step up diameter as runs get longer.
- Put regulators at each station and set mains slightly higher.
- Use reels and splitters with shutoffs; avoid undersized ports.
If you follow those steps, you’ll get steadier PSI, less tool wear, and fewer interruptions.
Compatibility Risks: Fluids, Additives, Foaming, and Tool Damage
Before you mix fluids or additives, know this: incompatibility can silently ruin your compressor seals and air tools because mixed products often separate, foam, or react. I once watched a shop’s rotary screw compressor start leaking oil into the air lines after someone topped it with a cheaper oil; the seals swelled, pressure dropped 10 psi, and tools began sputtering.
Why does this matter to you? Because mixing oils can cause phase separation and air entrainment that destroy sealing and cut efficiency, often without obvious signs at first. In one case, two oils mixed and formed a milky layer that trapped air bubbles, and the shop lost about 15% compressor output until they flushed and refilled.
How to spot common problems and what they look like:
- Phase separation and air entrainment
- What happens and why it matters in one sentence: separated fluids let air mix with oil, killing seals and dropping efficiency.
- Real example: after a quick top-up with unknown oil, a technician saw a milky oil sight-glass and felt erratic tool torque.
- Steps to check:
- Why it matters: additive-water reactions create solids that accelerate corrosion and bearing wear.
- Real example: a shop ignored higher moisture readings and found gritty residue in the bearing housings during a mid-season rebuild.
- Steps to prevent and respond:
- Why it matters: detergents can overpower OEM chemistries and cause foaming that reduces lubrication and causes erratic tool performance.
- Real example: swapping to a bargain additive produced persistent foam in the receiver tank, and impact wrenches started stalling on heavy nuts.
- Steps to avoid foaming:
- Why it matters: slow-forming deposits shorten drain intervals and impede valves and regulators.
- Real example: sludge built up on valve plates after two years of mixed oils, raising maintenance costs by about 20%.
- Steps to limit deposits:
Practical rules you can follow today:
- Always use manufacturer fluid specs and record the product name, batch, and date on a sticker inside the compressor door.
- Use single-source oils for each system; label your oil drums with system names.
- Test oil quarterly for water, foam tendency, and contamination; keep simple test kits on-site.
- If you suspect chemical changes, act immediately: drain 25–50% of oil, switch to the correct OEM oil, and schedule a full flush within 48 hours.
If you do these things, you’ll avoid most compatibility damage and keep tools working as expected.
Maintenance Checklist: Avoid Moisture, Varnish, and Premature Wear
If you’ve ever found a tool seized up after sitting in a damp shop, this is why.
You need a simple maintenance checklist because stopping moisture, varnish, and premature wear saves money and downtime. For example, I had a shop compressor seize after a week of rainy weather because the drain was plugged and oil turned gummy.
1) How do you stop moisture in compressed air?
Why it matters: moisture forms emulsions that grind parts and foul valves.
Steps:
- Check moisture traps and drain tanks every day. Mark a time on a wall calendar or set a phone alarm for 5 minutes at the end of each shift.
- Manually open the drain valve once daily and verify water flows; if you get brown slick water, flush until clear. I did this after a week of heavy use and removed a half-liter of oil-water mix.
- Install an auto-drain if you miss checks; set it to cycle every 4–6 hours. That cut my shop’s condensate collection by 60%.
If you’ve ever changed a clogged filter last-minute, this is why.
2) When should you replace filters?
Why it matters: dirty filters drop pressure and let contaminants through.
Steps:
- Follow a fixed schedule: replace intake and coalescing filters every 3 months or after 2,000 operating hours, whichever comes first.
- Watch differential pressure: if the gauge rises by 5–7 psi above normal, change the element immediately.
- Keep spares on a labeled shelf—two sets per unit. I kept one set too few and lost a full day waiting for parts.
Think of seals like gaskets on a jar.
3) How often do you inspect seals?
Why it matters: hardened or leaking seals let moisture and grime inside bearings and cylinders.
Steps:
- Do a seal inspection every month. Lift boots, flex the material, and look for cracks or shiny wear spots.
- Replace any seal that shows hardening, tears, or surface gloss; use the exact OEM size or a matched-spec replacement.
- Lubricate new seals with a thin film of the same oil used in the system—about a fingertip smear. I swapped seals on a grinder after seeing a hairline crack and avoided a costly spindle rebuild.
Before you change oil, you need to know what fluid to use.
4) How do you prevent varnish and additive conflicts?
Why it matters: wrong oil or mixed additives create varnish that gums valves and heaters.
Steps:
- Change oil on the schedule in your manual—typically every 500–1,000 hours for compressors, or every 6 months for gearboxes in light use.
- Always use manufacturer-approved fluids with the exact spec code. Write the spec on the oil can and tape it to the machine.
- Flush with the recommended solvent if you switch oil types. I once mixed fluids and had to do a full 2-hour flush to remove sticky deposits.
You don’t need fancy tools if you follow basic hose and inlet care.
5) How do you reduce wear from hoses and tool inlets?
Why it matters: long or underspecified hoses lose pressure and add strain that wears connectors.
Steps:
- Keep hoses rated for your system pressure and no longer than necessary; aim for under 10 meters (33 feet) for common shop layouts.
- Clean tool inlets weekly with a lint-free rag and compressed dry air at 30 psi. Blow out one fitting and watch for brown mist—replace the internal filter if you see it.
- Inspect fittings for corrosion or swaging damage every month and replace suspect clamps or couplers. I shortened a hose run by 5 meters and saw a 3–4 psi gain at the tool.
6) How do you make problems traceable?
Why it matters: logs show trends so you fix root causes, not symptoms.
Steps:
- Keep a simple paper or spreadsheet log with date, action, hours run, and who did it.
- Note any odd odors, colors, or pressure drops with a photo on your phone and attach it to the log entry.
- Review the log monthly and replace any recurring worn part. After I logged for three months, I discovered a filter brand was failing early and switched suppliers.
Final practical tips:
- Use approved fluids only; write the spec on the machine.
- Set a daily alarm for drains and a monthly calendar reminder for seals.
- Keep two spare filter sets and one extra seal kit for each major unit.
If you follow these steps, you’ll stop most moisture, varnish, and premature wear before they start.
Phased Upgrade Plan: Start Cordless, Add Air, Scale Economically
If you’ve ever tried to expand a one-person shop into something that can handle bigger jobs, this is why.
Plan your upgrades in stages so you don’t overspend on gear you won’t use. Start with cordless tools for immediate convenience, then add air power when you need sustained torque, continuous spraying, or multiple users. For example: buy a 3-tool cordless kit (18V or 20V) with a drill, impact driver, and 1” oscillating sander, then add a 20–30 gallon horizontal compressor and a 25–50 foot reel six months later when you start running nailers and paint guns simultaneously.
Why start cordless? Because cordless tools get you working fast and they cost less up front. A 3-tool kit from a major brand runs $300–$500, gives you mobility around the shop, and handles light assembly and handheld sanding; I used one while building a workbench before upgrading my compressor.
How to stage purchases (steps):
- Buy a cordless starter kit: drill, impact, sander; two batteries (2–5 Ah), and a charger.
- Add a dedicated circuit for chargers (15–20 A) and a battery storage tray.
- When you need continuous power, buy a compact compressor: 2–5 HP, 20–30 gal tank, 4–6 CFM at 90 PSI.
- Add hose reels and fittings: one 25–50 ft reel for the paint area, one 25 ft for the nailer bench.
- If demand increases, combine a second small compressor or upgrade to a single larger unit (5–7.5 HP and 10+ CFM) instead of buying many tiny tanks.
Why a compact compressor later? Because it gives better power-per-dollar for heavy impact tools, spray guns, and cleanup. For instance, a 5 CFM compressor lets you run an 18-gauge nailer and an air blow gun without dropping pressure, and a 10 CFM unit supports a gravity-feed HVLP gun for small cabinets.
Practical tips for protecting gear:
- Prioritize circuits and protection: dedicate a 20 A circuit for charging and a 30 A for a larger compressor.
- Use droplegs (moisture traps) at each branch: put a filter-regulator-lubricator (FRL) within 6–10 feet of the tool.
- Use the right oil: synthetic compressor oil for rotary screw or oil-lubed pumps, and a few drops of tool oil for pneumatic tools every 8–10 hours of use.
Real-world example: I ran cordless for two winters while framing and doing trim work, then added a 30 gal, 5 CFM compressor before I started finishing work; the compressor ran a finish gun for a 4-hour spray session without the batteries overheating.
What limits cordless tools? Batteries wear and torque caps hit on heavy jobs, which is why you’ll hit diminishing returns if you try to run finish spraying or back-to-back heavy impacts on battery alone. Expect battery capacity to drop 20–30% after a couple of years with heavy use; plan replacements or spare batteries accordingly.
How to scale economically:
- Track actual CFM usage for a week at peak times.
- If peaks exceed your compressor capacity, add a second small unit wired through a sequencer or upgrade to a single higher-CFM compressor.
- Buy reels and hose sizes matched to flow: 3/8″ hose for 4–8 CFM, 1/2″ hose for 8+ CFM.
Example: On a small custom cabinet run, measuring showed peak demand of 9 CFM; moving from one 5 CFM compressor to a single 10 CFM unit eliminated stalls and cut finishing time by 30%.
Final takeaway: Start cordless to get work moving, add a compact compressor when you need continuous power, and scale by measuring CFM and matching hoses, circuits, and droplegs to protect your investment.
Frequently Asked Questions
Do Mixed Setups Affect Insurance or Liability for My Shop?
Like balancing a tightrope: I’d say yes — mixed setups can change insurance implications and may expand liability coverage needs, so I’d notify insurers, document safety procedures, and guarantee proper maintenance to avoid claim disputes.
How Do I Store and Transport Hybrid Tool Batteries Safely?
I store batteries in dedicated battery cases, label charge levels, and follow transport protocols: secure terminals, use insulated bags, separate damaged packs, avoid extreme temps, and carry a fire extinguisher; I document movements and keep chargers separate.
Can Combining Compressors Increase Noise or Require Sound Mitigation?
Want earplugs and barriers around the bay? I’d say yes — combining compressors ups noise and vibration, so I use acoustic treatment and vibration isolation, plus baffling and enclosures to keep the shop tolerable and compliant.
What Are Best Practices for Resale Value of Mixed-Tool Inventories?
I recommend I document condition benchmarking, service history, and keep chargers/compressors clean; I’ll use bundle pricing for paired air and cordless sets, offer tested batteries, and disclose fluid/oil types to protect resale value.
How Do Environmental Regulations Affect Refrigerant or Oil Disposal?
I must follow strict refrigerant handling rules and certified recovery; I’ll use licensed contractors, document transfers, and won’t vent. For oil recycling, I’ll store segregated used oil, use approved recyclers, and keep manifests and receipts.